
On this page
Start here
Quick answer
Do not pry up, cut, drill, or lift the hardwood floor to inspect a suspected subfloor problem. From a safe standing position, document the shape and extent of the buckling, visible water or moisture clues, whether it reaches walls or neighboring rooms, and whether it is changing or creating a trip hazard. Active leaks, musty or mold-like conditions, soft or sinking areas, rapid expansion, or moisture near electrical equipment require isolation and high-priority flooring or water-damage assessment.
Before you begin
Safety first
- Do not pry, cut, drill, lift, pull boards, remove trim, scrape or spray suspected mold, add heat, test with water, or attempt to flatten, seal, or structurally repair the floor.
Work through in order
Diagnostic checks
Use only checks that match the exact appliance or system and its official guide.
-
Check 1
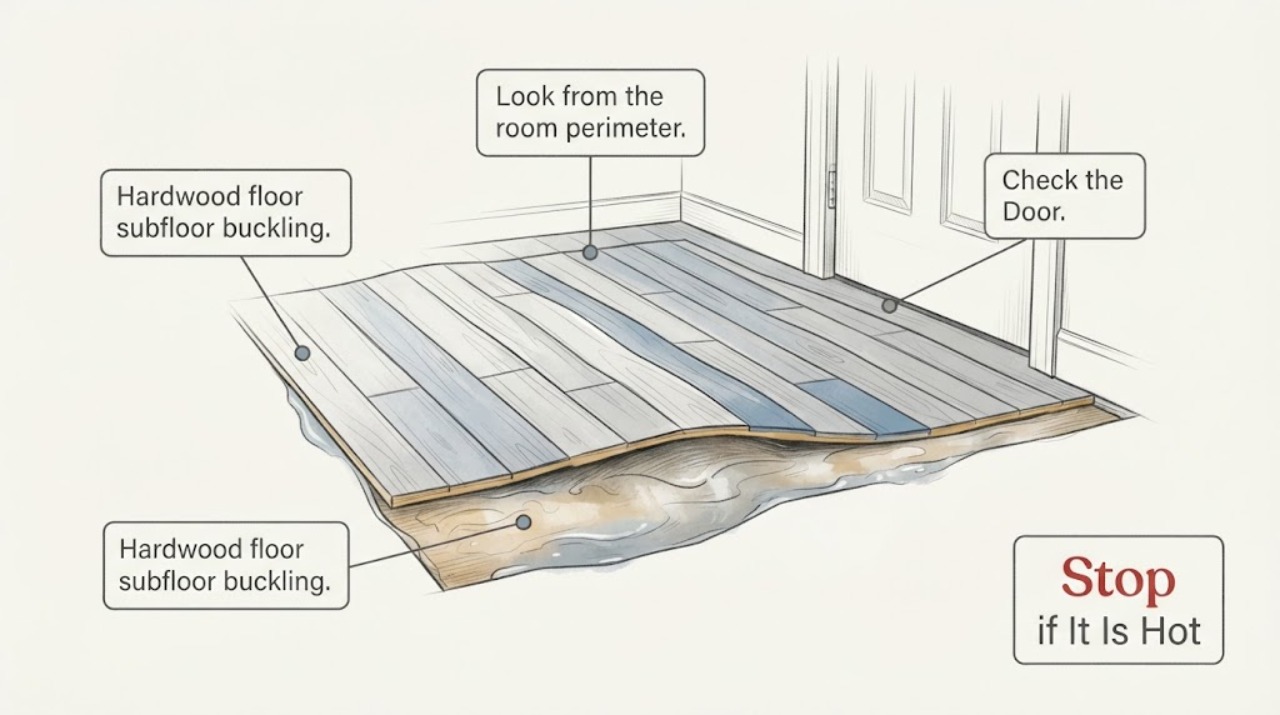
From a stable standing position, photograph the entire hardwood floor and the raised or rippled area from several safe angles. Note whether the change is a single hump, a broad wave, separated boards, lifted edges, or a depression around the apparent buckle without stepping on or pressing the affected area.
Expected result: A small localized shape differs from a broad wave, multiple lifted sections, a sinking edge, or a floor that appears to move under ordinary access.
Next step: Save dated photos and keep furniture, pets, and foot traffic off the affected area while arranging professional flooring assessment.
Stop if: Stop and isolate the room if the floor feels unstable, a board edge can catch a foot, the surface is wet, or the area is sinking or moving.
Why this matters
Why: The visible shape and extent help a flooring professional plan an assessment; they cannot confirm whether the subfloor, joists, adhesive, or finish flooring is affected underneath.
-
Check 2
Look from the room perimeter for visible moisture clues near the buckle: fresh drops, damp trim, staining, swollen transitions, peeling finish, condensation, or a nearby appliance, plumbing fixture, exterior wall, or floor-level opening. Do not remove trim, pull boards, or probe the surface.
Expected result: A dry-looking surface differs from active wetness, a recurring stain, swollen edges, or moisture concentrated near one source or wall.
Next step: Photograph the clue and note when it appeared; request prompt flooring and water-source assessment rather than covering or sealing the buckle.
Stop if: Stop immediately for active water, sewage or chemical contamination, a strong musty odor with symptoms, or any moisture near an outlet, appliance connection, or other electrical equipment.
Why this matters
Why: The pattern can help a professional prioritize plumbing, exterior entry, humidity, or below-floor moisture, while a dry surface does not rule out dampness inside the assembly.
-
Check 3
From safe room thresholds and hallways, compare the buckling with nearby walls, baseboards, doorways, transitions, and adjacent rooms. Note whether the pattern ends at a doorway, follows a wall, continues beneath another finish, or appears in more than one room without entering the affected area.
Expected result: A single-room, wall-side pattern differs from buckling that crosses a transition, repeats in neighboring rooms, or aligns with a wet wall or plumbing area.
Next step: Mark room names and visible boundaries on the photos and provide them to the flooring or water-damage professional; do not remove flooring to trace the pattern.
Stop if: Stop and keep people out if the buckle blocks a required exit, the floor is soft or sinking, or observing the next room would require stepping over an unstable section.
Why this matters
Why: The distribution helps scope the professional inspection and may show whether the visible floor is part of a larger moisture path or subfloor condition.
-
Check 4
Compare dated photos and household records to determine whether the buckle appeared after a spill, leak, cleaning event, heavy rain, seasonal humidity change, or a recent flooring change. Observe only; do not create a water test, add heat, or run equipment against the floor.
Expected result: A change tied to a recent water event differs from a slow seasonal rise or a buckle that continues to expand without an obvious event.
Next step: Share the timeline with the professional and request moisture-source and assembly assessment before any replacement or coating decision.
Stop if: Stop if the area is actively wet, the condition is expanding quickly, odors or symptoms appear, or any test would require disturbing the floor.
Why this matters
Why: The timeline helps distinguish a possible active source from delayed swelling or environmental movement, but it does not establish the moisture condition of the hidden subfloor.
-
Check 5
From a dry perimeter, observe safety and material warning signs: a soft-looking or sunken floor, visible rot-like deterioration, mold-like growth, loose boards, exposed fasteners, a trip edge, or water near electrical equipment. Do not touch, scrape, lift, or attempt to flatten the floor.
Expected result: A firm-looking, stable route differs from one with softening, sinking, rapidly expanding buckling, biological growth, loose material, or electrical proximity.
Next step: Isolate the area and communicate the specific warning signs, room location, photos, and timing when requesting service.
Stop if: Stop and leave the area for urgent help if there is collapse risk, active uncontrolled water, sewage, electrical arcing or heat, strong chemical odor, or breathing difficulty.
Why this matters
Why: These signs increase urgency and may require coordinated flooring, water-damage, building, mold, or electrical professionals rather than a finish-floor repair alone.
Use your observations
Decision map
Find the observation that best matches what you see, then follow the next safe action.
-
PATH 01Next step
What you see
The floor is soft, sinking, rapidly changing, wet, contaminated, electrically adjacent, or unsafe for ordinary access.
Do this next
Isolate the area and request high-priority flooring and water-damage assessment, with electrical or emergency help when indicated; do not enter or disturb the assembly.
-
PATH 02Next step
What you see
A recent spill, plumbing event, or active leak is associated with the buckle.
Do this next
Arrange prompt source control and professional drying assessment, then have the flooring and subfloor evaluated before any replacement or repair decision.
-
PATH 03Next step
What you see
The buckle is stable-looking, dry, localized, and not a trip or access hazard.
Do this next
Keep traffic and furniture off the area, retain dated photos, and schedule a professional flooring assessment rather than trying to flatten or seal it.
-
PATH 04Next step
What you see
Buckling continues into adjacent rooms, follows a wall or transition, or shows widespread moisture or mold-like signs.
Do this next
Request a broader moisture and building-assembly assessment; do not remove flooring, disturb suspected mold, or attempt structural repair yourself.
Helpful context
Understand the symptom
Buckling can occur when moisture reaches the floor assembly and the wood or subfloor swells, but the visible hump does not identify whether the source is a spill, plumbing leak, exterior entry, humidity, or moisture below the floor. A subfloor concern therefore needs source and extent assessment before cosmetic repair.
Use photographs and observations from a stable, dry location. Do not press down the raised area, move heavy furniture across it, remove baseboards, open the floor, scrape suspected mold, or try to flatten the boards. Those actions can worsen damage or expose hidden materials.
Treat a soft, sinking, rapidly changing, wet, contaminated, or electrically adjacent area as unsafe. Keep people and pets away, stop the suspected water source only if it can be done without approaching water or electrical hazards, and arrange professional flooring and water-damage evaluation.
Only after diagnosis
Potential parts
- moisture-meter
Only consider a meter after a flooring professional confirms a safe measurement approach and explains which accessible materials should be compared.
Instrument type, wood species, finish, subfloor, and measurement depth affect readings; a reading cannot certify the hidden assembly or replace source and damage assessment. - floor-repair-kit
Only consider a repair kit after the moisture source is controlled and a professional confirms that the stable, identified damage is suitable for that type of cosmetic repair.
Buckled boards or damaged subfloor may require replacement or assembly repair; finish, species, board construction, and installation method must be confirmed first.
When checks do not resolve it
Need a professional?
Arrange high-priority flooring or water-damage service for hardwood buckling involving active water, rapid expansion, softening, sinking, visible rot or mold-like growth, a trip hazard, or an uncertain subfloor condition. Add qualified electrical or emergency help for electrical contact, arcing, smoke, or collapse risk.
Safety scope: Do not pry, cut, drill, lift, pull boards, remove trim, scrape or spray suspected mold, add heat, test with water, or attempt to flatten, seal, or structurally repair the floor.
Common questions
FAQ
Why does a hardwood floor buckle?
Moisture can swell wood flooring or the subfloor below it, but the visible buckle does not identify whether the source is a spill, plumbing leak, exterior entry, humidity, or below-floor moisture. Professional source and assembly assessment is needed.
Should I push the boards back down or remove them to inspect the subfloor?
No. Do not press, pry, cut, drill, lift, or remove the floor as a DIY diagnostic. Keep traffic and furniture away, document the condition, and arrange professional flooring assessment.
What clues suggest the subfloor may also be affected?
A broad or spreading buckle, soft or sinking areas, moisture or staining near walls and plumbing, related changes in nearby rooms, persistent odor, or visible decay increases concern for the assembly below the finish floor.
When is a buckled hardwood floor urgent?
Active water, rapid expansion, softening or sinking, loose boards, mold-like growth, a blocked route or trip hazard, water near electrical equipment, sewage or chemical contamination, or collapse concerns warrants isolation and high-priority professional help.
Read the exact guide
Official sources
- Wood Flooring Installation GuidelinesNational Wood Flooring Association · Supports treating buckled wood floors as a moisture and assembly issue, comparing affected and unaffected areas, and involving qualified flooring professionals.
- Common Signs of Moisture ProblemsU.S. Department of Energy Building Science Education · Supports using visible staining, dampness, material changes, and recurring patterns as clues without claiming a remote diagnosis of the hidden subfloor.
- Table 1: Water Damage - Cleanup and Mold PreventionU.S. Environmental Protection Agency · Supports separating moisture-source control and drying assessment from cosmetic flooring repair and escalating contaminated or prolonged wet materials.
Community feedback
Share a repair observation
Share a plain-text repair observation. Accepted observations are published automatically; this page may take a moment to update.