
On this page
Start here
Quick answer
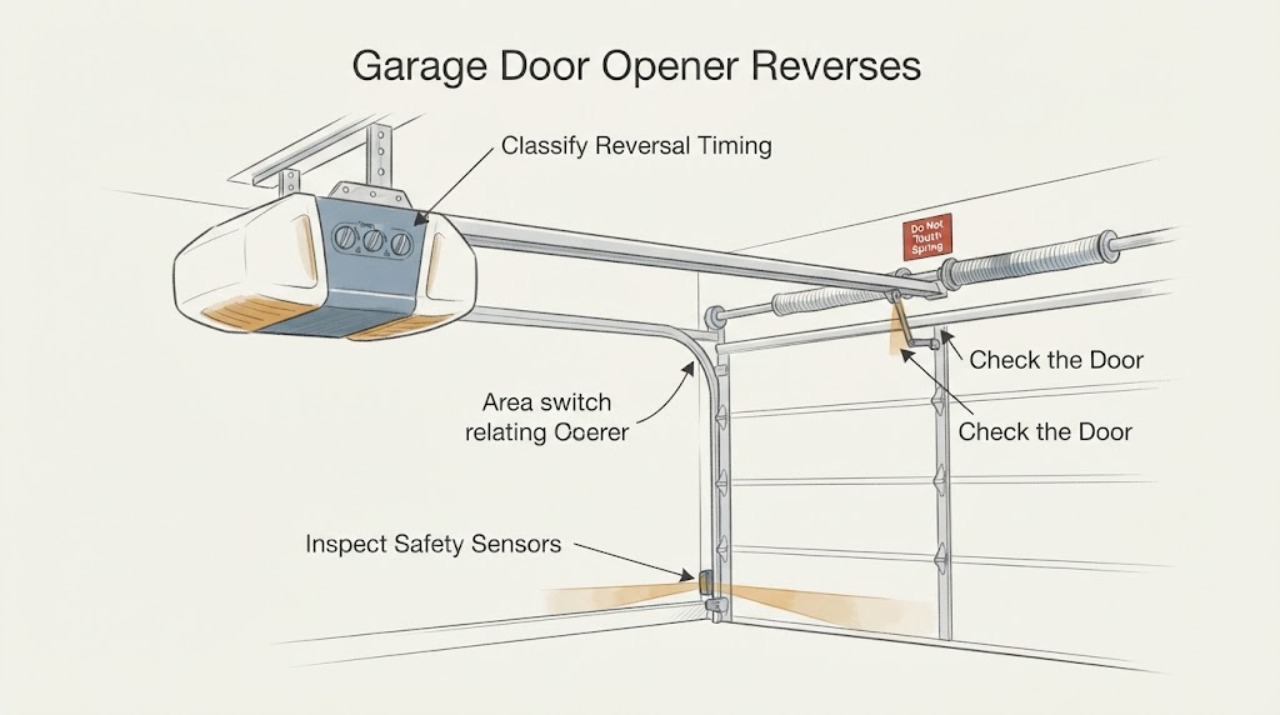
When a garage door opener reverses, first keep people and vehicles clear and note exactly when it reverses: immediately during closing, after touching the floor, after a few inches, or only when a control switch is used. From a safe standing position, inspect the door path and the two safety-reversing sensor indicators; the sensors must be connected, aligned, unobstructed, and showing the normal steady indicators for the opener design. A reversal at the same travel point can also reflect door binding, a travel or force setting, a cable-tension device, or a switch or travel-module signal. Do not bypass sensors, adjust springs or cables, or change travel or force settings without the exact manual and the required safety test. If the door is heavy, binding, damaged, falls, the sensors do not operate normally, or the opener still reverses after external checks, leave it out of service and call a trained door-systems technician.
Before you begin
Safety first
- This article covers safe visual observation of the closing path and safety sensors, one controlled normal observation, and model-specific interpretation of visible indicators. Do not bypass sensors, jumper or alter switch wiring, pull the release on an unstable door, adjust springs, cables, force, or travel, or open the opener housing.
Work through in order
Diagnostic checks
Use only checks that match the exact appliance or system and its official guide.
-
Check 1
Keep the doorway clear and observe one normal close command only from outside the door's path; record whether the door reverses immediately, after a few inches, at the floor, or only after a control switch or remote command.
Expected result: The door reverses immediately with sensor indicators abnormal; travels a short distance then reverses; touches the floor then reverses; or behaves differently between the wall control and remote.
Next step: Stop after the single observation and photograph the opener lights or diagnostic indicators, sensor indicators, door position, and input used. Follow the matching external check below or arrange service.
Stop if: Do not stand under or between the door sections, hold the door down, or repeat a reversal test if the door is unstable or damaged.
Why this matters
Why: Immediate close-direction reversal with abnormal sensor indicators supports the safety-sensor path. A short-distance or floor-contact reversal can involve resistance, travel sensing, force or limit setup, or a related switch signal. A difference between control inputs changes attention toward the control path, but does not make it safe to bypass a protection circuit.
-
Check 2
From beside the opening and without entering the door's travel path, inspect both safety-reversing sensor lenses, brackets, and visible wire runs for an obstruction, dirt, movement, or obvious disconnection; do not disconnect or bypass anything.
Expected result: Both indicators are steady and the lenses face each other; one indicator is off, dim, or flickering; a lens or beam path is blocked; or a bracket or visible wire is loose or damaged.
Next step: Clear only a harmless object from the beam path and clean the lens with a soft dry cloth if the manual permits. If alignment, wiring, or indicators remain abnormal, leave the opener unused and call a trained technician.
Stop if: Do not splice sensor wires, short terminals, disable the safety system, climb a ladder into the moving-door area, or hold the wall switch to defeat a reversal.
Why this matters
Why: The LiftMaster guide says the opener will not move down normally when sensors are obstructed or misaligned, and that steady indicators show correct alignment and wiring for that system. A loose bracket, damaged wire, or abnormal indicator keeps the safety system unresolved and does not support a forced close.
-
Check 3
With the opener not running, inspect the floor, threshold, tracks, and visible door edges for ice, snow, an object, a shifted track, or a section that is visibly rubbing; do not loosen hardware or reach into springs, cables, rollers, or hinges.
Expected result: The closing path is clear and the door looks aligned; an obstruction or ice is visible; the door is visibly skewed, damaged, or rubbing; or the door is heavy, drops, or cannot remain controlled.
Next step: Remove only a loose, harmless floor obstruction from a safe position. For binding, a shifted track, damaged sections, broken or slack cables, spring concerns, or uncontrolled movement, stop and call a trained door-systems technician.
Stop if: Do not pull the emergency release on an unstable door, lift the door to test balance, adjust springs or cables, or force the door through resistance.
Why this matters
Why: A physical obstruction or binding door can make the opener sense resistance and reverse. A heavy, dropping, skewed, or damaged door is a door-system hazard, not evidence that a switch should be adjusted or replaced.
-
Check 4
After the door is stationary, photograph the opener's diagnostic LED or arrow flashes and note whether the lights flash during reversal; compare the pattern only with the exact opener manual.
Expected result: The indicators point to sensor wiring or alignment; a travel or force condition; a cable-tension or travel-module condition; or no diagnostic pattern is available.
Next step: Give the exact flash count, model, reversal position, and sensor state to service. If the manual explicitly allows an external adjustment, do not proceed unless you can complete the required safety-reversal test; otherwise request service.
Stop if: Do not guess a code, change force or travel settings from another model, or continue if the door or opener behaves unpredictably.
Why this matters
Why: The LiftMaster manuals use model-specific patterns: sensor conditions can prevent downward movement, while other patterns can indicate motor-speed, cable-tension, or travel-limit and force conditions. A pattern is a routing clue, not permission to replace a switch or reprogram limits without the model-specific procedure.
-
Check 5
If the door and safety sensors are stable and the manual permits normal operation, compare one close command from the existing wall control with one from the remote while standing clear; do not open either control or alter its wiring.
Expected result: Both inputs produce the same reversal; only the wall control works; only the remote works; or neither input produces a controlled close.
Next step: Record the input, door position, reversal point, lights, and sensor state. Arrange service for any persistent reversal; do not use a defective control as a reason to bypass the safety system.
Stop if: Do not remove low-voltage wires, jumper terminals, hold the wall button through a protection fault, or operate a door that is unstable.
Why this matters
Why: The same reversal from both inputs points toward the door, safety system, travel sensing, or opener rather than one command switch alone. Different input behavior can indicate a control or lock feature, but it does not rule out a separate safety fault.
-
Check 6
After the sensor, path, indicator, and safe input observations, leave the opener out of service if the reversal remains and prepare a technician handoff with the exact evidence.
Expected result: The reversal stops after a harmless obstruction is removed; the sensors remain abnormal; the door binds or is damaged; the reversal repeats at the same point; or no external cause is found.
Next step: Call a trained door-systems technician and provide the opener model, reversal timing, input used, flash pattern, sensor indicators, path condition, and any prior adjustment history.
Stop if: Do not replace a switch, travel module, sensor, board, motor, spring, cable, or other internal component based on this symptom alone.
Why this matters
Why: A cleared floor obstruction may explain that event, but recurring reversal, abnormal sensors, binding, and same-point behavior keep the safety or door-system fault unresolved. No external cause does not prove a switch, board, or motor failure.
Use your observations
Decision map
Find the observation that best matches what you see, then follow the next safe action.
-
PATH 01Safety boundary
What you see
Is the door falling, heavy, binding, damaged, off track, or accompanied by a broken or slack spring or cable?
Do this next
Keep everyone clear, leave the opener out of service, and call a trained door-systems technician.
Why this path and its safety boundary
Safety stop: Do not lift, release, or force an unstable door.
-
PATH 02Safety boundary
What you see
Are the sensor lenses obstructed or are the normal sensor indicators off, dim, or flickering?
Do this next
Clear only a harmless beam obstruction and clean the lenses if allowed by the manual. If indicators remain abnormal, stop and arrange trained service; never bypass the sensors.
Why this path and its safety boundary
Safety stop: Continue by classifying the point of reversal and checking for door-path resistance.
-
PATH 03Safety boundary
What you see
Does the door reverse at the floor or at the same travel point with a clear path and normal sensor indicators?
Do this next
Treat resistance, travel sensing, force or limit setup, cable-tension monitoring, or a related switch signal as possible service paths. Use only exact model instructions and do not adjust without the required safety test.
Why this path and its safety boundary
Safety stop: Continue with the exact diagnostic indicator and control-input observations.
-
PATH 04Safety boundary
What you see
Does reversal occur from both the wall control and remote, or only from one input?
Do this next
The same reversal from both inputs favors a door, safety, travel, or opener path; one-input behavior may involve that control path. Persistent reversal still requires service.
Why this path and its safety boundary
Safety stop: Record which input was used and do not alter control wiring or bypass protection.
-
PATH 05Safety boundary
What you see
Does the opener still reverse after a harmless obstruction is removed and the applicable external sensor check?
Do this next
Leave it out of service and request a trained door-systems technician with the model and observations.
Why this path and its safety boundary
Safety stop: Monitor only normal operation, keep the door in sight, and stop if reversal or abnormal indicators return.
Helpful context
Understand the symptom
The point of reversal changes the diagnostic path
A door that reverses as soon as it starts down is different from one that reaches the floor and then reverses, or one that moves only a few inches. Sensor obstruction or misalignment is a common close-direction path in the LiftMaster guidance. A repeatable reversal at a particular travel point can instead involve resistance, travel sensing, a cable-tension device, or the opener's force and limit setup. The symptom does not identify a failed switch by itself.
Inspect the safety sensors without defeating them
Keep the door path empty and inspect both sensor lenses, brackets, and visible wire runs from a safe position. The two indicators should show the normal steady state for the installed system. Do not disconnect, jumper, relocate, or disable the sensors to make the door close; they are part of the entrapment-protection system.
Leave spring, cable, and force work to a trained technician
A garage door is heavy and its springs, cables, tracks, and opener can store dangerous energy. The manufacturer guidance calls for a trained door-systems technician when the door binds or a safety-reversal test fails. Record the reversal behavior and visible indicators rather than opening the housing or changing a switch, force, travel, spring, or cable adjustment as a trial.
Only after diagnosis
Potential parts
- safety-reversing sensor set
Consider this category only if the exact opener system has abnormal sensor indicators or qualified testing confirms a sensor or sensor-wire fault after the beam path and alignment are checked.
Confirm the exact opener model and manufacturer's fit information; never replace or disable sensors based only on a reversal symptom. - travel module or limit switch assembly
Consider this category only when reversal occurs at a repeatable travel point and qualified diagnosis confirms a travel-sensing or switch fault after door resistance and sensor conditions are addressed.
Confirm exact model-specific fit and adjustment procedure with a trained technician; do not change limits or force settings as a trial. - cable-tension monitor
Consider this category only for opener systems that use a cable-tension monitor and where qualified diagnosis confirms its connection or device is causing the close-direction reversal.
Confirm the exact door and opener system before any repair; cable work requires trained door-systems service.
When checks do not resolve it
Need a professional?
Stop and call a trained door-systems technician for a heavy, falling, binding, skewed, off-track, or damaged door; broken or slack springs or cables; abnormal or missing safety-sensor indicators; a reversal that returns after a harmless obstruction is removed; reversal at the same point with no clear cause; a failed safety-reversal test; or any need to adjust force, travel, limits, switches, cables, springs, wiring, or the opener housing. Do not bypass the safety sensors or hold a control switch to defeat a reversal.
Safety scope: This article covers safe visual observation of the closing path and safety sensors, one controlled normal observation, and model-specific interpretation of visible indicators. Do not bypass sensors, jumper or alter switch wiring, pull the release on an unstable door, adjust springs, cables, force, or travel, or open the opener housing.
Common questions
FAQ
Why does my garage door opener reverse while closing?
A sensor beam may be obstructed or misaligned, or the opener may sense door resistance, travel or force conditions, cable-tension behavior, or another fault. Note where the reversal occurs and inspect the sensors from a safe position without bypassing them.
What should the garage door safety-sensor indicators look like?
For the LiftMaster system described in the cited guide, both sensor indicators should glow steadily when the sensors are correctly aligned and wired. Your exact model may differ, so use its manual; abnormal indicators mean the safety path is unresolved.
Can I adjust the limit or force setting to stop the reversal?
Do not adjust it as a guess. Travel and force settings affect the safety-reversal system, and the exact manual and required safety test must be followed. A repeatable reversal with a clear path should be assessed by a trained door-systems technician.
Should I replace the wall switch when the door reverses?
Not from the symptom alone. If both the wall control and remote produce the same reversal, the door, sensors, travel, or opener path is more relevant than one switch. Record which input was used and have persistent reversal diagnosed safely.
When should I stop troubleshooting a reversing garage door opener?
Stop for a heavy, falling, binding, damaged, or off-track door; broken or slack springs or cables; abnormal sensor indicators; repeated reversal; a failed safety test; smoke or electrical damage; or any need to bypass sensors, adjust springs, cables, force, travel, or switch wiring.
Read the exact guide
Official sources
- Safety & ComplianceChamberlain · Chamberlain garage door opener entrapment-protection safety context
- WLED Elite Series LED Wi-Fi® Garage Door Opener User's GuideLiftMaster · LiftMaster garage door opener safety sensors, travel, and reversal behavior
- 114A4565 Wall Mount Garage Door Opener Model 8500LiftMaster · LiftMaster Model 8500 door reversal, cable-tension, travel, and diagnostic guidance
Community feedback
Share a repair observation
Share a plain-text repair observation. Accepted observations are published automatically; this page may take a moment to update.