
On this page
Start here
Quick answer
First identify which light is blinking. On a Chamberlain wall control, a continuously flashing indicator commonly means the Lock feature is enabled; the wall button may still operate the door while remotes are ignored. If the door control has a Lock button, press and hold it for about two seconds once, then confirm the indicator becomes steady and test the remote. A brief blink while the opener passes a stored travel point can be normal on some controls, while flashing opener bulbs when the door will not close points instead toward an obstruction or safety-sensor condition. Check the door path and sensor view from a safe position, but do not remove the wall control, short wires, open the opener housing, bypass sensors, or work on the moving door. If the indicator stays dark, blinks with a door-control fault, the door behaves unpredictably, or the pattern returns after Lock mode is cleared, stop and call a qualified garage-door technician.
Before you begin
Safety first
- Owner checks are limited to normal wall-control buttons, one safe remote test, clearing a loose obstruction outside the path, observing sensor sight lines and LEDs, and recording behavior. A qualified professional must handle wall-control wiring, sensor wiring or alignment, opener panels, live electrical tests, logic boards, motors, travel settings, springs, cables, tracks, and any forced or elevated-door work.
Work through in order
Diagnostic checks
Use only checks that match the exact appliance or system and its official guide.
-
Check 1
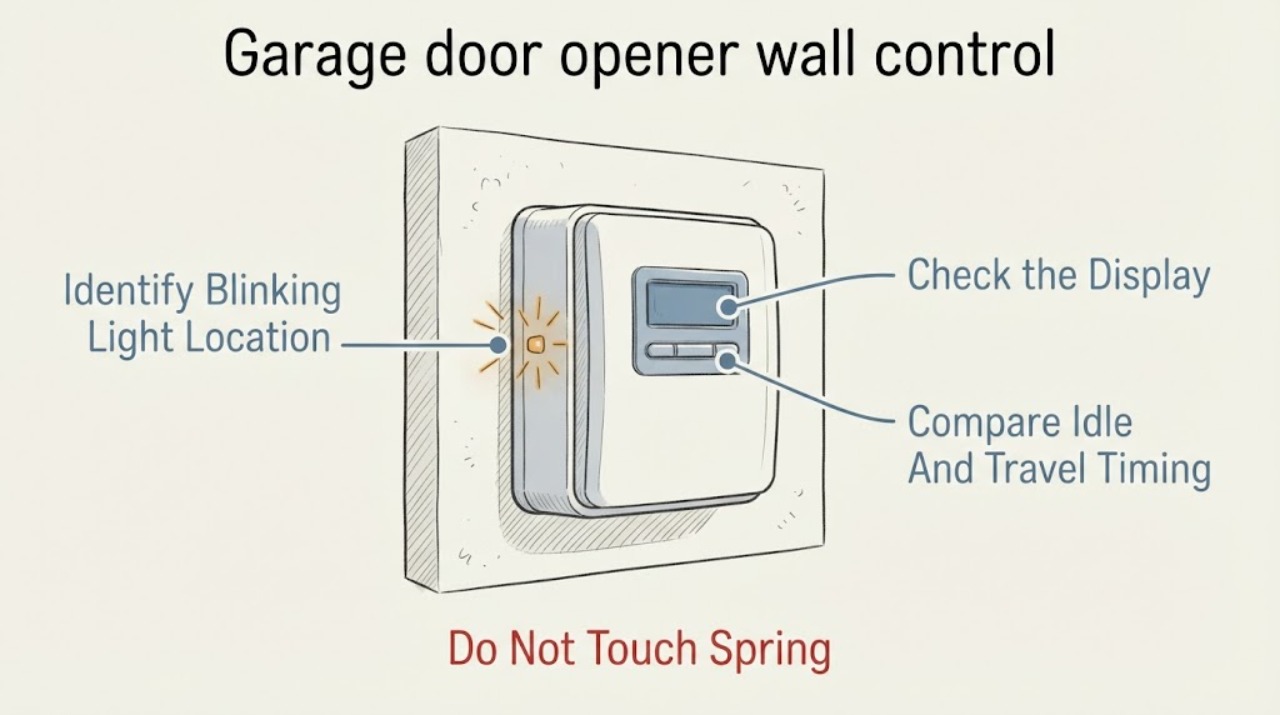
From outside the door's movement path, identify whether the blinking light is on the wall control, the opener housing, a floor-level safety sensor, or the diagnostic area beside the Learn button. Observe without touching the door, rail, springs, cables, panels, or wiring.
Expected result: The wall-control indicator flashes while idle, the wall-control LED flashes only during door travel, opener bulbs flash during a failed close, a sensor LED is off or flickering, or the Learn-button diagnostic LED repeats a count-and-pause pattern.
Next step: Continue only with the matching safe check below. If the door is moving unexpectedly, the path is unsafe, or the pattern is unclear, keep people and vehicles clear and call a qualified technician.
Stop if: Stop for uncontrolled movement, a crooked or jammed door, a broken spring or cable, exposed wiring, smoke, or any need to touch the mechanism.
Why this matters
Why: Light location and timing select different diagnostic paths. A continuously flashing wall-control indicator points toward Lock mode; travel flashes may be passpoint feedback; opener-bulb or sensor flashes can indicate a closing or safety issue.
-
Check 2
If the wall control has a Lock button and its indicator is continuously flashing, press and hold that normal control button for about two seconds, then release it. Keep your hands away from the panel edge, terminals, and wiring.
Expected result: The indicator becomes steady, the remotes work again, the wall button works but remotes remain blocked, or the control has no Lock button or a different interface.
Next step: Test one remote once with the door path clear. If the indicator stays flashing, the remote remains blocked, or the control layout does not match, stop normal troubleshooting and consult the exact manual or a qualified technician; do not remove the control.
Stop if: Stop for a stuck or damaged button, exposed or wet wiring, an unresponsive control, or any need to remove the wall plate or access terminals.
Why this matters
Why: A steady indicator and restored remote operation support Lock mode as the cause. If only the wall button works, the lock state may remain, or the remote may have a separate battery or programming issue. A different interface requires model-specific instructions.
-
Check 3
With the door area empty and safe, observe whether the wall-control light blinks continuously while idle or only briefly as the opener moves through travel. Do not repeatedly cycle the door and do not change travel limits or force the door.
Expected result: The blink is continuous at rest, occurs only at a repeatable travel point, begins after a remote attempt, or accompanies reversal, binding, grinding, or uneven movement.
Next step: For a travel-only blink with normal operation, record the pattern and consult the model manual. For mechanical symptoms, reversal, or an irregular pattern, stop cycling the door and call a qualified garage-door technician.
Stop if: Stop for a door that is off its tracks, lurches, falls, reverses unexpectedly, makes grinding or snapping sounds, or has damaged springs, cables, rollers, or track.
Why this matters
Why: Continuous idle flashing is consistent with a control state such as Lock mode. A travel-timed blink may be passpoint feedback. Mechanical symptoms or a new irregular pattern indicate a door or opener problem beyond a simple indicator setting.
-
Check 4
If the opener bulbs flash when a close attempt fails, look from a safe position for objects in the door opening and for anything blocking the two sensor lenses near the floor. Confirm only that each lens has a clear view and its indicator appears steady; do not disconnect, bypass, or realign wiring.
Expected result: The opening is blocked, a lens is dirty or obstructed, a sensor indicator is off or flickering, or the door path and sensor view are clear.
Next step: Remove only a loose object well outside the moving path and wipe a lens gently if it can be reached without entering a hazard. Make one normal test only; if the door still will not close or bulbs flash, stop and request service.
Stop if: Stop for a damaged sensor, loose bracket, exposed wire, a door that is closing unpredictably, an obstruction under tension, or any need to enter the travel path during operation.
Why this matters
Why: An obstruction or sensor-line problem can prevent closing and make the opener bulbs flash. A clear view does not prove the sensors, wiring, brackets, or opener controls are working, especially if the failure persists.
-
Check 5
Press the wall control's normal push bar once from a safe position and note whether the opener responds consistently. Do not hold the button, short terminals, remove the control, or touch the opener housing.
Expected result: The wall control opens and closes the door normally, the wall control is dark or unresponsive, it works intermittently, or the door responds but the indicator keeps flashing.
Next step: If the wall control is dark, intermittent, or fails to operate the door, leave the system unused as needed and arrange qualified diagnosis. If it works but the indicator remains abnormal, record the pattern and use the exact model manual or service support.
Stop if: Stop for a control that becomes hot, smells burnt, sparks, has exposed conductors, or requires removal from the wall or access to the motor unit.
Why this matters
Why: A working push bar with a flashing indicator keeps Lock mode or a control-state explanation in consideration. A dark or intermittent control can involve power, wiring, the panel, or the logic board; the symptom alone cannot identify which.
-
Check 6
From a dry position, note whether the opener has normal power and whether the blinking began after an outage, storm, new wall control, wiring work, remote programming, or a battery change. Do not open the opener, reset a repeatedly tripping breaker, or unplug equipment while the door is moving.
Expected result: The display is dead, power is intermittent, a breaker or GFCI has tripped, the issue began after wiring or accessory work, or power and history appear normal.
Next step: Only reset a tripped household protective device once if it can be done safely and there is no visible damage; stop if it trips again. For a dead or recurring control, recent wiring change, or uncertain compatibility, call a qualified technician with the model and history.
Stop if: Stop for repeated trips, smoke, heat, water, damaged cords, exposed conductors, or any need to access electrical components.
Why this matters
Why: Loss of power, a short or wiring issue, an incompatible control, or a post-programming state can affect the wall control. Normal power does not rule out a panel, wire, logic-board, or safety fault.
-
Check 7
Record the wall-control model if visible without removing it, opener model and Learn-button color if already accessible from a safe distance, exact blink timing, whether the Lock button changed the indicator, wall-control and remote behavior, sensor observations, door movement, and recent work. Do not open equipment to obtain model information.
Expected result: The blink stops after the normal Lock control, is limited to travel with otherwise normal operation, or persists with a dead control, remote failure, failed close, or abnormal door movement.
Next step: Keep the door area clear and call a qualified garage-door technician for persistent blinking, failed closing, an unresponsive control, repeated power trips, or any mechanical symptom. Share the recorded pattern instead of trying a guessed replacement.
Stop if: Stop after the safe button, visual path, sensor-view, and observation checks; do not continue into wiring tests, bypasses, panel removal, spring work, or forced door cycles.
Why this matters
Why: A resolved Lock state or documented travel feedback may be a control-state explanation. Persistence with another symptom points toward wiring, control-panel, safety-sensor, logic-board, or mechanical diagnosis rather than a user setting.
Use your observations
Decision map
Find the observation that best matches what you see, then follow the next safe action.
-
PATH 01Next step
What you see
The wall-control indicator flashes continuously while the door is idle, the wall control operates the door, and handheld remotes do not; the control has a Lock button.
Do this next
Press and hold the Lock button for about two seconds, confirm a steady indicator, and test one remote once. If the state does not clear, stop and use the exact manual or request service; do not access wiring.
-
PATH 02Next step
What you see
The wall-control LED or screen blinks briefly only at a repeatable point as the door travels, with normal movement, no reversal, and no remote or close failure.
Do this next
Record the pattern and consult the exact model manual. Do not change travel limits or repeatedly cycle a door that shows any mechanical irregularity.
-
PATH 03Next step
What you see
The blinking is on the opener bulbs, not the wall control, and the door will not close or reverses; a sensor LED is off, dim, or flickering, or the opening has an obstruction.
Do this next
Clear only a loose, safe obstruction and check the sensor sight line from outside the travel path. If the failure persists, stop and call service; do not bypass sensors or alter wiring.
-
PATH 04Next step
What you see
The wall-control LED or screen is dark, flickers unpredictably, or the push bar works intermittently, especially after an outage, wiring change, or accessory installation.
Do this next
Stop at visual checks and arrange qualified diagnosis. Do not remove the panel, short conductors, open the opener, or install a replacement without model-specific fitment confirmation.
-
PATH 05Next step
What you see
The flashing light is the diagnostic LED beside the Learn button and repeats a count followed by a pause, rather than the wall-control indicator.
Do this next
Record the count and consult the exact opener manual or Chamberlain support. Keep hands away from the opener and sensors; request service if the code persists or the door is unsafe.
-
PATH 06Next step
What you see
Blinking is accompanied by a broken spring or cable, door off track, uncontrolled movement, grinding or snapping, smoke, burning odor, exposed wiring, water, or repeated breaker trips.
Do this next
Keep people and vehicles away, turn off normal controls only if safe, and obtain urgent qualified help. Do not operate, lift, release, bypass, or repair the door or opener yourself.
Helpful context
Understand the symptom
Confirm which light is blinking
A Chamberlain system can show several different light behaviors: the indicator on the wall-mounted door control, the opener's light bulbs, the safety-sensor LEDs near the floor, or the diagnostic LED beside the Learn button. They do not mean the same thing. A wall-control indicator that flashes continuously is most often a Lock-mode clue; opener bulbs that flash when a door refuses to close point toward a different safety or obstruction path. Watch the location and whether the pattern is continuous, tied to door travel, or triggered by a remote attempt before changing anything.
Lock mode is a user-setting possibility
If the wall control has a Lock button and its indicator flashes continuously, Chamberlain identifies Lock mode as a reason handheld remotes stop operating the opener. Press and hold the Lock button for about two seconds, then look for a steady indicator and test one remote. This is a normal control action only; do not pry off the panel or touch its wiring. If the wall control has no Lock button, a screen, or a different control layout, use the exact owner's manual rather than guessing at a button combination.
A blink during travel may be different
Chamberlain says some door-control LED or screen flashes mark a passpoint as the opener moves, helping the system track travel. A momentary blink that repeats at a particular point in the door's movement is therefore different from a continuous flash while the door is idle. Do not alter travel limits or force the door by hand to reproduce a pattern. If the door reverses, binds, moves unevenly, or the light behavior is accompanied by a closing failure, stop and arrange service.
The wall-control light may not be the opener light
If the flashing light is actually on the opener housing, or if the opener bulbs flash when a close command is attempted, inspect the door opening and the two safety-sensor sight lines from a safe standing position. Chamberlain associates repeated opener-light flashes during a failed close with safety-sensor conditions, while its diagnostic chart distinguishes sensor and door-control errors. Do not bypass the sensors, disconnect their wires, or adjust a spring, track, or travel setting as a guess.
Safety boundary
Stop conditions
- Stop immediately for a broken spring or cable, door off track, uncontrolled or falling movement, grinding or snapping, smoke, burning odor, sparks, exposed wiring, water near electrical equipment, or repeated breaker trips; keep people clear and obtain urgent qualified help.
- Do not remove the wall control or opener housing, short or bypass door-control or safety-sensor wires, test live electrical parts, alter travel limits, adjust springs or cables, or force a jammed or heavy door.
- Do not infer a failed wall control, wire, or logic board from a blinking light alone. Identify the light location, timing, Lock-button response, remote behavior, sensor view, and door movement before considering any part.
- Stop owner troubleshooting after the normal Lock-button check and safe visual observations. If the indicator remains abnormal, the door will not close, the control is dark or intermittent, or any wiring or mechanism access is needed, call a qualified garage-door technician.
Only after diagnosis
Potential parts
- wall control panel
Relevant only if diagnosis shows the wall control itself is faulty after Lock mode, power, wiring, and opener compatibility are checked.
Confirm the opener model, Security+ generation, control type, connector or wire arrangement, and the manufacturer's compatibility information before ordering; do not remove or wire the panel as a first test. - low-voltage door-control wire
Relevant only when a qualified technician confirms an open, shorted, damaged, or otherwise unsuitable wall-control wire rather than a panel or logic-board fault.
Match the opener generation, wire requirements, routing, insulation, and terminal arrangement from the exact manual; never use a wire change to bypass a safety circuit. - safety reversing sensor kit
Relevant only when testing confirms a failed sensor or sensor component after the lens, sight line, brackets, and wiring are professionally evaluated.
Confirm the opener model and sensor generation before ordering; do not bypass sensors or treat a blinking opener bulb as proof that the sensors need replacement. - logic board or opener control board
Relevant only when qualified diagnosis rules out Lock mode, wall-control wiring, sensors, power, and mechanical causes and confirms a board fault.
Confirm the exact opener model, revision, radio and safety features, and manufacturer part information; board replacement involves hazardous electrical and configuration work. - opener motor or drive component
Relevant only when a professional confirms a motor or drive fault after the indicator behavior, door balance, track, sensors, controls, and power are assessed.
Confirm exact model, drive type, limits, safety features, and rated replacement information; never select a motor from a blinking light or work on springs and moving mechanisms yourself.
When checks do not resolve it
Need a professional?
Call a qualified garage-door technician when the wall-control light continues blinking after the correct normal Lock-button check, the control is dark or intermittent, remotes remain blocked, the opener lights flash during a failed close, a safety-sensor or diagnostic pattern persists, power trips recur, or any panel, wiring, sensor adjustment, motor, logic board, spring, cable, track, or travel-limit work is needed.
Safety scope: Owner checks are limited to normal wall-control buttons, one safe remote test, clearing a loose obstruction outside the path, observing sensor sight lines and LEDs, and recording behavior. A qualified professional must handle wall-control wiring, sensor wiring or alignment, opener panels, live electrical tests, logic boards, motors, travel settings, springs, cables, tracks, and any forced or elevated-door work.
Have this ready
- Provide the opener and wall-control model information if already visible without opening equipment, Learn-button color if safely observable, exact light location and blink timing, whether the Lock button changed it, wall-control and remote response, sensor LED observations, door movement or reversal, power-trip history, recent outage or wiring/accessory work, and safe photos from outside the travel path.
Common questions
FAQ
Why is the light on my Chamberlain wall control blinking?
A continuously flashing wall-control indicator commonly means Lock mode is enabled, especially if the wall button works but handheld remotes do not. Press and hold the Lock button for about two seconds if your control has one, then confirm the indicator becomes steady. A blink during door travel or a flash on the opener bulbs is a different symptom.
How do I turn off the blinking light on a Chamberlain wall control?
If the control has a Lock button and the indicator is continuously flashing, press and hold Lock for about two seconds and release. The indicator should become steady and remotes should work again. Do not remove the control or touch wires; use the exact manual for a different control layout.
Can I still open the garage door when the wall-control light is blinking?
In Lock mode, Chamberlain says the wall-mounted control can still operate the door while handheld remotes are ignored. Keep the door path clear and do not keep cycling a door that reverses, binds, moves unevenly, or has damaged springs, cables, or tracks.
Why do my Chamberlain opener lights flash when the door will not close?
That may be a safety-sensor or door-obstruction condition rather than a blinking wall-control indicator. Check the opening and sensor sight line from a safe position. If the sensors are blocked, damaged, or still fail after a safe obstruction check, call service and do not bypass or rewire them.
Is a brief wall-control blink during door travel normal?
Chamberlain says some door-control LEDs or screens flash as the opener passes stored travel points. A brief, repeatable travel blink with normal operation differs from a continuous idle flash. Do not alter travel limits; consult the exact manual or call service if movement is abnormal.
What if the blinking wall control is dark or the button is intermittent?
A dark or intermittent control can involve power, low-voltage wiring, the panel, or the opener logic board. Note whether the issue followed an outage or wiring or accessory work, then stop at visual checks and request qualified diagnosis. Do not remove the control or short its wires.
What does the flashing LED beside the Chamberlain Learn button mean?
That is a diagnostic indicator on the opener, not necessarily the wall-control light. Chamberlain uses repeating flash counts for conditions including safety-sensor and door-control-related errors. Record the count and pause pattern, consult the exact manual, and keep away from the opener housing and wiring.
Should I replace the Chamberlain wall control when its light blinks?
Not from the blink alone. First identify whether Lock mode, travel feedback, opener-bulb flashing, sensors, power, wiring, or a mechanical issue fits the pattern. Replace a wall control only after model-specific testing confirms it is faulty and the compatible part is verified.
Can I bypass the safety sensors to stop the Chamberlain light from blinking?
No. Do not bypass, disconnect, short, or rewire the safety sensors. They are part of the door's protective system. Keep people and vehicles clear and call a qualified technician if the sensors are damaged, misaligned, or the opener still refuses to close.
What information should I give a garage-door technician?
Provide the opener and wall-control model information if safely visible, Learn-button color, exact light location, blink timing, Lock-button response, remote and wall-button behavior, sensor LED observations, door movement or reversal, power-trip history, recent outage or wiring work, and safe photos. Do not open equipment to collect more information.
Read the exact guide
Official sources
- What Does the Flashing LED Next to the Learn Button MeanChamberlain Group · Official diagnostic chart separating sensor-related flashes, door-control-related errors, and flashing opener lights during failed closing
- Remote Control | Remote Does Not WorkChamberlain Group · Official support guidance distinguishing a wired wall control from handheld remotes and identifying a continuously flashing command LED as a Lock-mode clue
- How to Troubleshoot a Door Control PanelChamberlain Group · Official support overview of control types, safety-sensor light behavior, door-control wiring symptoms, and model-specific panel diagnosis
- Why the LED or Screen flashes on the door controlChamberlain Group · Official support explanation of Lock mode, remote blocking, and passpoint flashes on applicable door controls
- How To Activate Or Deactivate The Light Feature Or Motion Sensor FeatureChamberlain Group · Official support explanation that multi-function controls can manage opener lights and motion sensing, with model and feature limitations
Community feedback
Share a repair observation
Share a plain-text repair observation. Accepted observations are published automatically; this page may take a moment to update.