
On this page
Start here
Quick answer
First confirm that the blinking indicator is on the wall control itself, not the opener’s powerhead or the photo-eye sensors. The meaning varies by brand and wall-control series: for some Genie wired consoles, the normal door-button backlight should be on and an unlit control can indicate Sure-Lock or a wiring issue; other controls use their own status or diagnostic patterns. Read the model-specific guidance, keep the door in sight, do not bypass safety sensors or short wires, and call a garage-door technician if the wall control remains abnormal, the door will not operate safely, or wiring is damaged.
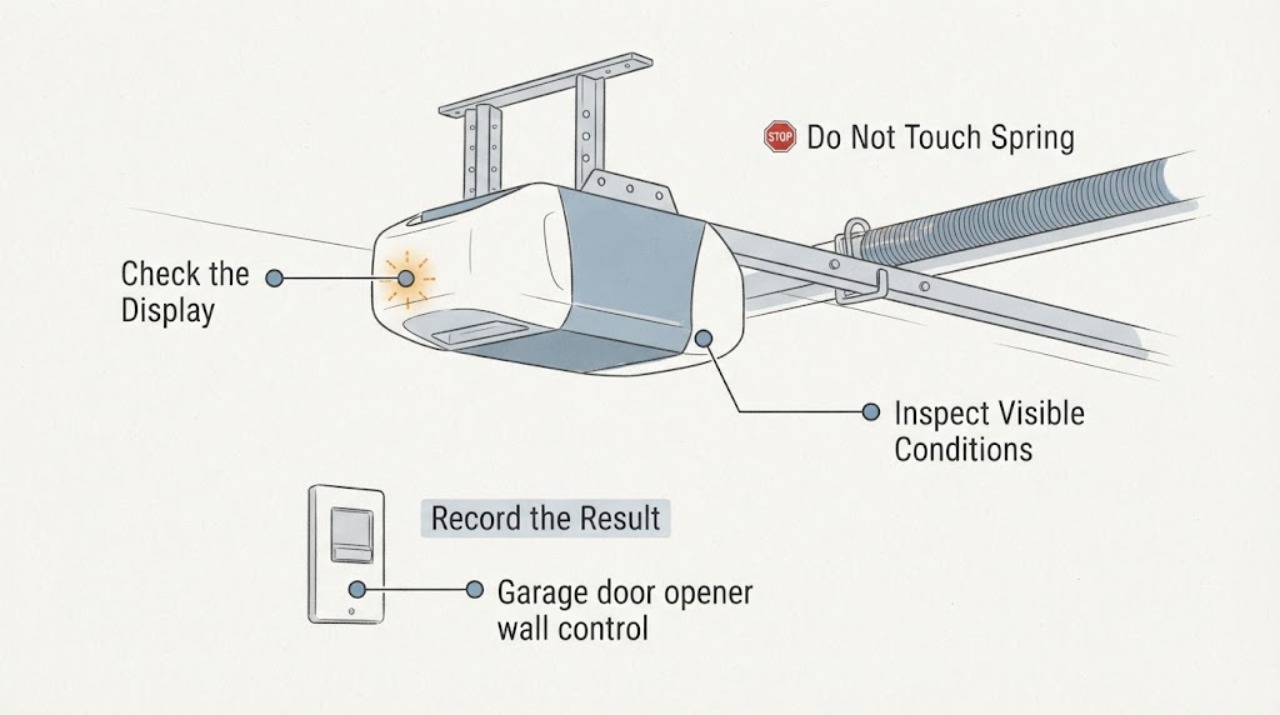
Work through in order
Diagnostic checks
Use only checks that match the exact appliance or system and its official guide.
-
Check 1
From a safe position with the door path clear and the door in view, identify which light is blinking: the wall control’s button or lock indicator, the opener powerhead’s diagnostic light, or one of the photo-eye sensor LEDs. Note the color, blink cadence, and whether the light is steady between blinks.
Expected result: Only the wall-control indicator blinks, the powerhead indicator also blinks, one photo-eye LED is dim or off, or the light is actually a normal backlight or lock indicator for that model.
Next step: Write down the exact pattern and locate the opener and wall-control model labels without removing covers. Do not press combinations repeatedly or treat a photo-eye indication as permission to bypass the safety system.
Stop if: Stop if the door starts moving unexpectedly, the indicator is accompanied by sparks or smoke, or the control or wiring is wet, hot, cracked, or loose.
Why this matters
Why: The component and pattern determine the fault path. A wall-control indication can involve the control, lock feature, or its wiring, while a dim or off photo-eye indicator can prevent closing. A model-specific manual is needed before interpreting a color or cadence.
-
Check 2
Observe the door’s current safe state and any response that already occurred: fully open, fully closed, stopped partway, no movement, reversal, or a response only while a wall button is held. Do not deliberately cycle the door to reproduce the symptom.
Expected result: The door remains stationary, opens but will not close, reverses, moves only with a held wall button, or operates normally while the wall-control light still blinks.
Next step: Keep the door path clear and report the exact response to a technician. Do not hold a button to defeat a safety function, force the door, or repeat cycles to test a theory.
Stop if: Stop all operation if the door binds, drops, slams, reverses unpredictably, the cables or springs look damaged, or anyone would need to enter the door’s travel path.
Why this matters
Why: A close-only problem can involve the safety-reversing system or an obstruction; a held-button response may be a diagnostic behavior on some openers. Normal movement does not prove the wall control or wiring is healthy.
-
Check 3
Visually inspect the wall control and the exposed portion of its cable from floor level without removing the control. Look for a loose faceplate, cracked housing, moisture, a visibly nicked cable, staples through the cable, or a cable pulled tight near the opener.
Expected result: The control and visible cable look intact, or there is a damaged, wet, loose, pinched, or visibly altered control or cable.
Next step: Leave the control untouched and arrange technician inspection. Provide photos from a safe position; do not remove the wall control, expose terminals, repair the cable, or short wires to see whether the opener responds.
Stop if: Stop if inspection would require a ladder, moving the opener or door, touching wiring, removing the plate, or approaching wet or energized equipment.
Why this matters
Why: An intact appearance does not rule out an internal control or wiring fault. Visible damage or moisture can interrupt the wall-control signal and can create a shock or equipment hazard.
-
Check 4
Check only clearly labeled user-facing indicators on the wall control, such as a lock or vacation marking, without opening the control or overriding a safety feature. Note whether the blinking began after a power interruption, programming attempt, battery event, or use of a lock function.
Expected result: A clearly labeled lock or status indicator appears engaged, the blinking began after a known power or programming event, or no user-facing state explains the blinking.
Next step: Follow only the model’s ordinary user guidance for a clearly identified status state, or ask a technician to interpret it. Do not enter programming mode repeatedly, change terminal connections, or hold buttons to defeat a lock or sensor.
Stop if: Stop if the status cannot be identified, the wall control becomes hot, the door responds unexpectedly, or the next step would involve wiring, opener housing, or safety-system override.
Why this matters
Why: Some wall-console designs use an indicator to show a lock state or normal status, while others use flashing patterns during charging or diagnostics. A user-facing state must be interpreted from the exact manual; it is not evidence that sensors or interlocks may be bypassed.
-
Check 5
Record a service handoff from a safe location: opener and wall-control model labels, indicator color and cadence, which component blinks, door position and response, photo-eye LED appearance, recent power or control changes, visible cable condition, and any unusual sound or odor.
Expected result: The record points to a wall-control-only indication, a safety-sensor or close behavior, visible wiring damage, or an unexplained pattern with no safe user reset.
Next step: Provide the record and safe photos to a qualified garage-door technician and keep the system out of service if operation is unreliable or unsafe.
Stop if: Stop the homeowner investigation once the pattern is documented; do not continue pressing controls or disassembling the system.
Why this matters
Why: This separates a model-specific status from a safety or wiring fault and gives the technician enough context to avoid unnecessary repeated operation. An unexplained wall-control pattern is not a reason to replace parts blindly.
Use your observations
Decision map
Find the observation that best matches what you see, then follow the next safe action.
-
PATH 01Next step
What you see
The blinking is confirmed on the wall control, while the door and photo-eye indicators appear normal
Do this next
Use the exact wall-control and opener manual to identify the indicator, or request technician service. Do not assume a universal reset or replace the control without compatibility confirmation.
-
PATH 02Next step
What you see
A clearly labeled lock or vacation indicator is engaged
Do this next
Follow only the model’s normal user instructions for that control state. Never use a held-button or wiring workaround to bypass an interlock or safety sensor.
-
PATH 03Next step
What you see
The photo-eye indicator is dim or off, or the door will not close
Do this next
Keep the door path clear, observe the sensors only from the floor, and arrange service if alignment, wiring, or sensor condition is not clearly resolved by the model manual. Do not bypass the sensors or force a close.
-
PATH 04Next step
What you see
The wall control or cable is wet, cracked, loose, visibly damaged, or hot
Do this next
Do not touch it or remove it from the wall. Keep the opener out of service and request qualified garage-door or electrical assessment.
-
PATH 05Next step
What you see
The door moves unpredictably, binds, slams, reverses unexpectedly, or has visible spring, cable, or track damage
Do this next
Leave the door and opener alone, keep people clear of the travel path, and call a trained door-systems technician.
Helpful context
Understand the symptom
A blinking wall-control light is an indicator, not a universal error code. The same-looking light can belong to the door button, a lock or vacation feature, a programming state, or a diagnostic display. Before taking action, identify the exact control, note the blink pattern, and compare it with the owner manual for the opener and wall control.
Keep every check at a safe distance. Do not remove the control from the wall, open the opener housing, loosen terminal screws, touch wires, bridge terminals, bypass photo eyes, defeat the reversal system, or repeatedly force the door to run. A garage door can move unexpectedly and its springs, cables, and moving parts are not homeowner diagnostic targets.
If the wall control is wet, cracked, loose, hot, or accompanied by a burning smell, arcing, a damaged cable, an unstable door, or a door that moves unpredictably, leave the system alone and arrange qualified service. Record the indicator behavior and door response so the technician can work from evidence rather than repeated operation.
Only after diagnosis
Potential parts
- garage door photo eye sensor
Consider this only if a technician or model-specific diagnostic identifies a failed safety-reversing sensor after safe obstruction and indicator checks.
Confirm opener series, sensor wiring, mounting, and safety requirements; never substitute a part to bypass the reversing system. - garage door wall button
Consider this only if the wall control itself is diagnosed as defective and the model requires that control type.
Match the opener family, wiring arrangement, and control features using the manual or technician identification; do not assume universal fit. - garage door opener control board
Consider this only after a qualified diagnosis rules out the wall control, wiring, power, and safety sensors and identifies the opener control board as failed.
Control-board replacement is model-specific and may require programming and safe electrical isolation by a qualified technician.
When checks do not resolve it
Need a professional?
Call a qualified garage-door technician when the wall-control light remains abnormal, the model-specific meaning is unclear, the door will not close safely, visible control wiring is damaged, or any spring, cable, track, sensor, or movement hazard is present.
Have this ready
- Provide the opener and wall-control model labels, exact indicator location and blink pattern, door position and response, photo-eye LED appearance, lock-state observation, recent power or control changes, visible cable condition, and safe photos.
Common questions
FAQ
Does a blinking wall-control light always mean the wall button is bad?
No. The light may indicate a lock state, model-specific status, programming or charging state, wiring issue, or a related safety-sensor problem. Identify the exact control and manual before selecting a replacement.
Can I bypass the safety sensors if the wall control is blinking?
No. Never short wires, hold a control to override a safety function, or bypass photo eyes. Keep the door in sight and call a qualified technician when the safety system or door behavior is abnormal.
What should I check without opening the wall control?
Identify which indicator is blinking, record its cadence and color, observe the door’s existing response, look for visible control or cable damage from floor level, note photo-eye LED status, and record the opener and wall-control model labels.
When should I stop using the opener?
Stop when the door moves unpredictably, will not close safely, reverses unexpectedly, the control or cable is wet or damaged, sensors are abnormal, or there is any spring, cable, track, electrical, or structural hazard.
Read the exact guide
Official sources
- Series III Wall Console - Product Support InformationThe Genie Company · Specific to the Genie Series III wall-console models listed on the page; other consoles use different indicators.
Community feedback
Share a repair observation
Share a plain-text repair observation. Accepted observations are published automatically; this page may take a moment to update.