
On this page
Start here
Quick answer
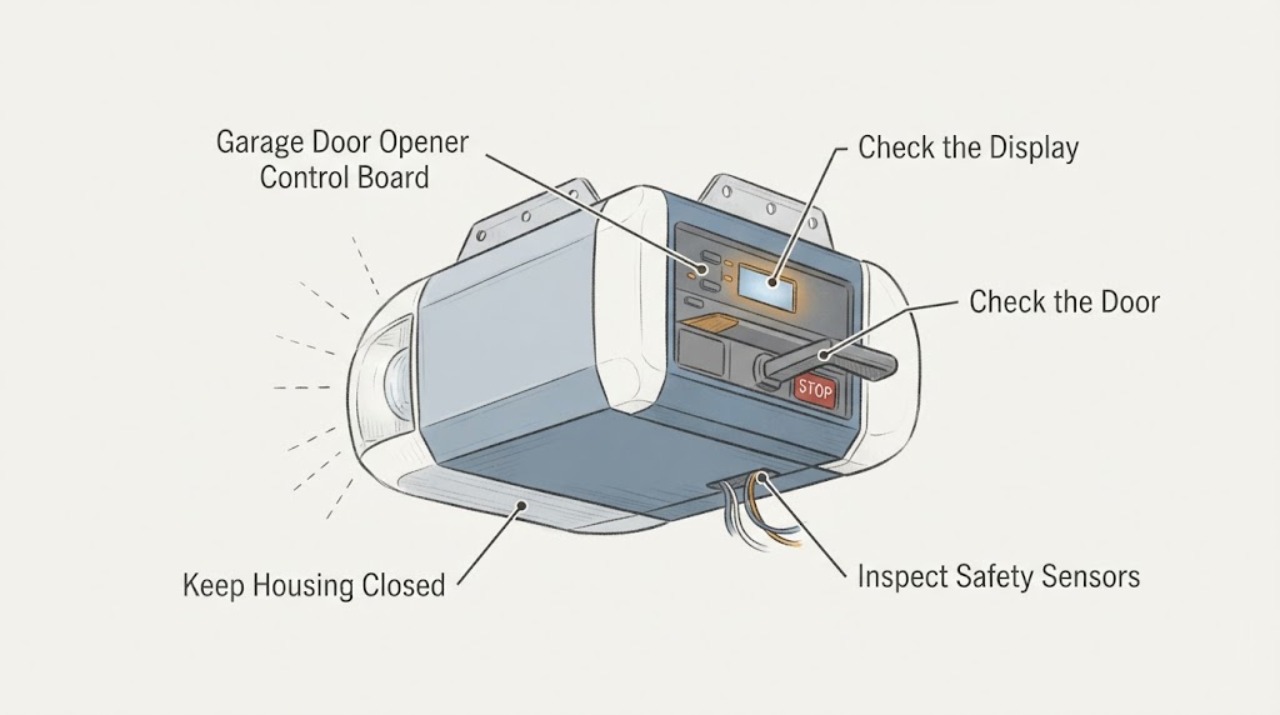
A blinking light on a Chamberlain garage door opener does not by itself prove that the control board has failed. First identify which indicator is blinking: the diagnostic LED beside the Learn button, the UP/DOWN arrows, the wall control LED or screen, or the opener work light. Count the repeating flashes and pause, note whether the door opens or closes, and compare that pattern with the diagnostic chart for the exact model. On older compatible units, one, two, or four diagnostic flashes commonly point to safety-sensor obstruction, alignment, or wiring; three points toward the door-control circuit; other patterns can indicate travel, power, motor, or logic-board faults. If the door will not close, check the sensor path and the sensor LEDs from a safe position without bypassing them. Do not open the motor-unit cover, short terminals, or order a control board from a blinking light alone. Stop and arrange garage-door service for a persistent logic-board code, a damaged or live-looking wire, repeated breaker trips, burning odor, uncontrolled door movement, or any spring, cable, or track problem.
Work through in order
Diagnostic checks
Use only checks that match the exact appliance or system and its official guide.
-
Check 1
From the floor and with the doorway clear, watch the opener without removing its cover. Identify whether the blinking light is beside the Learn button, on the UP/DOWN arrows, on the wall control, or the opener work light; count the flashes before the pause and note whether the pattern repeats.
Expected result: The Learn LED repeats a number of flashes, the UP/DOWN arrows repeat a paired pattern, the wall control LED or screen is blinking, the work light flashes only during a door command, or no consistent pattern can be counted.
Next step: Record the opener model from its exterior label and use the matching Chamberlain diagnostic chart. If the pattern is not repeatable, record a short description of when it occurs and continue with the door-behavior check rather than guessing at a part.
Stop if: Do not remove the motor-unit cover, touch the board or capacitor, or climb a ladder to reach the indicator. Stop if the opener sparks, smells burned, or moves unexpectedly.
Why this matters
Why: These indicators use different diagnostic paths. A repeating Learn-LED or arrow pattern can be a model-specific code; a wall-control or work-light symptom should not be decoded as a control-board failure without its own model guidance.
-
Check 2
With people, vehicles, and tools clear of the doorway, use the normal wall control once and observe the door and opener from a safe position. Note whether the door opens, closes fully, reverses, stays open, hums, clicks, or does not respond, and whether the work light flashes during the command.
Expected result: The door closes normally; it reverses or remains open; it moves only a short distance; the opener hums or clicks without movement; or the opener and wall control do not respond.
Next step: For a closing-only fault, inspect the sensor path next. For humming, clicking, uncontrolled travel, or a door that is heavy or crooked, stop operating it and arrange a trained garage-door inspection. For no response, check only the external power and wall-control observations below.
Stop if: Do not repeatedly cycle a door that reverses violently, binds, hangs crooked, or has a broken spring, loose cable, damaged track, or other mechanical hazard.
Why this matters
Why: A close-and-reverse or stay-open symptom makes the safety-sensor or door-travel paths more likely. A click or hum without movement can indicate a mechanical, motor, power, or code-specific fault; no response can involve the control, power, or lock path. The behavior is needed to interpret the blink.
-
Check 3
If the door will not close or the work light flashes during a close command, inspect both safety reversing sensors from the floor. Remove only a visible obstruction, check that the sending indicator is lit and that the receiving indicator is steady as specified for the model, and look for a visibly displaced sensor or damaged exterior wire without pulling on it.
Expected result: An object blocks the beam; the sending or receiving indicator is off; the receiving indicator is dim or flickering; both indicators appear steady; or a wire is visibly cut, pinched, or pulled loose.
Next step: Clear the obstruction and correct only an obvious sensor position issue without bypassing the circuit, then make one normal test. If an indicator remains wrong, a wire is damaged, or the door still reverses, leave the opener unused and have the sensor circuit and door inspected.
Stop if: Never bypass, jumper, cover, or disable the safety sensors, hold the wall button to defeat the reversal, or open the opener terminals to test them. Stop for exposed conductors or a sensor mounted near a moving door part.
Why this matters
Why: An obstruction, misalignment, disconnected wire, short, or sensor fault can produce the familiar close-reverse behavior and repeated opener-light flashes. Steady indicators with the same symptom make a different code, door travel, or mechanical condition more likely; they do not prove the control board is bad.
-
Check 4
Observe the wall-mounted door control without opening it. Note whether its LED or screen is lit, whether a lock indicator is shown, and whether the remote or keypad behaves differently from the wall control; use the control's labeled Lock function only as described in the exact model instructions.
Expected result: The wall control is dark, its LED or screen flashes, a lock indicator is active, the remote works but the wall control does not, or all controls fail in the same way.
Next step: If the model's control shows Lock mode, follow its documented unlock action and make one normal test. If the panel remains dark or the remote/wall results conflict, record the results and arrange service instead of shorting or rewiring the control circuit.
Stop if: Do not remove the wall control, disconnect its wires, short terminals, or continue if the panel is cracked, wet, hot, or has exposed conductors.
Why this matters
Why: A flashing or locked door control can prevent normal remote operation and can be associated with a door-control-related diagnostic pattern. A wall-control-only failure does not identify the logic board; an all-controls failure keeps power, opener, and model-specific faults possible.
-
Check 5
From a dry, safe position, check whether the opener's normal wall outlet is energized and whether the branch breaker is visibly in its normal position; note any recent outage, surge, repeated trip, or other appliance on the same circuit. Do not open the opener or electrical box.
Expected result: The outlet or breaker is off, power was recently interrupted, the breaker trips again, the opener powers normally, or power status cannot be confirmed safely.
Next step: Restore power only if the breaker or outlet condition is ordinary and safe to reset once. If it trips again, there is heat, arcing, water, or an unknown electrical condition, leave it off and call an electrician or garage-door technician. If power is normal, use the exact diagnostic chart.
Stop if: Do not reset a breaker repeatedly, use an extension cord as a repair, touch live conductors, or work near water or a hot electrical enclosure.
Why this matters
Why: A power interruption can create a power-related diagnostic condition, while a repeated trip or uncertain electrical supply is an electrical fault rather than evidence that the control board should be replaced. Normal external power leaves the model-specific code and opener behavior to interpret.
-
Check 6
Compare the recorded indicator, flash count, opener model, and door behavior with Chamberlain's matching diagnostic chart. Distinguish sensor, door-control, power, travel, motor, and logic-board codes before considering a part.
Expected result: The exact chart identifies a safety sensor or door-control path; it identifies a power, travel, or motor condition; it identifies a logic-board component failure; the model has no matching chart; or the symptom remains after the chart's safe external checks.
Next step: Follow only the chart's low-risk, model-specific external step. For a logic-board, motor, travel, wiring, or persistent code, stop operating the unit and provide the technician the model, code, indicator, door behavior, sensor observations, and power history.
Stop if: Do not remove the cover, replace a board, adjust force or travel, release springs, repair cables, or alter wiring based only on a flash pattern. Those tasks require the exact manual, suitable test equipment, and trained service.
Why this matters
Why: The same-looking blinking light can arise from different subsystems. A logic-board code makes the board a conditional suspect, but a sensor, control, mechanical, or power code points elsewhere. A missing model match or persistent fault means the diagnosis is not safe to complete from the outside.
Use your observations
Decision map
Find the observation that best matches what you see, then follow the next safe action.
-
PATH 01Next step
What you see
The door will not close or reverses, the work light flashes during the close command, and one sensor indicator is off, dim, flickering, or not aligned.
Do this next
Clear the visible obstruction and make only a safe external alignment check. If the indicator or door behavior does not normalize, stop using the opener and arrange sensor and wiring service without bypassing the safety circuit.
Why this path and its safety boundary
Why it matters: The safety-reversing sensor path is more likely than a failed control board. Chamberlain associates several repeating flash patterns with obstruction, alignment, or sensor wiring conditions.
-
PATH 02Next step
What you see
The diagnostic indicator shows a door-control-related pattern, the wall control is dark or malfunctioning, and the remote or keypad behaves differently.
Do this next
Use the exact model instructions for the control's Lock state only. Do not remove or short the control wiring; arrange service if the panel stays dark, the cable is damaged, or the controls disagree.
Why this path and its safety boundary
Why it matters: The door-control panel, its visible cable, or the control circuit is more likely than a control-board replacement chosen from the blink alone.
-
PATH 03Next step
What you see
The opener recently lost power, the outlet or breaker is not normal, or the indicator appears only after a power interruption while the door otherwise behaves normally.
Do this next
Confirm external power from a dry safe position and reset an ordinary tripped breaker only once. If it trips again or there is heat, arcing, or water, leave the circuit off and call a qualified professional.
Why this path and its safety boundary
Why it matters: A power-related condition is more likely than a failed board, but a breaker that trips again or an opener that will not recover needs electrical or garage-door diagnosis.
-
PATH 04Next step
What you see
The exact Chamberlain chart identifies a logic-board component or motor-circuit failure, the opener's behavior matches that code, and safety sensors, wall control, and external power do not explain it.
Do this next
Stop operating the opener and have a trained technician confirm the board, motor, transformer, battery, and harness diagnosis against the exact model before any replacement. Provide the recorded code and behavior.
Why this path and its safety boundary
Why it matters: The control board is now a reasonable conditional suspect, but the flash pattern still does not establish part fit or prove that replacing the board will correct the underlying fault.
-
PATH 05Next step
What you see
The door is heavy, crooked, binding, or uncontrolled; the opener hums or clicks without normal movement; a spring, cable, or track appears damaged; or the model and flash pattern cannot be matched.
Do this next
Leave the door and opener out of service, keep people clear, and call a trained garage-door technician. Do not release springs, lift a door with a broken cable, adjust force or travel, or work inside the motor unit.
Why this path and its safety boundary
Why it matters: A door or drive-mechanical fault, an electrical fault, or an unresolved model-specific condition is more likely than a diagnosis that can safely be completed by replacing the control board.
Helpful context
Understand the symptom
Identify the light before interpreting the blink
Chamberlain openers can show a diagnostic pattern beside the Learn button or through the UP and DOWN adjustment arrows. A wall control LED or screen can blink for a different reason, and the work light may flash as part of a door-closing safety response. Stand on the floor, watch one complete repeat, count the flashes before the pause, and record which indicator is involved. The model number on the motor unit determines which diagnostic chart applies; a generic flash count is not enough to choose a control board.
A door-closing symptom often points to the safety circuit first
If the door starts to close and reverses, or will not close while the opener flashes its work light, look at the safety reversing sensors and their indicator LEDs from a clear position. Remove an object that is visibly blocking the beam and check that the receiving indicator is steady according to the model guidance. Do not move a sensor into an uncertain position, defeat the safety circuit, or keep commanding the door when its travel is uncontrolled. A sensor pattern and a control-board pattern are different diagnostic paths.
When a control board is actually a reasonable suspect
A logic-board replacement is conditional. It becomes reasonable only after the exact model chart identifies a logic-board or motor-circuit condition, the opener's behavior matches that code, and simple power or external safety checks do not clear the symptom. If the unit has a dark door control, a sensor fault, a short-looking cable, or a mechanical door problem, replacing the board first can miss the actual cause. Record the model, indicator, flash pattern, door behavior, and any recent power event for a trained garage-door technician.
Safety boundary
Stop conditions
- Stop before opening the motor unit or touching wiring if the opener sparks, smells burned, has a hot enclosure, repeatedly trips a breaker, shows exposed conductors, or is near water. Stop operating the door for a broken spring or cable, a crooked or binding door, uncontrolled movement, damaged track, or a door that will not reverse normally. Do not bypass or jumper safety sensors, short door-control terminals, adjust force or travel from a generic blink code, or replace the control board without the exact model diagnosis. Arrange professional service for a persistent logic-board or motor code, an unresolved sensor or door-control fault, or any uncertain electrical or mechanical condition.
Only after diagnosis
Potential parts
- garage-door-opener logic or control board
Consider this only after the exact Chamberlain diagnostic chart identifies a logic-board or motor-circuit condition and a trained technician confirms the board is the failed component rather than a sensor, control, motor, transformer, battery, or wiring fault.
Control boards are model- and revision-specific. Confirm the complete opener model and the official parts or service documentation before selection; a blinking light alone is not a fitment diagnosis. - safety reversing sensor pair
Consider this only when the door-close symptom and sensor indicators support a failed or damaged sensor after visible obstruction and safe alignment checks have been ruled out.
Sensor kits and wiring requirements vary by opener family. Confirm the exact model and manufacturer's compatibility guidance, and never bypass the safety circuit. - garage-door opener door-control panel
Consider this only when the wall control is dark or defective, the diagnostic pattern points to the door-control path, and the exact model documentation identifies the matching panel.
Door controls differ by Chamberlain security generation and opener model. Confirm the model and installation instructions before selection; do not short control wires as a substitute.
When checks do not resolve it
Need a professional?
Call a trained garage-door technician when the exact model chart identifies a logic-board, motor, travel, or wiring fault; the safety or door-control checks do not resolve the pattern; the opener hums or clicks without normal movement; the door is heavy, crooked, binding, or uncontrolled; or a spring, cable, or track is damaged. Call an electrician for a hot, arcing, wet, or repeatedly tripping branch circuit. Use urgent service for smoke, burning odor, an uncontrolled door, a falling door, or exposed energized wiring.
Have this ready
- Provide the Chamberlain model number, which indicator flashes, the complete repeating pattern, whether the door opens or closes, the wall-control and remote results, sensor indicator observations, recent power events, and any visible heat, odor, damage, or water. Do not provide a guessed board part number.
Common questions
FAQ
Does a blinking Chamberlain opener light mean the control board is bad?
No. A blinking light can be a model-specific diagnostic code or a normal/control-state indication. Identify whether the Learn LED, UP/DOWN arrows, wall control, or work light is blinking, count the repeating pattern, and match it to the exact opener model. Only a confirmed logic-board or motor-circuit code makes the board a conditional suspect.
Why does my Chamberlain garage door opener flash and refuse to close?
The safety-reversing sensors are a common path when the door will not close and the work light flashes. Check for a visible obstruction and observe the sending and receiving sensor indicators from a safe position. If the indicators remain wrong or the door still reverses, stop using the opener and arrange service; do not bypass the sensors.
What should I count when the light on the control board is blinking?
Count one complete sequence from the first flash through the pause and repeat it to confirm the number. Also record which indicator is flashing and whether the door opens, closes, reverses, hums, clicks, or does not respond. Chamberlain uses different charts for different indicators and opener models.
What do one, two, or four flashes usually indicate on a Chamberlain opener?
On compatible older units, Chamberlain associates one, two, and four diagnostic flashes with safety-sensor conditions. The exact cause can be a blocked or misaligned beam, disconnected or damaged wiring, a short, or reversed sensor wires. Use the model chart and sensor indicator observations; do not assume the control board is the cause.
What does a three-flash Chamberlain opener code mean?
Chamberlain describes three flashes on the Learn-button diagnostic LED as a door-control-related error. A dark or malfunctioning wall control and a remote that behaves differently can support that path. Keep the door-control wiring intact and use the exact model instructions or a technician rather than shorting terminals.
When should I replace a Chamberlain control board?
Do not choose a board from a blinking light alone. First match the exact model, indicator, flash pattern, and door behavior to Chamberlain's diagnostic chart. If it identifies a logic-board or motor-circuit failure after external safety, control, and power checks, have a trained technician confirm the board and exact revision before ordering or replacing it.
What is unsafe to do when the Chamberlain opener light is blinking?
Do not open the motor unit, touch the control board or capacitor, short door-control terminals, bypass safety sensors, repeatedly reset a tripping breaker, adjust force or travel from a generic code, or work on springs, cables, and tracks. Stop for heat, smoke, burning odor, exposed wiring, uncontrolled movement, or a damaged door and arrange professional service.
Read the exact guide
Official sources
- What Does the Flashing LED Next to the Learn Button MeanChamberlain Group · Official Chamberlain support article explaining that the LED next to the Learn button flashes, pauses, and repeats to signal a potential issue, with pattern-specific safety-sensor, door-control, mechanical, and motor-circuit guidance.
- Why does the LED or Screen flash on my door controlChamberlain Group · Official Chamberlain support article explaining that a flashing door-control LED or screen can represent a control state such as Lock or another model-specific feature, so it should be distinguished from the opener's diagnostic LED.
- Garage Door Opener Light Blinks but The Door Won’t CloseChamberlain Group · Official Chamberlain support article connecting opener-light flashes during a no-close symptom with model-dependent diagnostic indicators and safety-sensor or Lock checks.
- Diagnostic Codes for Garage Door OpenersChamberlain Group · Official Chamberlain diagnostic chart for compatible openers with a yellow Learn button and UP/DOWN adjustment arrows, including safety-sensor, power, travel, motor, and logic-board code meanings.
- Diagnostic Codes for Chamberlain & Liftmaster Garage Door OpenersChamberlain Group · Official Chamberlain overview stating that different opener models use different indicators, showing examples of repeating flash patterns, and directing users to the chart that matches the opener model and indicator.
Community feedback
Share a repair observation
Share a plain-text repair observation. Accepted observations are published automatically; this page may take a moment to update.