
On this page
Start here
Quick answer
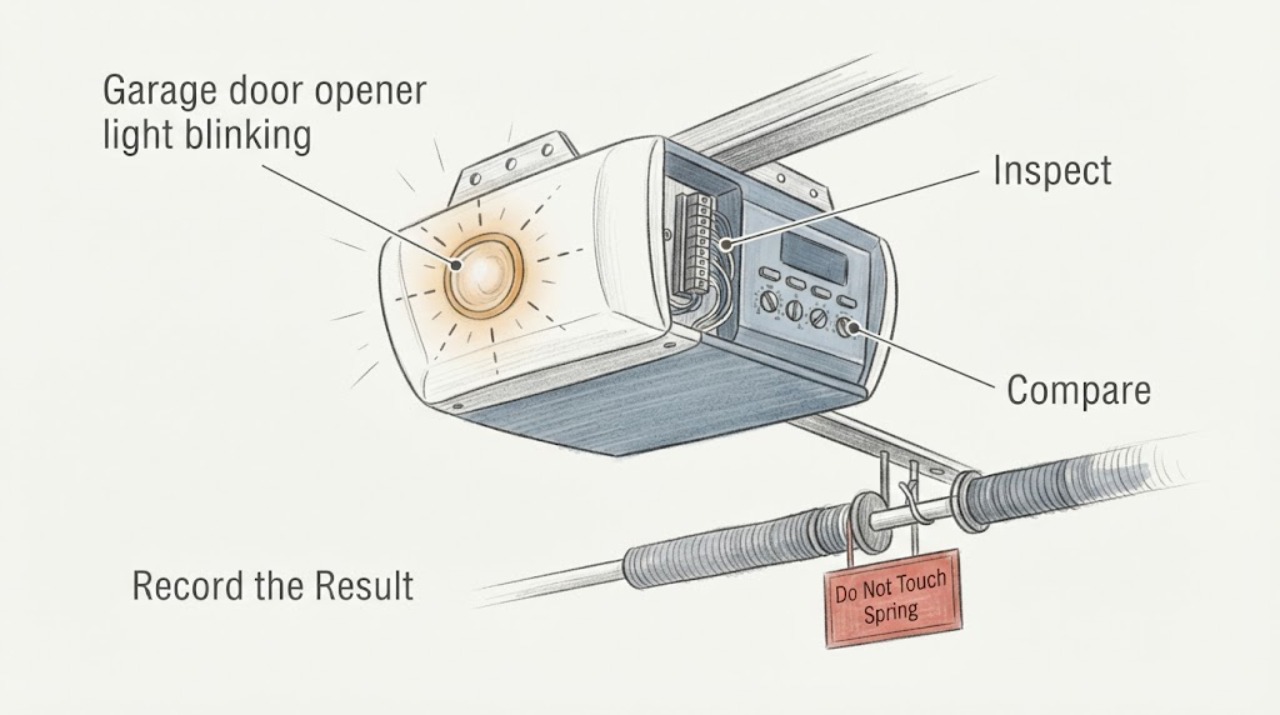
For a Chamberlain garage door opener whose light is blinking, first note whether the door also refuses to close and how many flashes repeat. Chamberlain’s support guidance links 10 flashes with a safety-reversing-sensor issue when the door will not close, and 2 flashes with the LOCK button on a door control. From a safe position, check only for an obvious sensor obstruction or a visibly active LOCK control; do not bypass the sensors, enter the door path, or open the opener. If the flash pattern does not match your model manual, the sensors do not show a steady ready indication, wiring is suspected, or the door is unsafe, stop and request Chamberlain-qualified garage-door service.
Work through in order
Diagnostic checks
Use only checks that match the exact appliance or system and its official guide.
-
Check 1
From outside the door path, observe when the Chamberlain opener light flashes: after a close command, during travel, when the door refuses to close, or while the door is idle. Count a repeatable flash pattern and record whether the wall control or remote also behaves differently; do not stand under a moving door or repeat unsafe operation.
Expected result: Record 10 flashes with a close refusal; 2 flashes with remote controls locked out; another repeatable pattern; flashes with normal door movement; or no reliable pattern.
Next step: Photograph the opener label and the light or diagnostic display, record the flash count and door response, and compare them with the exact Chamberlain manual before choosing a part or repeating a test.
Stop if: Stop for uncontrolled movement, a door that is off its tracks, a damaged spring or cable, exposed wiring, smoke, burning odor, or any need to enter the door path or open the opener.
Why this matters
Why: On Chamberlain openers, the flash count and the accompanying door behavior can select a different diagnostic path. A door that will not close with 10 flashes points first to the safety-reversing-sensor path, while 2 flashes can indicate that the door-control LOCK function is on. Other patterns are model-dependent.
-
Check 2
From a safe standing position, look at both Chamberlain safety-reversing sensors near the bottom of the tracks for an obvious object blocking the lenses, a visibly displaced sensor, or an unlit or unsteady indicator. Clear only a loose obstruction that can be removed without entering the door path; do not bypass, disconnect, rewire, or loosen a sensor mount as a guess.
Expected result: Both sensors appear clear and show the expected steady indication; one is blocked or visibly displaced; an indicator is dark or intermittent; or the condition cannot be judged safely.
Next step: Record each sensor’s visible indicator and the obstruction or alignment observation. Keep the safety system connected and request service if the indicators are not in the state specified by the exact manual.
Stop if: Stop before touching wiring, entering the closing path, moving a sensor bracket, or operating the door with a bypassed or disconnected safety system.
Why this matters
Why: Chamberlain identifies sensor obstruction or misalignment as a cause of a light-flash close refusal. If the indicator remains abnormal after a safe visual check, wiring, sunlight interference, or a failed sensor may require service rather than a defeated safety circuit.
-
Check 3
If the opener light flashes twice and the door control has a LOCK button, observe whether the wall control operates the door while remote controls do not. With the door stationary and the control clearly identified, press the LOCK button once only if the exact Chamberlain control manual supports that action; do not alter wiring or force the door.
Expected result: The wall control works and remotes are locked out; the LOCK function is visibly on; the opener has no LOCK control; or two flashes continue without that behavior.
Next step: Record whether the LOCK indicator or button state changes and whether remote operation returns, then stop if the symptom persists or the control does not match the manual.
Stop if: Stop for unexpected door movement, a damaged wall control, exposed conductors, or any need to open the control or opener housing.
Why this matters
Why: Chamberlain’s support guidance says two flashes can indicate that the door-control LOCK function is on; this is different from a sensor fault and can explain why remotes are locked out while the wall control still works. The button and behavior vary by control and model.
-
Check 4
Read the Chamberlain model number and learn-button or diagnostic-display details from the label or manual without climbing, removing covers, or touching live parts. Record whether the opener uses a learn-button LED or UP and DOWN diagnostic indicators.
Expected result: The exact model and diagnostic style are clear; only a partial label is visible; or the model and indicator scheme cannot be identified safely.
Next step: Give the model, flash pattern, sensor observations, LOCK behavior, and door response to a qualified technician or use the exact Chamberlain manual for the next documented low-risk check.
Stop if: Stop before opening the motor housing, measuring live voltage, changing force or travel settings to mask the symptom, or replacing a board without diagnosis.
Why this matters
Why: Chamberlain states that diagnostic indications vary by opener model: some use the LED by the learn button and others use UP and DOWN arrow flashes. Exact model information is required before selecting a sensor, wall control, or control board.
-
Check 5
Combine the flash pattern, door response, sensor indicators, LOCK behavior, and model details to select the next safe boundary. Keep the door out of service if it reverses unexpectedly, will not close safely, or has damaged hardware.
Expected result: The pattern matches a documented sensor or LOCK branch; it remains model-specific or unresolved; or a mechanical, electrical, or safety hazard is present.
Next step: Request a Chamberlain-qualified assessment with the recorded pattern and photos, and ask the technician to verify sensors, wiring, door hardware, controls, and board compatibility before replacement.
Stop if: Stop immediately for uncontrolled motion, broken springs or cables, exposed electrical parts, smoke, burning odor, or any bypassed safety device.
Why this matters
Why: A Chamberlain-specific sensor or LOCK indication can guide a narrow control check; a mismatched pattern, abnormal indicator, wiring concern, or unsafe door condition requires diagnosis rather than a generic part swap.
Use your observations
Decision map
Find the observation that best matches what you see, then follow the next safe action.
-
PATH 01Safety boundary
What you see
The Chamberlain opener flashes 10 times and the garage door will not close.
Do this next
From a safe position, check for an obvious obstruction and the visible state of both safety-reversing sensors without bypassing them. If the indicators remain abnormal, request service for sensor alignment, wiring, sunlight interference, or sensor failure.
Why this path and its safety boundary
Why it matters: Chamberlain’s support guidance identifies this combination with the safety-reversing-sensor path.
Safety stop: Do not bypass, disconnect, rewire, or enter the door path.
-
PATH 02Safety boundary
What you see
The opener flashes twice, the wall control works, and remote controls are locked out.
Do this next
If the control has a clearly identified LOCK button, follow the exact Chamberlain control instructions for turning that function off, then stop if remote operation does not return.
Why this path and its safety boundary
Why it matters: Chamberlain associates two flashes with the door-control LOCK function; this branch is different from replacing a sensor or board.
Safety stop: Do not open the control, change wiring, or continue if the door moves unexpectedly.
-
PATH 03Safety boundary
What you see
The flash pattern or diagnostic display does not match the exact Chamberlain model, or the sensor and LOCK checks do not explain it.
Do this next
Keep the door out of service as needed and request a technician with the model number, flash count, sensor observations, and door response.
Why this path and its safety boundary
Why it matters: Chamberlain diagnostic indications vary by model and may use a learn-button LED or UP and DOWN arrows; a generic blink interpretation is unsafe.
Safety stop: Do not change force or travel settings, replace a control board, or bypass a safety circuit as a guess.
-
PATH 04Safety boundary
What you see
The door has damaged springs, cables, tracks, uncontrolled movement, exposed wiring, smoke, or another immediate hazard.
Do this next
Keep people clear, stop operation, and request urgent qualified garage-door or electrical service as appropriate.
Why this path and its safety boundary
Why it matters: The light symptom is secondary to a mechanical or electrical hazard that exceeds user observation.
Safety stop: Do not enter the door path, touch springs or cables, open the opener, or perform live testing.
Helpful context
Understand the symptom
Use the Chamberlain flash pattern with the door symptom
On a Chamberlain opener, a blinking light should be interpreted with the door response and the model’s diagnostic display. Chamberlain support distinguishes a 10-flash close refusal associated with safety-reversing sensors from a two-flash condition associated with the LOCK function on a door control. Other openers may use the learn-button LED or UP and DOWN arrow flashes, so the exact model matters.
Keep the safety boundary intact
Only perform a safe visual check from outside the door path: look for an obvious sensor obstruction, a visibly active LOCK control, and the model label. Do not bypass sensors, enter a moving door path, touch springs or cables, open the opener, change force settings to compensate for a problem, or test live wiring.
Safety boundary
Stop conditions
- Do not perform work requiring live electrical, gas, pressurized, structural, contaminated, confined-space, elevated, or moving-system access.
- Do not open, disconnect, pry, cut, drill, mix chemicals, or force parts when cause or compatibility is unknown.
- Stop for smoke, flames, gas odor, sparking, active flooding, structural instability, severe contamination, or a failed safety function.
- Keep people and pets clear and use qualified service when the repair crosses the safety boundary.
Only after diagnosis
Potential parts
- garage door photo eye sensor
Consider only after the model-specific sensor branch or a qualified diagnosis identifies a sensor or compatible kit as the failed scope.
Match the exact Chamberlain opener model and sensor generation; never use a replacement to bypass or defeat the safety circuit. - garage door wall button
Consider only when the two-flash and remote-lockout behavior points to a control issue and the exact Chamberlain compatibility is confirmed.
Match the exact Chamberlain wall-control model and LOCK-function compatibility; a control cannot correct a sensor, wiring, or door-hardware fault. - garage door opener control board
Consider only after the exact model and diagnostic pattern rule out the safety sensors, LOCK control, door hardware, and wiring.
Control-board fit and diagnostic behavior are model-specific; a board is not a substitute for sensor, door, or wiring diagnosis.
When checks do not resolve it
Need a professional?
Request Chamberlain-qualified garage-door service when the flash pattern does not match the exact model, sensor indicators remain abnormal, the LOCK branch does not resolve the symptom, wiring or control-board work is suspected, or the door has damaged hardware or unsafe movement. Stop immediately for exposed electrical hazards, broken springs or cables, smoke, or a bypassed safety device.
Common questions
FAQ
What should I check first when my Chamberlain opener light blinks?
Record whether the door refuses to close, count a repeatable flash pattern, and check the visible state of both safety-reversing sensors and any LOCK control from a safe position. Chamberlain’s exact model manual controls interpretation.
What do 10 flashes mean on a Chamberlain opener?
Chamberlain support links 10 flashes together with a door that will not close to the safety-reversing-sensor path. Look only for an obvious obstruction or abnormal visible indicator; do not bypass or disconnect the sensors.
What do two flashes mean on a Chamberlain opener?
Two flashes can indicate that the LOCK function on the Chamberlain door control is on, especially when the wall control works but remotes are locked out. Follow the exact control instructions and request service if that behavior does not match.
When should I call for Chamberlain garage-door service?
Do not use a generic blink code across models. Record the model number, whether the opener uses a learn-button LED or UP and DOWN indicators, the flash count, sensor observations, LOCK behavior, and door response for a qualified technician.
Read the exact guide
Official sources
- Garage Door Opener Light Blinks but The Door Won’t CloseChamberlain · Supports the Chamberlain-specific 10-flash sensor branch, two-flash LOCK branch, and model-dependent diagnostic display guidance.
Community feedback
Share a repair observation
Share a plain-text repair observation. Accepted observations are published automatically; this page may take a moment to update.