
On this page
Start here
Quick answer
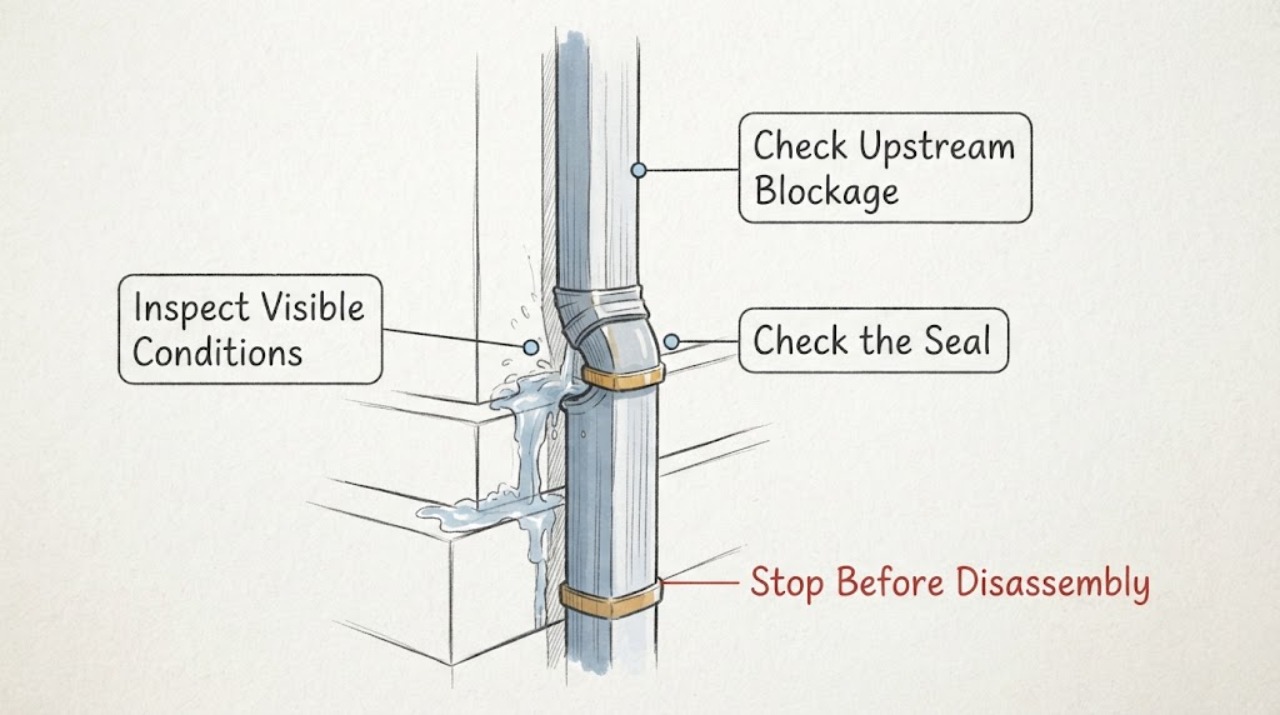
Watch the downspout from the ground during rain and identify whether water is backing up above a joint, escaping from an open or split joint while the outlet still flows, or pooling at the discharge end. A blocked gutter, outlet, or downspout can push water out at the weakest joint; a free-flowing outlet with a spray at one seam points more toward a loose connection, failed seal, split section, or misaligned overlap. Also check whether the outlet carries water away from the foundation. Do not climb, pull apart a wet downspout, use a pressure washer at the joint, or seal over debris. Clear or repair only from a safe, reachable position and use a gutter professional when the joint is high, the system is damaged, the discharge is underground, or water is reaching the foundation.
Work through in order
Diagnostic checks
Use only checks that match the exact appliance or system and its official guide.
-
Check 1
From solid ground and a safe distance, watch the gutter outlet, downspout joints, elbows, and bottom discharge during ordinary rain. Photograph the first point where water escapes and note whether the joint leaks immediately, only after the gutter fills, or only during a heavy downpour.
Expected result: Water backs up above the joint, sprays or drips from one seam while water still exits below, or no water exits at the bottom.
Next step: Use the observed pattern to choose the blockage, joint, or discharge branch. Do not climb or pull on the wet assembly to inspect it closely.
Stop if: Stop for lightning, high wind, icy surfaces, unstable ground, water near electrical equipment, or any need to use a ladder or roof access.
Why this matters
Why: Backup above the joint makes an upstream blockage or restricted outlet more likely. A leaking seam with continued outlet flow makes a separated, split, or poorly sealed joint more likely. No bottom flow raises concern for a downstream obstruction or buried connection.
-
Check 2
When the system is dry, inspect the reachable joint, elbow, outlet, and fasteners from the ground or a safe low position without disassembling them. Look for an open overlap, missing connector, split or corroded metal, loose fastener, sagging section, or sealant pulled away from the surface.
Expected result: The sections remain aligned and intact, or the joint is separated, cracked, corroded, loose, or visibly distorted.
Next step: Photograph the joint and note the section material and dimensions for a compatible repair. Leave damaged or high sections for a gutter professional.
Stop if: Do not pull, twist, remove fasteners, cut metal, or handle a joint that is carrying weight, is above safe reach, or is attached to unstable guttering.
Why this matters
Why: An intact but wet joint keeps blockage or flow capacity in play. A separated, split, or distorted joint can leak even when the downspout is clear and may need a matched connector or section rather than more sealant.
-
Check 3
From a safe reachable point, inspect the visible gutter outlet and the lower end of the downspout for leaves, sediment, nesting material, or a screen packed with debris. If the manufacturer and site allow a ground-level flush, use a gentle flow and observe whether water exits freely; do not use high pressure or force water into a sealed underground line.
Expected result: Debris is visible, the gutter fills while the lower outlet remains weak, the flush exits normally, or the system will not accept water.
Next step: Remove only loose debris that is safely reachable without climbing or entering the opening, then observe one rain event. Arrange service for compacted, deep, recurring, or underground obstructions.
Stop if: Do not climb, insert a rigid rod into an unseen line, use a pressure washer, flush toward an occupied building, or work near electrical lines.
Why this matters
Why: Debris or a weak lower flow supports a blockage. A normal ground-level flow with joint leakage shifts attention toward the connection, overlap, or damage. Failure to accept water may involve a buried line or capacity problem that a surface flush cannot diagnose.
-
Check 4
Follow the downspout to its endpoint and document whether it discharges onto soil, a splash block or extension, a drain inlet, or an underground pipe. Look for standing water, erosion, splash marks, a crushed outlet, or water returning toward the foundation.
Expected result: The outlet drains freely away from the building, pools at the base, erodes soil, or disappears into a restricted or unknown underground route.
Next step: Document the endpoint and coordinate an extension, redirection, or drain assessment that complies with local conditions. Do not disconnect or redirect a buried connection without knowing where the water will go.
Stop if: Stop if the endpoint is buried, near a foundation excavation, on a steep or unstable slope, near a public walkway, or connected to a utility or drainage system you cannot identify.
Why this matters
Why: A free outlet away from the building makes a local joint or upstream flow issue more likely. Pooling, erosion, or return toward the foundation indicates inadequate discharge management. An unknown underground route cannot be cleared by a visible joint repair.
-
Check 5
From the ground, compare the leaking joint with adjacent gutter and downspout sections for sagging, standing water, a shifted outlet, loose attachment to the fascia, or a visible change in slope. Compare only by sight; do not push the gutter or downspout.
Expected result: The gutter line appears to carry water toward the outlet, or water ponds, the section sags, the outlet has shifted, or the attachment is loose.
Next step: Photograph the deformation and have a gutter professional correct support, slope, or attachment. Do not compensate for a structural or fascia problem with extra sealant.
Stop if: Stop if the gutter is pulling away from the building, material may fall, the fascia is rotten, or inspection requires a ladder or roof access.
Why this matters
Why: Correct flow toward the outlet keeps a local obstruction or joint defect likely. Ponding, sagging, or a shifted outlet can overload a joint and may require support or realignment before sealing.
-
Check 6
After a safe, dry-period inspection or a qualified repair, watch the same joint and endpoint during the next suitable rain. Compare the first escape point, outlet flow, soil wetting, and any water reaching the wall or foundation with the original photographs.
Expected result: The joint stays dry and the outlet carries water away, or the same joint leaks, the outlet remains weak, or water reaches the building again.
Next step: Stop repeated DIY sealing and arrange a full gutter/downspout assessment when the pattern returns. Provide the before-and-after photos and note the rainfall intensity.
Stop if: Stop for active flooding, soil undermining, water entering the building, damage near electrical systems, or any unsafe access needed for follow-up.
Why this matters
Why: A dry joint with a clear outlet supports correction of that observed fault, but one dry storm does not prove the whole drainage system is clear. Recurrence points to another obstruction, a failed connection, poor slope, or an unresolved discharge route.
Use your observations
Decision map
Find the observation that best matches what you see, then follow the next safe action.
-
PATH 01Next step
What you see
The gutter or upper downspout fills, water escapes at the joint, and the lower outlet is weak or dry.
Do this next
Clear only loose, reachable debris from a safe position and recheck one rain event. Use a gutter professional for compacted or deep blockage, high access, recurring backup, or a buried outlet.
Why this path and its safety boundary
Why it matters: An upstream blockage at the gutter outlet, downspout, screen, or elbow is more likely than a joint-only leak.
-
PATH 02Next step
What you see
Water continues to exit the bottom, but the same seam sprays or drips while the sections are visibly separated, cracked, corroded, or misaligned.
Do this next
Document the material and damage and arrange a compatible joint or section repair. Sealant is only a possible part of a sound, dry, correctly aligned assembly; do not use it to mask movement or rot.
Why this path and its safety boundary
Why it matters: A failed joint, connector, overlap, or section is more likely than a full blockage.
-
PATH 03Next step
What you see
The downspout appears to accept water, but the endpoint pools, erodes soil, returns water toward the foundation, or disappears into an unknown or blocked underground route.
Do this next
Arrange a drainage or gutter assessment and document where the endpoint leads. Redirect only when the destination is safe, permitted, and away from the building.
Why this path and its safety boundary
Why it matters: The joint may be relieving pressure from an endpoint or buried drainage problem; repairing the seam alone may move the water problem elsewhere.
-
PATH 04Next step
What you see
The gutter or downspout sags, pulls away from the fascia, has a shifted outlet, or the leak returns after support or weather changes.
Do this next
Use a gutter or building professional to assess attachment, slope, and material condition before joint repair.
Why this path and its safety boundary
Why it matters: Support, slope, fascia, thermal movement, or a damaged section may be overloading the joint, so a surface seal is unlikely to be a durable fix.
Helpful context
Understand the symptom
A wet joint is a symptom, not the diagnosis
Rainwater may escape at a downspout joint because material is blocked upstream, the outlet cannot accept the flow, a section has separated or split, or water is being sent into a restricted underground route. Observe the system during rain from grade and compare the amount entering the top with the amount leaving the outlet. A joint that leaks while the outlet drains normally is a different repair path from a joint that overflows because water is trapped above it.
Keep runoff away from the foundation
Even a small joint leak can wet siding, fascia, soil, or the foundation. The discharge should carry water away from the building without creating a new erosion, trip, or neighbor-property problem. An extension or redirection is not automatically appropriate: local conditions, underground connections, and local requirements determine where runoff may safely go.
Use sealant only after the cause is known
A joint-repair sealant or connector can be appropriate for a sound, dry, compatible gutter system, but sealant cannot remove an obstruction, correct a reversed overlap, support a sagging section, or solve a blocked underground line. Do not seal a wet joint over leaves or sediment, and do not change a buried discharge route without checking where the water will go.
Safety boundary
Stop conditions
- Do not climb onto the roof or use a ladder in rain, wind, ice, or unstable ground for this check.
- Do not pull apart, twist, cut, or remove a loaded or high downspout joint, and do not use a pressure washer to force a blockage.
- Do not seal over leaves, sediment, active water, a split section, or a joint that is moving or pulling away from the building.
- Do not disconnect or redirect a buried downspout without identifying the route and safe permitted destination.
- Stop for flooding, soil undermining, water near electrical equipment, falling material, damaged fascia, or any need for roof or utility access.
Only after diagnosis
Potential parts
- compatible downspout connector or joint sleeve
Consider this category only when the downspout is clear and the joint is separated or damaged, and the connector matches the existing profile and material.
Confirm the downspout shape, dimensions, material, water-flow direction, overlap, fastener method, and local installation requirements before ordering. - compatible gutter or downspout sealant
Consider sealant only for a clean, dry, sound, correctly aligned joint after blockage and movement have been ruled out.
Follow the sealant manufacturer's instructions and confirm compatibility with the existing gutter material; do not seal over debris, active leaks from a buried line, or a drainage path. - downspout extension or splash block
Consider this category only when the outlet drains too close to the building or causes pooling or erosion and the proposed destination can safely receive the runoff.
Confirm the outlet size, slope, local rules, walkway safety, neighboring property, and distance from the foundation before redirecting water. - compatible gutter or downspout debris screen
Consider a screen only after the existing blockage is removed and the screen will not reduce flow or become a new obstruction for this roof and rainfall pattern.
Match the screen to the gutter outlet and downspout system and plan regular inspection; a screen does not replace cleaning or correct a damaged joint.
When checks do not resolve it
Need a professional?
Call a gutter or drainage professional when the joint is high, unstable, split, corroded, repeatedly leaking, attached to damaged fascia, or connected to an unknown or blocked underground line. Use prompt service when water reaches the building, foundation, electrical equipment, or an undermined walkway, or when clearing the obstruction would require climbing, pressure equipment, disassembly, or unsafe access.
Common questions
FAQ
Why does a clogged downspout leak at the joint?
When water cannot move through the gutter outlet, elbow, downspout, or downstream route, it can back up and escape at a separated or weak joint. If the bottom outlet flows normally while one seam leaks, a joint or section defect is more likely than a full blockage.
How can I check a downspout joint safely?
Watch it from the ground during rain, then inspect the reachable joint when dry for separation, cracks, corrosion, loose fasteners, or pulled-away sealant. Do not climb, pull on the assembly, or disassemble a wet or high section.
Should I add sealant to a leaking downspout joint?
Only after the system is clear, dry, aligned, and made from compatible materials. Sealant cannot correct a blockage, sagging support, reversed overlap, split metal, or an underground drainage problem, and it should not be applied over debris or active water.
Where should a downspout discharge?
It should carry runoff away from the building without creating pooling, erosion, a trip hazard, or damage to another property. Extensions or redirection depend on the site's grade, underground connections, local requirements, and the safe destination for the water.
When is a downspout clog a professional job?
Use a professional for high or unstable access, compacted or buried obstructions, repeated joint leaks, damaged fascia or gutter sections, foundation wetting, an unknown underground route, or any repair involving climbing, pressure equipment, or disassembly.
Read the exact guide
Official sources
- Preservation Brief 39: Holding the Line: Controlling Unwnted Moisture in Historic BuildingsNational Park Service, U.S. Department of the Interior · NPS guidance on directing roof runoff away from foundations, observing drains during rain, and diagnosing one moisture source at a time.
- Soak Up the Rain: Disconnect / Redirect DownspoutsU.S. Environmental Protection Agency · EPA information on where downspouts may discharge and why redirection must account for local regulations, property damage, and unsafe conditions.
- Gutter Install GuideGAF · An opened GAF installation guide used to ground the distinction between a joint splice, water-flow direction, compatible sealant, and product-specific installation requirements.
- Preservations Brief 47: Maintaining the Exteriors of Small and Medium Size Historic BuildingsNational Park Service, U.S. Department of the Interior · NPS preservation guidance used for the observable distinction between clear drainage, debris, sagging, leaking seams, and unsafe roof or ladder access.
Community feedback
Share a repair observation
Share a plain-text repair observation. Accepted observations are published automatically; this page may take a moment to update.