
On this page
Start here
Quick answer
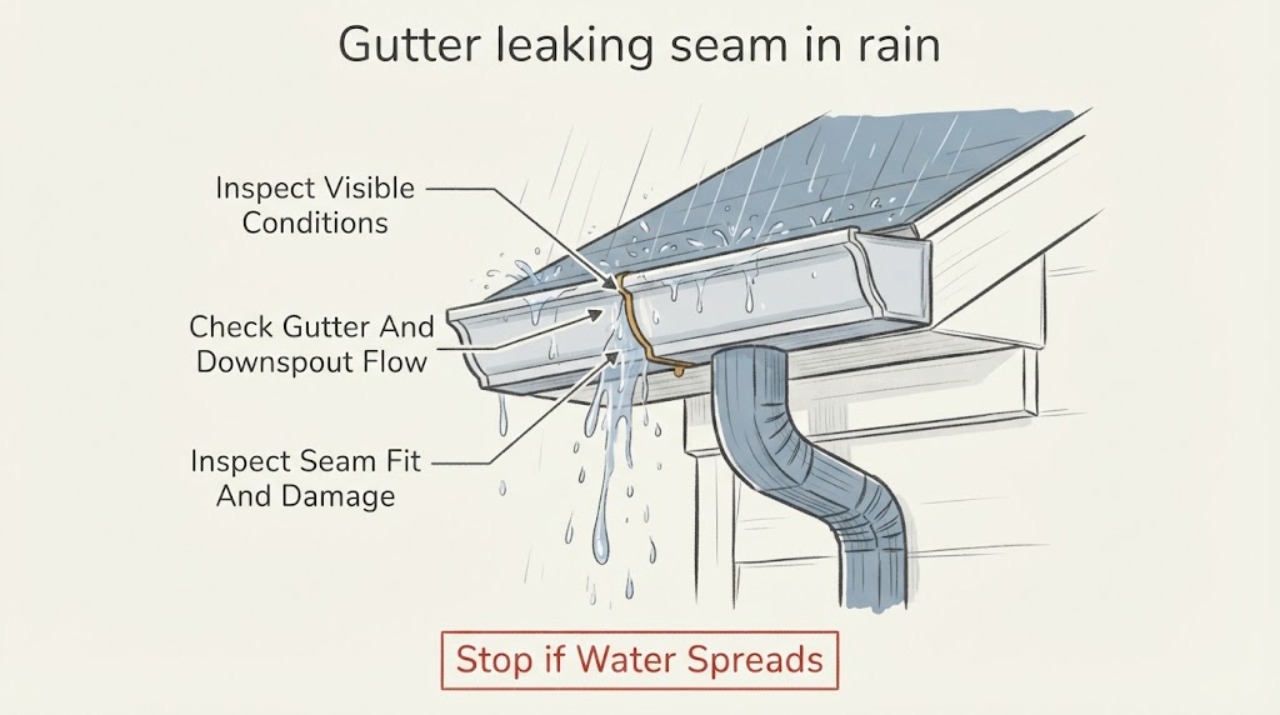
If a gutter seam leaks in rain, first determine whether water is coming through the joint or backing up and escaping because the gutter or downspout cannot carry the flow. A leak that appears at one aligned seam while the channel and downspout flow normally points to failed sealant or a loose lap. A leak that appears only in heavy rain, rises from a lower downspout joint, or accompanies a full gutter points to blockage, pooling, a sag, or an overwhelmed drainage path. Inspect only from ordinary safe access; when the joint is sound and reachable, clean and dry it and apply a compatible gutter sealant within the manufacturer's instructions. Movement, corrosion, a large gap, water behind the gutter, or a repeat leak after cure calls for qualified gutter or roofing service.
Before you begin
Safety first
- This article supports observation from ordinary safe access and a label-directed reseal only when the joint is sound and safely reachable. It does not authorize roof climbing, unsafe ladder work, concealed or buried drain clearing, structural refastening, roof-edge disassembly, or repair of corroded or perforated material.
Work through in order
Diagnostic checks
Use only checks that match the exact appliance or system and its official guide.
-
Check 1
From the ground or another ordinary safe-access position, observe the gutter during light and heavy parts of the same rain event and identify whether water emerges through the lap, corner, end cap, or outlet, or spills over the front or rear edge.
Expected result: Record the first visible escape point, whether the channel is below its top edge, whether the drip continues in light rain, and whether water travels behind the gutter or down the fascia.
Next step: Use the observation to choose the flow check or joint check; photograph the path from a safe position rather than climbing to chase water during a storm.
Stop if: Do not climb onto a roof or use an unstable ladder in rain, wind, or near a fragile edge. Stop if the area is not safely reachable.
Why this matters
Why: A localized drip through a seam with a partly empty channel supports a joint-seal problem. A drip that starts only when the channel fills, water over the edge, or water behind the run makes drainage, roof-edge, or installation alignment more likely.
-
Check 2
Observe the nearest downspout outlet and the gutter upstream of the leaking seam, looking for standing water, leaf or sediment buildup, a weak discharge, a sag, or water rising from a lower connection.
Expected result: Note whether water exits freely, backs up toward the seam, pools after the rain eases, or escapes at a downspout joint before reaching the outlet.
Next step: Clear only loose debris that is reachable without unsafe access, then reassess the joint after flow returns; arrange professional clearing when the restriction is concealed, underground, frozen, or high-access.
Stop if: Do not reach into a concealed downspout, dismantle a water-filled or loose run, or seal a joint while water is visibly backing up.
Why this matters
Why: Free discharge and no pooling keep a local seam seal as the leading possibility. Backup or rising water makes a clogged gutter, downspout, buried drain, sag, slope, or flow-capacity problem more likely; rain intensity can expose that problem even when light rain looks normal.
-
Check 3
When the surface is safe and the joint is reachable, inspect the inside and visible faces for cracked or missing sealant, an open lap, loose fasteners, a shifted connector, distortion, rust, or a hole; do not pull on the gutter or loosen fasteners just to test movement.
Expected result: Classify the joint as aligned with a failed bead, loose or moving, warped, broadly corroded, or perforated, and note the gutter material if it is identifiable.
Next step: Keep a photo and material note for the product label or technician; choose resealing only if the joint is sound, aligned, and within the chosen product's stated limits.
Stop if: Stop if the run pulls away from the fascia, fasteners are tearing out, flakes or holes are present, or inspection requires unsafe roof-edge access.
Why this matters
Why: An aligned sound joint with a small failed bead is a reseal candidate. A moving or warped joint needs its fit or support corrected first. Holes and extensive corrosion are material failures that sealant alone cannot reliably repair.
-
Check 4
Only for a sound, aligned, safely reachable joint, wait for conditions permitted by the product label, remove loose debris and failed sealant from the inside of the overlap, clean the mating surfaces, let them dry, and apply the gutter manufacturer's or sealant manufacturer's specified bead inside the joint; refasten or reassemble only as that system instructs.
Expected result: Before sealing, the joint should be free of loose old bead, sludge, grease, and standing water; after application, the sealant should contact both sides of the overlap without leaving a visible open channel.
Next step: Follow the product's cure and exposure instructions, keep runoff away during that period, and do not add layers simply because the next storm arrives before cure is complete.
Stop if: Do not mix sealants, use unapproved solvents, heat old sealant near roofing, bridge a large gap, or perform fastener and joint disassembly at unsafe height.
Why this matters
Why: Clean, dry, sound surfaces and a properly fitting lap give the sealant a chance to resist rain and normal outdoor movement. If the surfaces remain wet, contaminated, or separated, a new bead is unlikely to last.
-
Check 5
After the product's labeled cure period, observe the joint through a later light rain and, from a safe position, during heavier flow; compare the seam, the nearest downspout, and the fascia with the original notes.
Expected result: Record whether the seam stays dry, drips only when the gutter fills, leaks around a fastener or end cap, or sends water behind the gutter.
Next step: Stop applying more sealant and arrange qualified gutter or roofing inspection when the result is not dry or when water reaches building materials.
Stop if: Stop using the area as a DIY test if water reaches fascia, soffit, wall, electrical equipment, interior finishes, or the foundation in a damaging way.
Why this matters
Why: A dry seam through both rain conditions supports a successful local reseal. A repeat seam drip with normal flow suggests movement, poor fit, preparation failure, or an unsuitable product; a heavy-rain-only leak suggests unresolved backup or capacity even if the seam is sealed.
Use your observations
Decision map
Find the observation that best matches what you see, then follow the next safe action.
-
PATH 01Safety boundary
What you see
The channel is not full, the downspout discharges normally, and one aligned seam leaks in light rain as well as heavier rain.
Do this next
If safely reachable and sound, clean and dry the overlap and reseal it with a compatible product and placement allowed by the instructions.
Why this path and its safety boundary
Why it matters: A local failed seal, open lap, or fastener-area leak is more likely than rain volume alone.
Safety stop: Stop if the joint moves, will not sit flush, or leaks again after cure; request professional joint repair instead of layering more sealant.
-
PATH 02Safety boundary
What you see
The drip appears only in heavy rain, the channel reaches the top edge, water sheets over the gutter, or the downspout discharge is weak.
Do this next
Restore safe flow and support or have the drainage path assessed before resealing; retest in a lighter rain once the gutter is not backing up.
Why this path and its safety boundary
Why it matters: Overflow, debris, a sag or slope problem, a restricted outlet, or a drainage path that cannot accept the rain volume is more likely than a simple seam failure.
Safety stop: Do not seal the visible escape point while water is under pressure or standing in the run, and do not work beneath a loose or water-loaded gutter.
-
PATH 03Safety boundary
What you see
Water rises or sprays from a lower downspout connection during rain even though the upper gutter and visible downspout opening were cleared.
Do this next
Arrange safe clearing or drainage service for the full path, especially when the outlet is underground, concealed, frozen, or inaccessible.
Why this path and its safety boundary
Why it matters: A hidden restriction farther down the downspout, buried drain, elbow, or outlet can be forcing water back up through the joint; sealing that joint can only move the escape point.
Safety stop: Do not use a pressure washer, drain snake, heat, or chemical treatment in a concealed or buried rainwater line unless the system and method are appropriate and safely controlled by a qualified person.
-
PATH 04Safety boundary
What you see
The joint shifts, the lap is visibly open or warped, fasteners are loose, or corrosion and holes extend beyond the seam.
Do this next
Have a qualified gutter professional assess refastening, connector replacement, section replacement, or a correctly supported new run.
Why this path and its safety boundary
Why it matters: The mechanical fit or gutter material is failing, so a surface bead is unlikely to remain watertight under rain.
Safety stop: Do not bend fragile metal, force the connector closed, or rely on sealant to cover perforation or a detached run.
-
PATH 05Safety boundary
What you see
Water appears behind the gutter or on the fascia, soffit, wall, or interior rather than only through the joint interior.
Do this next
Stop seam patching and arrange a combined gutter and roofing assessment so the entry path and attached woodwork can be inspected.
Why this path and its safety boundary
Why it matters: The rain path may involve roof-edge flashing, drip-edge alignment, gutter placement, or concealed building damage instead of the seam seal alone.
Safety stop: Stop immediately for interior dampness, staining, rot, structural looseness, or water near electrical equipment.
Helpful context
Understand the symptom
Rain timing is a useful diagnostic clue
Light rain can reveal a seam leak because the gutter is not yet full. During a downpour, the same drip may be hidden by water flowing over the edge, or a blockage may force water back through a lower joint. Observe the first place water escapes and whether the gutter remains below its top edge. The drip location alone is not proof of the entry point because water can travel along the outside of a gutter or rise from a restricted downspout.
A sealant repair depends on the joint, not just the product
Geocel's gutter-seal technical data describes sealant for small gutter joints and calls for clean, dry, sound, frost-free surfaces. It places a bead along the inside edge of lap joints and around rivets. LOCTITE's gutter guidance likewise says to remove debris and old caulk, allow the area to dry, and press the sealant into a properly fitting joint. Follow the installed gutter manufacturer's instructions if they specify a different connector, material, or sealant.
Do not seal a pressure or structural problem closed
If water is backing up below the joint, sealing the visible opening can move the overflow higher or force water behind the gutter. A moving lap, sagging run, damaged fastener, broad rust, or hole also needs mechanical repair or replacement. Sealant guidance treats joint dimensions, construction, movement, and drainage as part of product selection; those conditions are reasons to stop patching and get the run assessed.
Safety boundary
Stop conditions
- Do not climb onto a roof or work from an unstable ladder during rain, wind, ice, or other unsafe conditions.
- Do not seal over a blocked, full, sagging, detached, or visibly unstable gutter; restore safe drainage and support first.
- Do not bridge a large or moving gap with sealant, bend fragile metal, or use a patch as a substitute for a perforated or extensively corroded section.
- Do not mix sealants or solvents, heat old sealant near roofing, or use a product outside its material, joint, weather, or cure instructions.
- Stop and arrange qualified gutter or roofing service when water reaches the fascia, soffit, wall, interior, electrical equipment, or foundation; when a hidden drain is blocked; or when a correctly prepared reseal still leaks after cure.
Only after diagnosis
Potential parts
- gutter-grade seam sealant
Consider this category only when the joint is aligned, sound, safely reachable, and the existing sealant has failed; the selected product must allow the material, joint size, weather, and cure conditions.
Confirm the gutter material and manufacturer's instructions before use; a product category is not proof of compatibility. - gutter connector or joint section
Consider this category only when inspection finds a warped, moving, cracked, or otherwise damaged connector or lap that sealant alone cannot keep closed.
Confirm the exact gutter profile, material, dimensions, and joining method; a generic connector may not align or drain correctly.
When checks do not resolve it
Need a professional?
Arrange qualified gutter or roofing service if the gutter leaks only after backing up, the downspout or buried drain remains restricted, the run is loose or sagging, the seam moves or will not sit flush, rust or perforation is present, water is reaching the building, the repair requires high-access disassembly, or a properly prepared reseal still leaks after the labeled cure period. Provide the rain intensity, first escape point, flow observations, gutter material, photographs, and any sealant preparation and cure details.
Safety scope: This article supports observation from ordinary safe access and a label-directed reseal only when the joint is sound and safely reachable. It does not authorize roof climbing, unsafe ladder work, concealed or buried drain clearing, structural refastening, roof-edge disassembly, or repair of corroded or perforated material.
Common questions
FAQ
Why does a gutter seam leak only during heavy rain?
Heavy rain can fill the channel or overwhelm a restricted downspout, raising water to a weak joint. If the seam also drips in lighter rain while the gutter is not full, a local seal or lap failure becomes more likely.
Should I add sealant over the old bead?
Usually not without preparation. Remove loose or failed material, clean and dry the sound surfaces, and use a product and bead location allowed by the gutter and sealant instructions. A moving, warped, or perforated joint needs more than another layer.
Read the exact guide
Official sources
- ProGutter Seal Tech Data ft DGeocel Products Group, a business unit of The Sherwin-Williams Company · Geocel Pro Gutter Seal technical data; the installed gutter manufacturer's instructions and selected product label control a specific repair.
- Sealant Best PracticesLOCTITE, Henkel Corp. · General LOCTITE sealant guidance; it does not replace the selected gutter sealant's technical data or the gutter manufacturer's installation requirements.
- Gutter Downspout Leaking at the SeamsReddit, r/HomeMaintenance · Community experience only; it does not replace safe drainage inspection or professional service for concealed or buried restrictions.
- Leaky gutter seamReddit, r/HomeImprovement · Community experience only; it is not a product endorsement or substitute for safe access and qualified inspection.
- How to fix gutters with sealantsLOCTITE, Henkel Corp. · LOCTITE repair guidance for gutters and downspouts; use the installed gutter manufacturer's instructions and product label for the particular material and joint.
Community feedback
Share a repair observation
Share a plain-text repair observation. Accepted observations are published automatically; this page may take a moment to update.