
On this page
Start here
Quick answer
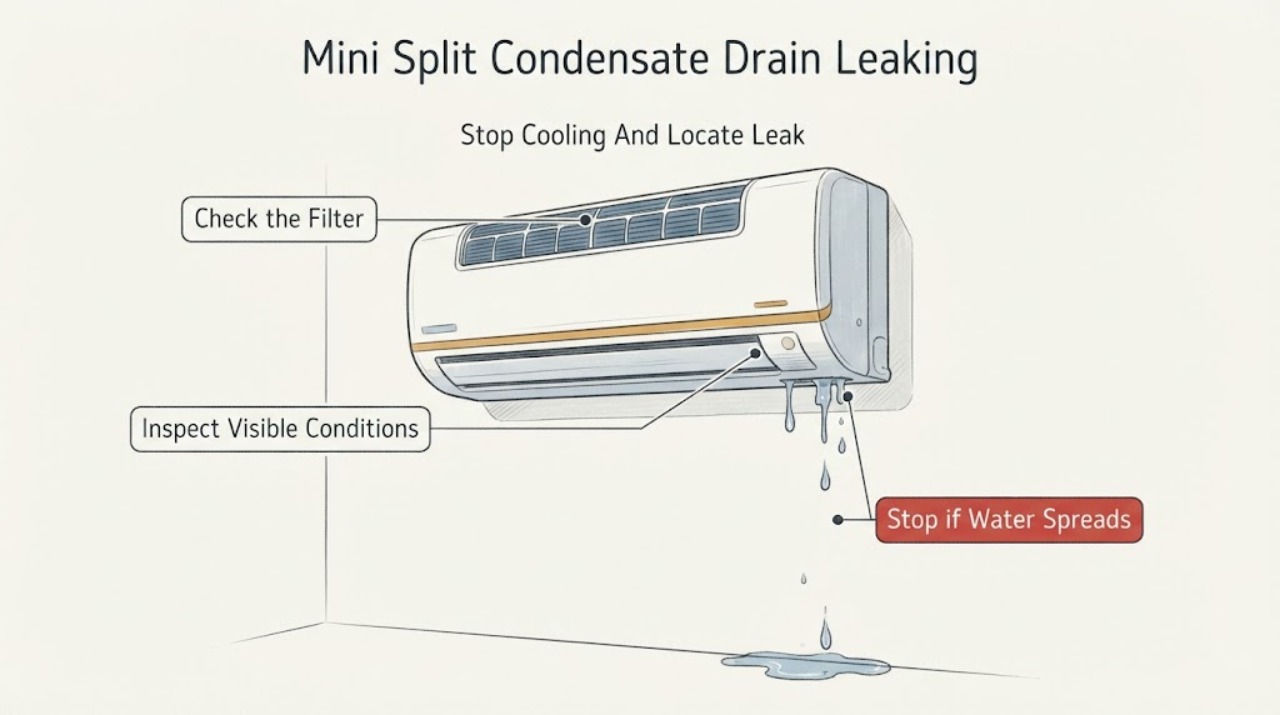
Water from a Carrier mini split's indoor unit usually means condensate is not reaching its drain safely, but a clogged drain is not the only possibility. Turn cooling off, protect the wall and floor, and identify whether water is dripping from the indoor unit, the drain connection, the line along the wall, or a nearby pipe. From outside the casing, inspect the accessible drain outlet for a missing flow, a visible kink or a backed-up line, and check the filter for heavy dust or ice on the coil area without removing panels. Carrier explains that a blocked drain line can back up the pan, a damaged pan can drip, and a dirty filter can freeze the coil so meltwater overwhelms the pan. A unit that was recently installed, moved or serviced can also have a drainage slope, insulation or mounting problem. Do not open the indoor unit, disconnect the drain, pour chemicals into the line, handle refrigerant, test wiring or keep running a system that is leaking near electrical parts. Arrange licensed Carrier ductless service for a persistent leak, visible pan damage, ice, poor airflow, a drain line that remains blocked, or any leak after installation; seek urgent help for flooding, smoke, burning odor, sparks or wet electrical components.
Before you begin
Safety first
- This article supports only normal controls, safe exterior source observation, user-accessible filter care, visible drain-route inspection and symptom recording. Drain clearing or reconnection, pan or pump access, electrical testing, refrigerant work, coil access, mounting correction and sealed-system diagnosis require a licensed HVAC professional.
Work through in order
Diagnostic checks
Use only checks that match the exact appliance or system and its official guide.
-
Check 1
Turn the mini split off with its normal control and observe the leak from a safe position. Protect the wall and floor with towels or a container without covering vents, and note whether water comes from the indoor unit, drain connection, wall penetration, exposed drain line or a nearby surface.
Expected result: Water is dripping, pooling, spraying or stopping after cooling stops; the first wet point is visible or remains uncertain; water is near an outlet or control.
Next step: Keep cooling off, record the first wet point and when the leak occurs, and arrange licensed Carrier ductless service if water is active, recurring or reaches the wall or electrical area.
Stop if: Stop immediately for flooding, spraying water, smoke, burning odor, sparks, a damaged cord or water contacting electrical components; leave the area if needed and seek emergency or electrical help.
Why this matters
Why: Water that continues from the indoor unit after cooling stops can be meltwater or a backed-up pan. A wet drain connection or line points toward drainage or insulation. An uncertain source means the visible drip may be traveling from a hidden connection. Water near electrical parts is a safety issue, not a routine drain check.
-
Check 2
With the system off, inspect only the user-accessible air filter and visible air outlet for heavy dust, blocked airflow or ice that can be seen without opening a panel. Clean the filter only as the exact Carrier manual allows; do not scrape ice or remove the coil cover.
Expected result: The filter is heavily loaded, airflow was weak, ice is visible, the filter is clean and airflow seems normal, or the indoor coil cannot be viewed safely.
Next step: Restore a clean, correctly seated filter if the manual permits, leave cooling off until visible ice is gone without forced heating, and arrange service if water returns, ice persists or airflow remains weak.
Stop if: Do not chip ice, use a heat gun or hair dryer, open the casing, touch the coil, handle refrigerant or continue cooling while water reaches electrical parts.
Why this matters
Why: Carrier notes that a dirty filter can restrict airflow, freeze the coil and produce meltwater that overwhelms the drain pan. Ice or weak airflow with a clean filter can instead involve a refrigerant, blower, coil or control problem; no visible ice does not clear the drain path.
-
Check 3
From a safe exterior position, locate the drain outlet if it is normally visible and check for a kinked, crushed, disconnected-looking or submerged end, debris at the opening, or an absence of expected condensate during cooling. Do not pull the line, disconnect it from the indoor unit, blow into it or pour cleaner into it.
Expected result: The outlet is dry while the indoor unit leaks, the line has a visible kink or crushed section, the end is submerged or blocked, water exits normally, or the drain route is not visible.
Next step: Photograph the safe exterior route and keep the system off if it leaks. Arrange licensed service to clear, reconnect or verify the drain and pan; do not attempt a pressure or chemical flush.
Stop if: Stop if the line is attached to a height, pump, wall penetration or electrical area, or if accessing it requires a ladder, roof work, panel removal or contact with water near wiring.
Why this matters
Why: A dry outlet while water appears indoors supports a restricted, disconnected or incorrectly routed drain path, but the indoor pan, connection or pump may also be involved. A visible external defect is useful evidence, not permission to alter the line. Normal outlet flow makes the leak source, pan, insulation or icing more important.
-
Check 4
Review whether the leak began after installation, relocation, service, a change in the drain route or a change in weather. From the room and wall exterior, observe whether the indoor unit appears loose or tilted, the visible drain section lacks insulation, or water is forming on a line rather than emerging from the unit; do not loosen mounting or line-set hardware.
Expected result: The leak follows recent work, the unit or drain appears misaligned, a visible drain or line section is sweating, or no installation change is known.
Next step: Record the installation history and safe visual clues and request a Carrier-qualified inspection of mounting, drain slope, connections and insulation. Do not rehang the unit or reshape the line yourself.
Stop if: Do not open the wall, move the indoor unit, disconnect line sets, disturb refrigerant piping or work above an unsafe height.
Why this matters
Why: A post-installation leak makes mounting, drainage routing, connection and insulation errors more plausible. Water on an uninsulated surface can be condensation rather than a blocked pan. A leak with no recent work still needs drain, pan, filter, coil and system diagnosis.
-
Check 5
After the leak is stopped and only from normal controls, note whether the mini split had reduced airflow, hissing, ice, unusual noise, an odor, a fault indication or failure to cool before water appeared. Confirm the outdoor unit is not obstructed only by visual inspection from ground level; do not test refrigerant or electrical performance.
Expected result: Ice, reduced airflow, hissing, a repeated fault, unusual noise, an odor or poor cooling is present, or the unit otherwise cools normally.
Next step: Keep the unit off for water, ice or a recurring fault and arrange licensed Carrier service. Tell the technician whether the leak followed cooling, defrost or shutdown and whether the outdoor unit was operating.
Stop if: Do not remove covers, test wiring, handle refrigerant, open service valves, restart repeatedly or approach an outdoor unit with damaged wiring, smoke or exposed moving parts.
Why this matters
Why: Ice, low airflow or hissing can fit a filter, blower, coil or refrigerant problem that may create meltwater; a fault or unusual noise can involve controls, fan, pump or another component. Normal cooling does not rule out a drain blockage, pan damage or installation issue.
-
Check 6
Record the Carrier model and serial information from ordinary-access paperwork or labeling, the first wet point, cooling mode, filter condition, visible drain route, frost or ice, installation history and any safe photos. Keep the system off if the leak is active or reaches building materials or electrical equipment.
Expected result: Water returns after a clean filter, the drain outlet remains dry, the pan or connection looks damaged, the leak began after installation, ice persists, or the cause remains uncertain.
Next step: Arrange licensed Carrier ductless service and provide the model, symptom sequence, photos and shutdown status. Protect the wall and floor and follow local food or property-damage guidance if cooling must remain off.
Stop if: Stop and seek urgent help for flooding, smoke, burning odor, sparks, a damaged cord, wet controls, refrigerant-line damage or any electrical hazard.
Why this matters
Why: These patterns require model-specific inspection of the condensate pan and drain, drain pump or float if fitted, mounting and insulation, airflow, coil and refrigerant condition, electrical controls and other possible causes. A visible symptom does not establish which part is compatible.
Use your observations
Decision map
Find the observation that best matches what you see, then follow the next safe action.
-
PATH 01Safety boundary
What you see
Do this next
Keep the system off, photograph the safe route and arrange licensed Carrier service to verify the drain, pan and connections. Do not pull, flush or chemically clean the line yourself.
Why this path and its safety boundary
Why it matters: A blocked, disconnected, misrouted or poorly draining condensate path is more likely, although a pan or connection problem can produce the same pattern.
Safety stop: Stop if access involves a ladder, roof, wall opening, electrical area or a line that cannot be handled without force.
-
PATH 02Safety boundary
What you see
Do this next
Clean or replace the filter only under the exact manual, leave the system off until ice clears naturally and arrange service if icing or leaking returns. Do not heat or scrape the coil.
Why this path and its safety boundary
Why it matters: Restricted airflow and coil icing can create meltwater that overwhelms the drain pan; a clean filter with persistent icing leaves refrigerant, coil, blower or control faults possible.
Safety stop: Do not run cooling with active water near electrical parts, open the casing or handle refrigerant.
-
PATH 03Safety boundary
What you see
Do this next
Keep the system off and request a qualified Carrier inspection of mounting, drain route, slope, connections and insulation. Do not move the unit or disconnect line sets.
Why this path and its safety boundary
Why it matters: Drain routing, unit mounting, connection sealing or insulation is more likely than a simple filter issue; gravity and condensation behavior depend on the installation.
Safety stop: Do not open the wall, climb unsafely, disturb refrigerant piping or work on electrical connections.
-
PATH 04Safety boundary
What you see
Do this next
Keep cooling off and arrange qualified Carrier ductless service. Provide the first wet point and whether the drain outlet flowed; do not open the indoor unit or test a pump or float.
Why this path and its safety boundary
Why it matters: A pan, connection, pump or internal drainage fault is more likely than an exterior blockage and requires internal access and model-specific diagnosis.
Safety stop: Stop for water near controls, exposed wiring, flooding, smoke, burning odor or sparks.
-
PATH 05Safety boundary
What you see
Do this next
Leave the system off, leave the area if unsafe and contact licensed Carrier HVAC service or appropriate emergency or electrical help. Do not restart to reproduce the symptom.
Why this path and its safety boundary
Why it matters: The issue extends beyond a routine drain blockage and may involve refrigerant, electrical, structural or equipment damage.
Safety stop: Do not touch wet controls, open service valves, handle refrigerant, test live wiring or approach smoke, sparks or flooding.
Helpful context
Understand the symptom
Start by locating the first wet point
A mini split creates water during cooling and routes it through an indoor drain pan and drain line. Water at the wall-mounted unit can therefore come from a backed-up line, a pan or connection, a frozen coil that is thawing, condensation on an uninsulated section, or water traveling from elsewhere. A wet wall alone does not identify the failed part.
Use the drain outlet and filter as exterior clues
A visible drain outlet that stays dry while the indoor unit drips supports a restricted or disconnected drainage path, but the outlet may be hidden or routed to another location. A loaded filter or weak airflow can contribute to coil icing and meltwater. Check what is accessible and leave pan, pump, coil and refrigerant work to a professional.
Protect the wall, wiring and refrigeration circuit
Turn the system off before maintenance, keep water away from outlets and controls, and use towels or a container only to protect surfaces. Do not open the indoor casing, disconnect a drain hose, flush chemicals, probe a float or pump, handle refrigerant or work on electrical connections.
Safety boundary
Stop conditions
- Stop the mini split and leave the area if needed for flooding, spraying water, smoke, burning odor, sparks, a damaged cord or water contacting electrical components; obtain appropriate emergency, electrical or HVAC help.
- Do not open the indoor casing, remove the drain pan, disconnect the drain, probe a float or pump, test wiring, handle refrigerant or open service valves.
- Do not pour chemicals, boiling water or compressed air into the drain, force a kinked line, drill a wall, move the indoor unit or disturb refrigerant piping.
- Do not chip or heat coil ice, keep cooling running while water reaches electrical parts, or restart repeatedly to reproduce a leak.
- Arrange licensed Carrier ductless service for a recurring leak, dry or damaged drain route, pan or connection damage, persistent ice or low airflow, a post-installation leak or any uncertain source.
Only after diagnosis
Potential parts
- Carrier mini split condensate drain hose or connection
Consider this category only when qualified diagnosis confirms a split, disconnected, crushed or incompatible drain section or connection after the complete route is inspected.
Hose diameter, connection design, routing and insulation vary by exact Carrier model and installation; confirm model fit before ordering. - Carrier mini split drain pan
Consider this part only when qualified inspection confirms a cracked, corroded, tilted or otherwise damaged indoor drain pan rather than a blocked line or melting coil ice.
Pan shape, mounting and drain connection are model-specific; internal removal and replacement require qualified service. - Carrier mini split condensate pump or float control
Consider this category only when the installation uses a pump or float and qualified testing confirms that it fails to move or sense condensate after the drain path is verified.
Pump capacity, float wiring and mounting depend on the exact unit and installation; do not substitute by appearance or attempt live testing. - Carrier mini split air filter
Consider this consumable only when the installed filter is damaged, loaded or not the model-approved type and the system's airflow or icing symptom supports replacement.
Filter size, washable design and installation method vary by exact Carrier model; follow the owner instructions before ordering.
When checks do not resolve it
Need a professional?
Arrange licensed Carrier ductless service when water returns after cooling, the drain outlet is dry or visibly compromised, the pan or connection may be damaged, the leak began after installation or relocation, ice or low airflow is present, or the cause is uncertain. Provide the exact model and serial information if safely accessible, first wet point, cooling state, filter condition, drain-route observations, frost, installation history and photos. Seek urgent emergency, electrical or HVAC help for flooding, smoke, burning odor, sparks, a damaged cord, wet controls, refrigerant-line damage or other unsafe conditions.
Safety scope: This article supports only normal controls, safe exterior source observation, user-accessible filter care, visible drain-route inspection and symptom recording. Drain clearing or reconnection, pan or pump access, electrical testing, refrigerant work, coil access, mounting correction and sealed-system diagnosis require a licensed HVAC professional.
Common questions
FAQ
Why is my Carrier mini split leaking water from the indoor unit?
The most common paths are a blocked or misrouted condensate drain, a damaged pan or connection, coil ice melting after restricted airflow, condensation on an installation surface, or a refrigerant or installation issue. Turn cooling off, locate the first wet point and arrange licensed service if the leak persists or reaches electrical parts.
How can I tell whether the Carrier mini split drain is clogged?
If the indoor unit drips while the accessible drain outlet remains dry, or the visible line is kinked, crushed or backed up, a drainage restriction is plausible. The pan, connection or pump can look similar, so do not disconnect or flush the line; photograph the safe route and have a qualified technician clear and verify it.
Can a dirty Carrier mini split filter cause water to leak?
Yes. Carrier explains that a dirty filter can restrict airflow and freeze the coil; meltwater can then overwhelm the drain pan. Clean or replace the accessible filter only as the exact model manual allows, and arrange service if ice, weak airflow or leaking returns.
Could a recent Carrier mini split installation cause the leak?
It can. Carrier says installation includes secure indoor mounting and verified condensate drainage, along with correctly routed refrigerant and electrical connections. A leak that starts after installation, relocation or service should be inspected for mounting, drainage, connection and insulation issues rather than corrected by moving the unit yourself.
When should I stop using a Carrier mini split that is leaking water?
Turn it off for an active or recurring indoor leak, visible ice, a dry or damaged drain route, water near electrical parts, poor airflow or a repeated fault. Seek urgent help for flooding, smoke, burning odor, sparks, damaged wiring or a damaged cord. Do not open the casing or handle refrigerant.
Read the exact guide
Official sources
- Mini Split Repair Guide | Troubleshooting & Service | CarrierCarrier · Official Carrier residential ductless support guide used for condensate mechanics, clogged drain, damaged pan, dirty-filter icing, low refrigerant clues and professional escalation.
- How to Install a Ductless Mini Split AC | Installation GuideCarrier · Official Carrier installation guide used for post-installation drainage, mounting, line-routing and electrical safety boundaries; it is not a homeowner installation procedure.
- Ductless Mini Split Maintenance | Service & Cleaning TipsCarrier · Official Carrier maintenance guidance used for turning the system off before maintenance, accessible filter care and the professional boundary for drain, coil, refrigerant and electrical inspection.
- Mini Split Leaking Water? Diagnosis & DIY Repair Tips | CarrierCarrier · Official Carrier article used for the water-source decision tree and the boundary between filter or drain observations and professional pan, installation or refrigerant work.
Community feedback
Share a repair observation
Share a plain-text repair observation. Accepted observations are published automatically; this page may take a moment to update.