
On this page
Start here
Quick answer
For a wall-mounted mini split leaking water, start by locating the first indoor wet point and checking whether the outside condensate outlet produces water during cooling. A blocked, kinked, sagging, or poorly sloped drain can back up into the indoor pan; a dirty filter or restricted airflow can freeze the coil and create a later melt overflow. A tilted indoor unit, damaged pan, or condensate pump configuration needs professional diagnosis. Note whether dripping begins immediately or only after sustained cooling, and whether the outlet flow is absent or weak. Do not handle refrigerant, open the electrical compartment, work at unsafe height, or use a drain treatment unless the exact manufacturer instructions and a qualified technician permit it.
Before you begin
Safety first
- Observation from stable accessible locations only; no refrigerant work, electrical-compartment access, indoor-unit removal, hose disconnection, chemical injection, or unsafe elevated work.
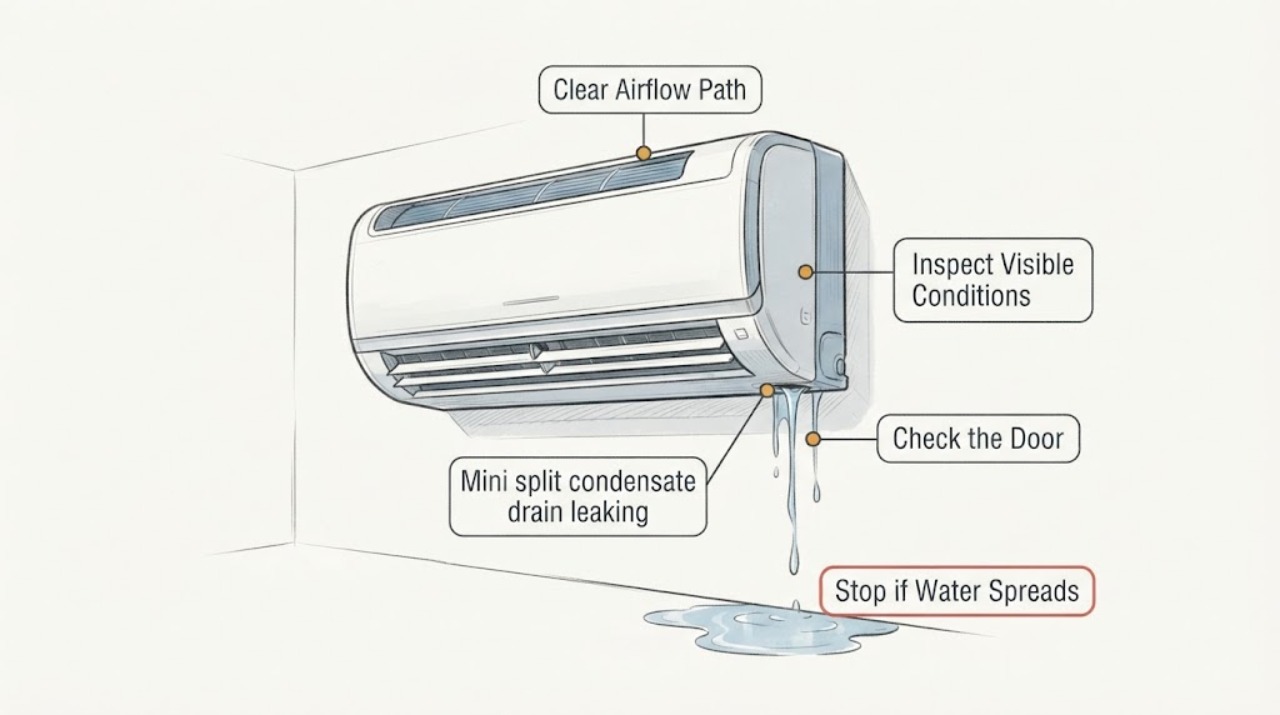
Work through in order
Diagnostic checks
Use only checks that match the exact appliance or system and its official guide.
-
Check 1
With the system off and the floor dry, use a flashlight from a stable standing position to identify where water first appears at the indoor unit: the drain-side corner, bottom edge, wall penetration, center of the pan, or below the door and filter area.
Expected result: Record a drip from one corner, water tracking down the wall, a wet line at the wall opening, water from the center of the unit, or only a floor puddle with no visible source. Note whether the filter cover and visible front surfaces are wet.
Next step: Photograph the first wet point and protect the floor. Do not remove the indoor cover, reach into the pan, or press the unit back against the wall.
Stop if: Stop for water near an outlet or electrical equipment, a loose or tilted indoor unit, an active stream, mold-like contamination, or any need to climb or open the unit.
Why this matters
Why: The first wet point is more useful than the largest puddle. Drain-side or wall-penetration moisture supports a condensate hose or connection check; center overflow can involve the pan or restricted drainage; water near the filter area can accompany ice melt or an airflow problem.
-
Check 2
If the condensate drain outlet is visible from a dry, ground-level position, observe it during an already necessary cooling period without touching the hose or using a ladder; note whether water exits steadily, weakly, intermittently, or not at all.
Expected result: The outlet may discharge water while the indoor unit still drips, discharge little or no water while the indoor unit drips, or be hidden inside a wall, pump route, or shared drain. Record a kink, sag, crushed section, or outlet blocked by debris only when it is plainly visible.
Next step: Photograph the outlet and timing and ask the technician to inspect the complete drain route. Do not blow into the line, inject chemicals, disconnect tubing, or use a vacuum unless the exact manual authorizes that safe procedure.
Stop if: Stop if the outlet is high, on a roof or ladder route, near electrical equipment, inaccessible, or requires opening a wall or manipulating the drain hose.
Why this matters
Why: A missing or weak outlet flow with indoor dripping supports a blocked, kinked, poorly sloped, or pump-related drainage problem. Normal outlet flow with indoor water shifts attention toward pan tilt, a leaking connection, excessive condensate, or ice melt; the outlet alone cannot prove the cause.
-
Check 3
With the system stopped, inspect the user-accessible air filters and visible airflow path according to the exact manual, and note any frost or ice that can be seen without removing the coil cover or touching refrigerant tubing.
Expected result: The filters may be clean, visibly loaded with dust, or inaccessible; airflow may feel normal or weak during ordinary operation; frost may appear on the visible coil area or tubing, or no ice may be visible. Do not scrape ice or run the unit to force it to melt.
Next step: Clean only user-removable filters as the exact manual directs, then let the system remain off if ice or water is present. Arrange HVAC diagnosis if dripping returns, airflow stays weak, or ice reappears.
Stop if: Stop for ice on inaccessible components, water near power, damaged filters, a burning odor, refrigerant smell or hiss, or any need to open the coil or electrical compartment.
Why this matters
Why: A dirty filter or restricted airflow can allow the coil to freeze and later overwhelm the drain pan as ice melts. No visible ice does not rule out a drain restriction, and ice or weak airflow should not be treated as proof of low refrigerant.
-
Check 4
From the room and other already-safe viewpoints, look for an indoor unit that appears tilted, a drain hose that visibly sags or rises, a pump alarm or float indicator if the installation has one, and a service-access condition that differs from the original installation.
Expected result: The unit may appear level and the drain path may be hidden, or there may be visible tilt, a sagging hose, a pump alarm, or water staining at the wall penetration. Do not remove the unit, open the line-set cover, or infer a slope measurement by eye.
Next step: Photograph the visible installation and provide the unit model and drain or pump configuration to a qualified technician. Do not shim, rehang, reroute, or disconnect the unit yourself.
Stop if: Stop if inspection requires a ladder, moving the indoor unit, opening a wall, touching refrigerant lines, or working near energized equipment.
Why this matters
Why: A tilted pan, sagging drain route, or failed condensate pump can prevent water from leaving even when the outlet itself is clear. These are installation or mechanical conditions that require model- and configuration-specific service.
-
Check 5
Record when dripping begins relative to cooling: immediately, after a long continuous run, after the unit stops, or only during humid weather; include whether it follows filter cleaning, a power event, or a recent installation change.
Expected result: Immediate dripping can fit a blocked or misrouted drain, while dripping after sustained cooling or shutdown can fit ice melt or a pan overwhelmed by condensate. A pattern only during high humidity or after installation changes adds environmental or installation context.
Next step: Send the timing, first wet point, outlet flow, filter and ice observations, model label, and pump configuration to HVAC service. Keep the system off if water continues or reaches electrical areas.
Stop if: Stop troubleshooting when the leak recurs, the cause is hidden, the wall or ceiling is getting wet, or the next step would involve refrigerant, electrical access, height, or disassembly.
Why this matters
Why: Timing separates a drainage-path restriction from airflow and freezing clues, but it does not authorize refrigerant work or prove the pan or pump has failed. Recurrent water damage is a service issue even if the outlet sometimes flows.
Use your observations
Decision map
Find the observation that best matches what you see, then follow the next safe action.
-
PATH 01Next step
What you see
The indoor unit drips while the visible outside drain outlet has no, weak, or intermittent flow, or the hose visibly sags, kinks, or is blocked.
Do this next
Stop use if water is spreading and arrange HVAC service to inspect the full condensate route and any pump. Do not blow into the hose, inject chemicals, disconnect tubing, or work at height.
-
PATH 02Next step
What you see
Filters are dirty or airflow is weak, and frost or ice appears or dripping begins after sustained cooling or shutdown.
Do this next
Clean only the user-accessible filters as the exact manual directs and leave the system off while ice or water remains. Request professional diagnosis if ice, weak airflow, or dripping returns; do not handle refrigerant.
-
PATH 03Next step
What you see
The drain outlet flows normally, but the first wet point is at the indoor unit drain-side corner, pan area, wall penetration, or a visibly tilted unit.
Do this next
Arrange model-specific HVAC inspection of the pan, drain connection, unit level, and wall penetration. Do not rehang the unit, open the cover, or seal over the leak.
-
PATH 04Next step
What you see
The installation uses a condensate pump, the pump alarm or float indicator is active, or the drain route is hidden and water appears only after the pump should run.
Do this next
Stop user testing and request professional pump and drain-path diagnosis. Provide the pump model if visible and do not open the pump, bypass its float, or disconnect its wiring.
-
PATH 05Next step
What you see
Dripping begins only after long cooling runs or during unusually humid conditions, with no safe visible blockage and no confirmed ice.
Do this next
Document the duration, room conditions, and first wet point and arrange HVAC assessment for condensate volume, airflow, pan, and drain capacity. Do not treat the timing alone as a refrigerant diagnosis.
-
PATH 06Next step
What you see
Water reaches an outlet, control board area, wall cavity, ceiling, or other electrical equipment, or the unit or drain is inaccessible without height or disassembly.
Do this next
Keep people away, do not touch wet equipment, and arrange qualified HVAC or electrical service as appropriate. Do not climb, open the electrical compartment, or continue cooling to reproduce the leak.
Helpful context
Understand the symptom
Find the first indoor wet point
Water from a mini split can travel from the drain pan or hose connection down the wall before it reaches the floor. Compare the drain-side corner, pan edge, wall penetration, and door or filter area from a stable position. The first wet point scopes service better than the largest puddle.
Check flow at the safe end of the drain
A visible outdoor outlet with little or no flow while the indoor unit drips supports a restriction, kink, sag, poor slope, or pump problem. Normal outlet flow does not rule out a pan, connection, tilt, or excessive-condensate issue. Do not blow into the line or inject a chemical treatment as a test.
Do not miss the filter and ice line
A dirty filter can restrict airflow, allow the coil to freeze, and produce meltwater that overwhelms the pan after a long run or shutdown. Clean only the user-accessible filter as the exact manual permits. Frost, hissing, or recurring ice needs professional diagnosis, not refrigerant handling.
Installation and electrical boundaries
A tilted indoor unit, sagging drain hose, failed pump, damaged pan, or water near electrical parts requires qualified service. Do not open the electrical compartment, move or rehang the unit, handle refrigerant, work at unsafe height, or keep running the system to reproduce a leak.
Safety boundary
Stop conditions
- Stop for water near outlets or electrical equipment, an active stream, a loose or tilted indoor unit, burning odor, hissing, or unsafe access.
- Do not handle refrigerant, open the electrical compartment, remove the indoor unit, disconnect wiring, inject chemicals, or work at unsafe height.
- Call qualified HVAC service when the drain outlet has weak or absent flow, dripping recurs, ice appears, a pan or pump is suspected, or the first wet point is hidden.
Only after diagnosis
Potential parts
- mini split drain hose
Consider this only after a technician confirms a damaged or incompatible hose and the exact drain routing. A clogged outlet, pan, pump, slope, or connection can create the same indoor leak.
Match the complete indoor-unit model, hose diameter and material, fittings, insulation, slope requirements, and manufacturer instructions. Hose replacement or rerouting may require HVAC service. - condensate drain treatment
Use only when the exact manufacturer instructions and a qualified technician permit that product for the drain system; it is not a substitute for clearing a blockage or correcting slope or pump failure.
Verify the exact treatment, drain materials, pump compatibility, label directions, and occupant exposure limits. Do not mix chemicals, pour an unapproved solution, or use treatment near electrical equipment. - mini split drain pan
Consider this only after professional inspection confirms a cracked, corroded, tilted, or incompatible pan. A drain restriction, airflow freeze, or hose connection may be the real cause.
Match the exact indoor-unit model, pan shape, drain outlet position, float or pump arrangement, seals, and manufacturer service instructions. Pan removal is not a user observation task.
When checks do not resolve it
Need a professional?
Call promptly for recurring drips, absent drain flow, ice, pump alarms, hidden routes, or water near electrical equipment.
Safety scope: Observation from stable accessible locations only; no refrigerant work, electrical-compartment access, indoor-unit removal, hose disconnection, chemical injection, or unsafe elevated work.
Have this ready
- Provide the first indoor wet point, photos, outdoor outlet flow, timing after cooling begins or stops, filter condition, visible ice, unit tilt, drain and pump configuration, model label, and whether water reached a wall, ceiling, outlet, or control area.
Common questions
FAQ
Where should I look first when a mini split leaks?
From a dry, stable floor, identify the first wet point at the indoor drain-side corner, pan edge, wall penetration, or filter area. Then compare it with flow at a visible outdoor condensate outlet.
Can a clogged condensate drain cause water inside?
Yes. Weak or absent outlet flow while the indoor unit drips supports a blocked, kinked, sagging, poorly sloped, or pump-related drain path. Do not blow into the line or inject chemicals as a test.
Can a dirty filter cause a mini split to drip?
It can restrict airflow, allow the coil to freeze, and create meltwater that overwhelms the drain pan. Clean only the user-accessible filter according to the exact manual; recurring ice or dripping needs HVAC diagnosis.
What if the drain outlet still has water flow?
Normal outlet flow does not rule out a leaking connection, pan, tilted unit, excessive condensate, or pump configuration. Document the first wet point and request inspection rather than replacing a hose by guesswork.
Should I add refrigerant or open the mini split?
No. Do not handle refrigerant, open the electrical or coil compartment, disconnect wiring, or remove the indoor unit. A qualified technician should diagnose the drain, airflow, ice, pan, pump, and refrigerant possibilities.
Read the exact guide
Official sources
- Mini Split Leaking Water: Diagnosis and RepairCarrier · Official Carrier guidance for ductless mini-split systems; other manufacturers and installations may differ in drain routing, pump configuration, filter access, and service limits.
Community feedback
Share a repair observation
Share a plain-text repair observation. Accepted observations are published automatically; this page may take a moment to update.