
On this page
Start here
Quick answer
If a Carrier mini split appears to leak from its drain pan, first stop cooling from the normal controller, protect the wall and floor, and identify whether water is coming from the indoor unit, the drain-line connection, or a separate source. A clogged condensate line can back water up into the pan; a dirty filter can restrict airflow, freeze the indoor coil, and produce a surge of meltwater; and a cracked, corroded, tilted, or poorly supported pan can leak directly. Check only the user-accessible filter, visible hose outlet, external obstructions, and pan edges that can be seen without opening the cabinet. Do not remove the indoor cover, probe the drain, handle refrigerant, or test electrical parts. If the pan is damaged, the line does not drain, the coil is iced, the unit is not level, water reaches wiring, or the leak returns after a safe filter check, keep the system off and arrange qualified HVAC service.
Before you begin
Safety first
- Do not open the indoor housing, remove the drain pan, probe or pressure-flush a concealed line, test electrical parts, touch the coil or fan, handle refrigerant, or operate the system while water is near electrical equipment.
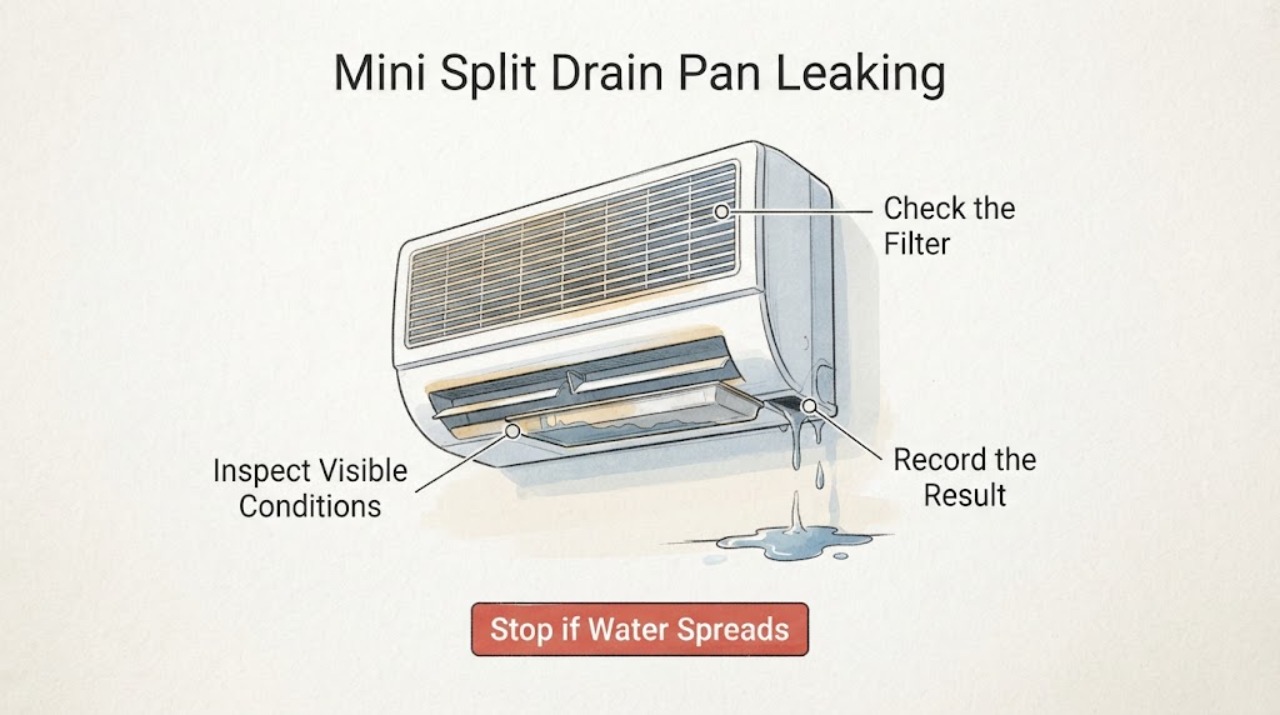
Work through in order
Diagnostic checks
Use only checks that match the exact appliance or system and its official guide.
-
Check 1
From a dry, safe position, identify the first wet point and note when it occurs: only in cooling, after the unit stops, during a humid period, or even when the system is off. Look for water at the indoor unit's lower edge, the visible drain-line connection, the wall, or the floor.
Expected result: Water may emerge from the bottom of the indoor head, collect under one corner, track along the wall, appear at a visible hose connection, or be present even without a cooling call.
Next step: Turn cooling off at the controller, contain the water, and photograph the first wet point. Do not remove the cover to trace a concealed path; use the pattern to choose the filter, drain-outlet, or service branch.
Why this matters
Why: Water from the indoor head is consistent with condensate backing up or escaping the pan, while a leak that continues when cooling is off may have another source. A wall stain above or beside the unit can also indicate installation or line-routing trouble rather than a pan crack.
-
Check 2
Turn the mini split off at its normal controller, then inspect the user-accessible air filter according to the Carrier model instructions. If it is visibly loaded, clean or rinse it only as the manual permits and let a washable filter dry fully before reinstalling it.
Expected result: The filter may be clean, dusty or restricted, incorrectly seated, or unavailable for owner access; the indoor coil may be dry or visibly covered with ice from a safe viewing position.
Next step: Correct only a clearly dirty or mis-seated accessible filter and keep cooling off while water or ice is present. If ice remains, airflow is weak, or the leak returns with a clean filter, arrange HVAC service rather than opening the coil section.
Why this matters
Why: Carrier explains that restricted airflow can make the indoor coil freeze; when that ice melts, the resulting water can overwhelm the drain pan. A clean filter does not rule out a blocked line, damaged pan, low refrigerant, or another internal fault.
-
Check 3
Without opening the indoor unit, observe the visible end of the condensate drain line while the system is operating only if there is no active indoor leak or electrical hazard and the owner's instructions allow normal observation. Note whether water exits, the outlet is submerged or blocked by debris, or no water appears while condensate is expected.
Expected result: The outlet may drain normally, drip weakly, remain dry while the indoor unit leaks, discharge into standing water, or be inaccessible because the line is concealed.
Next step: Clear only loose debris that is fully outside the outlet and safe to reach; do not insert anything into the line or pour chemicals into it. Keep the unit off and call an HVAC technician for weak or absent flow, a concealed line, or recurring overflow.
Why this matters
Why: Normal flow makes a completely blocked line less likely but does not prove the pan or connection is sound. No flow with indoor water, weak discharge, or a submerged or obstructed outlet makes restricted drainage, a disconnected line, or poor routing more likely.
-
Check 4
With the unit off, inspect only the drain-pan edge, drain-line joint, and wall area that are visible without removing a cover. Look for a crack, corrosion, standing water, a loose-looking connection, a unit that appears to lean, or water marks below one side.
Expected result: The visible pan edge may be intact and dry, visibly cracked or corroded, full of water, or impossible to see because the pan is inside the housing.
Next step: Do not seal, bend, level, or replace the pan based on appearance alone. Keep cooling off if the pan is damaged, full, or concealed behind the cover, and provide the observation to a qualified HVAC technician.
Why this matters
Why: A visible damaged pan can allow water directly onto the wall or floor; standing water or a one-sided trail can also fit a drainage or leveling problem. An intact visible edge cannot clear a concealed crack or connection.
-
Check 5
Check for companion symptoms from outside the equipment: reduced airflow, ice or frost on accessible surfaces, musty odor, unusual noise, a safety shutdown, poor cooling, or water damage that increases during longer cooling cycles. Do not touch coils, fans, wiring, or refrigerant lines to perform this check.
Expected result: The leak may be isolated, or it may occur with ice, weak airflow, reduced cooling, a musty smell, a stopped unit, or an unusual sound.
Next step: Keep cooling off and schedule HVAC service for ice, poor cooling, recurring shutdown, unusual noise, or a musty indoor leak. Do not diagnose refrigerant charge or electrical components yourself.
Why this matters
Why: Ice with restricted airflow can create meltwater, while weak cooling with ice or a hissing sound can point to a refrigerant or coil issue. A safety shutdown can occur when a pan fills, and odor or water damage raises the need for prompt service.
-
Check 6
After the water is contained and the accessible filter or exterior obstruction has been corrected, record whether the leak stops when cooling remains off and whether it returns on the next normal cooling call. Do not repeatedly cycle a leaking system to test it.
Expected result: The leak may stop with the system off, return promptly when cooling resumes, continue while off, or reappear only after the unit has run long enough to produce condensate.
Next step: Stop using the mini split until the source is confirmed if the leak returns, the pan fills, or water reaches the wall or electrical area. Share the timing and photos with a qualified HVAC technician.
Why this matters
Why: A repeat during cooling keeps condensate drainage, pan integrity, coil icing, or installation at the top of the service path. A leak that continues while off suggests another water source or stored water and should not be dismissed as normal condensation.
Use your observations
Decision map
Find the observation that best matches what you see, then follow the next safe action.
-
PATH 01Next step
What you see
Water appears at the indoor head during cooling, the visible drain outlet has weak or no discharge, or the pan fills.
Do this next
Treat restricted condensate drainage or a disconnected path as more likely than harmless condensation. Turn cooling off, contain the water, and arrange qualified HVAC service; do not probe or pressure-flush the line yourself.
-
PATH 02Next step
What you see
The leak is accompanied by a dirty filter, weak airflow, or ice that melts when the unit stops.
Do this next
Clean only the user-accessible filter as the model manual allows and keep the system off while ice or water remains. If the leak or icing returns, request service for airflow, coil, drain, or refrigerant diagnosis.
-
PATH 03Next step
What you see
A visible pan edge is cracked or corroded, water escapes from one side, or the indoor unit appears tilted.
Do this next
Keep cooling off and have a technician inspect the pan, support, drain connection, and installation level. A pan replacement or reinstallation is conditional on that inspection, not on the leak location alone.
-
PATH 04Next step
What you see
The filter is clean and the drain outlet appears open, but water still leaks from the indoor unit or the line is concealed.
Do this next
Do not open the indoor housing. A concealed pan, connection, slope problem, coil freeze, or low-refrigerant condition remains possible, so stop cooling and arrange qualified HVAC diagnosis.
-
PATH 05Next step
What you see
The leak continues when the system is off, the source is not clearly condensate, or water is damaging the wall, ceiling, or floor.
Do this next
Leave the system off, protect the area without contacting electrical equipment, and obtain prompt HVAC service. Investigate any separate plumbing, rain, or wall source only from a safe, dry position.
-
PATH 06Next step
What you see
Smoke, burning odor, sparks, abnormal heat, exposed wiring, a tripped breaker, or water near electrical parts is present.
Do this next
Do not touch the unit or attempt a reset. Keep clear, use the normal control only if it can be done without approaching the hazard, and seek urgent qualified HVAC or electrical help.
Helpful context
Understand the symptom
A drain-pan leak is a water-management problem, but the pan may only be the place where another problem becomes visible. In cooling mode, the indoor coil removes moisture from room air, the condensate collects in the pan, and the drain line carries it away. Water at the bottom of the wall-mounted unit can therefore result from a blocked line, a pan that is cracked or tilted, ice melting after restricted airflow, or a drainage path affected by installation. Begin with where and when the water appears, then use the least invasive checks first.
Keep the checks external. Turn cooling off at the controller before handling an accessible filter, put a container or towels under the drip, and keep water away from receptacles, disconnects, and wiring. You can inspect a filter and look at a drain outlet if they are designed for normal owner access. The indoor cover, pan, coil, fan, wiring, refrigerant circuit, and concealed hose connections are not ordinary homeowner repair points.
A clean filter can remove one common airflow cause, but it cannot prove that the drain pan is sound. If the coil is visibly frozen, airflow is weak, the drain outlet stays dry while water appears indoors, or the pan is hidden behind the cabinet, stop after the safe observations and request service. Do not use a wire, screwdriver, compressed air, chemical cleaner, or improvised tool to force a blockage through the drain.
After the immediate leak is contained, record photos of the first wet point, the indoor unit, the visible drain outlet, filter condition, any ice, and the system's operating mode. This helps a technician distinguish a pan overflow from a cracked pan, disconnected or poorly sloped drain, coil-freeze event, or refrigerant issue. If water is near electrical equipment, there is smoke or a burning odor, or the unit makes an abnormal electrical sound, leave the equipment off and seek urgent qualified help.
Safety boundary
Stop conditions
- Do not remove the indoor cover or pan, reach near the fan or coil, handle refrigerant, test wiring, or work on a live electrical circuit.
- Do not insert a wire, screwdriver, snake, or other tool into the condensate line, and do not use improvised chemicals or pressure to force a hidden blockage through the system.
- Keep cooling off when water is actively leaking, the pan is filling, ice is present, airflow is weak, or water is reaching the wall, floor, receptacle, disconnect, or wiring.
- Stop immediately and seek urgent qualified help for smoke, burning odor, sparks, abnormal heat, a damaged cord, repeated breaker trips, or water near electrical parts.
- Do not choose a drain pan, hose, refrigerant, coil, pump, or control part from the symptom alone; confirm the complete Carrier model and diagnosis first.
Only after diagnosis
Potential parts
- mini split condensate drain pan
Consider this only if a qualified technician confirms the pan is cracked, corroded, warped, or otherwise unable to retain condensate after the drain path and installation are checked.
Confirm the complete Carrier model and approved fit information; pan shape and mounting vary across indoor units. - mini split condensate drain hose or connection
Consider this only if service confirms a disconnected, damaged, or incorrectly routed drain hose or connection is causing water to back up or escape.
Verify the complete model, routing requirements, connection size, and installation instructions before selecting a replacement. - mini split air filter
Consider this only if the user-accessible filter is damaged or cannot be cleaned and the model documentation identifies it as replaceable; a filter does not repair a pan or drain fault.
Match the complete Carrier model and filter dimensions or manufacturer fit information before ordering. - mini split defrost or refrigerant-related component
Consider an internal component only after qualified service confirms recurring coil icing or a control, sensor, or refrigerant-system cause rather than a dirty filter or blocked drain.
Do not select an internal or refrigerant-system part from a leak symptom; use the complete model and technician diagnosis.
When checks do not resolve it
Need a professional?
Call a qualified HVAC technician when the Carrier mini split pan is visibly damaged, water returns after an accessible filter check, the drain outlet has weak or no flow, the line or pan is concealed, the unit is tilted, ice or poor cooling is present, or water is damaging the wall or floor. Seek urgent help for smoke, burning odor, sparks, abnormal heat, repeated breaker trips, exposed wiring, or water near electrical parts.
Safety scope: Do not open the indoor housing, remove the drain pan, probe or pressure-flush a concealed line, test electrical parts, touch the coil or fan, handle refrigerant, or operate the system while water is near electrical equipment.
Have this ready
- Provide the complete Carrier model, first wet point, operating mode and timing, photos of the indoor unit and visible outlet, filter condition, airflow, ice, pan-edge or hose observations, water-damage extent, and any safety shutdown or unusual sound.
Common questions
FAQ
Why is my Carrier mini split drain pan leaking water?
The condensate line may be blocked, the filter may have restricted airflow enough to freeze the indoor coil, or the pan may be cracked, corroded, tilted, or poorly supported. A poor slope or low-refrigerant condition can also produce overflow or meltwater and needs qualified diagnosis.
Can a dirty filter make a mini split drain pan overflow?
Yes. Carrier explains that restricted airflow can freeze the indoor coil; when the ice melts, the added water can overwhelm the pan. Clean only a user-accessible filter as the model instructions allow, and call for service if icing, weak airflow, or leaking continues.
Should I unclog my mini split drain line myself?
Do not probe a concealed line or use improvised pressure or chemicals. You may observe an accessible outlet from a safe position, but recurring indoor water, weak or absent discharge, or a concealed drain path should be handled by a qualified HVAC technician to avoid water and equipment damage.
How do I know whether the pan itself is cracked?
A crack, corrosion, standing water, or a one-sided trail may be visible at an accessible pan edge, but most pans and connections are partly concealed. Do not remove the indoor cover to confirm it. Have a technician inspect the pan, drain connection, slope, and support together.
Why does my mini split leak only when cooling?
Cooling creates condensate. If the drain path is restricted, the pan is damaged, or a coil freezes and then melts, water may appear only after the system has produced enough moisture. A leak that returns with each cooling call is a reason to stop cooling and arrange service.
When should I stop using the Carrier mini split and call an HVAC technician?
Stop cooling for active indoor leakage, a filling pan, weak or absent drain flow, ice, poor airflow, poor cooling, a damaged or concealed pan, or water damage. Seek urgent help for smoke, burning odor, sparks, abnormal heat, repeated breaker trips, exposed wiring, or water near electrical parts.
Read the exact guide
Official sources
- Mini Split Leaking Water: Diagnosis and RepairCarrier · Carrier residential ductless mini-split water leaks; model-specific instructions may differ
- How to Clean AC Drain LineCarrier · Carrier residential air-conditioning condensate drainage guidance used for the same condensate-path symptoms in a ductless indoor unit
- Ductless Mini Split MaintenanceCarrier · Carrier residential ductless mini-split maintenance guidance; use the owner's manual for the exact model
Community feedback
Share a repair observation
Share a plain-text repair observation. Accepted observations are published automatically; this page may take a moment to update.