
On this page
Start here
Quick answer
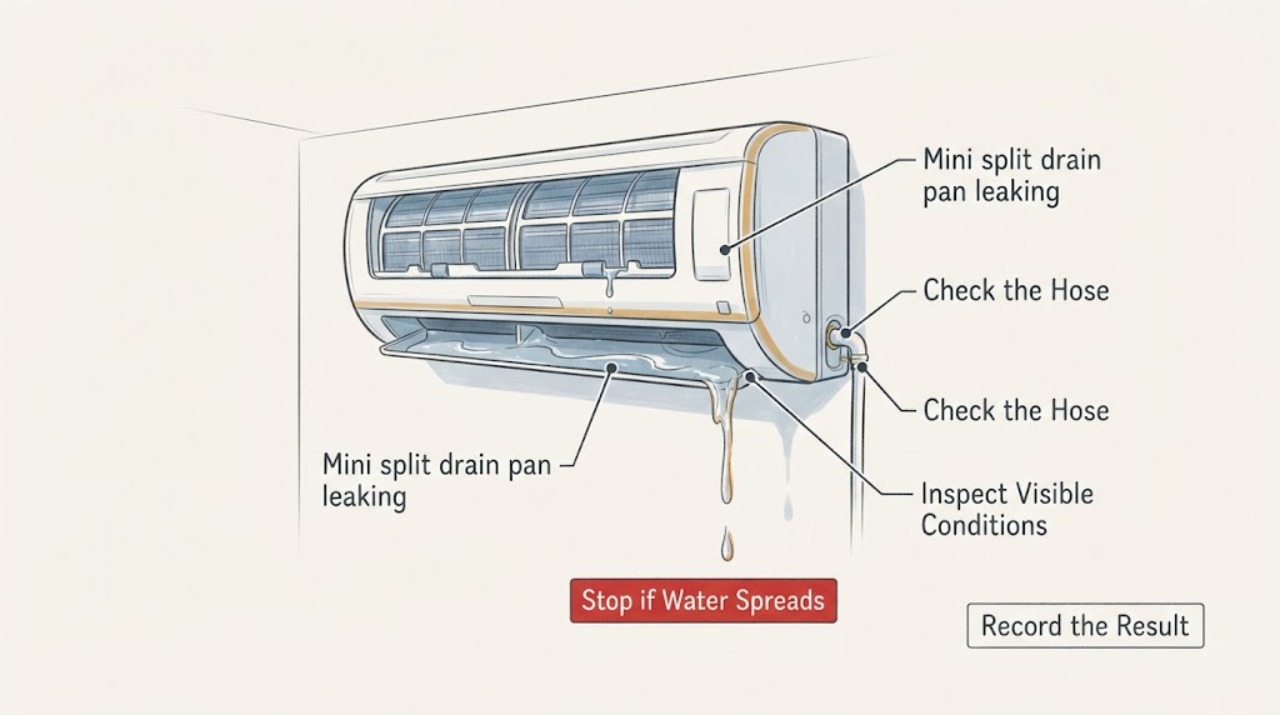
For a mini-split drain pan leaking water, first locate the first wet point from the floor and stop operation if water can reach electrical parts. Check whether the pan visibly holds or overflows water, whether the condensate hose is kinked or blocked-looking, whether ice or weak airflow is creating meltwater, and whether a separate condensate pump alarms or fails to discharge. Also note whether water appears during heating, rain, plumbing use, or while the unit is off, because it may not be condensate. Do not open the cabinet, touch refrigerant or wiring, flush or suction the drain, climb, or replace the pan by guesswork; have qualified HVAC service confirm the cause and model-compatible repair.
Before you begin
Safety first
- Request diagnosis of the visible drain pan, pan outlet and slope, condensate hose, airflow and ice clues, pump and discharge route, mounting, and non-condensate sources. The qualified HVAC provider determines whether drain correction, pan replacement, pump service, sealed-system work, or coordination with plumbing, roofing, or water-damage service is appropriate.
Work through in order
Diagnostic checks
Use only checks that match the exact appliance or system and its official guide.
-
Check 1
From the floor or another stable position, locate where water leaves the indoor mini-split: the lower drain-pan edge, wall penetration, drain hose, or nearby surface. If the leak reaches wiring or other electrical parts, stop the system with the normal control only if that can be done without contact and keep clear.
Expected result: Record the indoor-unit location, first wet point, amount and timing of water, operating mode, and whether the wall, floor, cord, or electrical enclosure is affected.
Next step: Take wide and close photos, note whether the water is dripping, overflowing, or staining, and leave the unit off when water is near electrical components or the source is not clear.
Stop if: Do not remove the cabinet, reach into the unit, touch wet wiring, climb to a high-mounted unit, or continue operation when water can contact electrical parts.
Why this matters
Why: Water directly below the pan or at its visible lip keeps the pan and its outlet in the lead; water that appears elsewhere or reaches electrical parts needs prompt HVAC or electrical assessment rather than a pan repair guess.
-
Check 2
Using only the normal user-accessible view or filter access described by the unit's manual, look for standing water at the visible drain-pan edge, a cracked or corroded-looking pan, a displaced outlet, or a unit that appears tilted. Do not remove the indoor-unit housing.
Expected result: Record whether water stays in the pan, spills over the front or side, appears at a seam, or begins at the drain connection, and whether the leak is limited to cooling operation.
Next step: Photograph the pan edge and mounting relationship without wiping inside the assembly and ask an HVAC professional to verify pan integrity, slope, outlet connection, and model-specific replacement needs.
Stop if: Stop if a cover resists, the unit moves, water is near electrical components, the pan is inaccessible, or inspection would require a ladder, tools, or contact with condensate residue.
Why this matters
Why: A pan that holds water but does not deliver it to the drain, or a visible crack, corrosion, or position problem, can explain leakage even when the drain hose is open; concealed pan damage or mounting error requires a technician.
-
Check 3
From a safe ground-level position, follow the visible condensate drain hose to its outlet and look for a kink, sag, crushed section, disconnected joint, blocked-looking end, or missing downward path. Do not insert anything, flush chemicals, apply suction, or disconnect the hose.
Expected result: Record whether condensate is visible at the intended outlet during an otherwise safe, normal cooling observation, whether it backs up at a joint, and whether the leak starts after the unit runs.
Next step: Document the hose route and outlet condition and request professional drain inspection or cleaning, especially if water appears at the indoor unit instead of exiting at the normal outlet.
Stop if: Do not run a leaking system to create water, use pressurized air, pour cleaner or vinegar into the drain, open a wall, or work on a high or concealed line.
Why this matters
Why: A restricted or poorly routed drain can make the pan back up and overflow even when the pan itself is intact; a clear-looking exterior line does not rule out an internal restriction or a hidden connection problem.
-
Check 4
Without opening the coil compartment, note visible frost or ice, weak airflow, a dirty user-accessible filter, or a leak that appears when ice melts after shutdown. Use only the normal filter access and cleaning method in the manual when no water or electrical hazard is present.
Expected result: Record whether frost is visible, airflow is reduced, the filter is visibly loaded, and whether water starts during operation or only after ice melts.
Next step: Stop cooling if ice or water is present, preserve photos of the frost and filter condition, and have a qualified technician assess airflow, coil condition, installation, and sealed-system concerns.
Stop if: Do not scrape ice, use heat, open the coil or refrigerant circuit, adjust refrigerant, or continue operating to see whether the leak worsens.
Why this matters
Why: Ice or restricted airflow can create more meltwater than the drain pan can carry, so a pan overflow may be a downstream symptom rather than a cracked pan; persistent ice requires HVAC diagnosis, including checks the user must not perform.
-
Check 5
If a separate condensate pump or high-level alarm is visible without opening anything, observe its alarm, sound, discharge, and tubing from the floor. Do not lift the reservoir, move wiring, reset a flooded control, or reach into the pump.
Expected result: Record whether the pump is silent, running, alarming, leaking at a joint, or discharging normally, and whether the indoor leak coincides with the pump event.
Next step: Record the pump model or label only if readable from a safe position and arrange qualified HVAC service to test the pump, float, power, discharge height, and pan connection.
Stop if: Stop for standing water around the pump, exposed wiring, a high-mounted reservoir, unusual heat or odor, or any need to open, rewire, or bypass the pump.
Why this matters
Why: An alarm, silent pump, absent discharge, or water at the reservoir can point to pump or lift failure even when the drain pan is sound; a pump that discharges does not exclude a blocked pan outlet or hose.
-
Check 6
Compare the timing and location with operating mode and other plausible sources: cooling versus heating, rain or exterior water, a nearby pipe, line-set insulation, wall stain, or a spill. Observe only from accessible surfaces and do not assume every clear drip is condensate.
Expected result: Record mode, weather, nearby plumbing use, color or odor seen without touching, the exact first wet surface, and whether the leak continues while the mini-split is off.
Next step: Add the timeline and source comparison to the service request so the HVAC provider can coordinate with a plumber or building professional when the water does not originate in the mini-split drain path.
Stop if: Stop if tracing requires opening a wall or ceiling, touching insulation or refrigerant lines, climbing, testing live electrical parts, or contacting unknown water.
Why this matters
Why: Water during cooling near the pan supports condensate management; water during heating, rain, or an unrelated plumbing event, or water that is cold, dirty, or far from the pan, keeps non-condensate sources in the diagnosis.
Use your observations
Decision map
Find the observation that best matches what you see, then follow the next safe action.
-
PATH 01Next step
What you see
Water is near wiring or other electrical parts, the indoor unit is still wet, or the source is rapidly worsening.
Do this next
Stop operation without touching the wet equipment, keep people clear, and arrange prompt HVAC and electrical assessment. Do not remove the cover or try to dry the electrical compartment.
-
PATH 02Next step
What you see
Water is visible at the pan edge or outlet, the pan holds water, and the drain hose has a kink, sag, blocked-looking end, or disconnected joint.
Do this next
Treat the pan overflow as a drain-path problem until inspected. Leave the system off if it leaks, do not flush or suction the line yourself, and request qualified drain inspection and correction.
-
PATH 03Next step
What you see
The visible pan is cracked, corroded, displaced, or tilted, while the drain route appears unobstructed.
Do this next
Ask a qualified HVAC technician to confirm the pan and mounting diagnosis and match a model-specific replacement or repair. Do not patch, straighten, or remove the pan as a user repair.
-
PATH 04Next step
What you see
Frost or ice, weak airflow, or a dirty accessible filter accompanies water that appears after shutdown or thawing.
Do this next
Stop cooling and document the frost and filter condition. A technician should check airflow, coil, installation, and sealed-system causes; do not scrape ice or handle refrigerant.
-
PATH 05Next step
What you see
A condensate pump has an alarm, does not run or discharge, leaks at its reservoir, or fails when the mini-split produces condensate.
Do this next
Leave the unit off and request qualified HVAC service to assess the pump, float, power, discharge route, and pan connection. Do not reset, rewire, bypass, or open a flooded pump.
-
PATH 06Next step
What you see
Water appears during heating, rain, or plumbing use, continues while the mini-split is off, or starts at a wall, pipe, line-set, or ceiling rather than the pan.
Do this next
Do not force the diagnosis into condensate or replace the pan. Photograph the first wet point and arrange the appropriate HVAC, plumbing, roofing, or water-damage evaluation for the non-condensate source.
-
PATH 07Next step
What you see
The unit is high, concealed, inaccessible, or the pan, drain, pump, or wiring cannot be observed from the floor.
Do this next
Stay off ladders and avoid disassembly. Provide safe photos and the leak timeline to a qualified HVAC professional who can access and test the system safely.
Helpful context
Understand the symptom
Start at the pan without assuming it is the cause
A leaking mini-split drain pan is a location-specific question, not proof that the pan has failed. First find the visible first wet point and note whether water appears during cooling, after shutdown, at the drain hose, or somewhere away from the indoor unit. If water can reach wiring or electrical parts, stop operation without touching the wet equipment and arrange qualified help.
Separate pan, drain, ice, and pump clues
From the floor, look for water retained at the pan edge, a visible crack or tilt, and the route of the condensate hose. A restricted hose can overflow an intact pan. Frost, weak airflow, or a filter problem can create meltwater that overwhelms drainage, while a pump alarm or absent discharge points to a lift problem. These are observation clues only; do not open the unit, flush the drain, or touch refrigerant or electrical components.
Keep non-condensate sources in the diagnosis
Water during heating, rain, plumbing use, or while the mini-split is off may not be condensate at all. Keep a timeline and photograph the first wet surface so an HVAC provider can coordinate with a plumber, roofer, or water-damage professional when needed. A pan replacement is conditional on confirming pan damage and model compatibility after safe access.
Only after diagnosis
Potential parts
- mini split drain hose
Consider this only after a qualified technician confirms the hose is the failed or incompatible section and verifies routing, slope, connection, and model fit; a replacement hose does not correct a blocked pan, pump, ice, or non-condensate source.
Match the exact system, hose dimensions, fittings, insulation, and installation instructions; do not disconnect a concealed or high line as a user repair. - condensate drain treatment
Consider this only if the manufacturer and HVAC professional approve the product for the exact drain and identify maintenance treatment as appropriate; it cannot clear a confirmed blockage or repair a cracked pan.
Follow the product label and system guidance exactly, never add unapproved chemicals to the pan, and keep all treatment work within qualified service boundaries. - mini split drain pan
Consider this only after a technician confirms a cracked, corroded, displaced, or model-specific pan and verifies the replacement is compatible; pan replacement is not a substitute for correcting drainage, ice, pump, or installation causes.
Match the exact indoor-unit model, pan geometry, outlet, mounting, insulation, and service instructions; installation requires qualified access and must not involve refrigerant or electrical work by the reader.
When checks do not resolve it
Need a professional?
Arrange prompt HVAC service for any persistent leak, visible pan damage, drain restriction, ice, pump alarm or failed discharge, water near electrical parts, high or concealed access, or a source that may be plumbing, rain, or another non-condensate path. Do not open the unit, handle refrigerant or wiring, or run a leaking system to test it.
Safety scope: Request diagnosis of the visible drain pan, pan outlet and slope, condensate hose, airflow and ice clues, pump and discharge route, mounting, and non-condensate sources. The qualified HVAC provider determines whether drain correction, pan replacement, pump service, sealed-system work, or coordination with plumbing, roofing, or water-damage service is appropriate.
Have this ready
- Photos of the indoor unit, first wet point, pan edge, hose route, pump or alarm, and affected wall or floor from a safe position
- Whether the water appears during cooling, after shutdown, heating, rain, plumbing use, or while the mini-split is off
- Visible pan overflow, crack or corrosion, hose kink or sag, ice, weak airflow, filter condition, and pump discharge observations
- Whether water is near wiring, electrical parts, a high or concealed unit, or any contaminated or secondary damage
- Model and installation details only if readable without opening, moving, climbing, or dismantling anything
Common questions
FAQ
What is the first safe check for a mini-split drain-pan leak?
From the floor, photograph the first wet point and note whether water is retained at the pan edge, appears at the hose, follows cooling or shutdown, or reaches electrical parts. Do not remove the housing or touch wet wiring.
Can a blocked drain cause the pan to leak?
Yes. A kinked or restricted condensate hose can make an intact pan overflow, and a pan can also crack, tilt, or have a displaced outlet. A technician should confirm which condition is present before replacement.
Why is there ice or weak airflow with the water leak?
Ice, weak airflow, or a dirty filter can create meltwater that overwhelms the pan. Use only normal filter access if the manual permits and no hazard is present; do not scrape ice or investigate refrigerant or coil internals.
How do I recognize a condensate-pump problem?
A pump alarm, silent pump, absent discharge, or wet reservoir can indicate a pump or lift problem. Do not open, rewire, reset, or bypass a flooded pump; arrange qualified HVAC service.
When should I call an HVAC professional?
Call promptly for water near electrical parts, a persistent or worsening leak, visible pan damage, ice, pump alarms, concealed or high access, or water that appears during heating, rain, plumbing use, or while the unit is off.
Read the exact guide
Official sources
- Should You Have the Air Ducts in Your Home Cleaned?U.S. Environmental Protection Agency · Official EPA HVAC moisture guidance supporting proper condensate-pan drainage, prompt attention to standing water, and qualified handling of wet or contaminated HVAC materials; it does not authorize mini-split disassembly.
- Mini Split Leaking Water: Diagnosis and RepairCarrier · Official Carrier ductless mini-split guidance used for the relationship among condensate, drain pans, drain-line restriction, airflow or ice, installation slope, and professional pan replacement; other manufacturers and models may differ.
Community feedback
Share a repair observation
Share a plain-text repair observation. Accepted observations are published automatically; this page may take a moment to update.