
On this page
Start here
Quick answer
A Carrier mini split that leaks from the indoor wall or ceiling unit most often has a restricted condensate drain, a dirty filter that has reduced airflow and allowed the indoor coil to ice, or a damaged or incorrectly tilted drain pan. Turn the system off, contain the water, and identify whether it is coming from the indoor unit, the visible drain connection, or only the outdoor unit. Clean the user-removable filter and inspect visible drain and airflow conditions only as the model manual allows. Water near electrical parts, an indoor leak that returns, ice, weak airflow, poor cooling, a hissing sound, wall damage, or a pan or installation problem calls for qualified HVAC service; do not open the refrigerant circuit or internal covers.
Before you begin
Safety first
- This article covers shutting down, containing water, locating the leak, cleaning a user-removable filter, checking visible drain routing, observing ice and airflow, and one safe supervised retest. A qualified technician must handle internal covers, pan or pump access, mounting and drain correction, electrical diagnosis, coil and fan service, and refrigerant leak or charge work.
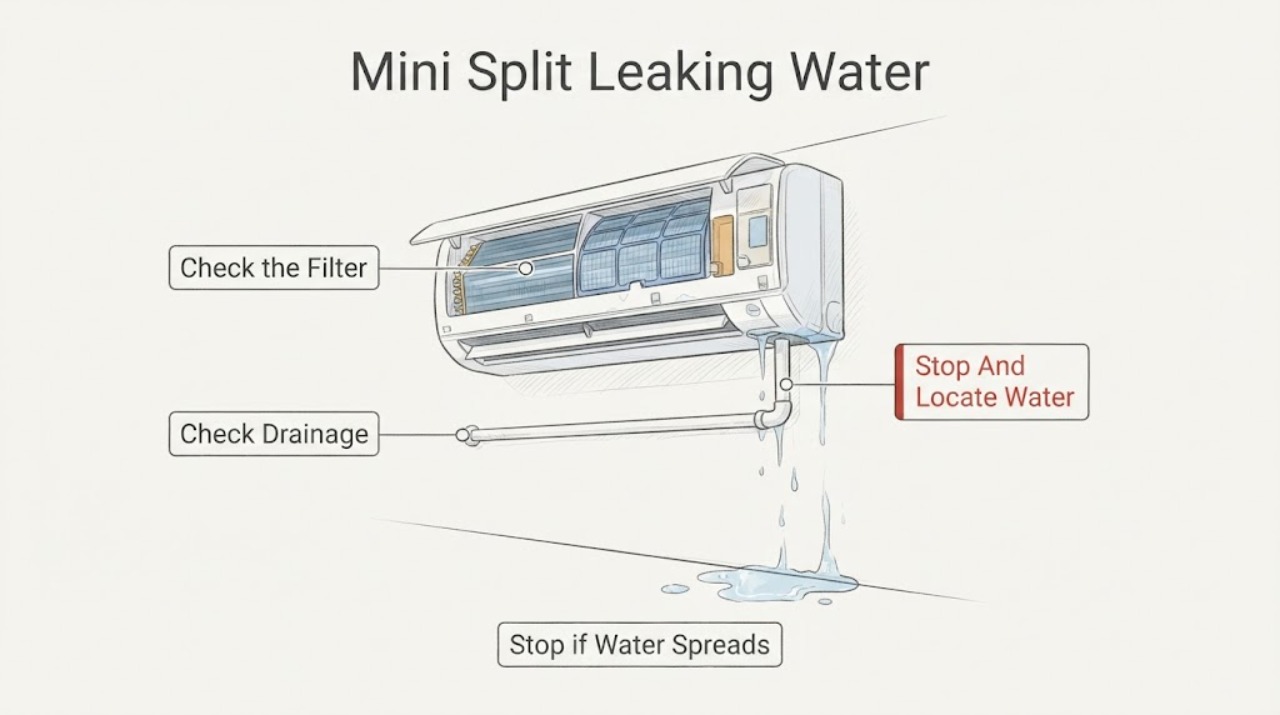
Work through in order
Diagnostic checks
Use only checks that match the exact appliance or system and its official guide.
-
Check 1
Turn the mini split off with its normal controller, keep people away from pooled water, and place a container or towel below the drip. From outside the cabinet, identify whether water is coming from the indoor head, running down the wall, appearing at a drain connection, or coming only from the outdoor unit.
Expected result: The indoor unit is dripping or wetting the wall; water is only at the outdoor unit during heating or defrost; the drain outlet is dry while the indoor pan area is wet; or water is near a receptacle, disconnect, wiring, or other electrical part.
Next step: Leave the system off while the indoor leak or electrical exposure is present. If the water is only a normal outdoor defrost discharge, keep the outlet area clear and continue only if there is no indoor leak; otherwise proceed to the filter and visible drain checks.
Stop if: Stop immediately for water near electrical parts, smoke, burning odor, arcing, a damaged cord or disconnect, ceiling damage, or water that cannot be contained safely.
Why this matters
Why: An indoor leak points first to condensate collection or drainage, while outdoor water during a heating defrost can be normal for a heat pump. A dry drain outlet with indoor water makes a blocked line, pan, connection, or installation slope more likely. Water near electrical equipment changes this from routine troubleshooting to a safety stop.
-
Check 2
With the system off, remove only the user-accessible indoor filter described by the Carrier owner's manual. Inspect it for dust or matting, then vacuum or wash it by the manual's method and let a washed filter dry fully before reinstalling it.
Expected result: The filter is visibly dirty or airflow was weak; the filter is clean and airflow appears normal; or the filter cannot be removed without tools or opening a fixed cover.
Next step: Reinstall the completely dry filter and do not operate without it. Do not restart yet if ice is present, water is still active, or the leak is near electrical parts; continue with visible checks only after the area is safe.
Stop if: Do not remove the indoor coil cover, fan guard, drain pan, or electrical panel, and do not use a wet filter or force a filter that does not fit.
Why this matters
Why: A restricted filter can reduce airflow, allow the indoor coil to freeze, and create meltwater that overwhelms the drain pan. A clean filter makes that cause less likely but does not clear a blocked drain or rule out a coil, refrigerant, pan, or installation fault. A filter that is not user-accessible is a service boundary.
-
Check 3
Trace the visible condensate hose or pipe from the indoor unit as far as it is safely accessible. Look for a sharp kink, crushed section, disconnected joint, standing water, debris at the outlet, or an outlet that has no path to drain. Do not open the cabinet or use pressure, wire, or a chemical treatment unless the exact manual explicitly permits that method.
Expected result: The hose is kinked, disconnected, visibly blocked, or has no downward route; the outlet is clear and water drains normally; or the line is hidden or inaccessible.
Next step: Correct only a plainly visible, loose exterior obstruction or restore a connection exactly as the manual directs, then keep the unit off until water has stopped. Arrange service for a hidden blockage, recurring backup, pump-equipped system, or any repair requiring cabinet access.
Stop if: Do not force a hose, drill or push a wire into the drain, pour improvised chemicals, use compressed air or high pressure, or disconnect a concealed line.
Why this matters
Why: A restriction or poor route can back up condensate and overflow the indoor pan. A clear visible route does not rule out a blockage inside the line, a failed condensate pump, a cracked pan, or a poor connection behind the cabinet. Hidden drainage requires service rather than invasive access.
-
Check 4
Without removing covers, inspect the accessible air outlet and the visible front of the indoor unit for frost or ice. Note weak airflow, poor cooling, a hissing sound, or ice on the indoor coil or refrigerant line; do not touch the coil or scrape ice.
Expected result: Ice or frost is present, airflow is weak, cooling has declined, a hissing sound is heard, or the unit has no ice and airflow is normal.
Next step: Leave the system off and allow any ice to melt without a heat gun, flame, or sharp tool. If ice returns, cooling remains poor, or hissing accompanies the leak, arrange qualified HVAC diagnosis; refrigerant work is not a homeowner repair.
Stop if: Do not open the refrigerant circuit, attach gauges, bend line-set tubing, chip ice, apply heat, or operate continuously while the coil is frozen or the indoor leak continues.
Why this matters
Why: Ice with restricted airflow can follow a dirty filter, while persistent ice or ice with poor cooling or hissing can indicate low refrigerant or another mechanical fault. No ice and normal airflow make an airflow-freeze pattern less likely, but they do not clear a drain or pan problem.
-
Check 5
From outside the cabinet, compare the indoor unit's apparent mounting with the installation instructions and look for a unit tilted toward the room, a visible drain connection that has shifted, staining below one corner, or a cracked or corroded pan only if the pan is already visible without removing a cover.
Expected result: The unit appears tilted, the drain route lacks the required slope, staining is concentrated at one corner, a visible pan or connection is damaged, or the installation and visible surfaces look sound.
Next step: Do not shim, remount, seal, or replace a pan yourself. Photograph the leak and installation, keep the system off, and arrange a qualified ductless technician for a tilt, slope, pan, or hidden-connection finding.
Stop if: Do not remove the wall unit, loosen mounting hardware, drill into the wall, open the cabinet, or work near line-set, electrical, or condensate connections.
Why this matters
Why: Carrier notes that an unlevel indoor unit or an incorrectly sloped drain can let water pool and overflow; a damaged pan can leak directly onto a wall or floor. A sound visible installation does not rule out a concealed pan, connection, or drain fault.
-
Check 6
After the filter is dry and reinstalled and any plainly visible exterior drain obstruction has been addressed according to the manual, perform at most one brief supervised cooling retest only when there is no ice, active indoor water, electrical exposure, or wall damage. Observe the indoor unit and drain outlet from a safe position.
Expected result: No indoor water returns and the drain behaves normally; the leak returns quickly; water appears only after cooling starts; the drain remains dry; or cooling, airflow, ice, odor, or electrical symptoms are abnormal.
Next step: Stop the retest at the first sign of renewed indoor water. Keep the system off and give the technician the leak location, mode, filter condition, drain observations, ice or airflow findings, installation concerns, and any photos.
Stop if: Do not repeat cycling to reproduce the leak or continue operation for comfort when water is reaching the wall, ceiling, floor, or electrical area.
Why this matters
Why: A stable dry indoor unit after a filter or visible drain correction supports that accessible cause, although recurrence still requires service. A rapid return, a dry outlet with indoor water, or a leak linked to cooling points to a concealed drainage, pan, pump, slope, coil, or refrigeration issue that the external checks cannot identify.
Use your observations
Decision map
Find the observation that best matches what you see, then follow the next safe action.
-
PATH 01Next step
What you see
Water is observed only beneath the outdoor heat-pump unit during heating or a defrost event, with no water from the indoor head or wall.
Do this next
Keep the outdoor discharge path clear and observe from a safe distance. Arrange service if water enters the building, the unit cannot drain, ice becomes unsafe, or the amount and timing do not fit the model manual.
Why this path and its safety boundary
Why it matters: Outdoor defrost discharge is more likely than an indoor condensate leak; ENERGY STAR warns that this water can form icy patches around the outdoor unit.
-
PATH 02Next step
What you see
The indoor filter is heavily dirty and there is weak airflow or frost, with no electrical hazard.
Do this next
Clean and fully dry the user-removable filter, leave the system off while ice melts naturally, and perform no more than one safe retest. If ice or water returns, call a qualified HVAC technician for coil, airflow, and refrigerant diagnosis.
Why this path and its safety boundary
Why it matters: Restricted airflow with icing makes the filter-to-coil-freeze-to-meltwater path more likely than a leak caused only by the room-facing cabinet.
-
PATH 03Next step
What you see
Water is coming from the indoor unit, the visible drain outlet is dry or backed up, and the filter is clean or the leak persists after filter cleaning.
Do this next
Keep the system off and correct only a plainly visible exterior issue permitted by the manual. Have a technician clear and test the full condensate path and inspect the pan or pump; do not use pressure, wire, or chemicals as an improvised fix.
Why this path and its safety boundary
Why it matters: A restricted hose, disconnected joint, condensate pump, pan connection, or concealed blockage is more likely than the filter alone.
-
PATH 04Next step
What you see
The unit appears tilted, staining is concentrated at one corner, or a visible pan or drain connection is cracked, corroded, or shifted.
Do this next
Do not shim, reseal, remount, or remove the indoor unit. Stop operation and arrange qualified ductless service for mounting, pan, and connection correction, with wall or ceiling drying assessed if needed.
Why this path and its safety boundary
Why it matters: An installation slope or pan and connection fault is more likely, and water can bypass the intended drain even when the outlet itself is open.
-
PATH 05Safety boundary
What you see
Ice returns, airflow and cooling are poor, or hissing accompanies the leak after the filter is clean and the visible drain route is reasonable.
Do this next
Keep the system off and arrange qualified HVAC service for airflow, coil, refrigerant, electrical, and leak diagnosis. Do not attach gauges, add refrigerant, or order a sealed-system part from symptoms alone.
Why this path and its safety boundary
Why it matters: Low refrigerant, a coil or fan problem, or another internal fault becomes more likely; the symptom pattern does not identify which component or confirm a refrigerant leak.
Safety stop: Stop immediately for smoke, burning odor, arcing, exposed wiring, or water near electrical parts.
Helpful context
Understand the symptom
First separate outdoor defrost water from an indoor leak
During cooling, moisture from indoor air collects in the indoor unit's drain pan and should leave through the condensate line. Water dripping from the indoor head, running down the wall, or appearing at a ceiling cassette is therefore a drainage or indoor-unit problem until proven otherwise. In heating mode, an outdoor heat-pump unit can release water during defrost; ENERGY STAR notes that outdoor defrost water can form icy patches. That outdoor discharge is different from water entering the room. Shut down and contain any indoor leak before continuing.
Why a small airflow problem can become a water leak
A washable filter that is heavily dirty can restrict air over the indoor evaporator coil. Carrier explains that the coil may freeze and then release more meltwater than the pan or drain can handle when the system stops. A clean filter does not rule out a blocked drain, a dirty coil, low refrigerant, or a mounting and slope problem, so recurring water should not be treated as a filter-only issue.
Keep the diagnosis external and model-specific
The safe homeowner checks are to stop operation, clean a removable filter according to the Carrier manual, look for a visible kink or blockage at the drain outlet, and record ice, airflow, and leak location. A drain pan behind the cabinet, refrigerant charge, coil, electrical compartment, and line-set connections require trained service. Do not keep running the unit to reproduce a leak that is wetting a wall or is close to wiring.
Safety boundary
Stop conditions
- Turn the system off and stop testing for water near electrical parts, smoke, burning odor, arcing, damaged wiring, ceiling damage, or an active leak that cannot be contained safely.
- Do not remove the indoor cabinet, drain pan, fan guard, electrical cover, or wall-mounted unit; do not loosen line-set or condensate connections.
- Do not open the refrigerant circuit, attach gauges, add refrigerant, bend tubing, chip ice, apply a flame or heat gun, or test live voltage.
- Do not force a drain hose, push wire into it, use compressed air or high pressure, or pour an improvised chemical treatment; follow only the exact model manual or leave drain clearing to a technician.
- Do not keep operating a leaking or frozen unit to reproduce the symptom. Use the recorded leak location, mode, filter, drain, ice, airflow, and installation observations when arranging qualified HVAC service.
Only after diagnosis
Potential parts
- Carrier mini split air filter
Consider this category only if the existing user-removable filter is damaged, missing, or no longer fits after the manual-directed cleaning check.
Confirm the exact indoor-unit model, filter dimensions, frame, and washable or replaceable design before ordering. - Mini split condensate drain hose or fitting
Consider this category only when a technician confirms a cracked, disconnected, crushed, or otherwise failed model-specific drain hose or connection after tracing the full drain path.
Confirm the exact indoor-unit model, drain outlet size, routing, slope, connection type, and material before ordering or installing. - Mini split drain pan
Consider this category only if professional inspection confirms a cracked, corroded, warped, or incorrectly seated drain pan is the leak source.
Confirm the exact indoor-unit model and pan orientation; pan access and replacement require a qualified technician. - Condensate pump
Consider this category only when the installation uses a condensate pump and a technician confirms that the pump or float fails to move water after the drain path is checked.
Confirm whether the unit actually has a pump, the exact model and voltage, float arrangement, lift requirement, and approved replacement procedure.
When checks do not resolve it
Need a professional?
Arrange qualified HVAC service for any indoor leak that returns after the filter and safe visible checks, a dry drain outlet with indoor water, a hidden or pump-equipped drain, a tilted unit, a damaged pan or connection, recurring ice, weak airflow, poor cooling, hissing, or a leak that needs cabinet access. Seek prompt help for water near electrical parts, ceiling or wall damage, smoke, burning odor, arcing, exposed wiring, or an uncontrolled leak.
Safety scope: This article covers shutting down, containing water, locating the leak, cleaning a user-removable filter, checking visible drain routing, observing ice and airflow, and one safe supervised retest. A qualified technician must handle internal covers, pan or pump access, mounting and drain correction, electrical diagnosis, coil and fan service, and refrigerant leak or charge work.
Common questions
FAQ
Why is my Carrier mini split leaking water inside?
An indoor leak is commonly related to a blocked condensate drain, a dirty filter that allowed the indoor coil to freeze and melt, a damaged drain pan, or an installation slope or connection problem. Low refrigerant or another internal fault can also cause icing. Turn the system off and arrange service if the leak returns, water is near electrical parts, or ice or poor cooling is present.
Can a dirty filter make a mini split leak?
Yes. Carrier explains that a restricted filter can reduce airflow, freeze the indoor coil, and produce meltwater that overwhelms the drain pan. Clean only the user-removable filter according to the exact manual, let it dry fully, and call for service if ice or water returns.
Is water under the outdoor mini split always a problem?
Not always. A ductless heat pump can release water outdoors during winter defrost. ENERGY STAR notes that this water can form icy patches. Outdoor discharge is different from water dripping from the indoor head or entering the wall; indoor water requires a condensate and equipment diagnosis.
Can I unclog the Carrier mini split drain myself?
You may inspect the visible hose or outlet and address only a plainly visible external issue when the model manual permits it. Do not force a hose, push a wire, use compressed air or high pressure, or pour an improvised chemical into a concealed line. A recurring, hidden, pump-equipped, or cabinet-access blockage should be handled by a qualified technician.
Should I run the mini split while water is leaking?
No. Turn it off when water is coming from the indoor unit, reaching a wall or ceiling, or approaching electrical parts. A single brief supervised retest is reasonable only after the filter is dry, visible conditions are corrected as the manual permits, and there is no ice, active leak, damage, or electrical exposure. Stop immediately if water returns.
Does a leaking mini split need a new drain pan?
Not automatically. A clogged or poorly routed drain, a dirty filter and frozen coil, a pump, or an installation problem can produce the same symptom. A drain pan should be considered only after a technician confirms it is cracked, corroded, warped, or incorrectly seated and verifies the rest of the condensate path.
Read the exact guide
Official sources
- Ductless Heating & CoolingENERGY STAR · Government-backed ENERGY STAR guidance for ductless heat pumps and mini splits; the product manual controls model-specific operation.
- Ductless Mini Split MaintenanceCarrier · Official Carrier residential ductless mini split maintenance guidance; filter and cleaning details remain model-specific.
- Maintenance ChecklistENERGY STAR · Government-backed ENERGY STAR heating and cooling maintenance checklist; a ductless system's manual and qualified technician determine exact service procedures.
- Mini Split Leaking Water: Diagnosis and RepairCarrier · Official Carrier residential ductless mini split troubleshooting page; the exact Carrier model manual controls user-accessible procedures.
Community feedback
Share a repair observation
Share a plain-text repair observation. Accepted observations are published automatically; this page may take a moment to update.