
On this page
Start here
Quick answer
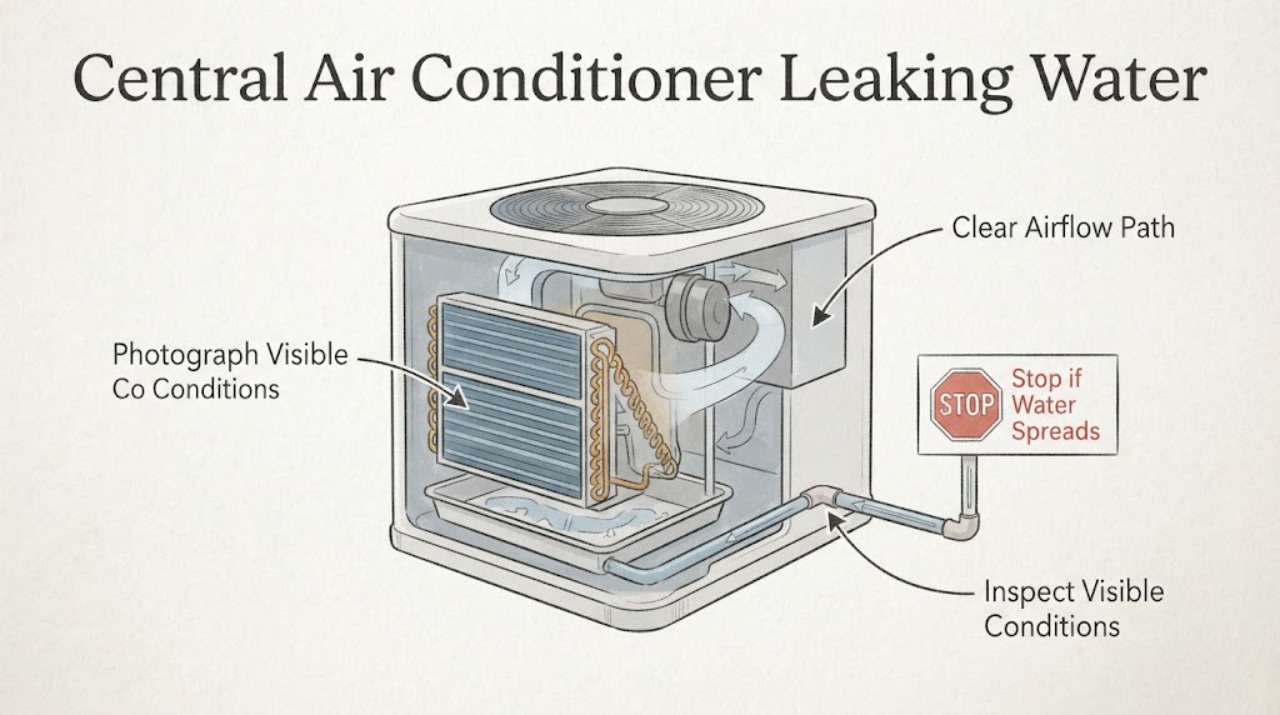
A central air conditioner normally creates condensate while cooling, but that water should collect in an indoor drain pan and leave through the condensate drain. Water escaping onto a floor, ceiling, wall, or around the air handler usually means the drain is blocked, the pan is damaged or overflowing, or a frozen evaporator coil is melting; restricted airflow, a dirty filter, low refrigerant, or a pump problem can be upstream causes. Turn cooling off when water is actively leaking or near electrical equipment, protect nearby contents, and photograph where the water starts rather than repeatedly running the system. From a safe user-accessible position, inspect the filter, registers, visible drain termination, ice, and pan-area symptoms without opening the cabinet or handling refrigerant lines. Do not pour chemicals into an unknown drain, connect gauges, open electrical panels, or keep operating through ice or water damage. Arrange qualified HVAC service when the leak persists, the coil is frozen, the pan or drain is inaccessible, the ceiling or wall is wet, or the cause is not obvious.
Before you begin
Safety first
- Turn cooling off for active leakage, visible ice, standing water, water near electrical equipment, or building damage. Do not open the air-handler cabinet, touch refrigerant lines, connect gauges, add refrigerant, scrape ice, use a heat source, force a drain with wire or compressed air, pour drain chemicals, or bypass a float or safety control.
Work through in order
Diagnostic checks
Use only checks that match the exact appliance or system and its official guide.
-
Check 1
Map the water from a safe, dry position before wiping it away. Photograph the first visible wet point, the floor or ceiling below it, the air-handler cabinet, nearby insulation, and any water trail; record whether the drip occurs only while cooling runs, continues after shutdown, follows a recent filter or service change, or appears after heavy humidity.
Expected result: Water starts at the indoor unit, exits a drain termination, appears below a ceiling-mounted unit, spreads along insulation or drywall, or continues after cooling stops.
Next step: Turn cooling off for active leakage, protect nearby contents, and preserve the photos. Use the drain, airflow/ice, building-damage, or service branch that matches the path; do not run the system again merely to reproduce the drip.
Stop if: Stop immediately if water is near electrical equipment, the ceiling is sagging, insulation is saturated, or the leak is spreading into a wall or floor assembly.
Why this matters
Why: The source location separates a pan or drain problem from a downstream building leak or a thawing frozen coil. Continued dripping after shutdown can reflect stored water or melting ice, while water below a ceiling or in a wall raises the risk of hidden damage.
-
Check 2
Inspect the accessible air filter and supply or return airflow without opening the air-handler cabinet. Note whether the filter is visibly loaded, wet, collapsed, or incorrectly seated, and whether airflow is weak at several registers or only one. Do not reach into the blower or coil area.
Expected result: The filter is dirty or wet; airflow is weak throughout the home; airflow is normal but the leak continues; or only one register has poor airflow.
Next step: If the filter is clearly due for replacement, install only the exact system-specified type and record whether airflow changes; do not operate through active water or ice. Arrange HVAC service for a wet filter, persistent weak airflow, or a leak that continues with normal airflow.
Why this matters
Why: A loaded filter or broad weak airflow can contribute to a frozen evaporator coil and subsequent meltwater. A wet filter can be downstream evidence of the leak. Normal airflow makes a filter-only explanation less likely and keeps a blocked drain, damaged pan, pump, coil, or refrigerant issue in play.
-
Check 3
Look for ice or frost from outside the cabinet: inspect visible refrigerant tubing, the accessible coil-area exterior, and the floor or pan area for ice, frost, or a large amount of meltwater. Do not touch refrigerant lines, scrape ice, use a heat source, or remove an access panel.
Expected result: Ice or frost is visible; ice has recently melted and left a large amount of water; the filter is wet; or no ice is visible.
Next step: Turn cooling off for visible ice or meltwater and arrange qualified HVAC service. Keep the area dry and do not restart the system to force a thaw or to test whether the leak returns.
Stop if: Stop for visible ice, water near electrical components, a saturated filter, or a refrigerant line or cabinet that is damaged or unsafe to approach.
Why this matters
Why: A frozen evaporator can thaw faster than the drain handles the water. Restricted airflow and low refrigerant are possible contributors, but the visual pattern cannot identify which one. No visible ice makes a frozen-coil path less likely at that moment but does not clear a blocked drain or damaged pan.
-
Check 4
If the drain outlet is safely reachable without a ladder or disassembly, observe it during a normal cooling period only when there is no active indoor leak. Note whether water exits, the outlet is buried or kinked, the line end is visibly blocked, or the outlet stays dry while the indoor pan area is wet. Do not insert wire or tools, blow compressed air, pour drain chemicals, or open the air handler.
Expected result: Water exits normally; the outlet is dry while indoor water accumulates; the line end is visibly obstructed or kinked; or the drain route cannot be reached safely.
Next step: Photograph the outlet and keep cooling off if water is escaping indoors. Arrange HVAC service for no flow, repeated overflow, an inaccessible line, a pump-equipped system, or any need to clear the line from the equipment side.
Why this matters
Why: Normal outlet flow makes a complete blockage less likely but does not rule out a partial restriction, poor slope, pan crack, or pump problem. No outlet flow with indoor accumulation supports a drainage problem. An inaccessible route requires a service inspection rather than a guessed cleanout.
-
Check 5
Inspect only the visible area around the indoor unit for a pan-edge overflow, cracked or corroded metal, a condensate pump alarm or float indication, wet insulation, a musty odor, or staining on the floor, ceiling, or wall. Do not remove the cabinet cover or lift insulation to expose the pan.
Expected result: The pan edge appears to overflow; the pan or cabinet is visibly corroded or cracked; a pump alarm is present; wet insulation or staining is visible; or no accessible damage is apparent.
Next step: Keep cooling off for active leakage and arrange HVAC service for pan, pump, insulation, or cabinet inspection. Dry safe surfaces promptly and document any drywall, ceiling, flooring, or odor change for the technician and building owner if applicable.
Stop if: Stop for standing water, ceiling sag, wet electrical components, visible mold, or a musty odor coming from a wet air handler or duct area.
Why this matters
Why: An overflow, pan defect, pump alarm, or damaged insulation points to a collection or moisture-management failure that needs service. Wet building materials can continue damaging the structure even after the air conditioner stops. A clean visible exterior does not rule out a hidden pan or drain fault.
-
Check 6
Assemble a service timeline instead of testing the refrigeration circuit. Record the thermostat setting and cooling run pattern, filter change date, outdoor weather or humidity, drain or pump observations, ice or meltwater, the exact leak location, and whether the system lost cooling or began leaking after a repair or installation.
Expected result: The leak follows high humidity; cooling runs continuously; the system has weak airflow or ice; water continues after shutdown; or there is no clear trigger.
Next step: Give the timeline and photos to a qualified HVAC technician and keep the system off if water or ice is present. Do not add refrigerant, connect gauges, open electrical covers, or use a chemical drain treatment as a substitute for diagnosis.
Stop if: Stop and seek prompt service for active pooling, electrical exposure, ceiling or wall damage, visible mold, suspected refrigerant trouble, or repeated leakage after a prior clearing.
Why this matters
Why: Humidity increases condensate production, while continuous operation, ice, weak airflow, and post-shutdown water help distinguish drain overload or frozen-coil paths from a simple pan or line defect. A no-trigger leak still requires the same pan, drain, coil, pump, and building inspection.
Use your observations
Decision map
Find the observation that best matches what you see, then follow the next safe action.
-
PATH 01Next step
What you see
Water appears at the indoor unit while cooling runs, the safe drain outlet has little or no flow, or the pan area appears to overflow without visible ice.
Do this next
Keep cooling off, protect the building, and arrange HVAC service to inspect the pan, line, trap, slope, and pump. Do not push tools, compressed air, or chemical cleaner into an unknown line.
Why this path and its safety boundary
Why it matters: A blocked or restricted condensate line, poor drain path, pump issue, or pan overflow is more likely than an outdoor-unit fault.
-
PATH 02Next step
What you see
Ice or frost is visible on the refrigerant tubing or coil area, the filter is dirty or airflow is weak, and water increases as the ice melts.
Do this next
Turn cooling off and arrange qualified HVAC diagnosis of airflow, coil condition, and refrigerant-related causes. Do not scrape ice, heat the coil, or keep cycling the system.
Why this path and its safety boundary
Why it matters: A frozen evaporator is likely contributing to the leak. Restricted airflow and low refrigerant are both possible upstream causes, so replacing a filter alone may not resolve it.
-
PATH 03Next step
What you see
The drain appears to flow but water still escapes, the pan edge or cabinet is corroded or cracked, a pump alarm is present, or water appears below a ceiling-mounted air handler.
Do this next
Keep cooling off for active leakage and arrange an HVAC inspection of the pan and condensate-pump assembly. Treat ceiling, wall, and insulation wetness as building-moisture damage that needs prompt drying and assessment.
Why this path and its safety boundary
Why it matters: A damaged collection pan, pump, float control, installation detail, or hidden overflow is more likely than a simple outlet blockage.
-
PATH 04Next step
What you see
The system runs during very humid weather, the drain flows, no ice is visible, and the leak is intermittent or follows a large indoor moisture load.
Do this next
Document the weather and run duration, keep the area dry, and have a technician verify drainage and airflow under operating conditions. Do not accept recurring indoor pooling as normal condensate.
Why this path and its safety boundary
Why it matters: A high condensate load may be exposing a marginal pan, trap, slope, pump, or drain capacity problem. Humidity can explain more water but should not make indoor overflow normal.
-
PATH 05Next step
What you see
Water has reached drywall, ceiling, flooring, insulation, or ductwork; visible mold or a musty odor is present; or the leak source cannot be safely located.
Do this next
Stop cooling, dry safe exposed materials promptly, keep people away from damaged electrical areas, and arrange HVAC plus appropriate water-damage or mold assessment. Do not paint, caulk, or seal over wet or moldy material.
Why this path and its safety boundary
Why it matters: The problem includes building moisture and possible material or indoor-air-quality damage, not just an HVAC drain symptom.
Helpful context
Understand the symptom
Cooling creates water, but it should not create a puddle
The indoor coil removes heat and moisture from the air. That moisture becomes condensate, which should be captured by a pan and routed away through a drain. A leaking pan, blocked line, frozen coil that is thawing, or a failed condensate pump can put water where it does not belong even while the outdoor unit and indoor blower continue to run. The location and timing of the water are more useful than the fact that the system is still cooling.
Protect the building before chasing the cause
Water near an air handler can damage flooring, drywall, insulation, and electrical equipment. Stop cooling for active leakage, ice, standing water, or water near electrical parts, and dry what is safely reachable. Do not hide a leak by caulking around the cabinet, opening a panel, forcing a drain, or repeatedly restarting the system.
A filter check is useful, a refrigerant check is not a DIY step
A dirty filter can restrict airflow enough to contribute to a frozen coil, and melting ice can overwhelm a drain. Replacing a visibly loaded filter with the exact type specified by the system is a limited user check. Refrigerant charge, evaporator access, pan repairs, pumps, electrical controls, and drain work inside an air handler belong to a qualified HVAC technician.
Only after diagnosis
Potential parts
- condensate drain pan
Consider this category only when inspection confirms a cracked, corroded, warped, or otherwise failed pan; water around the unit alone does not identify the pan as the failed part.
Confirm the air-handler model, pan orientation, dimensions, drain connection, materials, and installation requirements. Pan work may expose electrical, coil, and refrigerant hazards and should be performed by a qualified technician. - condensate drain line or trap component
Consider this category only when a qualified inspection identifies a damaged, incorrectly sloped, restricted, or otherwise failed drain section or trap.
Match the system's drain size, trap, slope, termination, access, and local installation requirements. Do not substitute a line or sealant that defeats the drain design. - condensate pump or float safety switch
Consider this category only when the system uses a pump and service testing confirms a failed pump, float, alarm, or control rather than a blocked gravity drain.
Confirm pump capacity, switch wiring, voltage, reservoir fit, discharge routing, and the air-handler control interface with the technician. Do not bypass a float safety switch. - replacement air filter
Consider this category only when the accessible filter is visibly loaded, wet, collapsed, or due for replacement and the equipment guidance specifies a replacement.
Confirm the exact size, filter type, airflow direction, and system guidance. A filter cannot repair a blocked drain, damaged pan, frozen coil from low refrigerant, or pump fault.
When checks do not resolve it
Need a professional?
Stop cooling and arrange qualified HVAC service for visible ice, active pooling, water near electrical equipment, a wet or damaged ceiling, wall, floor, insulation, or duct, a blocked or inaccessible drain, damaged pan, pump alarm, repeated leakage, suspected refrigerant trouble, or any need to open the air handler or test the refrigeration circuit. Dry safe exposed materials promptly and do not scrape ice, pour chemicals into the drain, connect gauges, or bypass safety controls.
Safety scope: Turn cooling off for active leakage, visible ice, standing water, water near electrical equipment, or building damage. Do not open the air-handler cabinet, touch refrigerant lines, connect gauges, add refrigerant, scrape ice, use a heat source, force a drain with wire or compressed air, pour drain chemicals, or bypass a float or safety control.
Common questions
FAQ
Why is my central AC leaking water while it is still cooling?
Cooling produces condensate, but the water should drain away. A clogged drain line, overflowing or damaged pan, frozen evaporator coil that is melting, condensate-pump problem, or restricted airflow can let water escape while the system still runs. Turn cooling off for active leakage and document the source before arranging service.
Can a dirty filter cause an AC water leak?
Yes. A dirty filter can restrict airflow and contribute to a frozen evaporator coil; when the ice melts, the resulting water can overwhelm the drain. Inspect the accessible filter and replace it only with the system-specified type if it is clearly due. A filter change does not rule out low refrigerant, a blocked drain, or a damaged pan.
Should I keep running the AC if it is dripping water?
Do not keep running it when water is actively escaping indoors, ice is visible, water is near electrical parts, or flooring, drywall, ceiling, or insulation is getting wet. Running through a drain, pan, or frozen-coil problem can worsen equipment and building damage. Turn cooling off and arrange an HVAC inspection.
Can I unclog my AC drain line with chemicals or a wire?
Do not pour chemicals, insert a wire, or use compressed air into an unknown condensate path. The line may be connected to a trap, pump, float safety, or inaccessible pan, and forcing a blockage can cause a new leak or damage. Observe only a safely reachable drain termination and have service clear and verify the complete path.
When is an AC water leak an emergency?
Treat active pooling, water near electrical equipment, a sagging ceiling, wet drywall or insulation, visible mold or musty odor, or a frozen coil as urgent service conditions. Stop cooling, keep people away from unsafe areas, dry what is safely reachable, and arrange HVAC and appropriate moisture-damage assessment.
Read the exact guide
Official sources
- AC Leaking Water? Find Out Why and What to DoTrane · Manufacturer troubleshooting guidance explaining how a split central system should drain condensate and why indoor water requires action
- Maintenance ChecklistENERGY STAR, U.S. Environmental Protection Agency · Official maintenance checklist for central air-conditioning components associated with poor cooling, airflow restriction, and condensate management
- Why Is My AC Leaking Water? | Troubleshooting & RepairCarrier · Manufacturer troubleshooting guidance directly addressing water leaking from a running central air conditioner
- A Brief Guide to Mold, Moisture and Your HomeU.S. Environmental Protection Agency · Official EPA moisture-control guidance for limiting building damage and mold after an air-conditioning leak
- Should You Have the Air Ducts in Your Home Cleaned?U.S. Environmental Protection Agency · Official EPA guidance on cooling-coil condensation, standing water, pan drainage, and moisture damage in HVAC equipment and ducts
Community feedback
Share a repair observation
Share a plain-text repair observation. Accepted observations are published automatically; this page may take a moment to update.