
On this page
Start here
Quick answer
For a mini-split indoor coil that appears to leak water, first turn the system off and observe from the floor. Find the first wet point and record whether it appears during cooling, after shutdown as ice melts, after a long run, in humid conditions, or continuously. Check only the normal user-accessible filter face and airflow, then inspect the visible drain outlet, pan edge, hose route, wall penetration, and water spread without opening the casing. Restricted airflow can freeze a sound coil; a blocked drain, pan, hose, connection, installation slope, or concealed moisture path can look similar. Do not handle refrigerant, open the electrical or coil compartment, scrape ice, flush or disconnect the drain, climb, or assume the indoor coil is damaged. Water near electrical equipment, recurring leakage, visible ice, wall or floor damage, or an unclear source needs qualified HVAC service.
Before you begin
Safety first
- This article covers floor-level observation and normal user filter care only. Qualified HVAC professionals must handle refrigerant, electrical diagnosis, casing or coil access, drain disassembly, pan replacement, unit removal, and elevated work.
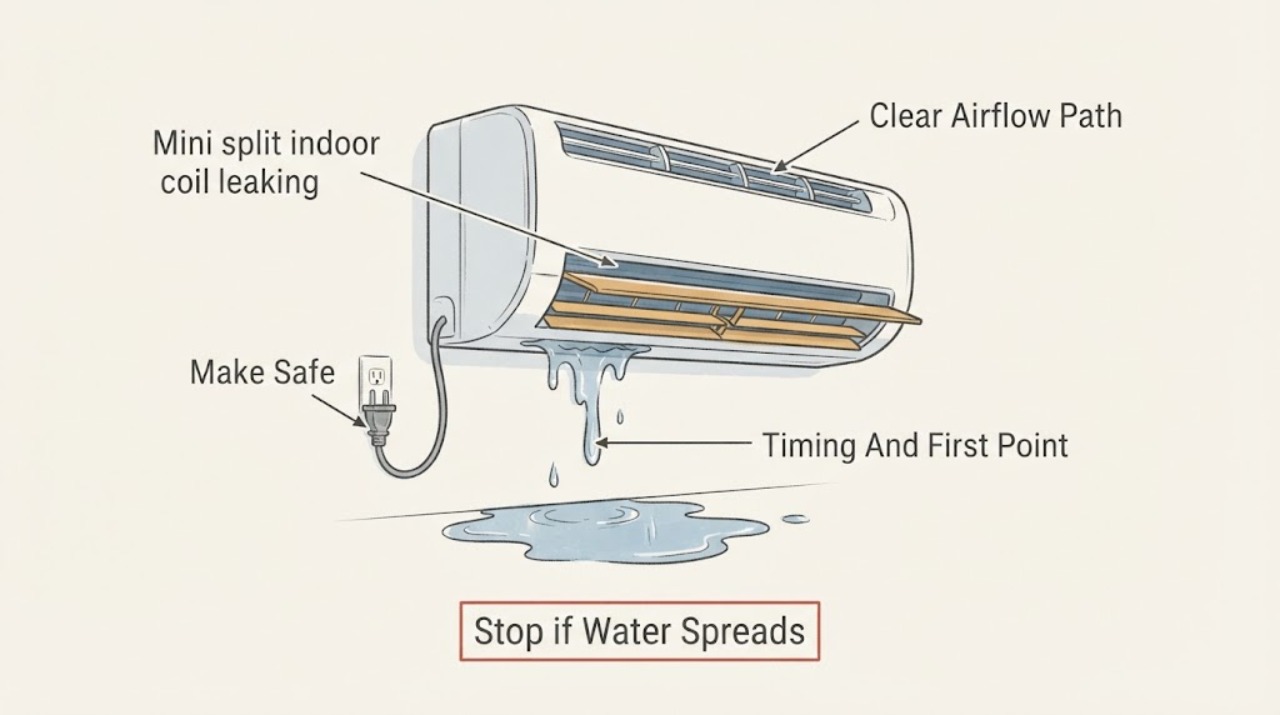
Work through in order
Diagnostic checks
Use only checks that match the exact appliance or system and its official guide.
-
Check 1
Turn the mini-split off with its normal control and observe from the floor; if water reaches electrical equipment, stop using the system and isolate power only when the disconnect is dry, clearly accessible, and safe.
Expected result: Water may drip from the lower edge, run down the wall, collect below the unit, or appear near a plug, wiring, or other electrical equipment.
Next step: Keep people and furnishings clear, photograph the wall, floor, indoor unit, and visible drain outlet, and continue only with dry, external observation.
Stop if: Stop for water near electricity, smoke, burning smell, shock, active flooding, unstable mounting, or any need to open the casing or work at height.
Why this matters
Why: Water from an indoor unit can create an electrical hazard, and a wet wall-mounted unit is not a safe place to open covers or touch wiring while trying to find the leak.
-
Check 2
From a normal user position, inspect the visible air intake and user-accessible filter face for dust, matting, or blockage and note whether airflow is weak or normal; do not open the indoor-unit casing or touch the coil.
Expected result: The filter may be visibly dusty, clean, inaccessible, or damaged; airflow may be weak, normal, intermittent, or accompanied by frost at a visible edge.
Next step: Record filter condition, airflow change, cooling performance, and any visible frost or ice without scraping it; use only the model manual's normal filter-care boundary when it can be done without opening the casing.
Stop if: Do not pry the cover, remove coil panels, scrape ice, touch refrigerant lines, enter the electrical compartment, or use a ladder to reach the indoor unit.
Why this matters
Why: Restricted airflow can let the indoor coil freeze and later release meltwater, so a wet wall does not automatically mean the coil is cracked or damaged.
-
Check 3
Observe the leak timing and visible pattern from the floor: during cooling, after the system stops, after a long run, only in humid weather, or continuously; note whether water starts at the lower unit edge, wall penetration, drain outlet, or a visible connection.
Expected result: Moisture may appear only while cooling, shortly after shutdown as ice melts, after hours of operation, during humid conditions, or before the system runs.
Next step: Make a dated log of mode, run duration, room humidity or weather, first visible wet point, and how far water travels without running the system repeatedly to reproduce a leak.
Stop if: Stop for rapid flow, water entering a wall or floor, hot or exposed wiring, refrigerant odor or hissing, or any test requiring the system to remain on while unsafe.
Why this matters
Why: A freeze-and-thaw pattern differs from a blocked drain or pan overflow, while water at a wall penetration or connection needs a professional source check; timing alone cannot diagnose coil damage.
-
Check 4
From outside and at ground level, inspect the visible condensate drain outlet, hose route, pan edge, wall sleeve, and connection area for kinks, sagging, blockage signs, overflow marks, or a separated fitting; do not flush, pull, disconnect, or open the drain assembly.
Expected result: The outlet may be dry, dripping normally, blocked, kinked, disconnected, or absent from the expected location; the pan edge may show overflow or staining.
Next step: Photograph the outlet and visible path, note whether water reaches the expected discharge point, and arrange HVAC service if the route is hidden, blocked, damaged, or inaccessible.
Stop if: Do not pour cleaners or water into the unit, use compressed air, disconnect the hose, open the pan, or reach behind the indoor unit or wall.
Why this matters
Why: A sound indoor coil can still leak when condensate cannot leave the pan, the pan or hose connection is damaged, or the drain route is restricted or poorly supported.
-
Check 5
Compare the leak with visible installation and room conditions, including whether the indoor unit appears tilted, the drain route slopes away, the wall penetration is stained, and the wall or floor shows previous moisture; do not loosen the mount or alter the route.
Expected result: The unit may look level, visibly tilt, have a damp wall sleeve, show old staining, or leave water in a path that does not match the apparent drip point.
Next step: Map the wet wall, trim, floor, and furnishings from a dry position and provide the photos and installation history to a qualified technician.
Stop if: Stop for soft wall or flooring, mold-like growth, structural movement, concealed moisture, or any need to remove the unit, wall finish, or mounting hardware.
Why this matters
Why: An installation slope, wall penetration, or concealed drain issue can redirect condensate even when the visible coil is intact, and water damage may extend beyond the drip point.
-
Check 6
Prepare a service handoff with model information, filter and airflow observations, frost or ice evidence, leak timing, first wet point, drain outlet and pan clues, installation slope or wall-penetration clues, and the full water-damage boundary.
Expected result: The record may show a dirty filter and weak airflow, freeze-thaw timing, drain overflow, pan or hose damage, wall-penetration moisture, or no safe way to localize the source.
Next step: Arrange qualified HVAC service for recurring or active leakage, visible ice, weak airflow, inaccessible drainage, wall or floor damage, or any suspected refrigerant or electrical issue.
Stop if: End user observation if the next check requires refrigerant work, electrical diagnosis, casing or coil access, drain disassembly, unit removal, or elevated access.
Why this matters
Why: The indoor coil is only one part of the condensate path; the record helps a professional separate coil-surface condensation or freeze-thaw water from airflow, drain, pan, hose, connection, refrigerant, electrical, or installation faults.
Use your observations
Decision map
Find the observation that best matches what you see, then follow the next safe action.
-
PATH 01Safety boundary
What you see
Water appears during or after cooling, visible frost or ice is present, airflow is weak, or the filter face is heavily restricted.
Do this next
Keep the system off, use only the model's normal filter-care boundary when safe, and arrange HVAC assessment of airflow, coil freeze-thaw, condensate load, and refrigerant condition.
Why this path and its safety boundary
Safety stop: Do not scrape ice, add refrigerant, open the casing, or assume the indoor coil is damaged.
-
PATH 02Safety boundary
What you see
The filter face and airflow appear normal, but water collects at the indoor-unit edge or the visible drain outlet is dry, blocked, kinked, or disconnected.
Do this next
Keep the system off and request qualified HVAC service to assess the drain pan, drain hose, outlet, and connection without user disassembly.
Why this path and its safety boundary
Safety stop: Do not flush chemicals or water, use compressed air, pull the hose, or open the pan.
-
PATH 03Safety boundary
What you see
Water starts at a pan edge, drain connection, wall penetration, or visible hose fitting, with staining or overflow below the unit.
Do this next
Document the first wet point and spread and arrange HVAC and water-damage assessment; the visible coil may be intact while the pan or connection fails.
Why this path and its safety boundary
Safety stop: Do not seal over the drip, loosen the mount, remove the pan, or cover wall or floor damage before the source is assessed.
-
PATH 04Safety boundary
What you see
The indoor unit appears tilted, the drain route lacks a visible safe path, or water travels along the wall instead of toward the expected outlet.
Do this next
Request professional assessment of unit level, drain routing, wall penetration, and concealed moisture; keep the unit off if water continues.
Why this path and its safety boundary
Safety stop: Do not shim, remount, reroute, cut the wall, or disconnect refrigerant or electrical lines.
-
PATH 05Safety boundary
What you see
Water is current or spreading, reaches electrical equipment or flooring, or the wall, trim, or floor is soft or visibly damaged.
Do this next
Stop the system, keep people clear, isolate power only if safely accessible, and request prompt HVAC and water-damage assessment.
Why this path and its safety boundary
Safety stop: Do not operate the unit to reproduce the leak or touch wet electrical parts.
-
PATH 06Safety boundary
What you see
The leak is accompanied by hissing, suspected refrigerant loss, unusual electrical behavior, burning odor, or a fault that cannot be observed externally.
Do this next
Leave the system off and arrange qualified HVAC service for refrigerant and electrical diagnosis; provide the timing and visible evidence.
Why this path and its safety boundary
Safety stop: Do not handle refrigerant, open the electrical compartment, measure live circuits, or remove the indoor unit.
-
PATH 07Safety boundary
What you see
No safe first wet point can be found, or water recurs after the visible filter and drain observations are normal.
Do this next
Keep the system off, preserve the log and photos, and obtain professional diagnosis rather than replacing the coil or drain parts by appearance.
Why this path and its safety boundary
Safety stop: Do not open the casing, climb, or treat the indoor coil as failed without evidence.
Helpful context
Understand the symptom
Find the first wet point safely
A mini-split indoor coil that appears to leak is not automatically a damaged coil. From the floor, find the first wet point and note whether water follows cooling, shutdown, long run time, humidity, or no trigger.
Separate airflow, frost, and drainage clues
Check the visible filter face and airflow, then distinguish coil-surface condensation or freeze-thaw meltwater from a drain pan, hose, outlet, or connection problem. Do not open the casing, touch the coil or refrigerant lines, or flush the drain.
Protect the wall and call at the boundary
Map water traveling down the wall or across the floor and stop the system when water reaches electrical equipment or damage is spreading. Refrigerant, electrical, pan, drain, mounting, and concealed moisture work belongs to qualified HVAC service.
Safety boundary
Stop conditions
- Turn the system off for water near electrical equipment, active or spreading leakage, burning smell, shock, unstable mounting, or visible wall or floor damage.
- Do not handle refrigerant, open electrical or coil compartments, scrape ice, flush or disconnect the drain, remove the pan, loosen the mount, or climb to reach the indoor unit.
- Do not assume the indoor coil is damaged from a drip; restricted airflow, filter condition, freeze-thaw, drain, pan, hose, connection, slope, and concealed moisture can produce similar evidence.
- Use qualified HVAC or water-damage service when drainage is hidden or blocked, ice returns, the source is unclear, refrigerant or electrical work may be involved, or water damage is spreading.
Only after diagnosis
Potential parts
- mini split drain hose
Consider this category only after qualified diagnosis confirms a damaged, restricted, or incompatible hose and safe access is available.
Match the complete mini-split model, hose diameter, length, routing, fittings, insulation, and installation instructions; do not use a hose part to mask a blocked pan or concealed wall path. - condensate drain treatment
Consider this category only after the drain problem and treatment compatibility are confirmed; it is not a substitute for clearing a hidden blockage or repairing a pan.
Use only a treatment approved for the exact system and material, and only under the product and HVAC professional's instructions; never pour an unknown chemical into the indoor unit. - mini split drain pan
Consider this category only when qualified diagnosis confirms a cracked, corroded, distorted, or otherwise failed pan rather than filter, drain, slope, or coil-surface condensation.
Match the complete mini-split model, pan geometry, drain outlet, mounting orientation, and material; pan access and replacement are professional work.
When checks do not resolve it
Need a professional?
Call promptly for recurring or active water, visible ice, weak airflow that persists, hidden or blocked drainage, wall or floor damage, water near electricity, refrigerant suspicion, or any check beyond normal user access.
Safety scope: This article covers floor-level observation and normal user filter care only. Qualified HVAC professionals must handle refrigerant, electrical diagnosis, casing or coil access, drain disassembly, pan replacement, unit removal, and elevated work.
Common questions
FAQ
What should I check first when a mini split leaks near the indoor coil?
From the floor, note the first wet point, cooling or shutdown timing, visible filter and airflow condition, frost or ice, drain outlet, pan edge, wall penetration, and water spread. Do not open the casing.
Does water from the indoor unit mean the coil is broken?
No. Restricted airflow can freeze the coil and create meltwater, while a blocked drain, pan, hose, connection, installation slope, or concealed issue can look similar. A leak does not prove the coil is damaged.
Can the air filter cause the leak?
A dirty or restricted filter can contribute to weak airflow and freeze-thaw water, but inspect only the normal user-accessible filter boundary and follow the model manual. Do not scrape ice or open the unit.
When should I call an HVAC professional?
Keep the system off and arrange HVAC service when water continues, the drain path is blocked or hidden, visible ice returns, the wall or floor is damaged, or refrigerant or electrical work may be involved.
What should I tell the technician?
Provide the model, filter and airflow observations, frost or ice, first wet point, leak timing, drain outlet and pan clues, wall or floor spread, installation history, and any electrical or refrigerant concern.
Read the exact guide
Official sources
- Mini Split Leaking Water: Diagnosis and RepairCarrier · Official Carrier ductless-mini-split guidance used for the relationship among indoor coil condensation, filter-related airflow restriction, drain pan and drain-line problems, ice meltwater, installation slope, and professional refrigerant or electrical assessment; exact model instructions control.
Community feedback
Share a repair observation
Share a plain-text repair observation. Accepted observations are published automatically; this page may take a moment to update.