
On this page
Start here
Quick answer
When a mini split leaks from the indoor unit during cooling, the water is usually condensate that is not leaving through the drain path. Stop cooling if water is reaching the wall, floor, or electrical area, collect the drip, and check the outside drain outlet for a visible obstruction without opening the unit. Clean the accessible air filter according to the owner's instructions; a restricted filter can reduce airflow, freeze the indoor coil, and cause meltwater to overflow the drain pan. If the drain outlet is clear but water still backs up, the line may be bent or clogged, the pan may be damaged or incorrectly pitched, the indoor unit may not be level, or low refrigerant may be causing ice. Do not open refrigerant or electrical compartments, use high-pressure air or harsh chemicals in the drain, or keep running a leaking system. Arrange qualified HVAC service for persistent leakage, visible ice, weak cooling, a buried or inaccessible drain, improper installation, or water near wiring.
Before you begin
Safety first
- This article supports turning cooling off, containing water, cleaning an accessible filter, removing a loose obstruction from the drain outlet, and observing visible airflow and ice from a safe position. It does not authorize refrigerant or electrical work, coil or pan removal, concealed drain access, pressure flushing, mounting adjustment, or operation while leaking near electrical parts.
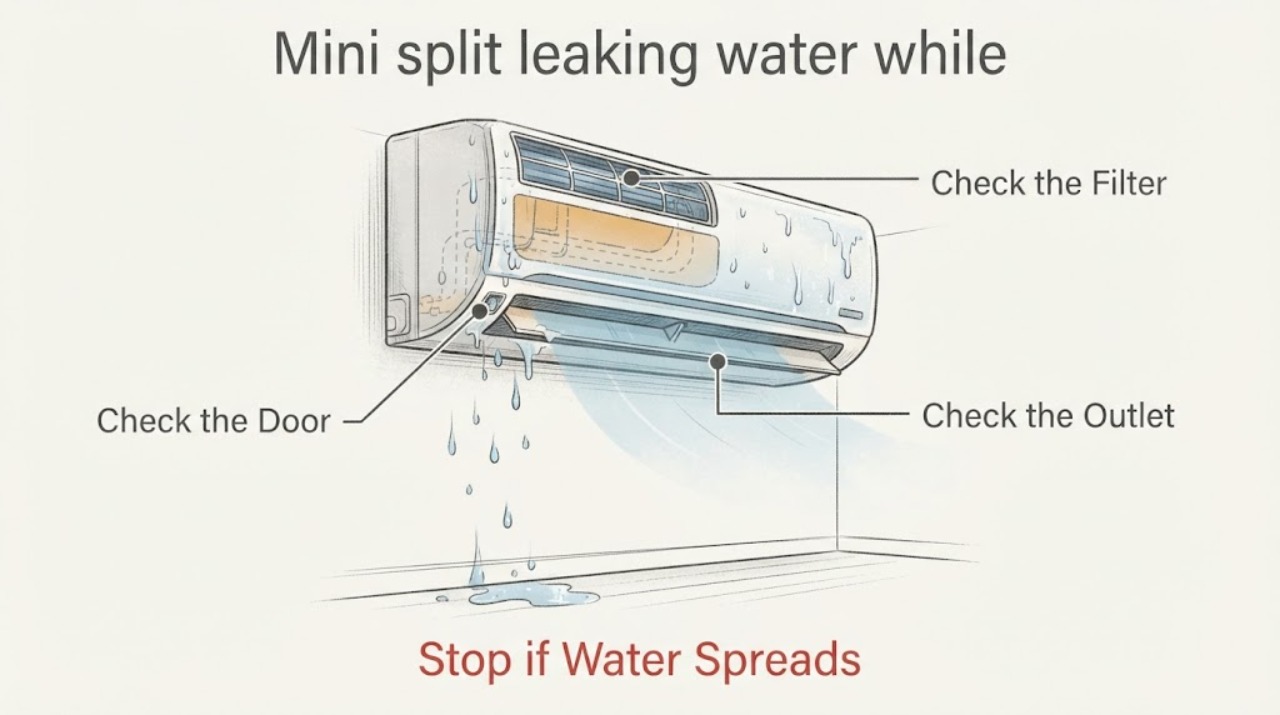
Work through in order
Diagnostic checks
Use only checks that match the exact appliance or system and its official guide.
-
Check 1
Turn the mini split off with its remote or controller and place a bucket or absorbent cloth under the indoor unit. Keep water away from outlets and electrical equipment, and note whether the leak is from the bottom, a side, the drain-line connection, or the wall penetration.
Expected result: Record whether dripping stops after cooling stops, whether the wall or floor is wet, whether water is near wiring or an outlet, and whether there is visible ice, airflow reduction, or an unusual odor.
Next step: Use the drain-and-filter branch only when the area is safe and the water can be contained. Arrange prompt service if water reaches wiring, the wall, or furnishings, or if the source is not visible.
Stop if: Do not open the indoor cabinet, touch wet electrical parts, restart the system to make more water, or continue if the unit is dripping into an electrical area.
Why this matters
Why: A leak that follows cooling is consistent with condensate overflow or ice melt. Water near electrical parts, a persistent leak after shutdown, visible ice, or wall damage raises the urgency and means the system should remain off until inspected.
-
Check 2
With the system off and the indoor unit dry enough to handle safely, open only the routine filter access described in the owner's manual. Remove the washable filter or filters, inspect for dust loading, clean them by the approved method, let them dry as directed, and reseat them correctly.
Expected result: Note a heavily loaded or incorrectly seated filter, blocked return opening, weak airflow before shutdown, or frost on the visible coil area. Record whether the filter correction changes airflow but do not run the unit if ice or water remains.
Next step: Leave cooling off until any visible ice has cleared naturally according to the manual. If the filter was clean, the leak persists, or frost returns, arrange HVAC service rather than cleaning inside the coil housing.
Stop if: Do not scrape ice, use heat, spray cleaner into the coil, run without a filter, or remove the fan, coil, pan, or electrical cover.
Why this matters
Why: A dirty filter can restrict airflow, make the indoor coil freeze, and cause meltwater to overflow the pan. A clean filter with continued ice or leakage makes a drain, pan, installation, airflow, or refrigerant issue more likely.
-
Check 3
From outside the home, locate the mini split condensate drain outlet while the system is off. Check that the outlet is not covered by mud, insects, vegetation, or another loose obstruction and look along the visible hose for a kink, crushed section, or upward bend that could hold water. Do not pull on a line that enters the wall.
Expected result: Record whether water is draining outside, the outlet is dry while the indoor unit leaks, the hose is visibly blocked or bent, or the line disappears into a wall or shared drain. Note whether the leak began after landscaping, cleaning, or installation work.
Next step: Remove only a loose obstruction at the outlet without pushing material into the hose, then keep the system off until the indoor area is dry and the manual allows a test. Call an HVAC technician if the line is buried, kinked, inaccessible, or still will not drain.
Stop if: Do not force wire, compressed air, a pressure washer, or chemical cleaner into the drain, disconnect a wall line, or use a ladder or roof access that is unsafe.
Why this matters
Why: No discharge with an indoor leak makes a drain obstruction or bend more likely. A free-flowing outlet shifts attention to the pan, filter and airflow, indoor-unit pitch, line connection, or ice. A concealed or shared line needs model- and installation-specific service.
-
Check 4
Check visible indoor vents and the outdoor unit for loose obstructions while power is off. Do not remove covers. Note whether airflow is weak, the indoor or outdoor coil is visibly iced, the outdoor unit is blocked by leaves or debris, or the system had been running unusually long before the leak.
Expected result: Record clear versus restricted airflow, ice that melts after shutdown, a dirty outdoor coil or blocked unit, and whether cooling performance was poor or the set temperature was never reached.
Next step: Remove only loose outdoor debris from around the unit without touching the coil or fan, and leave the system off while ice melts naturally. Arrange HVAC service if ice returns, cooling remains weak, or the leak continues.
Stop if: Do not chip ice, hose a powered unit, open the coil cabinet, add refrigerant, clean a coil with unapproved chemicals, or reach through a fan guard.
Why this matters
Why: Restricted airflow can contribute to indoor-coil icing, while outdoor obstruction can reduce system performance. Persistent ice, weak cooling, or a leak after a clean filter and clear airflow can indicate low refrigerant, fan, coil, drain-pan, or control faults.
-
Check 5
Arrange qualified HVAC service when the leak returns after the filter and outlet checks, the drain line is concealed or inaccessible, the pan or mounting appears damaged, ice returns, cooling is weak, or water is near wiring. Provide the technician the leak location, filter condition, drain-outlet result, frost pattern, and any recent installation or maintenance.
Expected result: Report whether water exits outside, whether a clean filter changed airflow, whether ice melted after shutdown, how quickly the leak returns, whether the indoor unit appears level, and whether the outdoor unit or drain route was recently disturbed.
Next step: Keep the system off and the area dry until the technician inspects the drain pan, drain path, mounting pitch, coil, airflow, refrigerant circuit, and electrical components, then verifies leak-free cooling.
Stop if: Do not open refrigerant or electrical compartments, alter drain routing, adjust the unit's mounting, or continue operating a leak that can damage the wall, floor, or wiring.
Why this matters
Why: The technician must distinguish a drain blockage or bend from a cracked pan, poor pitch, dirty coil, fan or airflow issue, low refrigerant, or another model-specific fault. The leak location alone cannot identify a part.
Use your observations
Decision map
Find the observation that best matches what you see, then follow the next safe action.
-
PATH 01Safety boundary
What you see
Water leaks from the indoor unit during cooling, the outside drain outlet is dry or blocked, and the filter is not the only abnormal finding.
Do this next
Keep cooling off, remove only a loose obstruction at the outlet, and arrange HVAC service if the line remains blocked, concealed, or unable to drain.
Why this path and its safety boundary
Why it matters: A blocked, bent, or disconnected condensate drain path is more likely than normal condensation.
Safety stop: Do not force tools, compressed air, chemicals, or pressure into the drain, or disconnect a line at the wall.
-
PATH 02Safety boundary
What you see
The filter is heavily loaded or airflow is weak, ice is visible on the indoor coil area, and water appears as the ice melts after cooling stops.
Do this next
Clean and reseat the filter as directed, allow ice to melt naturally with the system off, and arrange service if cooling or leakage does not normalize.
Why this path and its safety boundary
Why it matters: Restricted airflow and coil icing are more likely contributors, but low refrigerant, fan, or coil faults remain possible if the pattern returns.
Safety stop: Do not chip or heat the ice, run without a filter, clean inside the coil housing, or add refrigerant.
-
PATH 03Safety boundary
What you see
Water is visibly draining outside, but the indoor unit still leaks, the pan appears damaged or mispitched, the unit is not level, or the drain connection is wet.
Do this next
Turn the system off and arrange HVAC service to inspect the pan, mounting, drain connection, coil, and refrigerant and airflow conditions.
Why this path and its safety boundary
Why it matters: A cracked or tilted pan, poor installation pitch, partial restriction, connection leak, or water formed by icing is more likely than a simple blocked outlet.
Safety stop: Do not loosen the indoor unit, re-pitch the mounting plate, seal a pan with an unapproved product, or open the refrigerant circuit.
-
PATH 04Safety boundary
What you see
Water reaches wiring, an outlet, the wall cavity, flooring, or furnishings, or the leak continues after cooling is switched off.
Do this next
Leave the mini split off, keep people away from wet electrical areas, contain water only from a safe position, and arrange prompt HVAC or electrical help as appropriate.
Why this path and its safety boundary
Why it matters: The immediate risk is property or electrical damage, and the leak cannot be treated as routine condensate maintenance.
Safety stop: Do not touch wet electrical parts, operate a wet disconnect, restart the system, or remove the indoor cabinet.
Helpful context
Understand the symptom
Cooling normally creates water, but it should leave through the drain
A mini split removes moisture from indoor air while its indoor coil cools. That condensate should collect in the pan and leave through the drain line. A leak from the wall-mounted indoor unit means water is overflowing, the pan or connection is damaged, the unit is not positioned for drainage, or ice is melting faster than the drain can carry it. The fact that cooling is running does not prove that the condensate path is clear.
Start with water containment, the filter, and the drain outlet
Protect the wall and floor first. A clean, correctly seated filter and an unobstructed outdoor drain outlet are low-risk checks. If water is not coming out at the drain outlet, a bend or blockage is more likely; if water is draining outside but the indoor unit still leaks, airflow, icing, pan damage, installation pitch, or a connection problem needs attention.
Ice and persistent leaks need more than a drain-tip check
A dirty filter can reduce airflow enough for the indoor coil to freeze, and low refrigerant can produce a similar ice-and-melt symptom. A cracked pan, an improperly pitched indoor unit, or a drain line concealed in the wall also cannot be confirmed from the outside outlet. Leave refrigerant, coils, electrical parts, and concealed drainage to a qualified HVAC technician.
Safety boundary
Stop conditions
- Stop cooling and contain indoor water when a mini split leaks; do not allow water to reach wiring, outlets, walls, floors, or furnishings.
- Do not open refrigerant or electrical compartments, add refrigerant, test live parts, alter the mounting pitch, or bypass a condensate safety device.
- Do not chip or heat ice, force tools or pressure into a drain, use harsh internal coil cleaners, or disconnect a concealed drain line.
- Do not keep running the system when ice, weak airflow, visible pan damage, persistent water, or wall or electrical damage is present.
- Arrange qualified HVAC service when the drain path is inaccessible, the leak persists after safe filter and outlet checks, ice returns, cooling is weak, or installation or pan damage is suspected.
Only after diagnosis
Potential parts
- mini-split condensate drain hose or drain fitting
Consider this category only when a qualified inspection confirms a cracked, disconnected, kinked, or otherwise failed drain hose or fitting.
Confirm the indoor-unit model, hose size, routing, slope, insulation, and approved installation method; a replacement hose will not correct a hidden downstream blockage or poor mounting pitch. - mini-split condensate drain pan
Consider this only when the pan is confirmed cracked, corroded, tilted, or unable to contain condensate after the drain path and airflow are checked.
Match the exact indoor-unit model and mounting orientation; pan replacement requires access and leak testing by qualified HVAC service. - mini-split air filter
Consider this only when the washable or replaceable filter is damaged or cannot be restored and restricted airflow is confirmed as a contributor to icing or leakage.
Use the model-specified filter type and dimensions; a filter does not replace diagnosis of recurring ice, refrigerant loss, or drain failure.
When checks do not resolve it
Need a professional?
Arrange qualified HVAC service when a mini split continues leaking after the filter and visible drain-outlet checks, when the drain line is concealed, the pan or mounting appears damaged, ice returns, cooling is weak, or the indoor unit is not draining outside. Call promptly for water near wiring, outlets, walls, or flooring, or for a leak that continues after shutdown. Do not access refrigerant, electrical, coil, or concealed drain components.
Safety scope: This article supports turning cooling off, containing water, cleaning an accessible filter, removing a loose obstruction from the drain outlet, and observing visible airflow and ice from a safe position. It does not authorize refrigerant or electrical work, coil or pan removal, concealed drain access, pressure flushing, mounting adjustment, or operation while leaking near electrical parts.
Common questions
FAQ
Why does my mini split leak water while cooling is running?
Cooling creates condensate that should drain outside. A clogged or bent drain, dirty filter and frozen indoor coil, damaged pan, poor installation pitch, low refrigerant, or another airflow or component fault can make water overflow indoors. Turn cooling off, contain the water, and check only the accessible filter and outside drain outlet.
Should I keep running a mini split that is dripping water?
No. Daikin advises refraining from using an indoor unit that is leaking because water can damage the wall, floor, furnishings, or other parts of the home. Turn cooling off, contain the water safely, and arrange service if the leak does not stop or its source is not clear.
Can a dirty mini split filter cause water leakage?
Yes. A restricted filter can reduce airflow, make the indoor coil freeze, and produce meltwater that overwhelms the drain pan. Clean the filter using the model instructions and leave the system off while visible ice melts naturally. If ice or leakage returns, a technician must check airflow, refrigerant, coil, and drainage.
What if water is not coming out of the mini split drain hose outside?
An indoor leak with no outside discharge makes an obstruction, bend, disconnected hose, or other drainage-path problem more likely. Remove only a loose obstruction at the visible outlet; do not force wire, pressure, or chemicals into the hose. Have an HVAC technician clear a concealed or persistent blockage.
When is a mini split water leak an HVAC service issue?
Call when the leak persists after safe filter and outlet checks, the drain is concealed, the pan or mounting is damaged, ice returns, cooling is weak, or water is near wiring or walls. Drain-pitch, pan, refrigerant, coil, electrical, and concealed-line work requires qualified HVAC service.
Read the exact guide
Official sources
- Ductless Mini Split MaintenanceCarrier · Carrier residential ductless maintenance guidance; cleaning and service procedures vary by model.
- Troubleshooting | Air Conditioning and RefrigerationDaikin · Daikin global troubleshooting guidance; exact drain layout and filter instructions vary by model.
- Mini Split Leaking Water: Diagnosis and RepairCarrier · Carrier residential ductless mini-split guidance; drain routing and parts vary by model and installation.
Community feedback
Share a repair observation
Share a plain-text repair observation. Accepted observations are published automatically; this page may take a moment to update.