
On this page
Start here
Quick answer
Condensation, damp insulation, or a musty odor around an air handler or duct is a moisture-control problem first and a mold-cleanup question second. From a safe, visible location, document where the moisture appears, whether a drain pan is holding water, the condition of the exterior insulation, the room humidity, and whether the odor changes when the system operates. Do not open the air handler, perform live electrical or refrigerant work, scrape or vacuum suspected mold, or use a contaminated HVAC system as a DIY cleanup project. Wet or moldy porous duct insulation generally needs assessment and possible removal or replacement by a qualified HVAC professional, and the water source must be corrected or the growth can return.
Before you begin
Safety first
- Do not do refrigerant work, live electrical testing, panel or duct disassembly, mold scraping or vacuuming, chemical treatment, ladder work, or confined-space entry. If the system is known or reasonably suspected to be mold-contaminated, follow professional guidance about stopping its use.
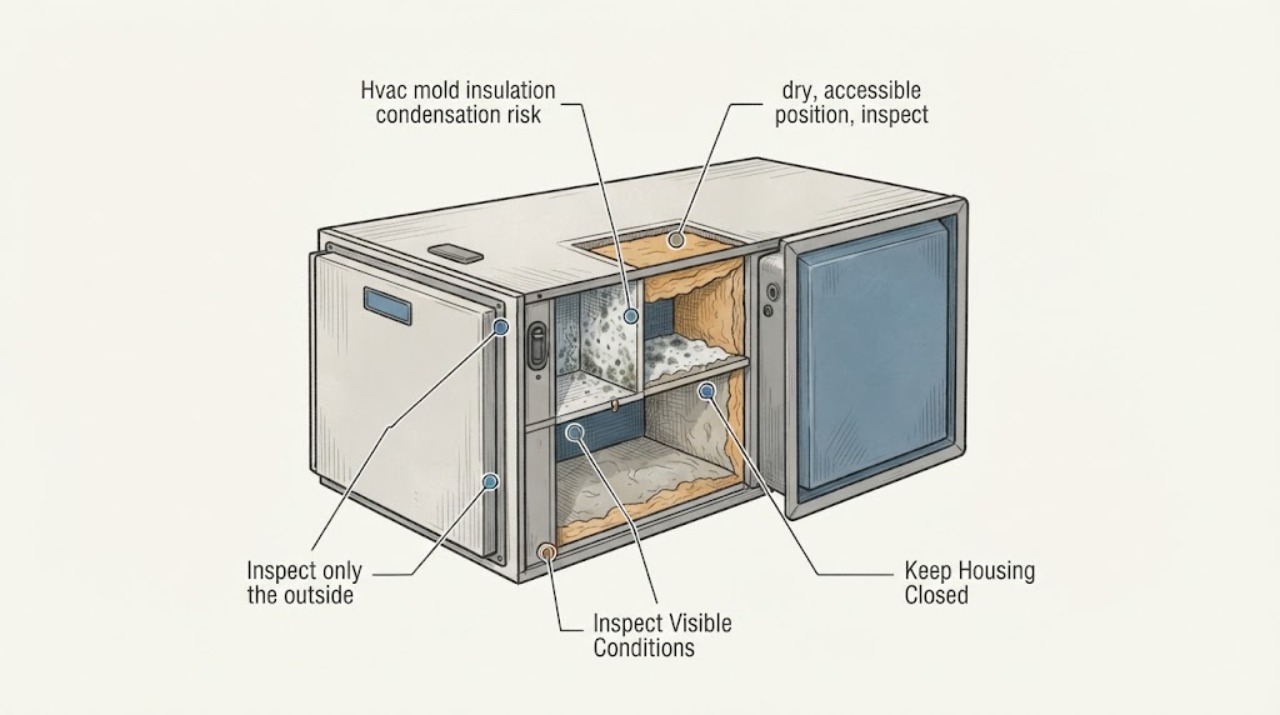
Work through in order
Diagnostic checks
Use only checks that match the exact appliance or system and its official guide.
-
Check 1
From a safe, dry, accessible position, inspect the exterior of the air handler, nearby duct jacket, supply and return grilles, and the ceiling or wall below them without removing covers or insulation.
Expected result: Record whether you see dry surfaces, condensation beads, frost or ice, water stains, sagging insulation, a musty odor, or mold-like spotting; note the exact location and whether the condition is active or merely stained.
Next step: Photograph the condition from the same safe viewpoint and continue only with the visible drain and insulation checks below. Do not touch or clean the material.
Stop if: Stop if the observation requires opening the unit, reaching into a duct, stepping onto an unstable surface, or approaching exposed wiring or pooled water.
Why this matters
Why: Condensation or wet materials show an active or recent moisture path. A mold-like appearance is not confirmation of mold, but it raises the need for professional assessment, especially near an intake or air handler.
-
Check 2
Look at the visible condensate-pan area, drain outlet, or drain termination from a dry location; do not remove an access panel or put hands into the pan.
Expected result: Look for standing water, an overflow mark, a fresh drip, wet flooring, algae-like debris, or no visible water and no staining. If the outlet can be seen without contact, note whether water is draining during normal operation; do not force the system to run for this check.
Next step: Photograph the pan or water mark and tell the HVAC technician when it appears, whether cooling was operating, and whether water reached building materials. Request a drain-pan, drain-line, and coil-area inspection.
Stop if: Stop immediately if water is close to electrical components, the floor is slippery, or checking the outlet would require removing a cover or making the equipment operate unsafely.
Why this matters
Why: Standing water, overflow marks, or a non-draining outlet point to a drainage or installation problem that can wet nearby insulation and support growth. A dry view does not rule out an intermittent blockage or a concealed leak.
-
Check 3
Inspect only the outside of accessible insulation on ducts and around the air handler, looking for intact dry covering rather than pulling, cutting, or wiping it.
Expected result: Classify it as dry and intact, damp but not visibly spotted, compressed or torn, stained, sagging, or mold-like in appearance. Note whether the damp area is adjacent to a cooling coil, drain pan, duct joint, or an unconditioned space.
Next step: Keep the area undisturbed, save photos and measurements, and ask a qualified HVAC professional to identify the insulation type and moisture source before any replacement or remediation scope is chosen.
Stop if: Stop if the insulation is friable, shedding fibers or debris, inside the unit, or reachable only by ladder, crawlspace, or another confined or poorly ventilated area.
Why this matters
Why: Wet or moldy porous insulation cannot reliably be made clean by household wiping or spraying and may need qualified removal and replacement. A torn or compressed jacket can also leave a cold surface exposed to humid air, so the moisture cause still needs correction.
-
Check 4
Measure room temperature and relative humidity with a humidity meter if one is already available, placing it in the affected room away from a supply grille, wet surface, or direct sun; do not install or wire a device inside the HVAC system.
Expected result: Record the reading, time, room, and whether condensation is visible. Compare repeated readings rather than relying on one snapshot; EPA advises keeping indoor relative humidity below 60 percent and ideally between 30 and 50 percent when possible.
Next step: Give the technician the readings and weather or operating context. If humidity is repeatedly high, ask for a moisture-source and system-capacity assessment rather than buying a replacement part based on humidity alone.
Stop if: Stop if obtaining the reading would require entering a wet mechanical area, opening the unit, or handling a contaminated instrument or surface.
Why this matters
Why: Persistently high humidity makes condensation and mold growth more likely, while a normal reading does not exclude a cold-surface, drain, leak, or insulation problem at the equipment.
-
Check 5
From the face of the return and supply grilles, observe airflow, odor, and the visible filter edge or filter indicator without removing a wet or contaminated filter.
Expected result: Record normal or weak-looking airflow, a musty odor that appears at the grille, visible dust or spotting, a filter that looks dry and seated, or a filter that is wet, damaged, or bypassed by gaps.
Next step: If the filter is dry and the manufacturer-specified size and fit are known, provide that information to the technician; otherwise leave it in place for professional handling and request inspection of the filter rack, coil, blower, pan, and duct insulation as a connected system.
Stop if: Stop if odor is accompanied by smoke, burning, gas, severe leakage, or breathing irritation, or if inspecting the filter requires contact with wet or mold-like material.
Why this matters
Why: A musty odor or visible contamination near the air path increases concern that the HVAC system may distribute contaminants. Weak airflow or a poor filter fit can contribute to moisture or dust issues but cannot identify the failed component by itself.
-
Check 6
Make a short timeline of when condensation, staining, or odor occurs and compare it with cooling cycles, heavy rain, recent cleaning, filter changes, drain events, and room use.
Expected result: Note whether the problem is seasonal, appears only while cooling, follows a leak or overflow, returns after drying, or occurs even when the HVAC is off. Map each affected room and distinguish supply-side, return-side, and equipment-area observations.
Next step: Send the timeline, room map, safe photos, humidity readings, and equipment identification to the service provider. Ask for a written scope that names the moisture source, insulation or duct materials involved, containment needs, and how drying will be verified.
Stop if: Stop and escalate if the timeline includes flooding, repeated overflow, suspected internal contamination, structural damage, or a need to operate or dismantle the HVAC system to learn more.
Why this matters
Why: Timing helps separate a cold-surface condensation pattern from a plumbing or building leak, drainage failure, or moisture entering an unconditioned duct route. Recurrence after surface drying means the source remains unresolved.
Use your observations
Decision map
Find the observation that best matches what you see, then follow the next safe action.
-
PATH 01Next step
What you see
Only external condensation is visible, with no wet or mold-like insulation, standing water, or musty air.
Do this next
Document when it occurs and request an HVAC moisture assessment focused on insulation continuity, duct leakage, drain function, and indoor humidity. Monitor for recurrence without wiping or covering the surface.
-
PATH 02Next step
What you see
Insulation is damp, sagging, stained, or mold-like in appearance.
Do this next
Keep it undisturbed and arrange a qualified HVAC professional to identify the insulation and moisture source. Treat removal or replacement of wet porous material as a professional scope, not a household cleaning task.
-
PATH 03Next step
What you see
The visible pan has standing water, overflow evidence, or a drain outlet that is not flowing when it should.
Do this next
Use the high-urgency service route for drainage and coil-area inspection. Do not force the unit to run to test drainage; if operation is unsafe or water is near electrical equipment, leave it off and seek prompt professional help.
-
PATH 04Next step
What you see
Mold-like growth or persistent musty air is inside the air handler, ductwork, or immediately at an intake or supply path.
Do this next
Do not open or clean the system. If it can be done without entering a hazard, stop using the suspected contaminated system and arrange professionals experienced with both HVAC systems and mold remediation; containment and porous-material handling may be needed.
-
PATH 05Next step
What you see
Visible surfaces look normal but the odor or condensation keeps returning.
Do this next
Request inspection for concealed drain, coil, duct-sealing, insulation, or building-moisture problems and provide the timeline. A clean-looking snapshot does not close the case when the symptom is recurrent.
-
PATH 06Next step
What you see
There is exposed wiring, water near electrical equipment, refrigerant damage, smoke, burning odor, unsafe access, or a confined-space concern.
Do this next
Stop all user checks and use a qualified HVAC or other appropriate professional. Do not perform live electrical, refrigerant, ladder, crawlspace, or confined-space work.
Helpful context
Understand the symptom
Why insulation and condensation belong in the same check
Warm, humid air can condense when it reaches a cold duct, coil area, or other HVAC surface. Insulation is meant to keep the surface from reaching the surrounding air's dew point, so beads of water, wet insulation, water stains, or recurring dampness indicate that moisture is reaching a place that should stay dry. That does not by itself prove that a dark spot is mold; appearance alone is not a reliable identification. Treat the visible condition as evidence to document and have assessed.
Keep the inspection observation-only
Stay on an accessible floor or other stable location and use a flashlight or phone camera without removing panels, cutting insulation, reaching into the unit, or disturbing debris. Do not spray chemicals into ducts or on porous liner, and do not brush or vacuum a suspected contaminated surface. A replacement filter may be a later maintenance item, but a wet, visibly contaminated, or inaccessible filter should be shown to the technician rather than handled as mold cleanup.
Stop and call a professional
Stop the inspection if water is near electrical equipment, a panel is hot or damaged, there is a burning smell, a refrigerant line is damaged, access requires a ladder or confined-space entry, or anyone develops breathing or irritation symptoms. If visible mold-like growth is inside the air handler or ductwork, the HVAC system is suspected to be contaminated, or the pan is overflowing, arrange qualified HVAC and mold-remediation assessment promptly.
Only after diagnosis
Potential parts
- HVAC condensate drain-pan alarm
Consider only when the inspection shows an accessible pan or overflow risk and a professional confirms that an alarm is appropriate for the installation; an alarm cannot repair a blocked drain or leak.
Confirm the installation layout, alarm sensing method, and manufacturer instructions with the HVAC professional before choosing a device. - Indoor humidity meter
Consider only to document repeated room humidity while investigating condensation; a reading does not diagnose mold, a refrigerant issue, or a failed HVAC component.
Use it as a room-level observation tool and follow its measurement instructions; do not install it inside equipment or alter wiring. - HVAC replacement air filter
Consider only if the existing filter is dry, visibly clean enough to handle, and its size and efficiency are confirmed; a filter is not a remedy for wet insulation or internal mold.
Verify the exact equipment model, filter dimensions, airflow direction, and manufacturer-recommended efficiency before ordering or fitting.
When checks do not resolve it
Need a professional?
Call promptly for wet or mold-like insulation, standing pan water, overflow marks, repeated condensation, a musty odor from the air path, visible internal contamination, water damage, or any unsafe electrical or access condition.
Safety scope: Do not do refrigerant work, live electrical testing, panel or duct disassembly, mold scraping or vacuuming, chemical treatment, ladder work, or confined-space entry. If the system is known or reasonably suspected to be mold-contaminated, follow professional guidance about stopping its use.
Have this ready
- Provide the safe photos, affected-room map, symptom timeline, humidity and temperature readings, filter observations, equipment identification, and whether the symptom follows cooling, rain, or a drain event.
Common questions
FAQ
Can I dry or spray the HVAC insulation myself?
Do not spray, brush, scrape, or vacuum suspected mold or wet porous duct insulation. Keep it undisturbed and have a qualified HVAC professional identify the material, moisture source, and whether removal or replacement is needed.
Is condensation proof that the HVAC has mold?
No. Condensation shows that warm moisture has reached a cold surface and raises the risk, but a dark or stained area is not confirmed mold by appearance alone. Document the location and have the moisture source assessed if it recurs or affects porous materials.
Can I keep running the HVAC while I investigate?
Do not run a system that is known or reasonably suspected to be mold-contaminated without professional guidance, because operation may distribute contaminants. If water is near electrical equipment or there is another immediate hazard, stop using it and seek prompt professional help.
When does insulation need replacement rather than cleaning?
EPA guidance says wet or moldy porous insulation cannot be effectively cleaned and should be removed and replaced by a qualified heating and cooling contractor. The cause of wetting must also be corrected to prevent recurrence.
What should I tell the HVAC or mold professional?
Share safe photos, the exact affected locations, when condensation or odor appears, pan or drain observations, humidity readings, filter condition, equipment identification, recent leaks or overflow, and whether the symptom returns after drying. Ask for a written moisture-source and remediation scope.
Read the exact guide
Official sources
- Mold Course Chapter 2U.S. Environmental Protection Agency · General building HVAC and moisture assessment; visible observations do not replace professional diagnosis.
- Mold Course Chapter 5: Large Areas and Other Special ConcernsU.S. Environmental Protection Agency · HVAC systems with known or suspected mold contamination; professional judgment and containment may be required.
- Should You Have the Air Ducts in Your Home Cleaned?U.S. Environmental Protection Agency · General forced-air heating and cooling systems; use a qualified professional for internal or contaminated components.
Community feedback
Share a repair observation
Share a plain-text repair observation. Accepted observations are published automatically; this page may take a moment to update.