
On this page
Start here
Quick answer
If an American Standard faucet has weak flow, first compare this faucet with another fixture and note whether hot, cold, or both sides are affected. When the problem is isolated to this outlet, inspect the faucet aerator: American Standard identifies dirt in an aerator as a cause of distorted or reduced flow and directs the user to remove it and rinse it clean. Reinstall the aerator and its gasket without forcing the threads. If the aerator is hidden, seized, damaged, or cleaning does not restore flow, check only the accessible supply valves and hose for an obvious restriction, then use the exact model instructions or call a qualified plumber. American Standard lists different aerator sizes and flow rates for different faucet models, so do not substitute a screen or cartridge by appearance.
Before you begin
Safety first
- Do not force a seized outlet, loosen a pressurized connection, open a cartridge without the exact model procedure, twist the faucet body, or continue testing an active leak or unsafe temperature.
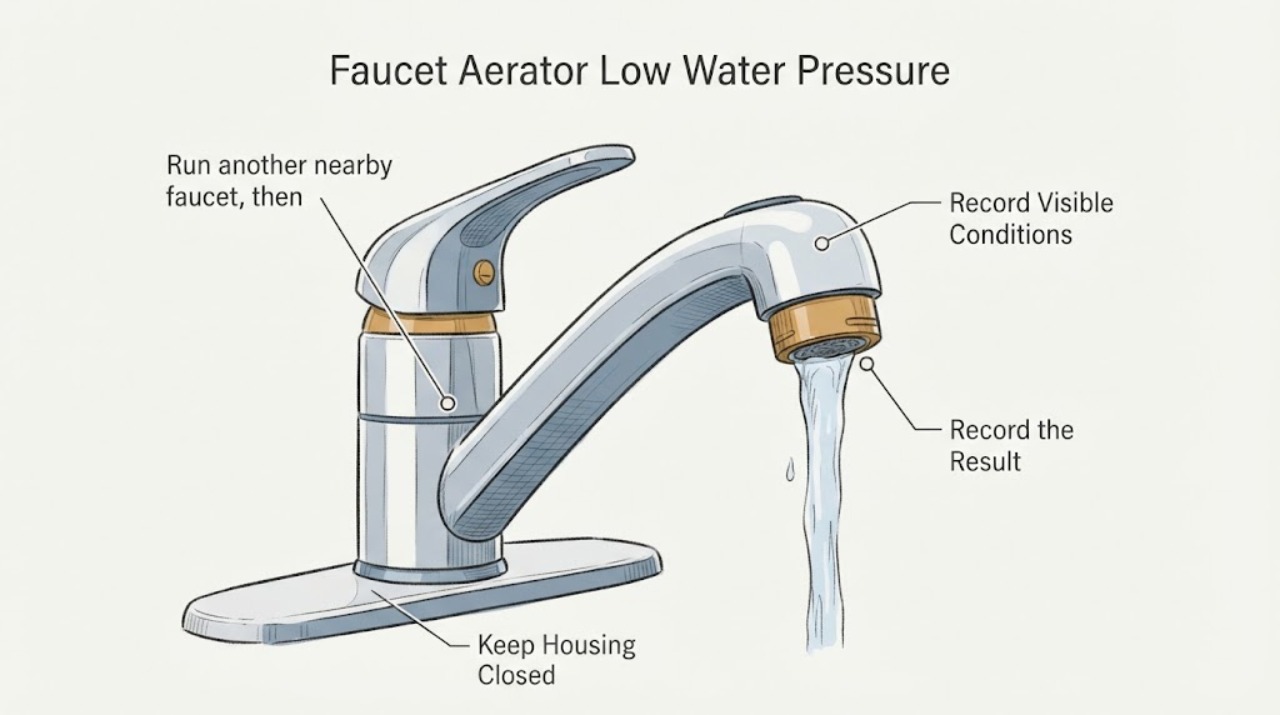
Work through in order
Diagnostic checks
Use only checks that match the exact appliance or system and its official guide.
-
Check 1
Run another nearby faucet, then test the American Standard faucet with cold and hot water separately. Note whether weak flow is limited to this faucet, affects both temperatures, affects one temperature, or occurs at multiple fixtures.
Expected result: Only this faucet is weak; both hot and cold are weak; one side is weak; or several fixtures are weak.
Next step: If several fixtures are affected, stop treating the aerator as the root cause and arrange plumbing diagnosis. If the symptom is local, continue with the faucet outlet and accessible supply checks.
Why this matters
Why: A one-faucet problem keeps the aerator and local supply path high on the list. Weak flow at several fixtures makes a building supply, shutoff, pressure-reducing device, or plumbing restriction more likely; one-sided weakness makes an inlet, valve, or cartridge restriction more plausible than an outlet screen alone.
-
Check 2
Identify the faucet model from the faucet, paperwork, or the manufacturer's model documentation. Record whether the aerator is visibly threaded at the spout, recessed, or integrated into a spray outlet, and compare the documented aerator style before using a tool.
Expected result: The model identifies a removable female or male aerator, the outlet is recessed or hidden, or no matching model information is available.
Next step: Use only the model-compatible removal method. If the outlet is hidden, integrated, corroded, or the model cannot be matched, do not pry or force it; move to professional help if the supply checks do not explain the symptom.
Why this matters
Why: American Standard documents multiple aerator thread styles and model-specific flow designs. A visible thread is not proof that a different-size aerator fits, and a recessed or integrated outlet may require a model-specific key or service procedure.
-
Check 3
With the faucet off, protect the finish with a cloth and inspect the aerator at the end of the spout. If the model permits hand removal, or removal with a protected tool, loosen it gently and keep the screen, housing, and gasket together so their order can be recorded.
Expected result: The aerator loosens normally, the screen has sediment or scale, the gasket is missing or damaged, or the aerator is seized and the spout or threads begin to twist.
Next step: Continue only if the assembly comes out without force. Stop for seized threads, a damaged spout, or a loose faucet body and arrange qualified plumbing service.
Why this matters
Why: Sediment on the screen is a direct local explanation for weak or distorted outlet flow. A missing gasket can cause leakage after reassembly. A seized aerator or moving spout can turn a low-risk cleaning task into a damage and leak risk.
-
Check 4
Rinse the removed screen and housing with clean water, remove loose debris without enlarging the screen openings, and check that the gasket is present and seated. Reassemble the same parts in the documented order and start the faucet slowly while watching the spout for a leak.
Expected result: Flow returns and the stream is even, flow improves only partly, the stream remains weak, or the spout leaks after reassembly.
Next step: If flow is normal and dry, monitor it. If flow remains weak, do not keep forcing the aerator or stack screens; continue with the accessible supply check. If it leaks, turn the faucet off and arrange service when the gasket or threads cannot be correctly restored.
Why this matters
Why: Normal flow after rinsing supports aerator blockage as the cause. Partial improvement can mean debris remains, the screen is damaged, or another restriction exists upstream. A leak points to a missing, displaced, damaged, or incompatible gasket or thread rather than a pressure problem alone.
-
Check 5
Look under the sink or at the accessible faucet supply point without loosening a connection. Confirm the hot and cold stop valves are open as intended, inspect the flexible hoses for kinks or crushing, and look for moisture, a disconnected hose, or a valve that will not move normally.
Expected result: A stop is closed or partly closed, a hose is kinked or crushed, moisture is present, or the valves and hoses appear open and intact.
Next step: Correct only an obvious valve-position issue that moves normally and then retest once. Do not loosen a pressurized fitting; stop for a leak, seized valve, damaged hose, or uncertainty about the supply arrangement and call a plumber.
Why this matters
Why: A restricted local supply can reduce flow even after the outlet screen is clean. Moisture or a damaged hose is a leak and water-damage concern. If both supplies are intact, the faucet inlet, cartridge, or an upstream restriction becomes more plausible.
-
Check 6
If the aerator is clean and the accessible supplies are intact, compare the symptom again with the aerator installed and, only when the exact model instructions allow it, with the outlet temporarily open. Do not run an open outlet near electrical equipment or leave it unattended.
Expected result: Flow is strong with the aerator removed but weak when it is installed, flow remains weak with the outlet open, or the water pulses or changes when another fixture runs.
Next step: Reinstall the exact model aerator if the open-outlet test identifies it, or arrange service for an inlet, cartridge, valve, or supply restriction. Do not begin generic cartridge disassembly without the exact model procedure and a confirmed water shutoff.
Why this matters
Why: Strong flow with the aerator removed points to the aerator screen, housing, gasket, or a model-mismatched replacement. Weak flow with the outlet open points upstream toward the hose, stop, inlet screen, cartridge, valve, or building supply. Pulsing with another fixture suggests shared supply or pressure behavior rather than a dirty screen alone.
Use your observations
Decision map
Find the observation that best matches what you see, then follow the next safe action.
-
PATH 01Next step
What you see
Several fixtures have low flow, or the faucet changes noticeably when another fixture runs.
Do this next
Leave the faucet intact and arrange plumbing diagnosis of the building supply, shutoff, pressure control, or shared piping. Clean the aerator only as a local maintenance check, not as a promise to fix whole-home pressure.
Why this path and its safety boundary
Why it matters: The pattern is less consistent with a single dirty aerator and more consistent with an upstream pressure or supply restriction.
-
PATH 02Next step
What you see
Both hot and cold flow are weak only at this faucet, and the screen is visibly dirty; flow improves after rinsing.
Do this next
Reinstall the original or exact model-compatible aerator with its gasket, check for a dry connection, and monitor the stream. Do not replace a cartridge when the outlet test already explains the symptom.
Why this path and its safety boundary
Why it matters: A blocked aerator is the most direct explanation for the observed pattern.
-
PATH 03Next step
What you see
Flow is strong with the aerator removed but weak after the aerator is installed, or the replacement fits poorly.
Do this next
Use the exact faucet model and the manufacturer's parts information to confirm the aerator style. Replace only when fit and model compatibility are confirmed, and stop for damaged threads or a persistent leak.
Why this path and its safety boundary
Why it matters: The aerator, gasket, screen, thread style, or flow specification is still the likely restriction; a similar-looking part may be incompatible.
-
PATH 04Next step
What you see
Flow remains weak with the aerator removed, while both supply valves appear open and the hoses are not kinked.
Do this next
Use the exact American Standard model guide before any internal faucet work. Shut off water only as the model procedure requires, and arrange a plumber for cartridge or valve-body diagnosis when the procedure, shutoff, or part identity is uncertain.
Why this path and its safety boundary
Why it matters: The restriction is upstream of the outlet and could involve an inlet screen, cartridge, valve, hose, or building piping; the aerator is not proven to be the cause.
-
PATH 05Next step
What you see
Only hot or only cold flow is weak, while the other side has normal flow.
Do this next
Inspect only the accessible affected-side valve and hose for an obvious restriction or leak. Do not force a valve or open the cartridge without the exact model procedure; call a plumber if the restriction persists.
Why this path and its safety boundary
Why it matters: A one-sided supply valve, hose, inlet, cartridge passage, or connection is more likely than a shared outlet screen alone.
-
PATH 06Next step
What you see
The aerator is recessed, integrated, seized, or the spout starts to twist; a leak appears after attempted removal or reassembly.
Do this next
Stop, close the local supply only if it moves safely, dry the area, and arrange qualified plumbing service. Do not pry the insert, twist the faucet body, or continue testing an active leak.
Why this path and its safety boundary
Why it matters: Further force can damage the finish, spout, threads, valve connection, or cabinet, and a leak can cause water damage.
Helpful context
Understand the symptom
Start by separating the outlet from the supply
Low flow at one faucet points first toward that faucet's outlet, inlet, valve, or local supply path. If every fixture has weak flow, the aerator is unlikely to be the only cause. Compare a nearby faucet, then compare hot and cold flow at the affected American Standard faucet before taking anything apart.
The aerator is a model-specific part
An aerator is not just a universal screen. American Standard lists pressure-compensating aerators with different thread descriptions and model examples, and product pages list different flow ratings on different faucets. Treat the model number and the existing aerator's thread and gasket as identification evidence; do not force a similar-looking replacement.
Safety boundary
Stop conditions
- Do not force a seized aerator, twist the faucet body, enlarge the screen openings, loosen a pressurized supply connection, or substitute a similar-looking American Standard aerator or cartridge.
- Stop immediately for an active leak, a damaged spout or hose, water entering the cabinet or wall, a shutoff that will not close, or an unexpectedly unsafe water temperature. Close the supply only if safe and arrange qualified plumbing help.
- If multiple fixtures have weak flow, or if the faucet remains weak with the exact aerator clean and the accessible supplies intact, stop repeating outlet cleaning and arrange plumbing diagnosis.
Only after diagnosis
Potential parts
- American Standard faucet aerator
Consider only when the screen or housing is damaged, the gasket cannot seal, or the exact model-compatible aerator remains restricted after cleaning and the open-outlet comparison points to it.
American Standard lists different thread styles and flow specifications across faucet models. Confirm the exact model, thread, gasket, and documented flow before selecting a replacement. - faucet aerator gasket or screen
Consider only when the existing gasket is missing or damaged, or the screen is deformed and the faucet body and aerator housing are otherwise serviceable.
A gasket or screen must match the aerator housing and model; do not stack unverified screens or use a part that changes the documented outlet behavior. - faucet supply hose, inlet, or cartridge component
Consider only after the aerator is clean or ruled out, the accessible supply path is intact, and a model-guided or professional diagnosis identifies an upstream faucet restriction.
Cartridge, inlet, and hose designs vary by American Standard faucet family and installation. Confirm the exact model and parts diagram before selecting a component.
When checks do not resolve it
Need a professional?
Arrange qualified plumbing service when the aerator is recessed, integrated, seized, or damaged; a faucet body, hose, or supply connection leaks; a shutoff cannot be operated safely; flow remains weak with the aerator removed; only one side remains restricted after accessible checks; or the exact American Standard model procedure is unavailable. Treat water entering a cabinet or wall, an uncontrolled leak, or a supply that cannot be shut off as urgent.
Safety scope: Do not force a seized outlet, loosen a pressurized connection, open a cartridge without the exact model procedure, twist the faucet body, or continue testing an active leak or unsafe temperature.
Common questions
FAQ
Can a dirty aerator cause low water pressure at an American Standard faucet?
Yes. American Standard's Colony Soft guide says dirt can accumulate in the aerator and cause distorted or reduced flow. If the symptom is limited to this faucet, rinse the model-compatible screen and housing, reinstall the gasket, and retest; weak flow at several fixtures needs an upstream plumbing check.
Why is only one side of my American Standard faucet weak?
A shared outlet screen can restrict both temperatures, so weakness on only hot or only cold makes the affected-side stop valve, hose, inlet, connection, or cartridge passage more plausible. Inspect only the accessible valve and hose, and use the exact model procedure before internal work.
How do I know which American Standard aerator to use?
Use the exact faucet model and parts information, then match the documented thread style, gasket, and flow specification. American Standard lists separate 55/64 female and 15/16-27 male aerator examples, so a similar-looking screen is not enough evidence of fit.
What if the aerator is recessed or will not come out?
Do not pry the insert or twist the spout. Recessed or integrated outlets may require a model-specific key, and seized threads can damage the finish or create a leak. Stop and arrange qualified plumbing service if the exact model procedure is not available or the outlet begins to move.
When should I call a plumber for low flow at an American Standard faucet?
Call when several fixtures are weak, the aerator is hidden, seized, or damaged, a hose or valve leaks, flow stays weak with the aerator removed, or the exact model procedure is unclear. Do not loosen a pressurized connection or begin generic cartridge disassembly.
Read the exact guide
Official sources
- INSTALL FAUCET COLONY SOFT SINGLE CONTROL LAVATORY FAUCET WITH SPEED CONNECT® DRAIN INSTALLATION INSTRUCTIONSAmerican Standard · Colony Soft 2175.503 installation guide; the aerator and cartridge details are model-specific.
- Moments 1-Handle Monoblock Vessel Bathroom FaucetAmerican Standard · American Standard Moments faucet product page; it is an example of model-specific faucet construction, not a universal repair procedure.
- Pc Aerator 55/64 FemaleAmerican Standard · American Standard product page for a model-specific 55/64 female aerator; not a universal fit claim.
- Pc Aerator 1.5Gpm-Male-15/16-27Uns-RpAmerican Standard · American Standard product page for a model-specific male aerator and stated flow specification; fit must be confirmed for the faucet model.
- Colony® Soft 4-Inch Centerset Single-Handle Bathroom Faucet 1.2 gpm/4.5 L/min With Lever HandleAmerican Standard · American Standard Colony Soft product page; its cartridge and 1.2 GPM rating apply to this model example only.
Community feedback
Share a repair observation
Share a plain-text repair observation. Accepted observations are published automatically; this page may take a moment to update.