
On this page
Start here
Quick answer
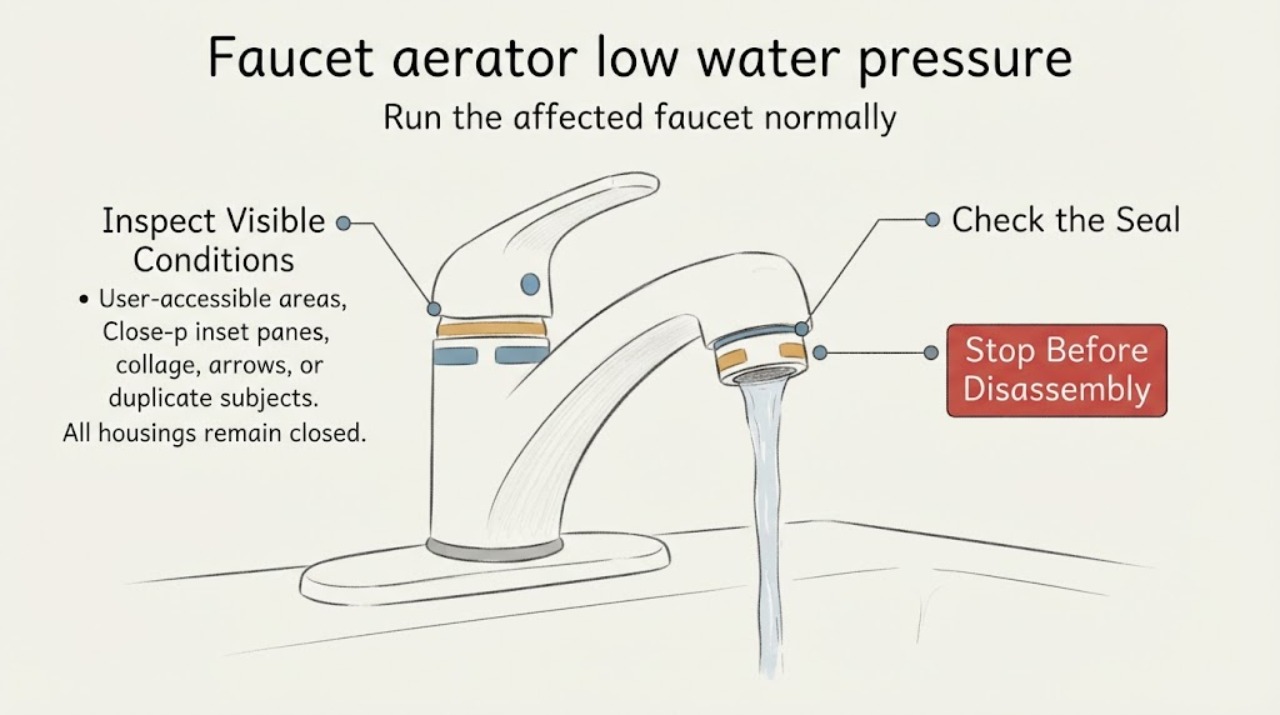
When one faucet has weak flow, the aerator is a sensible first suspect because scale or debris can restrict its screen. Compare hot and cold flow and another nearby fixture before assuming the whole home has low pressure. Look at the aerator and visible supply connections for debris, leaks, or corrosion. If the faucet and manufacturer instructions allow it, turn the handles off, protect the drain and small parts, remove the accessible aerator, rinse the screen, and perform only a brief controlled flow check with splash protection. Do not force a seized fitting or dismantle the cartridge, stop valve, or supply plumbing. If flow stays low with the aerator removed, several fixtures are affected, a valve or hose leaks, or the problem returns, have a plumber assess the supply valve, hose, cartridge, and household pressure.
Work through in order
Diagnostic checks
Use only checks that match the exact appliance or system and its official guide.
-
Check 1
Run the affected faucet normally and compare hot flow, cold flow, and another nearby faucet or fixture without changing any valves or repeatedly cycling the water.
Expected result: Weak flow on both hot and cold at only this faucet points toward the spout end, faucet body, or local supply connections. Weak flow on only hot or only cold points toward that side's stop, hose, or faucet passage. Similar low flow at several fixtures points upstream to household supply, a service valve, or a broader plumbing condition.
Next step: Record which fixtures and temperatures are affected, then inspect the aerator and visible local connections. If multiple fixtures are weak, skip part replacement and arrange plumber assessment of the home's supply condition.
Stop if: Stop if operating the faucet causes spraying, a new leak, sudden pressure change, or water near electrical equipment.
Why this matters
Why: The comparison separates an aerator-level symptom from a single supply side or whole-home pressure problem; it does not identify a failed part by itself.
-
Check 2
With the faucet off, look at the spout outlet and accessible aerator face using a light. Note scale, sand-like debris, a distorted screen, an incorrect-looking insert, or a damaged or missing gasket; do not scrape the screen, push objects into the outlet, or force a concealed aerator tool.
Expected result: Visible scale or debris at the aerator supports a restricted outlet. A clean-looking outlet does not rule out a blocked internal passage, supply hose, stop valve, or cartridge, especially when hot and cold behavior differs.
Next step: If the aerator is accessible and the faucet instructions permit servicing, prepare for a controlled removal and rinse. If it is concealed, seized, damaged, or has no safe removal method, leave it in place and request professional service.
Stop if: Stop if the spout or aerator is corroded, loose in the faucet body, leaking around its threads, or requires force that could damage the faucet.
Why this matters
Why: The aerator is a likely local restriction only when the symptom is limited to the faucet and the outlet shows a plausible obstruction; appearance alone is not a compatibility or replacement decision.
-
Check 3
If the aerator is visibly accessible and the faucet's instructions permit service, turn both handles fully off, cover the drain, secure the small screen and gasket, and remove the aerator gently with the specified tool or hand method; rinse visible debris and do not disassemble the faucet body.
Expected result: A screen carrying scale or grit confirms that the outlet may have been restricting flow. A clean screen, damaged insert, missing gasket, or aerator that will not release leaves the cause unresolved; a corroded fitting should not be forced.
Next step: Keep the parts together, rinse only as allowed by the faucet instructions, and reinstall without cross-threading. If removal is not safe or the aerator cannot be identified, stop and have a plumber service it.
Stop if: Stop immediately if the fitting binds, the spout begins to turn, the gasket tears, water continues to flow with the handles off, or the parts cannot be retained safely.
Why this matters
Why: Kohler's homeowner guidance directs users to turn handles off, remove an accessible aerator with the provided tool, clear debris, and reinstall it. The exact method varies by faucet, so that instruction is conditional rather than universal.
-
Check 4
After the aerator is securely reinstalled, perform one brief flow check with the basin drain open and splash controlled; compare the stream with the earlier hot/cold observations and inspect the spout for seepage. Do not run the faucet unattended or leave the aerator off for an extended test.
Expected result: Improved, even flow after the rinse supports an aerator restriction. No improvement with the aerator clean or removed points toward the local valve, supply hose, cartridge, or upstream pressure. New seepage around the outlet suggests a damaged insert or gasket.
Next step: If flow remains low, stop repeated testing and document whether the issue is hot, cold, both, or several fixtures. Request plumber diagnosis before opening the faucet or replacing a cartridge or hose.
Stop if: Stop and close the local stop only if it is safely accessible and turns normally when a leak develops; if it cannot stop the water or sprays, shut off the appropriate water supply from a safe location and call a plumber.
Why this matters
Why: This result is a practical branch, not proof that the aerator caused every low-flow symptom. EPA notes that faucet accessories have designed flow behavior, so a replacement must match the faucet's intended type rather than simply maximize flow.
-
Check 5
Look beneath the sink and at the visible hot and cold supply stops and hoses without disconnecting them. Note a valve that appears partly closed, corrosion, moisture, a kink, bulging, or a connection that drips while the faucet is used; do not force a stiff valve or tighten a pressurized connection.
Expected result: A dry, intact local supply with low flow only at the spout keeps the aerator or faucet body in focus. A wet, corroded, kinked, or restricted-looking hose or stop can explain one-temperature or single-faucet flow loss and needs plumbing assessment.
Next step: Photograph the visible connection and tell the plumber which temperature and fixtures are affected. If several fixtures are weak or the home's service pressure is abnormal, request whole-home pressure and supply evaluation.
Stop if: Stop immediately for active leaking, a corroded valve body, a connection that twists, a hose bulge, or water near electrical equipment.
Why this matters
Why: Visible local conditions help distinguish the aerator from a supply-side problem, but concealed valve and cartridge condition cannot be confirmed without appropriate plumbing work.
Use your observations
Decision map
Find the observation that best matches what you see, then follow the next safe action.
-
PATH 01Safety boundary
What you see
Only one faucet is weak on both hot and cold, the aerator visibly contains scale or debris, and no local leak is present.
Do this next
Service the accessible aerator only according to the faucet instructions, then perform one brief controlled flow check.
Why this path and its safety boundary
Safety stop: Do not force a concealed or seized aerator or open the faucet body.
-
PATH 02Safety boundary
What you see
Flow is weak on only hot or only cold, or the visible supply stop or hose is wet, corroded, kinked, or abnormal.
Do this next
Treat the issue as a local supply-side or faucet-valve branch and arrange plumber assessment.
Why this path and its safety boundary
Safety stop: Do not force the valve, disconnect the hose, or continue testing a leaking connection.
-
PATH 03Safety boundary
What you see
Flow is still low with a clean or safely removed aerator.
Do this next
Stop repeated tests and have a plumber evaluate the cartridge, supply path, stop valve, and applicable household pressure condition.
Why this path and its safety boundary
Safety stop: Do not disassemble the faucet or use improvised probes, chemicals, or pressure methods.
-
PATH 04Safety boundary
What you see
Several faucets or fixtures have low flow at the same time.
Do this next
Treat it as a broader supply or service-pressure question rather than replacing one aerator; document the affected fixtures and call a plumber.
Why this path and its safety boundary
Safety stop: Stop if there is a whole-home leak, sudden pressure change, or water damage.
-
PATH 05Safety boundary
What you see
The aerator or spout is corroded, the faucet body turns, water will not stop, or a fitting sprays or leaks.
Do this next
Stop hands-on work, isolate water only from a safely accessible control, protect the area, and request plumbing service.
Why this path and its safety boundary
Safety stop: Do not continue turning the fitting or open the faucet body under pressure.
Helpful context
Understand the symptom
Start by locating the restriction
An aerator is the small flow-shaping device at the end of many faucet spouts. Its screen can collect scale or debris, but a weak stream can also come from a partially closed supply stop, a restricted hose, a cartridge, or low pressure upstream. EPA guidance treats faucet aerators as flow-control accessories and recommends checking faucets for scale, leaks, and flow issues; a single weak faucet should be separated from a whole-home problem before parts are chosen.
Use a limited, splash-safe check
The only hands-on step here is an accessible aerator inspection and rinse when the faucet instructions permit it. Keep the drain protected so a screen or gasket cannot disappear, close the faucet handles before the aerator is removed, and keep the test brief. Do not apply force to a corroded fitting, disconnect supply lines, or open the faucet body to reach a cartridge.
Only after diagnosis
Potential parts
- faucet aerator
Consider only if the accessible aerator is damaged, cannot be cleaned, or remains restricted after an instruction-approved rinse and the faucet body and supply are otherwise sound.
Confirm the faucet model or exact spout thread, insert style, and intended flow type; do not guess from appearance alone. - faucet cartridge
Consider only after flow remains low with the aerator clean and a plumber or reliable model documentation points to the faucet valve as the restriction.
Cartridges are model- and valve-specific; confirm the exact faucet identity and manufacturer fit information before selection. - faucet supply hose
Consider only when a professional confirms a restricted, kinked, leaking, or failed visible supply hose is causing the affected-side flow problem.
Confirm connection type, length, material, and local plumbing requirements; do not disconnect a pressurized hose as a diagnostic step.
When checks do not resolve it
Need a professional?
Call when cleaning an accessible aerator does not restore flow, only one temperature is affected, several fixtures are weak, a stop or hose leaks or is corroded, or the aerator is seized or concealed.
Have this ready
- Provide the faucet location, hot-versus-cold comparison, nearby fixture comparison, aerator condition, brief test result, visible stop and hose observations, and any history of plumbing work or sudden pressure change.
Common questions
FAQ
Can a dirty aerator cause low faucet flow?
Yes, scale or debris on the outlet screen can restrict or distort the stream, especially when only one faucet is affected. Compare hot, cold, and another fixture before deciding that the aerator is the cause.
Can I remove the aerator to test the faucet?
Only when it is accessible and the faucet instructions permit it. Turn the handles off, protect the drain and small parts, avoid force, and perform only a brief splash-controlled check. Do not disconnect supply plumbing or open the faucet body.
What if the water is weak only on hot or only on cold?
That pattern points away from a common spout restriction and toward the affected-side stop, supply hose, or faucet valve. Inspect only visible conditions and arrange plumber assessment if flow does not return normally.
When is low faucet pressure a whole-home plumbing problem?
If several fixtures are weak at the same time, or the change is sudden, document the affected fixtures and call a plumber. A single aerator replacement will not correct an upstream supply or service-pressure issue.
Read the exact guide
Official sources
- Home MaintenanceU.S. Environmental Protection Agency, WaterSense · EPA home-maintenance guidance recommends monitoring faucets for leaks and checking scale or calcium buildup that may restrict flow, supporting the article's low-risk inspection sequence.
- Bathroom FaucetsU.S. Environmental Protection Agency, WaterSense · EPA explains that aerators are faucet accessories, that labeled products are independently certified for flow criteria, and that the specification considers homes with low water pressure.
- Homeowners Guide: Clean the AeratorKohler Co. · Kohler's homeowner guide gives a model-specific example: handles off, use the supplied aerator tool, clear debris, and reinstall; the article keeps this step conditional because faucet designs differ.
Community feedback
Share a repair observation
Share a plain-text repair observation. Accepted observations are published automatically; this page may take a moment to update.