
On this page
Start here
Quick answer
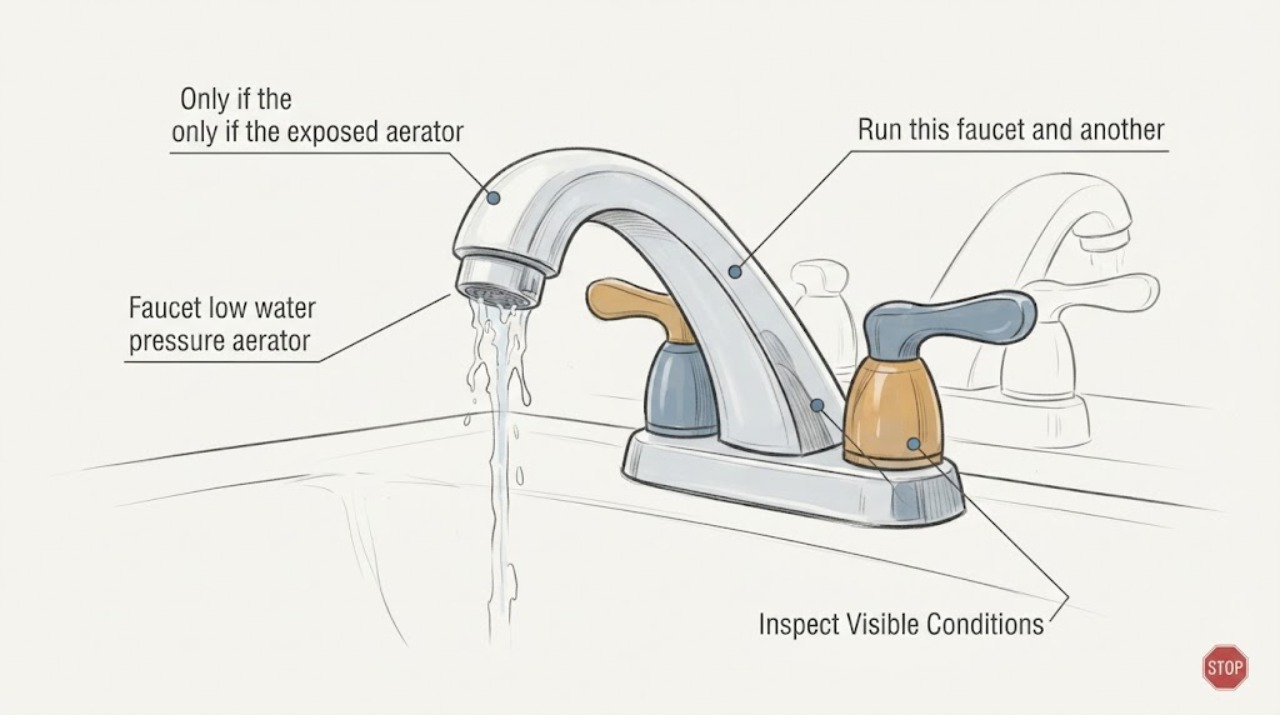
If one faucet has low flow and its aerator has visible debris, the debris may be restricting the screen or flow limiter. First compare another faucet and compare hot and cold flow so you do not mistake a house-wide supply problem for an aerator blockage. Identify whether the aerator is exposed, concealed, or part of a sprayhead, and follow the faucet manufacturer's instructions. If an exposed aerator is designed to loosen by hand, a gentle rinse and reinstallation may restore flow; do not force a stuck aerator, scratch the screen, or disassemble the cartridge or supply connections. If cleaning does not change the flow, the next possibilities include a kinked supply hose, inlet filter, sprayhead, cartridge, or faucet body. Persistent low flow, a leak, a stuck fitting, or an unidentified model belongs with a plumber.
Before you begin
Safety first
- Do not force or drill the aerator, disconnect pressurized supply lines, open the cartridge or valve body without verified isolation and model instructions, or continue troubleshooting a leaking connection.
Work through in order
Diagnostic checks
Use only checks that match the exact appliance or system and its official guide.
-
Check 1
Run this faucet and another nearby faucet at comparable hot-and-cold settings, then compare the stream strength and spray pattern without disconnecting any plumbing.
Expected result: Only this faucet is weak, both faucets are weak, or only one temperature side is weak.
Next step: Continue with the aerator check only for a local symptom. If several fixtures are affected, arrange plumbing or water-supply diagnosis instead of treating this aerator as the root cause.
Why this matters
Why: A single-faucet symptom supports a local aerator, sprayhead, hose, cartridge, or faucet-body restriction. Low flow at multiple fixtures points toward shared supply pressure or upstream plumbing. A one-sided result points toward that side's supply path or valve.
-
Check 2
Look at the spout tip and identify whether the aerator is an exposed screen, a concealed insert, a sprayhead screen, or not visible; record the faucet make and model if it is marked, and do not insert a sharp object into the screen.
Expected result: Debris is visible on an exposed screen, the aerator is concealed or tool-dependent, the sprayhead has debris, or no outlet aerator is visible.
Next step: Use the model-specific instructions. If the aerator is concealed, stuck, or not intended for user removal, do not improvise a tool; stop at identification and arrange service if the instructions are unclear.
Why this matters
Why: Visible debris makes an outlet restriction plausible. Concealed or non-accessible designs may require a supplied tool or an in-line filter procedure, while a sprayhead screen or inlet filter can be the actual restriction.
-
Check 3
Only if the exposed aerator is designed to loosen by hand and is not stuck, place a cloth over it, remove it gently according to the manufacturer's direction, rinse the screen and visible debris with clean water, and reinstall it without overtightening; do not use force or disassemble the valve.
Expected result: Debris rinses out and the stream improves, the screen is clean but flow remains low, or the aerator will not loosen without a tool or force.
Next step: If flow improves, monitor for recurrence and keep the faucet model and aerator type recorded. If it does not improve or the part is stuck, reinstall only what was safely removed and continue with visible supply checks or call a plumber.
Why this matters
Why: Improved flow after rinsing supports a local aerator blockage. No change makes the aerator less likely to be the only restriction. A stuck or damaged aerator needs model-specific service rather than increasing force.
-
Check 4
For a pull-out or pull-down faucet, inspect the sprayhead face, hose path, and any visible screen for debris, twisting, or kinks; if the model instructions allow the sprayhead to separate without tools or force, compare the hose flow only as directed and keep the hose from retracting into the faucet.
Expected result: The sprayhead is clogged but hose flow is strong, the hose itself has weak flow, or neither path can be safely separated or identified.
Next step: Clean only the removable sprayhead or screen allowed by the manufacturer's instructions. Leave hose, filter, cartridge, and valve-body work to model-specific instructions or a plumber.
Why this matters
Why: Strong flow before the sprayhead makes a sprayhead screen restriction more likely. Weak flow before the sprayhead points toward a supply hose, inlet filter, cartridge, or faucet-body restriction. Unclear separation means the model-specific boundary has been reached.
-
Check 5
Look under the sink at the hot and cold supply stops and flexible hoses for a partly closed stop, sharp kink, crushed hose, moisture, or a disconnected connection; do not force a valve or loosen a wet fitting.
Expected result: The stops and hoses look open and dry, one hose is kinked or damaged, a stop is partly closed or stiff, or there is a leak.
Next step: Correct only an obvious, normal stop position without force and recheck the faucet. Leave a leaking, seized, damaged, or uncertain connection undisturbed and call a plumber.
Why this matters
Why: A kinked hose or restricted stop can reduce flow independently of a clean aerator. Wetness or a stiff stop changes this from a routine screen cleaning to a plumbing repair and possible leak risk.
-
Check 6
If the aerator is clean and flow remains low, record whether hot, cold, or both sides are affected and identify the faucet model, handle type, spray configuration, and any recent water shutoff or plumbing work; do not open the cartridge or valve body as a next test.
Expected result: Both temperatures remain weak, only one side is weak, the problem began after water work, or no model information is available.
Next step: Provide the symptom pattern and model to a plumber or manufacturer support. Do not order a cartridge or hose until the model and diagnostic path identify it.
Why this matters
Why: Both sides after aerator cleaning can point to an inlet, cartridge, spray hose, or body restriction. A one-sided result points toward that supply path or valve. Debris after recent water work supports flushing or model-specific debris service, but internal work is not universal.
Use your observations
Decision map
Find the observation that best matches what you see, then follow the next safe action.
-
PATH 01Next step
What you see
Only this faucet is weak, debris is visible on an exposed removable aerator, and flow improves after a gentle model-approved rinse.
Do this next
Reinstall the screen without overtightening and monitor the stream. If debris returns quickly, report the recurrence and have the supply or faucet checked rather than repeatedly forcing the aerator.
Why this path and its safety boundary
Why it matters: The aerator or flow-restrictor screen was likely the local restriction.
-
PATH 02Next step
What you see
Only this faucet is weak, but the aerator is clean or cleaning produces no meaningful change.
Do this next
Use the faucet model to choose the next manufacturer-supported check. Arrange plumbing service for internal valve, filter, hose, or diverter work that cannot be safely observed or identified.
Why this path and its safety boundary
Why it matters: An inlet filter, kinked supply hose, sprayhead, cartridge, diverter, or faucet body becomes more likely than the outlet screen alone.
-
PATH 03Next step
What you see
A pull-out or pull-down faucet has good flow from the hose but poor flow through the sprayhead.
Do this next
Clean only the removable sprayhead or screen specified by the model instructions. Replace it only if the model-specific diagnosis supports replacement.
Why this path and its safety boundary
Why it matters: Debris in the sprayhead or its screen is more likely than a supply or cartridge restriction.
-
PATH 04Next step
What you see
A pull-out or pull-down faucet has weak flow even before the sprayhead, or a fixed faucet has weak hot and cold flow after its aerator is clear.
Do this next
Check visible hose kinks and stop positions without force, then provide the model and symptom pattern to a plumber or manufacturer. Do not disconnect pressurized lines or open the valve body as a guess.
Why this path and its safety boundary
Why it matters: The restriction is upstream of the sprayhead or aerator, such as a hose, inlet filter, cartridge, diverter, valve body, or supply path.
-
PATH 05Next step
What you see
Several faucets have low flow, or this faucet's stops are leaking, seized, damaged, or cannot be identified safely.
Do this next
Stop at safe observation, protect the area from leaks, and arrange plumbing service to assess the shared supply or failed connection.
Why this path and its safety boundary
Why it matters: A house supply issue or plumbing fault is more likely than a single aerator blockage, and further faucet disassembly could worsen the problem.
Helpful context
Understand the symptom
Prove the blockage is local before treating the aerator
A low-flow faucet with cold and hot water both reduced can have debris at the aerator, but a restricted supply hose, cartridge, sprayhead, or house supply can look similar. Compare another nearby faucet and note whether only this spout is affected. A local symptom supports inspecting the faucet end; low flow at several fixtures calls for plumbing or supply diagnosis instead of replacing an aerator first.
Aerator designs are not interchangeable
Some aerators are visible at the tip of the spout, some are concealed and require a supplied tool, and some faucets have no removable aerator at the outlet because a filter is located elsewhere. Moen notes that designs, flow rates, attachment methods, and spray patterns vary. Identify the faucet and aerator type before using a tool; if the part is not intended for user removal, stop at observation and use the model instructions or a plumber.
A clean aerator changes the next diagnosis
If debris is rinsed from a removable aerator and the flow improves, the blockage was local to the outlet. If the screen is clear or cleaning changes nothing, do not keep forcing the cap or move immediately to cartridge work. Check the visible supply hoses and sprayhead path, record the faucet model, and have the internal valve or supply side assessed if the problem remains.
Safety boundary
Stop conditions
- Do not force a stuck aerator, use pliers that can deform the screen, insert sharp objects into the outlet, or overtighten the cap.
- Do not disconnect a supply hose, remove an inlet filter, cartridge, diverter, or valve-body component unless the model instructions and safe water isolation are confirmed.
- Stop for a leaking or seized supply stop, damaged hose, sudden loss of flow, cabinet water, or water near electrical equipment; keep clear and call a plumber as needed.
- Do not assume an aerator is removable when it is concealed or non-accessible, and do not order a cartridge or hose by appearance alone.
Only after diagnosis
Potential parts
- faucet aerator
Consider this only when the exact faucet model and aerator type are identified and the screen is damaged, missing, or remains restricted after an appropriate cleaning.
Match the attachment, screen or flow-restrictor design, flow rate, finish, and manufacturer fit information; a visually similar aerator may change flow or not seal. - faucet cartridge
Consider this only when the aerator and visible supply path are clear and a model-specific diagnosis points to a restricted or failed cartridge.
Confirm the exact make, model, handle configuration, cartridge revision, and included seals before ordering; do not select by appearance alone. - faucet supply hose
Consider this only when the hot or cold hose is confirmed kinked, damaged, restricted, or leaking and replacement is supported by the model and connection diagnosis.
Match length, end fittings, connection type, material, and rated use to the existing faucet and plumbing; isolate water before any connection work.
When checks do not resolve it
Need a professional?
Request plumbing service for persistent low pressure after cleaning, weak flow before a sprayhead, a kinked or leaking hose, a failed stop, recurring debris, or any diagnosis requiring cartridge, diverter, inlet-filter, or valve-body work.
Safety scope: Do not force or drill the aerator, disconnect pressurized supply lines, open the cartridge or valve body without verified isolation and model instructions, or continue troubleshooting a leaking connection.
Have this ready
- Provide the faucet make and model, exposed or concealed aerator type, hot/cold comparison, fixed or pull-out/pull-down configuration, whether the screen contained debris, whether flow improved after a gentle rinse, hose and stop observations, recent water shutoffs, and photos of the faucet and any leak.
Common questions
FAQ
Can debris in the faucet aerator cause low water pressure?
Yes. Moen and Delta both identify debris or mineral deposits in an aerator or flow restrictor as a cause of reduced flow. Confirm that the problem is local to this faucet before treating the outlet screen.
How do I know whether the aerator is the only blockage?
Compare another faucet, compare hot and cold flow, and check whether flow improves after a model-approved gentle rinse of an exposed aerator. If several fixtures are weak or the stream does not improve, consider the supply, hose, sprayhead, cartridge, or faucet body instead.
What if the faucet has a concealed aerator?
Do not improvise a tool. Identify the faucet model and use its supplied removal method only if the instructions permit it; some faucets use an in-line filter rather than a visible removable aerator.
Why is my pull-down faucet still low after cleaning the aerator?
The restriction may be in the sprayhead, hose, inlet filter, cartridge, or faucet body. If hose flow is good before the sprayhead, the sprayhead is more likely; if hose flow is also weak, use the model-specific path or call a plumber.
Should I replace the faucet cartridge after finding debris?
Not automatically. Clean or identify the outlet screen first, check visible supply hoses and stops, and use the exact model to confirm a cartridge diagnosis. A cartridge is conditional only when the upstream path remains restricted after the aerator is clear.
Read the exact guide
Official sources
- Low water flow from spout- BOTH hot and cold water on sink faucetsMoen · Manufacturer guidance used to distinguish aerator debris from cartridge, diverter, wand, and supply-line paths and to keep parts model-specific.
- Why does my faucet have low water pressure?Delta Faucet · Manufacturer guidance used for clogged aerator or flow restrictor symptoms and the distinction between flushing and model-specific internal service.
- Low Flow from Hot and Cold WaterKohler Assist · Manufacturer guidance used as cross-brand support for distinguishing sprayhead, hose, cartridge, faucet body, and kinked supply-hose restrictions and for model-specific replacement parts.
- Faucet Aerator CleaningMoen · Manufacturer guide used for explaining that debris and mineral deposits restrict flow, and that exposed, concealed, and non-accessible aerators require different handling.
Community feedback
Share a repair observation
Share a plain-text repair observation. Accepted observations are published automatically; this page may take a moment to update.