
On this page
Start here
Quick answer
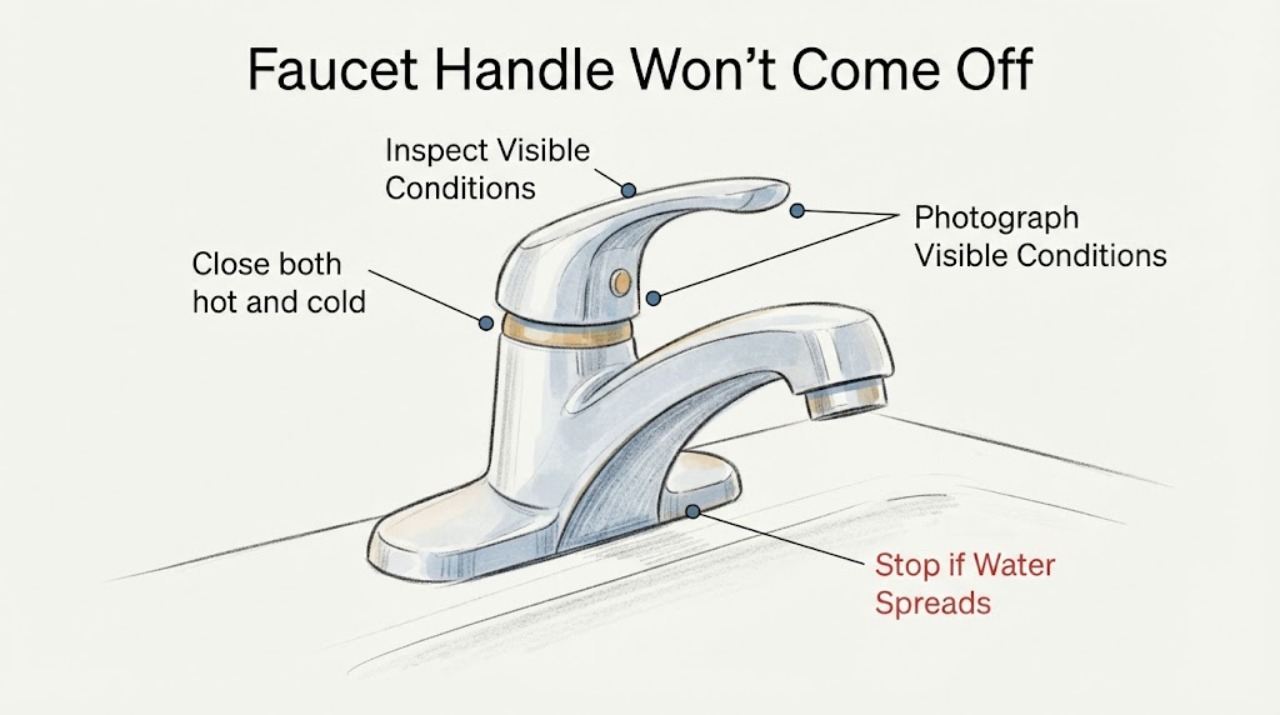
Shut off the faucet's hot and cold supplies, or the home's main water shutoff if the local valves do not stop the flow, then open the faucet briefly to relieve pressure. A handle that will not come off may still be held by a cap, set screw, screw, threaded base, or another model-specific retainer; manufacturer instructions show that handle-release methods vary even within one brand. With no brand or model, inspect only for a clearly visible release and do not pry, drill, heat, or force the handle. First identify whether the leak is around the handle, at the spout, or below the sink; if water continues after shutoff, the leak is at a supply connection, or the release is not positively identified, leave the faucet off and use the exact model instructions or a qualified plumber.
Work through in order
Diagnostic checks
Use only checks that match the exact appliance or system and its official guide.
-
Check 1
Close both hot and cold faucet supply valves under the sink, turning each clockwise until closed; if there are no usable local valves or water still flows, close the home's main water shutoff when it is safe to do so, then open the faucet briefly.
Expected result: The faucet stops flowing and only residual water drains, or water continues after the local valves are closed.
Next step: Proceed only after the water is isolated. If water continues, keep the main shutoff closed and call a plumber rather than removing the handle under pressure.
Why this matters
Why: Stopping flow confirms the local supply is isolated; continuing flow means the local shutoff is not controlling the leak or has failed.
-
Check 2
Dry the faucet, valves and supply connections, place a towel under the sink, and observe where the first new drop appears during a brief, controlled reopening of the isolated supply.
Expected result: The first water appears around the handle or faucet deck, from the spout while the faucet is off, at a shutoff valve or supply line, or only while the faucet is being used.
Next step: If the leak is under the sink or continuous, isolate the water and arrange service. If it is around the handle, continue only with the exact faucet's removal instructions.
Why this matters
Why: Leak location and timing separate an above-deck/handle symptom from a continuous shutoff or supply-line leak; they do not by themselves identify a cartridge or other internal part.
-
Check 3
Look for the faucet brand and complete model marking on the body, base, supply tag or installation paperwork, and take photos of the cap, underside and handle junction before selecting a tool.
Expected result: A complete model is available, only a brand is visible, or no identity marking can be found.
Next step: Use the exact model support page when available. Without it, limit the next check to a clearly visible release and do not order a cartridge or handle by appearance.
Why this matters
Why: A model-specific manual can identify the retainer and any service procedure; a brand-only or unidentified faucet leaves the release method unresolved.
-
Check 4
With water still isolated, inspect the handle for a removable index cap, exposed set screw, retaining screw or threaded handle base. Use only the tool and direction specified by the exact manufacturer instructions; do not pry against the finished surface or twist the valve stem.
Expected result: The exact manual identifies the visible retainer, or no retainer is confidently identified and the handle remains seized.
Next step: If the release is not positively identified, re-isolate the water and stop for manufacturer or qualified plumber help rather than escalating force.
Why this matters
Why: The first result supports a controlled model-specific removal. The second means the handle design, corrosion or internal damage cannot be distinguished safely from outside.
-
Check 5
If the handle, stem or finish begins to bend, the supply valve leaks, the local shutoff cannot isolate the faucet, or water reaches cabinetry or electrical equipment, keep the water off and document the condition and model before arranging service.
Expected result: The leak is controlled and the handle is intact, or water cannot be controlled or visible damage is increasing.
Next step: Use the main shutoff when safe and contact a qualified plumber for uncontrolled leaks or damaged connections. Do not drill, heat, pry or reconnect an unidentified faucet.
Why this matters
Why: A controlled, identified faucet may be matched to a manufacturer procedure; uncontrolled water or damage is a plumbing containment problem rather than a handle-removal exercise.
Use your observations
Decision map
Find the observation that best matches what you see, then follow the next safe action.
-
PATH 01Next step
What you see
Both local supply valves stop the flow and the leak is limited to the handle or faucet deck.
Do this next
Use the exact faucet model instructions to identify the cap, screw, set screw or threaded base; stop if the release is not clear.
Why this path and its safety boundary
Why it matters: The water is isolated and the symptom is in the faucet assembly, but the seized handle still does not identify the internal part.
-
PATH 02Next step
What you see
Water continues after the under-sink valves are closed, or a shutoff valve or supply line leaks continuously.
Do this next
Close the home's main water shutoff when safe, contain the water, and arrange qualified plumbing service.
Why this path and its safety boundary
Why it matters: The local isolation is ineffective or the leak is below the faucet, so removing the handle will not safely control it.
-
PATH 03Next step
What you see
The faucet manual clearly identifies a visible retainer and the handle remains undamaged.
Do this next
Follow that exact procedure with water isolated and protect the finish. If the retainer is stripped or the handle deforms, stop and escalate.
Why this path and its safety boundary
Why it matters: A model-scoped removal path is available; it does not authorize a different tool, direction or force than the manual specifies.
-
PATH 04Next step
What you see
No complete model is available, no release is visible, or the handle is corroded or deforming.
Do this next
Leave the supply off, photograph the faucet and leak, and use manufacturer support or a qualified plumber instead of prying, drilling, heating or pulling harder.
Why this path and its safety boundary
Why it matters: The public evidence cannot distinguish the handle design or the cause of seizure safely.
Helpful context
Understand the symptom
Make the faucet safe before touching the handle
Close the hot and cold shutoff valves under the sink when they are present. Moen's water-shutoff guidance says to turn the faucet on after closing the valves so the remaining pressure can discharge and to use the home's main shutoff when a local shutoff is not available. Put a towel or container under the connections and keep the drain covered so a small screw or cap cannot disappear.
A stuck handle is not a universal fastener problem
Do not assume that every faucet handle pulls straight up. Kohler's official instructions show named faucet families using a plug button and set screw, a cap and Phillips screw, or a set screw in the lever. With no complete model, treat those as examples of design variation rather than instructions for this faucet. Photograph the brand, model marking and the handle from several angles, then use the matching manual or manufacturer support page before applying a tool.
Locate the leak before choosing a repair
Dry the faucet and supply connections, reopen the local valve only briefly if it is safe, and watch where the first drop appears. A leak around the handle or above the countertop follows a different path from water at a shutoff valve, supply line, or connection below the sink. Moen's troubleshooting guide uses leak location, whether the leak is continuous, and whether it appears only during use to direct the next repair, so a seized handle alone does not identify the failed part.
Stop when the release or leak path is uncertain
If there is no clearly visible cap, screw, set screw or model-specific retainer, stop rather than prying against the finish or twisting the stem. If the supply valves do not stop the water, if a hose or shutoff valve is leaking continuously, or if the handle body starts to deform, close the main water shutoff when safe and arrange qualified plumbing service. Do not use heat, penetrating chemicals near drinking-water components, drilling, or an improvised handle puller on an unidentified faucet.
When checks do not resolve it
Need a professional?
Contact the faucet manufacturer with the complete model and photos when the release method is unclear. Use a qualified plumber for an uncontrolled leak, failed shutoff, damaged supply connection, seized or deforming handle, or any repair that would require force or internal disassembly.
Common questions
FAQ
Should I pull harder if the faucet handle is stuck?
No. Handle-release methods vary by faucet family. Shut off and relieve the water pressure, identify the exact model and visible retainer, and stop if the release is not clear or the finish or handle begins to deform.
Does a leak around the handle prove the cartridge is bad?
No. Moen says a handle-area leak is usually associated with its cartridge on Moen kitchen faucets, but the same source says its cartridges are not interchangeable. On an unidentified faucet, use the leak location and exact model documentation rather than diagnosing a part from the symptom alone.
What if the valves under the sink do not stop the water?
Keep the faucet closed, use the home's main water shutoff when safe, and arrange plumbing service. A handle-removal attempt cannot safely proceed while the supply remains uncontrolled.
Read the exact guide
Official sources
- Kitchen Faucet: Leaking Around The HandleMoen Solutions · Moen kitchen faucets only; not a diagnosis for an unidentified faucet or another brand
- Single-Handle Bathroom Sink Faucets - Handle RemovalKohler Assist · Named Kohler bathroom faucet families only; examples of model/family-specific release designs, not universal instructions
- How To Turn Off The Water Supply To The FaucetMoen Solutions · Moen faucet/shower repair guidance used here only for the general safety sequence; exact shutoff locations vary by installation
- Bathroom Faucet: Leaking Under The Sink BaseMoen Solutions · Moen bathroom faucet troubleshooting; used to support separating above-deck leaks from continuous or use-related under-sink leaks
Community feedback
Share a repair observation
Share a plain-text repair observation. Accepted observations are published automatically; this page may take a moment to update.