
On this page
Start here
Quick answer
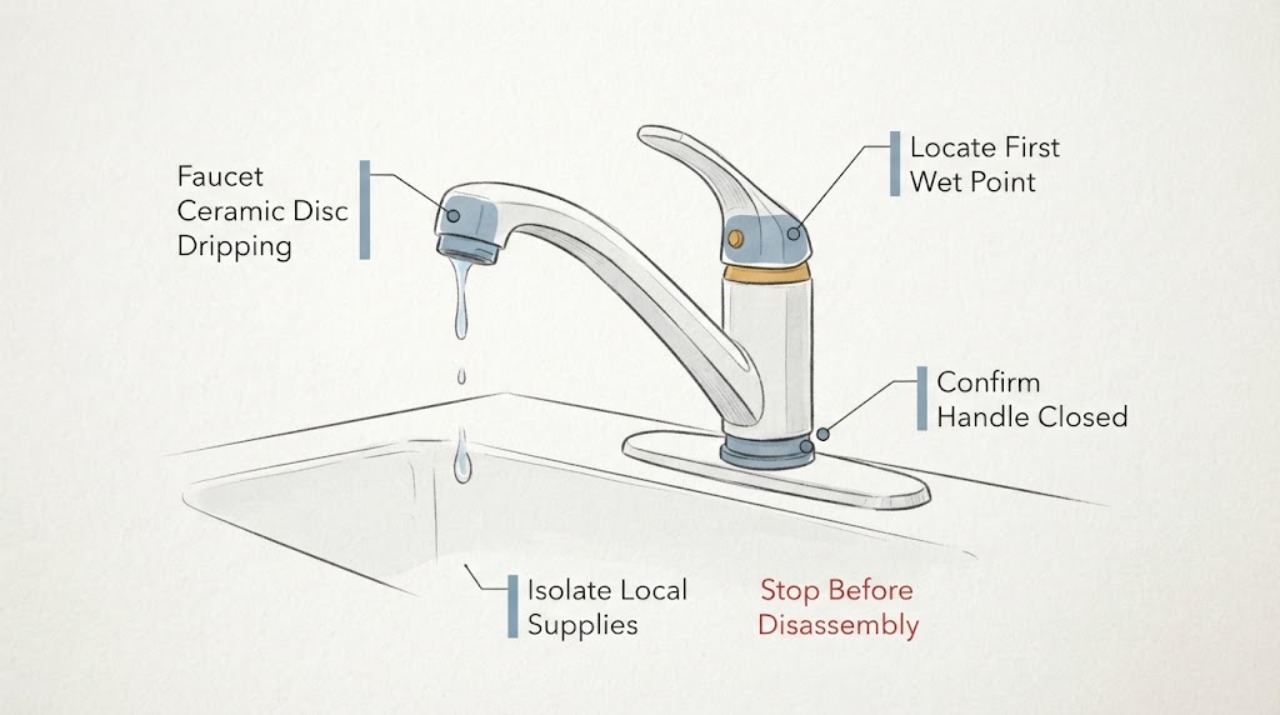
A closed American Standard faucet that continues to drip usually needs the drip location and the affected water path identified before any part is chosen. American Standard describes its ceramic disc valves as drip-free on several faucet families, but that description does not identify the failed component on an individual faucet. First determine whether water is coming from the spout, around the handle, or from the faucet base and supply connections. Confirm that the handle is fully in its normal off position, and inspect only accessible surfaces for a loose obstruction, mineral residue, a wet connection, or a damaged seal. If the drip is from the spout after the faucet is fully closed, a cartridge or ceramic sealing surface is a conditional possibility; if water is around the handle or base, seals, retaining hardware, a supply connection, or the faucet body may be involved. Shut off the local hot and cold supplies only if they are clearly identified and turn freely, and do not force a valve. Do not remove the handle or cartridge unless the exact American Standard model instructions support that work and the water is isolated. Arrange qualified plumbing service for a persistent drip, a seized shutoff, a damaged cartridge or seal, an under-sink leak, or an uncertain source; stop immediately for spraying water, flooding, a cracked body, or water contacting electrical equipment.
Before you begin
Safety first
- Do not dismantle a pressurized faucet, force a shutoff, or work near water contacting electrical equipment.
Work through in order
Diagnostic checks
Use only checks that match the exact appliance or system and its official guide.
-
Check 1
With the faucet handle or handles in the normal closed position, dry only the accessible outside surfaces and observe where the next drop first appears: the spout outlet, around the handle or cap, below the escutcheon, at the faucet base, or at a visible supply connection under the sink. Do not place hands near a spray or a sharp damaged edge.
Expected result: The drip starts at the spout, appears around the handle, emerges at the base or underside, comes from a supply connection, or the source cannot be seen.
Next step: Record the first wet point and whether the handle was fully closed, then continue only with the matching safe check below. Keep a persistent or under-sink leak isolated when the correct supply shutoff is known and safe to use.
Stop if: Stop for spraying water, a cracked faucet body, flooding, a seized or leaking shutoff, a sharp edge, or water contacting an electrical device; obtain qualified plumbing help.
Why this matters
Why: A spout drip keeps the valve cartridge or ceramic sealing surfaces in consideration. Moisture around the handle or base points more toward seals, retaining parts, the faucet body, or a connection. A supply-side leak is not diagnosed by the ceramic disc, and an unseen source needs service rather than guesswork.
-
Check 2
Move the handle or handles gently through their normal range and return them to the marked closed position without forcing, over-tightening, or removing trim. Observe whether the spout drip changes immediately, stops only at a particular handle position, or continues unchanged.
Expected result: The drip stops when the handle reaches its normal off position, changes as the handle moves, or continues with the handle fully closed.
Next step: If the handle does not move normally, feels loose, binds, or cannot reach the closed mark, stop and provide that result to a plumber. If the spout continues to drip fully closed, proceed to isolate the water path and identify the model before any disassembly.
Stop if: Do not force a handle, operate a cracked assembly, or remove the cap, set screw, retaining nut, or cartridge without model-specific instructions and isolated water.
Why this matters
Why: A change with handle position suggests the valve is not reaching or maintaining its sealing position, but it does not distinguish a worn cartridge from an alignment or handle problem. A drip that continues fully closed makes the cartridge or another internal seal more likely when the water is from the spout; it does not prove a particular part.
-
Check 3
For a persistent drip, look under the sink for clearly labeled hot and cold faucet supply shutoffs. Protect the cabinet from water, close the appropriate shutoff gently if it turns freely, and observe whether the faucet drip stops; if a shutoff is absent, unidentified, seized, or leaking, do not force it and use the building's known main shutoff only with appropriate help.
Expected result: Closing a known supply stops the drip, reduces it on one side, does not change it, or the supply cannot be safely isolated.
Next step: Leave the affected supply closed if the faucet is still leaking or the source is uncertain, place a container under a safe accessible drip, and arrange qualified service. Do not reopen a valve that sprays or leaks at its stem.
Stop if: Stop immediately for a burst connection, uncontrolled flow, a valve that will not close, flooding, or water near an outlet or electrical equipment.
Why this matters
Why: A drip that stops when the relevant supply is isolated confirms that pressurized water was feeding the faucet, but it does not identify whether the cartridge, seals, or body is at fault. No change can mean the wrong supply was closed, stored water remains, or the source is elsewhere. An unsafe shutoff is itself a plumbing-service issue.
-
Check 4
With the water safely isolated or the faucet no longer actively flowing, inspect the spout outlet, aerator edge, handle-to-body joint, base, and visible supply connections for mineral residue, a loose-looking external piece, a split seal, or a fresh wet trail. Clean only removable exterior residue with water and a soft cloth; do not insert a tool into the valve or loosen a fitting.
Expected result: Residue is limited to the outlet, a visible seal is damaged, moisture begins at the handle or base, a connection is wet, or no external clue is present.
Next step: Document the location with a photo and model information. Replace or clean only an accessible item covered by the exact model instructions; otherwise leave the faucet isolated and have a plumber diagnose the internal valve or hidden connection.
Stop if: Do not pry the aerator, probe the valve, apply abrasive or acidic cleaner, loosen supply fittings, or continue if the faucet body or connection is cracked.
Why this matters
Why: Residue at the outlet may affect the visible stream but does not prove that it caused a closed-faucet drip. A damaged seal or wet base/connection shifts the diagnosis away from a ceramic disc alone. No external clue keeps an internal cartridge or valve-body fault in consideration.
-
Check 5
Read the American Standard model number from ordinary-access paperwork or labeling and compare the faucet's handle style, number of handles, and visible cartridge or seal terminology with the matching manufacturer guide. Do not remove the handle or cartridge just to identify it.
Expected result: The model and handle configuration match an official guide, the model is missing or unreadable, or the faucet does not match the guide's configuration.
Next step: Give the model, configuration, drip location, supply-isolation result, and photos to a qualified plumber or use the exact manufacturer guide. Keep the water isolated if the drip returns or the faucet is not dependable.
Stop if: Do not order by appearance, force a retaining part, substitute a cartridge without fit confirmation, or open the valve body when the model is uncertain.
Why this matters
Why: A confirmed model can identify the correct service procedure and a conditional cartridge or seal category. A missing or mismatched model makes a visually similar replacement unreliable; ceramic-disc construction alone is not enough to establish fit.
-
Check 6
Prepare the service record: model and serial information if available, faucet type, first wet point, handle position, whether the drip is hot-side, cold-side, or both, supply-shutoff result, duration, and whether the leak is from the spout, base, handle, or connection. Keep the affected supply closed if safe until service.
Expected result: The drip persists with the handle closed, returns after an accessible cleaning or seal check, appears under the sink, or the source remains uncertain.
Next step: Arrange qualified plumbing service and provide the recorded observations. Ask the technician to verify the source and model compatibility before replacing a cartridge, seal, or faucet body.
Stop if: Stop using the faucet for active spraying, flooding, a cracked body, a failed shutoff, water near electrical equipment, or any leak that cannot be contained safely.
Why this matters
Why: A persistent closed-spout drip is consistent with an internal cartridge or ceramic sealing fault but still needs model-specific diagnosis. A base, handle, or under-sink leak can involve seals, connections, or the faucet body instead. An uncertain source is not a reason to replace a cartridge blindly.
Use your observations
Decision map
Find the observation that best matches what you see, then follow the next safe action.
-
PATH 01Next step
What you see
The first wet point is the spout and the drip continues with the handle fully closed.
Do this next
Isolate the known local supply if safe, confirm the model and handle configuration, and use the exact manufacturer procedure or qualified plumbing service before cartridge work.
Why this path and its safety boundary
Why it matters: An internal cartridge or ceramic sealing surface becomes more likely, but the observation cannot identify the exact cartridge or prove that the ceramic disc itself is damaged.
-
PATH 02Next step
What you see
Water appears around the handle, below the escutcheon, or at the faucet base rather than first at the spout.
Do this next
Keep the affected supply closed if safe, avoid removing trim or tightening pressurized parts, and have a plumber trace the first wet point.
Why this path and its safety boundary
Why it matters: The pattern makes a handle seal, retaining part, body seal, or connection more likely than a spout cartridge-only explanation.
-
PATH 03Next step
What you see
Moisture starts at a visible supply connection or the faucet drip does not change when the expected local valve is closed.
Do this next
Do not force the valve or fitting. Use only a known safe upstream shutoff if needed to prevent damage and arrange qualified plumbing service.
Why this path and its safety boundary
Why it matters: A supply connection, shutoff, wrong valve, or another plumbing path is more likely than a ceramic disc failure. A valve that cannot safely isolate the faucet raises the service urgency.
-
PATH 04Next step
What you see
The model number, handle configuration, and drip location match an American Standard guide that identifies a cartridge or seal procedure.
Do this next
Follow only the exact guide's water-isolation and service boundary, or provide the model and observations to a qualified plumber. Do not generalize a part from another American Standard faucet family.
Why this path and its safety boundary
Why it matters: A model-specific repair path may be available, but the part remains conditional on the observed failure and the manufacturer's fit information.
-
PATH 05Safety boundary
What you see
Water is spraying, pooling rapidly, reaching electrical equipment, or the faucet body or shutoff is cracked or unsafe to operate.
Do this next
Leave the area clear, shut off a known safe upstream supply only if it can be done without contact with the hazard, and obtain urgent plumbing or emergency assistance.
Why this path and its safety boundary
Why it matters: This is an immediate water-damage or electrical hazard, not a routine ceramic-disc diagnosis.
Safety stop: Do not touch wet electrical equipment, force a broken shutoff, or dismantle the faucet while pressurized.
Helpful context
Understand the symptom
Locate the water before naming the failed part
A drop at the spout is a different clue from water around a handle, below the escutcheon, or at a supply connection. Dry the outside surfaces and observe from a safe position with the faucet closed. Water can run along the body, so the lowest wet spot is not always the source. The ceramic disc or cartridge is only one possible cause until the first wet point is known.
Use the model instructions for cartridge and seal work
American Standard's own faucet repair pages show model-specific work involving the handle, cartridge, spout, and seals, and they begin by turning off the water. A product page may list a ceramic cartridge for one family while another faucet uses a different assembly. Record the model from the ordinary-access product label or paperwork and use that model's installation or repair guide before ordering or removing a part.
Keep the boundary at the shutoff and accessible surfaces
A user can observe the drip, check that the handle is fully closed, inspect accessible connections, and close a clearly identified local supply valve without force. Do not pry trim, loosen a pressurized fitting, remove a cartridge by guesswork, or continue operating a cracked or spraying faucet. A plumber should handle seized shutoffs, hidden leaks, body damage, cartridge extraction, and any repair that cannot be matched to the exact model instructions.
Only after diagnosis
Potential parts
- American Standard ceramic disc cartridge or valve cartridge
Consider only when the first wet point is the spout and the faucet continues to drip with the handle fully closed, after the exact model and cartridge configuration are confirmed.
American Standard faucet families use different assemblies; confirm the model and the manufacturer's fit information before ordering. - American Standard faucet spout seal kit
Consider when the model-specific guide identifies spout seals and the wet point is at the spout base or body joint rather than the outlet.
Seal shape and procedure vary by model; do not substitute a visually similar kit. - American Standard handle, retaining, or body seal
Consider only when moisture starts around the handle, cap, escutcheon, or faucet base and the model guide identifies a matching seal or retaining assembly.
Confirm the faucet model, handle style, and exact repair diagram before selecting any seal or hardware. - Faucet supply connection or shutoff component
Consider when water begins at a visible supply connection or the local shutoff leaks during isolation, rather than at the ceramic valve.
Connection and shutoff work may involve the home's plumbing; a qualified plumber should verify thread, tubing, and system compatibility.
When checks do not resolve it
Need a professional?
Call a qualified plumber when the drip persists with the faucet closed, the source is at the handle, base, supply, or wall connection, the shutoff is unsafe, or the exact model procedure is unavailable.
Safety scope: Do not dismantle a pressurized faucet, force a shutoff, or work near water contacting electrical equipment.
Common questions
FAQ
Is a dripping American Standard ceramic-disc faucet always a failed cartridge?
No. A spout drip with the handle fully closed makes a cartridge or ceramic sealing surface more likely, but water around the handle, base, or supply connection points to other seals, hardware, the faucet body, or plumbing. Confirm the first wet point and model before choosing a part.
What should I check first when the faucet drips after shutoff?
Confirm the handle is in its normal closed position and identify whether the first drop is at the spout, handle, base, or supply connection. This separates an internal valve clue from a seal or plumbing leak before disassembly.
Can I remove the American Standard faucet cartridge to clean or replace it?
Only if the exact model instructions support the work, the correct hot and cold supplies are isolated, and the faucet can be handled safely. American Standard's model-specific repair pages begin by turning off the water before cartridge and seal removal; do not use a generic procedure when the model is unknown.
Why is water coming from under the handle instead of the spout?
Water at the handle, escutcheon, or faucet base shifts attention toward a handle seal, retaining part, body seal, or connection rather than a spout cartridge-only explanation. Keep the supply closed when safe and have a plumber trace the first wet point if it returns.
When should I stop troubleshooting the dripping faucet?
Stop for spraying or rapidly pooling water, a cracked body, a failed or seized shutoff, water near electrical equipment, or a leak that continues after safe observation and isolation. Arrange qualified plumbing service instead of forcing a valve or dismantling a pressurized faucet.
Read the exact guide
Official sources
- Colony® PRO 4-Inch Centerset 2-Handle Bathroom Faucet 1.2 gpm/4.5 Lpm With Lever HandlesAmerican Standard · American Standard two-handle faucet ceramic disc valve and model-specific cartridge resources
- How To Replace The Spout Seal Kit For Your Reliant FaucetAmerican Standard · American Standard model-specific faucet handle, cartridge, spout, and seal service sequence
- How To Replace The Spout Seal Kit For Your Hamilton FaucetAmerican Standard · American Standard faucet repair sequence for a model-specific spout seal and cartridge procedure
- Colony® Soft 4-Inch Centerset Single-Handle Bathroom Faucet 1.2 gpm/4.5 L/min With Lever HandleAmerican Standard · American Standard faucet product features and ceramic disc valve construction
Community feedback
Share a repair observation
Share a plain-text repair observation. Accepted observations are published automatically; this page may take a moment to update.