
On this page
Start here
Quick answer
An American Standard faucet that drips may have a worn, displaced, or model-specific O-ring, but a drip from the spout with the handles fully off can also come from the cartridge or valve rather than the O-ring. First identify whether water appears at the spout, handle, base, hose, or supply connection, then close the hot and cold supply stops and confirm the faucet no longer receives water. American Standard's seal-kit guidance uses a model-specific sequence that turns off the water, removes the applicable handle, cartridge, and spout, replaces the spout seals, and reassembles the faucet. Do not force the spout, substitute a generic ring, or assume an O-ring is the cause until the exact model instructions and leak location agree.
Before you begin
Safety first
- Close the appropriate water supply when safe, keep the work area dry, and do not force supply stops, pry against the faucet body, cut seals with a sharp tool, or work on a pressurized connection.
Work through in order
Diagnostic checks
Use only checks that match the exact appliance or system and its official guide.
-
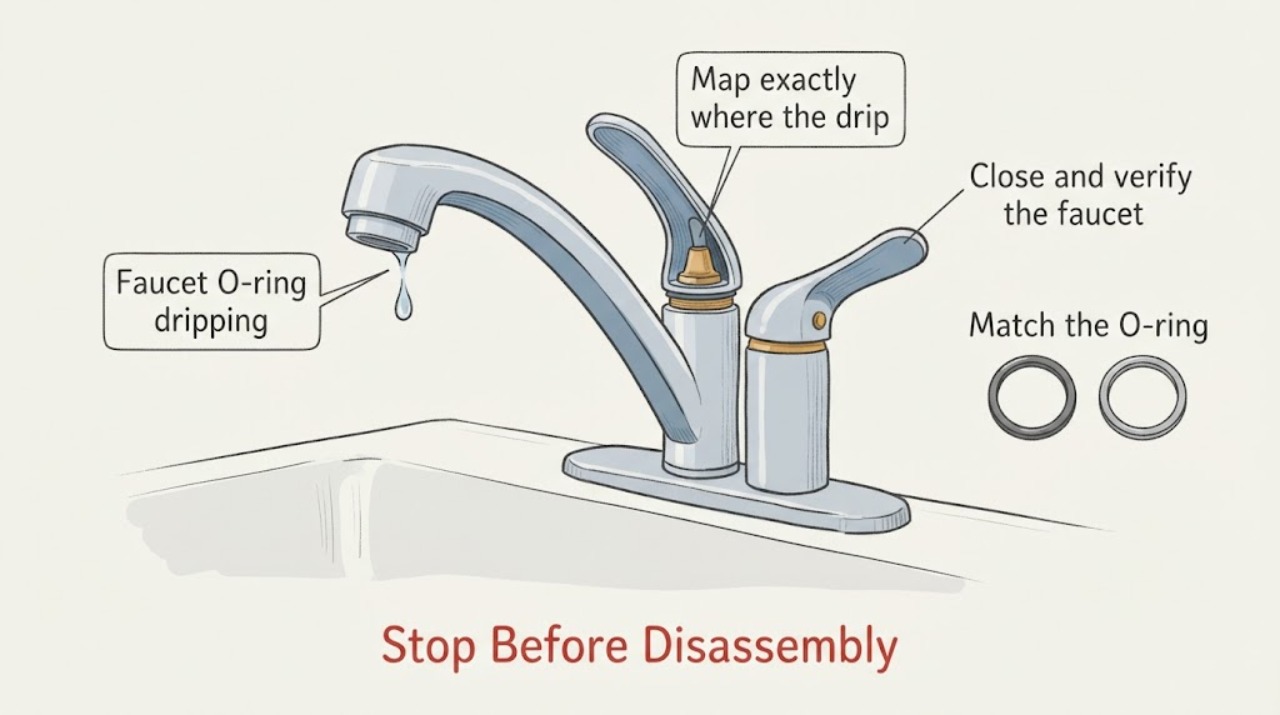
Map exactly where the drip starts
Dry the accessible faucet surfaces and cabinet area, place a dry cloth beneath the faucet without blocking the drain, and operate the handles and movable spout normally while watching the first point where water returns.
Expected result: Water first appears at the spout outlet, handle or cap, spout-to-body seam, faucet base, pull-down hose, supply connection, shutoff, or an area that cannot be seen.
Next step: Photograph the first wet point and continue only with the matching model-specific check. Close the supply stops and arrange plumbing service for a hidden, wall-side, shutoff, or corroded-connection leak.
Stop if: Do not reach into standing water, force a moving spout, or continue if water is reaching electrical equipment or the cabinet structure.
Why this matters
Why: A spout-to-body seam or moving-spout leak supports an O-ring or spout-seal check; a drip from the spout outlet with the handles off makes the cartridge or valve path more relevant. A below-sink or hidden leak is not safely diagnosed by replacing a visible ring.
-
Close and verify the faucet supply stops
Turn the hot and cold faucet supply stops clockwise only as far as they operate normally, then open the faucet briefly to confirm that flow stops before placing a cloth under the work area.
Expected result: Both supply stops close and flow stops, one stop does not close, a stop or hose leaks while being operated, or water continues with both stops closed.
Next step: If the stops do not isolate the faucet or begin leaking, stop and arrange qualified plumbing service. If isolation succeeds, use the exact faucet instructions before removing any handle, cartridge, spout, or seal.
Stop if: Do not force a seized stop, loosen a pressurized connection, or work in a wet cabinet near electrical equipment.
Why this matters
Why: A confirmed shutoff creates a safer boundary for a seal inspection. A stuck or leaking stop, or continued water with the local stops closed, points to a supply or upstream plumbing issue rather than a simple O-ring service step.
-
Match the O-ring to the exact faucet model
Record the complete American Standard model identifier from the faucet paperwork, product label, or existing parts diagram, and compare the diagram's seal location with the observed leak before choosing a repair part.
Expected result: The diagram identifies an O-ring or spout seal at the leaking seam, identifies a cartridge or different seal instead, or does not match the faucet configuration.
Next step: Use only the exact model's installation or repair instructions. If the model or seal location is uncertain, preserve the photos and have a plumber or the manufacturer identify the correct procedure.
Stop if: Do not order by faucet brand alone, substitute a generic ring, or rely on a part from a different American Standard model.
Why this matters
Why: American Standard lists different O-rings and seal kits for different faucet products, so a visual match is not proof of compatibility. A cartridge or valve indication means changing the O-ring may not stop a drip from the outlet.
-
Inspect the accessible O-ring or spout seal
With the supply isolated and only after the exact model instructions allow it, remove the applicable handle, cartridge, or spout in the documented order and inspect the accessible seal for a cut, flattening, displacement, debris, or a dry or damaged sealing surface.
Expected result: The seal is visibly damaged or displaced, the seal looks intact but the body or groove is damaged, the wrong seal is present, or the component will not release without force.
Next step: If the seal and groove are accessible and the instructions specify replacement, use the exact model seal and reassembly sequence. If the part is seized, the body is damaged, or the leak source is elsewhere, stop and arrange plumbing service.
Stop if: Do not pry against the faucet body, gouge a seal groove, use a sharp tool to cut out a ring, or disassemble a pressurized faucet.
Why this matters
Why: A damaged or displaced seal can explain a leak at its own sealing joint. An intact seal with a damaged groove, body, cartridge, or spout means an O-ring replacement alone may not address the leak; resistance or corrosion makes the model-specific service boundary important.
-
Reassemble and check for recurrence
Reinstall the exact model's seal, cartridge, spout, handle, and retaining hardware in the documented order, reopen the supply stops slowly, and run cold and hot water briefly while watching the original leak point and the connections below the sink.
Expected result: The original leak point stays dry, the drip returns at the spout outlet with the handles off, water appears at the base or connection, or the handle or spout binds or does not seat normally.
Next step: Close the stops again and arrange qualified plumbing service for any recurring drip, connection leak, binding, or uncertain reassembly. Do not keep tightening or repeatedly cycling a leaking faucet.
Stop if: Do not use excess force, sealant as a substitute for the specified seal, or continue operation if water reaches the cabinet, wall, or electrical equipment.
Why this matters
Why: A dry joint after a correct seal procedure supports the O-ring or seal as the contributor. A returning outlet drip makes the cartridge or valve path more likely; a base or connection leak suggests a different seal or fitting; binding or misalignment means the assembly is not safely restored.
Use your observations
Decision map
Find the observation that best matches what you see, then follow the next safe action.
-
PATH 01Next step
What you see
Water begins at the spout-to-body seam or appears when the spout moves, and the local supply stops close normally.
Do this next
Follow the exact model's spout-seal or O-ring procedure only after isolating the supply. Replace the specified seal if it is accessible without force; stop for corrosion, a damaged groove, or a seized spout.
-
PATH 02Next step
What you see
Water continues from the spout outlet with the handles fully off, even though the spout body itself is dry.
Do this next
Treat the cartridge or valve path as more likely than a spout O-ring. Use the exact model documentation and arrange plumbing service if the drip returns after the documented cartridge check; do not keep replacing spout rings.
-
PATH 03Next step
What you see
Water first appears around a handle, cap, or faucet base rather than at the spout seam.
Do this next
Use the model diagram to identify the handle, cartridge, or base seal for that location. Stop and obtain qualified service if the leak reaches below the deck, the retaining hardware is corroded, or the faucet cannot be disassembled without force.
-
PATH 04Next step
What you see
Water appears at a hose, shutoff, wall-side connection, cabinet surface, or continues when the local supply stops are closed.
Do this next
Stop the faucet work, isolate the broader water supply if it can be done safely, protect the cabinet, and arrange qualified plumbing service. An O-ring replacement will not safely resolve a hidden or upstream leak.
-
PATH 05Next step
What you see
The exact seal was installed according to the model instructions, but the same drip returns or the faucet binds after reassembly.
Do this next
Close the supply stops and stop further tightening or cycling. Have a plumber evaluate the groove, spout, cartridge, valve body, alignment, and related connections rather than substituting another ring.
-
PATH 06Next step
What you see
A supply stop is seized or leaking, water is near electrical equipment, the faucet body is corroded, or the component will not release without force.
Do this next
Stop and arrange qualified plumbing service. Keep the area clear and dry from a safe position; do not turn a stuck connection into a larger leak.
Helpful context
Understand the symptom
Locate the water before naming the failed seal
A drip from the spout outlet, water around the handle stem, water at the spout base, and water below the sink are different observations. An O-ring commonly seals a moving or seated faucet component, but the exact location and model construction determine which seal is involved. Dry the outside of the faucet, operate the handles normally, and watch the first place that becomes wet. Do not remove a handle or spout while the supply is open.
Use the American Standard model instructions as the boundary
American Standard publishes different faucet configurations and parts diagrams. Its product pages identify O-rings or spout bushing and O-ring kits for particular models, while its repair guides describe a model-specific spout-seal sequence. Record the complete model and finish information before ordering anything; a ring that looks similar may have the wrong size, material, or location.
A spout drip can still be a cartridge problem
American Standard describes ceramic-disc cartridges as the water-control seal in applicable faucets. If water continues from the spout with both handles fully off, an O-ring around the spout may not be the part that stops the flow. If water appears only while the spout moves or at the spout base, a seal-kit path becomes more plausible. Those observations guide the next check; they do not prove a part is bad without the model instructions.
Stop when the leak is not confined to the faucet
Close the supply stops and stop disassembly for a leak at a shutoff, hose, wall connection, corroded fitting, damaged sink deck, or hidden cabinet surface. Also stop if a supply stop will not close, the faucet cannot be disassembled without force, the model cannot be identified, or water continues despite the stops being closed. Keep the cabinet dry and arrange qualified plumbing service rather than stressing a seized connection.
Only after diagnosis
Potential parts
- faucet spout O-ring or seal kit
Only consider this after the leak is localized to the spout seam or moving spout and the exact model diagram identifies that seal as the applicable component.
Confirm the complete faucet model and the manufacturer's parts diagram before ordering; similar-looking rings are not interchangeable by brand alone. - faucet cartridge
Only consider this when water drips from the outlet with the handles fully off and the exact model documentation or qualified diagnosis points to the cartridge or valve path rather than the O-ring.
Confirm the exact model and cartridge configuration with the manufacturer or qualified plumber before ordering. - faucet handle or base seal
Only consider this when the first wet point is around the handle, cap, or faucet base and the exact model diagram identifies a corresponding seal.
Confirm the exact model, seal location, and installation sequence before replacement.
When checks do not resolve it
Need a professional?
A recurring drip, outlet drip with the handles off, failed isolation, hidden connection leak, damaged faucet body, or uncertain model-specific disassembly requires qualified plumbing evaluation.
Safety scope: Close the appropriate water supply when safe, keep the work area dry, and do not force supply stops, pry against the faucet body, cut seals with a sharp tool, or work on a pressurized connection.
Common questions
FAQ
Can an O-ring stop an American Standard faucet from dripping?
It can when the leak is at the O-ring's own sealing joint, such as an applicable spout seam or moving-spout seal. A drip from the spout outlet with the handles fully off can instead involve the cartridge or valve, so locate the first wet point and match the exact model instructions before replacing a ring.
Do I need to shut off the water before replacing a faucet O-ring?
Yes. American Standard's spout-seal guides begin by turning off the water supply before removing the faucet parts. Close the hot and cold supply stops only if they operate normally; stop if a stop is seized, leaks, or does not isolate the faucet.
Why does the faucet still drip after I replace the O-ring?
The leak may come from the cartridge, another seal, a damaged groove or spout, a misaligned component, or a connection below the sink. Close the supply stops, avoid repeated tightening, and have the exact model and leak location evaluated by a qualified plumber.
Can I use any O-ring that looks the same?
No. American Standard product pages list different O-rings and seal kits for specific faucet models and locations. Confirm the complete model and the manufacturer's parts information before ordering; do not choose by brand alone.
Read the exact guide
Official sources
- Pekoe® Single-Handle Pull-Down Dual-Spray Kitchen Faucet 2.2 gpm/8.3 L/minAmerican Standard · Example of model-specific spout bushing and O-ring kit, cartridge, and hose/seal listings
- How To Replace The Spout Seal Kit For Your Hamilton FaucetAmerican Standard · Model-specific example of water isolation, spout removal, seal replacement, and reassembly
- Jocelyn® 2-Handle High-Arc Kitchen FaucetAmerican Standard · Example of a product-specific parts listing that includes an O-ring and separate valve cartridge
- What Is A Ceramic Disc ValveAmerican Standard · General mechanism context for ceramic-disc water-control cartridges in applicable American Standard faucets
- How To Replace The Spout Seal Kit For Your Reliant FaucetAmerican Standard · Model-specific example of isolating water, removing the applicable faucet parts, replacing spout seals, and reassembling
Community feedback
Share a repair observation
Share a plain-text repair observation. Accepted observations are published automatically; this page may take a moment to update.