
On this page
Start here
Quick answer
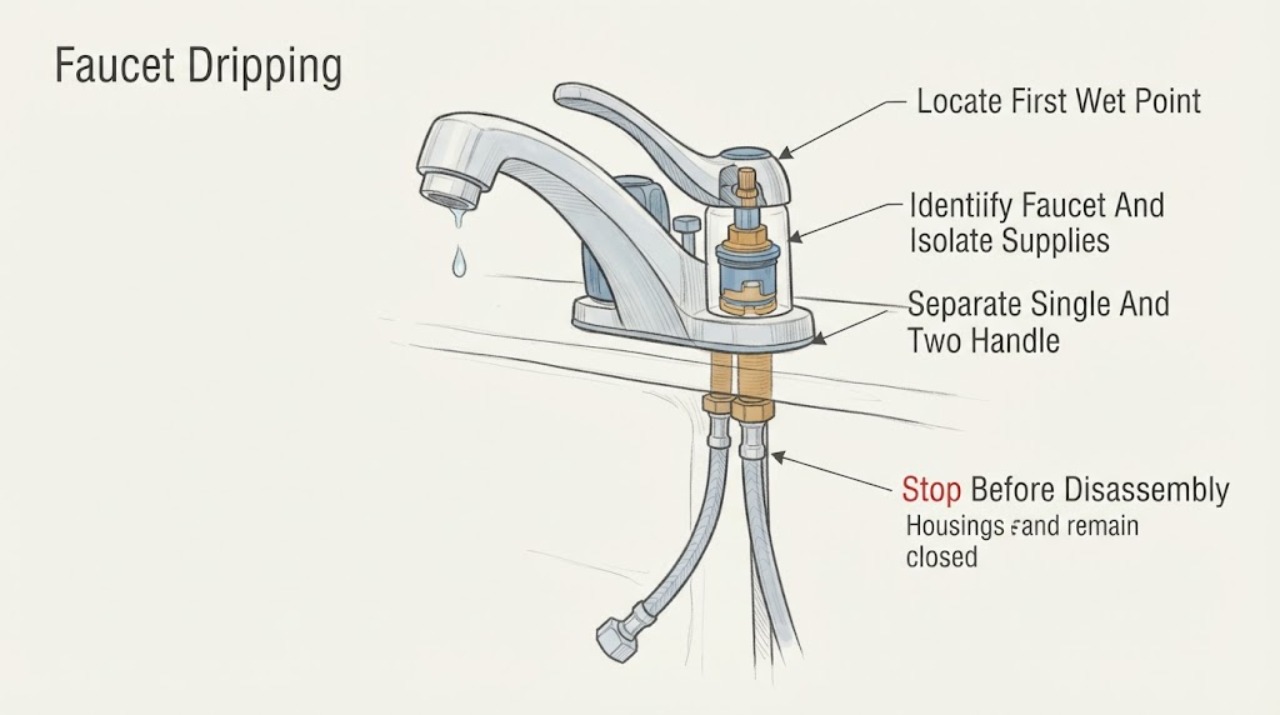
An American Standard faucet that drips after the handles are closed usually has a valve or cartridge that is not sealing, debris at the valve, or—when water appears around the spout or handle—a worn seal or O-ring. First identify whether water comes from the spout outlet, handle, faucet body, supply connection, or drain, then close the hot and cold shutoff valves under the sink before removing any handle or cartridge. Check the exact faucet model's parts diagram and installation guide: American Standard uses different single-handle, two-handle, ceramic-disc, and seal arrangements. A spout drip that stops when one supply valve is closed points to that side's valve or cartridge; a leak only when the handle or spout moves points more toward a seal or body joint. Replace a cartridge or seal only when the model-specific part and procedure are confirmed. Stop and call a licensed plumber for seized shutoffs, a leak under pressure, corroded or inaccessible connections, a cracked body, water damage, or a drip that persists after correct reassembly.
Work through in order
Diagnostic checks
Use only checks that match the exact appliance or system and its official guide.
-
Check 1
Dry the spout, handle, faucet body, deck, supply connections, and cabinet area. Close the handles, then watch from a dry position for the first new drop without repeatedly cycling the faucet or touching a pressurized connection.
Expected result: Water forms at the spout outlet, around the handle, at the spout base or body, at a supply connection under the sink, or from the deck or drain area.
Next step: Record the exact wet point and faucet style, then close the hot and cold faucet shutoffs before any handle or cartridge work. If water is spraying, pooling near electrics, or cannot be controlled, stop and call a plumber.
Stop if: Do not loosen a pressurized supply connection, dismantle the drain to diagnose a faucet drip, or continue after a burst hose, uncontrolled leak, or water damage.
Why this matters
Why: A spout-outlet drip keeps the valve or cartridge in focus. A handle or spout-base leak points toward a cartridge, stem, O-ring, or seal. A supply, mounting, or drain leak is a different plumbing path and may not be fixed by a cartridge.
-
Check 2
Photograph the faucet and locate its model information, then close both under-sink faucet shutoff valves slowly. Open the faucet briefly to release controlled pressure and confirm the water stops before removing a handle, trim piece, or cartridge.
Expected result: Both shutoffs close and the faucet stops; one shutoff does not close; a valve handle spins; water continues; the supply connection moves; or the model information is missing.
Next step: Use the model's installation guide or repair-parts diagram when both shutoffs hold. If either shutoff fails, close the building's appropriate water supply only if it is safely accessible and arrange plumbing service; do not begin faucet disassembly.
Stop if: Do not force a seized shutoff, disconnect a braided hose under pressure, remove the cartridge retaining hardware while water is on, or rely on a faucet handle as the water isolation.
Why this matters
Why: A complete shutoff creates the safe boundary for model-directed seal or cartridge work. A failed shutoff, moving supply connection, or continuing flow means the faucet remains pressurized and disassembly could cause flooding.
-
Check 3
With the faucet isolated and the model identified, determine whether it is single-handle or two-handle and whether the drip is from the spout when closed or from a moving joint. For a two-handle faucet, reopen only one supply shutoff at a time for a brief controlled observation if the connections are dry and stable; then close it again before working.
Expected result: A two-handle faucet drips with only the hot side open, drips with only the cold side open, stops when both are isolated, or a single-handle faucet still drips with its supply reopened.
Next step: Use the exact parts diagram to identify the affected cartridge, valve, or seal. If the isolation test is not safe because a shutoff leaks or the faucet is unstable, leave the water off and arrange service.
Stop if: Do not run an isolation test with a loose hose, active spray, cabinet flooding, or an inaccessible shutoff; do not assume hot and cold cartridges are interchangeable without model documentation.
Why this matters
Why: On a two-handle faucet, the side that reproduces a spout drip keeps that valve or cartridge in focus. A single-handle drip points to its cartridge or valve assembly. A drip that does not follow the valve isolation may be at a body seal, supply, or another plumbing path.
-
Check 4
With water isolated, inspect only the accessible outlet aerator, handle opening, cartridge retaining area, and spout joint described by the model guide. Remove loose surface debris gently, keep small parts organized, and look for scale, a damaged seal, a scored cartridge, or a spout O-ring without scratching sealing surfaces.
Expected result: The aerator is clogged but the valve area is dry; the cartridge or stem shows scale or damage; the spout O-ring or seal is flattened or torn; the retaining hardware is corroded; or no defect is visible.
Next step: Clean only the accessible aerator or surfaces allowed by the manual. If the documented inspection identifies a replaceable seal or cartridge and the part matches the model, proceed to model-directed replacement; otherwise stop and arrange service.
Stop if: Do not scrape ceramic or sealing faces, drill corroded hardware, use penetrating chemicals inside the valve, or open the faucet body beyond the model's documented procedure.
Why this matters
Why: An aerator can affect the stream but usually does not explain a valve that drips while closed. Scale or a damaged cartridge or seal can prevent shutoff, while corrosion or an unseen defect makes user disassembly less reliable.
-
Check 5
Only if the faucet is isolated and the official model instructions identify the component, replace the matching cartridge, valve, spout seal, or O-ring using the documented order. Keep the sealing surfaces clean, lubricate only where the manual specifies, and reinstall the handle, retaining hardware, and spout without forcing them.
Expected result: The replacement component matches the model diagram and seats correctly; the old seal is damaged; the cartridge will not release; the retaining hardware is seized; or the faucet cannot be reassembled with all parts accounted for.
Next step: If the component seats and the faucet is fully reassembled, reopen the shutoffs slowly while watching every joint. If the part cannot be removed or the fit is uncertain, keep water off and call a plumber rather than forcing the assembly.
Stop if: Do not substitute a generic cartridge, force a cartridge stem, overtighten trim, reuse a cut or damaged seal, or proceed without the model's installation or repair-parts information.
Why this matters
Why: A correctly matched seal or cartridge can restore the valve's sealing function, but a stuck component, corroded retainer, missing part, or uncertain orientation can create a new leak or damage the faucet.
-
Check 6
After reassembly, reopen the hot and cold shutoffs gradually, operate the handle through its normal range, and watch the spout, handle, spout base, supply connections, and cabinet for several minutes. Record whether the original drip stops and whether any new leak appears when the spout or handle moves.
Expected result: The spout remains dry when closed and all joints stay dry; the drip returns from the spout; water appears around the handle or spout base; a supply connection leaks; or the faucet becomes difficult to operate.
Next step: Close the shutoffs again for any leak and arrange a plumber if the drip returns, the faucet binds, or any connection leaks. Do not keep tightening or cycling a leaking faucet under pressure.
Stop if: Do not leave the cabinet unattended during the first test, operate with a spray leak, continue after water reaches electrical equipment, or keep a failed faucet in service to see whether it worsens.
Why this matters
Why: A dry test supports a successful repair, but a returning spout drip means the valve or cartridge is still not sealing. A moving-joint or supply leak points to a seal, body, or connection issue rather than proving the replaced part was wrong.
Use your observations
Decision map
Find the observation that best matches what you see, then follow the next safe action.
-
PATH 01Next step
What you see
A two-handle faucet drips from the spout only when one isolated supply side is reopened, and the body and supply connections remain dry.
Do this next
Use the exact American Standard model diagram to identify that side's cartridge or valve and replace it only with a confirmed matching component; call a plumber if the shutoff or retainer is unreliable.
Why this path and its safety boundary
Why it matters: The valve or cartridge on that hot or cold side is more likely to be failing to seal than the spout body itself.
-
PATH 02Next step
What you see
A single-handle faucet drips from the spout while closed, with both supplies stable and no water at the handle or body.
Do this next
Follow the identified model's cartridge procedure and use a matching part. If the cartridge is seized, the valve body is damaged, or the drip persists after correct reassembly, arrange plumbing service.
Why this path and its safety boundary
Why it matters: The single cartridge or valve assembly is the leading suspect, but debris, worn sealing faces, or a damaged valve seat can produce the same symptom.
-
PATH 03Next step
What you see
The faucet is dry when stationary but leaks around the spout base or handle when that part is moved.
Do this next
Isolate the water and follow the model's seal or spout instructions. American Standard's seal guide illustrates removing the handle, cartridge, spout, and seals, but do not use that sequence unless it matches the installed model.
Why this path and its safety boundary
Why it matters: A moving-joint O-ring, spout seal, cartridge stem seal, or body joint is more likely than a drip solely through the closed outlet.
-
PATH 04Next step
What you see
The spout is dry but water appears at a flexible supply hose, shutoff connection, mounting area, faucet body, or drain opening under the sink.
Do this next
Close the affected shutoff, dry the cabinet, and arrange a plumber for a pressurized connection, corroded fitting, body leak, or water-damage inspection. Tighten only a clearly loose connection if the model instructions permit and the shutoff is reliable.
Why this path and its safety boundary
Why it matters: The leak is outside the valve outlet path and may involve a supply hose, fitting, mounting seal, body crack, or sink plumbing; a cartridge change may not help.
-
PATH 05Next step
What you see
The drip continues after a model-matched seal or cartridge repair, the faucet cannot be isolated, parts are corroded or missing, water sprays, or a crack or uncontrolled leak is present.
Do this next
Close the building water supply only if it is safely accessible, protect the cabinet from water, and call a licensed plumber. Do not keep replacing parts or operate the faucet under an uncontrolled leak.
Why this path and its safety boundary
Why it matters: A damaged valve body, wrong or incorrectly seated component, upstream shutoff problem, or broader plumbing fault remains possible and requires more than consumer adjustment.
Helpful context
Understand the symptom
Where the water appears determines the first branch
A drop from the spout outlet after the faucet is shut off is a valve-sealing symptom. Water around the handle or under the trim can come from a cartridge, stem, or seal. Water that appears only when the spout or handle moves is more consistent with a moving-joint seal, while water under the sink may be a supply, mounting, or body connection. Dry the area and observe the first point that becomes wet rather than tightening every visible nut.
American Standard parts are model-specific
American Standard product pages show different faucet families using different cartridge and seal arrangements. Some are single-handle and some are two-handle; even a similar-looking cartridge may have a different stem, retaining method, or seal. Use the faucet's model information and official repair-parts diagram before ordering or removing a component.
A shutoff valve is part of the repair boundary
Close the hot and cold faucet shutoffs before opening the handle or cartridge area, and relieve pressure by opening the faucet briefly only when the water is controlled. If a shutoff will not close, a supply hose twists, the connection is corroded, or water continues under pressure, do not proceed with disassembly. The faucet can be left out of service while a plumber replaces or repairs the upstream shutoff.
Safety boundary
Stop conditions
- Stop and close the faucet shutoffs before removing any handle, cartridge, spout, or seal. Stop for a failed shutoff, pressurized spray, corroded or seized connection, cracked faucet body, uncontrolled leak, water near electrical equipment, or a drip that remains after a model-matched repair. Do not use a generic cartridge, force retaining hardware, open a pressurized fitting, or continue tightening a leak without identifying its path.
Only after diagnosis
Potential parts
- faucet valve cartridge
Consider this only when the model-specific diagnosis shows that the cartridge or valve is not sealing and the exact faucet model identifies that component.
Cartridge dimensions, stem, retaining method, hot/cold orientation, and safety features vary by collection; confirm the exact model and official repair-parts diagram before selecting a part. - faucet spout seal or O-ring kit
Consider this only when water appears at a moving spout joint or the model-directed inspection finds a damaged spout seal or O-ring rather than a valve-outlet drip.
Seal size, material, lubrication, and spout construction are model-specific; confirm the faucet model and the manufacturer's procedure before replacement. - faucet supply hose or shutoff valve
Consider this only when the leak is confirmed at the supply connection or the shutoff cannot reliably isolate the faucet, and a plumber identifies the failed component.
Connection size, hose routing, valve type, and local installation requirements must match the sink and plumbing; do not select a part from a spout drip alone.
When checks do not resolve it
Need a professional?
Call a licensed plumber when the faucet cannot be isolated, a shutoff or supply hose is unreliable, the body or connections are corroded or cracked, a leak is under the sink or at the deck, the cartridge or seal is seized, the correct model part is uncertain, or the drip persists after correct reassembly. Use urgent service for an uncontrolled spray, flooding, or water near electrical equipment.
Have this ready
- Provide the faucet brand and model or collection, single- or two-handle style, leak location, whether the drip occurs with the handle closed or moving, which supply side reproduces it if tested safely, photos of the faucet and under-sink connections from a dry position, and the parts or steps already attempted.
Common questions
FAQ
Why is my American Standard faucet dripping after I turn it off?
The valve or cartridge may not be sealing, or debris or a damaged seal may be allowing water through. First identify whether the drop comes from the spout outlet, handle, spout base, body, or supply connection. The location and whether the drip follows one supply side or movement determine the next check.
Should I shut off the water before replacing an American Standard faucet cartridge?
Yes. Close the faucet's hot and cold shutoffs and confirm the flow stops before removing a handle, trim, cartridge, or spout. American Standard's spout-seal guide begins by turning off water. If a shutoff does not hold or a supply connection moves, stop and call a plumber.
How do I tell whether a two-handle faucet's hot or cold side is dripping?
With stable shutoffs and dry connections, reopen one faucet supply at a time for a brief controlled observation, then close it again. If the spout drip returns with one side, that side's valve or cartridge is more suspect. Do not perform this test if a shutoff, hose, or connection is unreliable.
Is a dripping faucet always fixed by replacing the cartridge?
No. A leak at the spout base, handle, supply connection, deck, or drain can come from an O-ring, seal, hose, shutoff, mounting joint, or body problem. A cartridge is conditional on the leak location and the exact model's parts diagram; do not replace it from the brand name alone.
Can I use any American Standard cartridge that looks similar?
No. Collections use different cartridge sizes, stems, retaining methods, and seal arrangements. Record the faucet model and use the official installation guide or repair-parts diagram. If the model or fit is uncertain, leave the water isolated and ask a plumber or the manufacturer to identify the part.
What if the faucet still drips after I replace the seal or cartridge?
Close the shutoffs again and check whether the component is the correct model part and fully seated, but do not force it or keep tightening. A damaged valve body, debris or scoring, a second seal, or an upstream connection may be involved. Persistent leakage, a seized component, or an unreliable shutoff needs a licensed plumber.
When should I call a plumber for an American Standard faucet drip?
Call when the faucet cannot be isolated, a shutoff or supply hose is corroded or unreliable, water sprays or floods, the faucet body is cracked, the leak is under the sink or at the deck, a cartridge is seized, or the drip remains after a model-matched repair. Use urgent service if water reaches electrical equipment or cannot be controlled.
Read the exact guide
Official sources
- How to Replace the Spout Seal Kit for Your Reliant FaucetAmerican Standard · Official American Standard guide that starts with turning off water and shows a model-specific sequence involving the handle, faucet cartridge, spout, and spout seals.
- Heritage® Wall Mount Faucet With Gooseneck Spout and Lever HandlesAmerican Standard · Official American Standard product page showing a faucet with washerless ceramic disc valves, a spout seal kit, a model-specific replacement cartridge, and an installation guide and repair-parts diagram.
- Reliant 3® 4-Inch Centerset Single-Handle Bathroom Faucet 1.2 gpm/4.5 L/min With Lever HandleAmerican Standard · Official American Standard product page showing that a single-handle faucet collection uses a ceramic disc valve cartridge and provides a model-specific installation guide and repair-parts diagram.
Community feedback
Share a repair observation
Share a plain-text repair observation. Accepted observations are published automatically; this page may take a moment to update.