
On this page
Start here
Quick answer
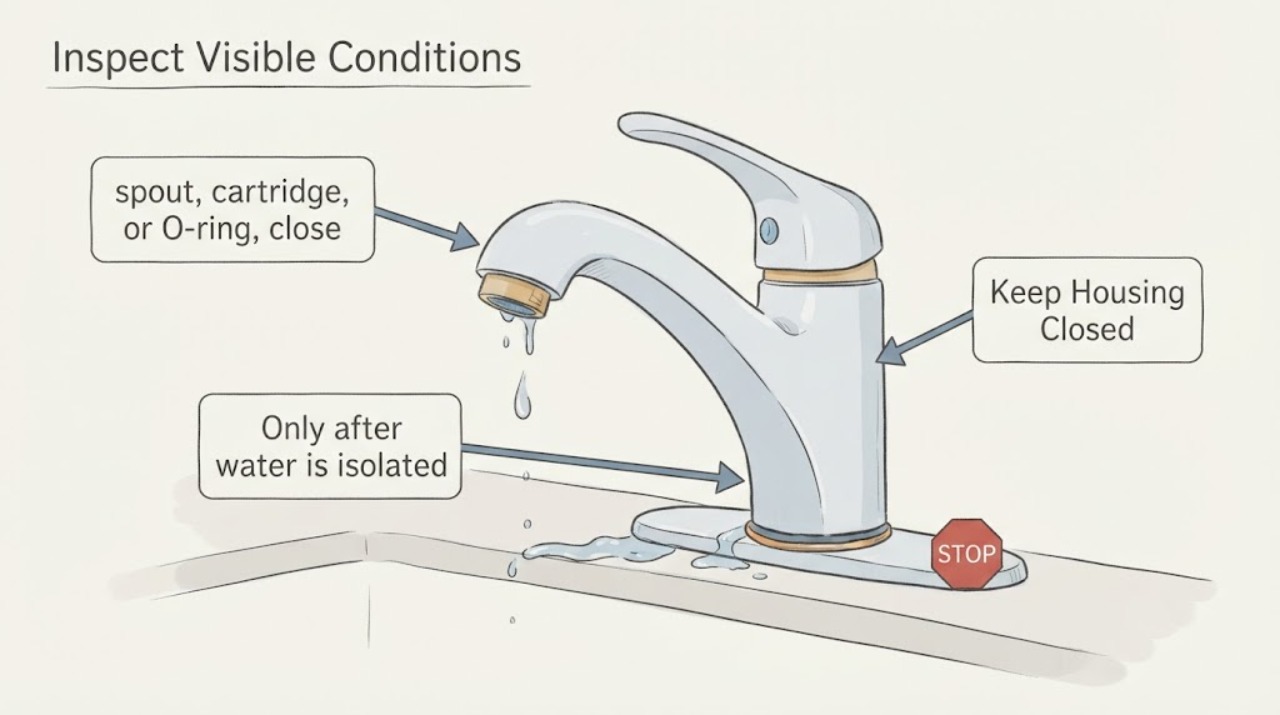
A dripping faucet may have a worn, flattened, dirty, or incorrectly fitted O-ring, but a drip from the spout can also come from a cartridge or valve and a leak at the base or supply connection has a different cause. Locate the water first. Before removing a handle, spout, cartridge, or seal, close the fixture's hot and cold shutoff valves, open the faucet to release pressure, and verify that flow has stopped. If a shutoff fails, water is uncontrolled, or the leak persists after a model-compatible O-ring service, isolate the fixture when safe and arrange plumbing service.
Work through in order
Diagnostic checks
Use only checks that match the exact appliance or system and its official guide.
-
Check 1
With the faucet handle closed, dry the spout, handle, base, and visible supply connections, then observe where fresh water appears without removing anything.
Expected result: Record whether water drips from the spout, seeps around the handle or base, appears under the sink, or comes from a supply connection; note whether it continues steadily or stops after residual water drains.
Next step: Photograph the first wet location, identify the faucet model if visible, and prepare to isolate the fixture before any disassembly.
Stop if: Stop for spraying water, cabinet flooding, water near electrical equipment, a concealed leak, or a source that cannot be safely observed.
Why this matters
Why: A base, handle, or under-deck leak may involve an O-ring, while a continuous spout drip may involve a cartridge or valve. A supply-line leak is not diagnosed by changing a faucet O-ring.
-
Check 2
Before removing a handle, spout, cartridge, or O-ring, close both accessible fixture shutoff valves, open the faucet briefly, and verify that pressure and flow have stopped.
Expected result: No continuing stream or pressure should remain while both valves are closed; a valve that will not close or continues to supply water is a failed isolation point.
Next step: Proceed only when the fixture is isolated and dry; otherwise leave the fixture alone and arrange plumbing service.
Stop if: Stop for a seized or leaking shutoff, uncontrolled flow, uncertainty about the supply line, or any need to force a valve.
Why this matters
Why: A dry, depressurized fixture is required before seal service. A failed shutoff makes disassembly unsafe and may require upstream isolation by a plumber.
-
Check 3
Only after water is isolated, inspect the accessible O-ring location using the faucet's model-specific documentation, without prying, cutting, or forcing the spout or cartridge.
Expected result: Look for a flattened, torn, brittle, displaced, dirty, or missing O-ring, and compare its location and shape with the model documentation; note mineral buildup or damage in the sealing groove.
Next step: Record the model and exact seal location, then select a compatible seal only if the faucet design and leak path support it; stop for uncertain or damaged components.
Stop if: Stop for trapped pressure, broken ceramic, corrosion, a stuck component, sharp fragments, or any need to drill, cut, or apply force.
Why this matters
Why: A visibly damaged or displaced seal can explain a leak at that joint, but damage to the cartridge, valve body, groove, or mating surface can make an O-ring replacement insufficient.
-
Check 4
After a confirmed compatible O-ring or related seal service, reassemble according to the model documentation and reopen the fixture shutoffs slowly while watching the original leak location.
Expected result: Check for a dry joint, a returning drip at the same location, seepage at the handle or base, a new supply connection leak, and normal handle movement as pressure returns.
Next step: Close the fixture shutoffs again if safe when leakage persists and arrange professional assessment with the old seal and photos available.
Stop if: Stop reopening for tests if flow becomes uncontrolled, a joint leaks, the handle binds, or water reaches electrical equipment or cabinet materials.
Why this matters
Why: A dry result supports the seal as the cause. Persistent or relocated leakage can indicate wrong fit, damaged mating surfaces, a cartridge or valve issue, or an unrelated connection leak.
-
Check 5
If the drip remains, compare the post-service location and timing with the original record without repeatedly cycling the faucet or tightening parts by force.
Expected result: Record whether the spout continues to drip, the base leaks only while running, the handle area remains wet, or the supply connection leaks; note cabinet swelling or persistent dampness.
Next step: Keep the fixture isolated when practical and provide the plumber with the model, seal location, original and post-service photos, and shutoff behavior.
Stop if: Stop use for flooding, failed isolation, structural cabinet damage, mold-like growth, or water near electrical devices.
Why this matters
Why: A continuing spout drip may point to a cartridge or valve, while base or supply leakage may require a different seal or connection diagnosis. The O-ring was not proven to be the only failed part.
Use your observations
Decision map
Find the observation that best matches what you see, then follow the next safe action.
-
PATH 01Safety boundary
What you see
Water is at the base, handle, or a visible under-deck joint and the fixture shutoffs close fully.
Do this next
Identify the model-specific O-ring location and perform only the documented, depressurized seal inspection; arrange service if the assembly is uncertain.
Why this path and its safety boundary
Safety stop: Do not replace a seal based only on appearance or force a spout, cartridge, or shutoff.
-
PATH 02Safety boundary
What you see
The spout drips continuously while the handle is closed, but no O-ring joint is visibly wet.
Do this next
Treat the cartridge or valve as a possible cause and arrange model-specific faucet assessment rather than assuming an O-ring will solve it.
Why this path and its safety boundary
Safety stop: Do not open the valve while pressurized or substitute an unverified seal.
-
PATH 03Safety boundary
What you see
A supply connection leaks or the cabinet is getting wet.
Do this next
Close the fixture shutoffs if safe, protect the cabinet, and arrange prompt plumbing service for the connection and any water damage.
Why this path and its safety boundary
Safety stop: Do not continue using the faucet, force a fitting, or work near wet electrical equipment.
-
PATH 04Safety boundary
What you see
The O-ring is torn, flattened, missing, or displaced and the exact model fit is confirmed.
Do this next
Use the confirmed compatible seal and model procedure, then reopen water slowly and recheck the original leak location.
Why this path and its safety boundary
Safety stop: Do not seal over a damaged groove, valve body, cartridge, or ceramic component.
-
PATH 05Safety boundary
What you see
The drip or seep remains after a compatible seal service, or the shutoff cannot isolate the fixture.
Do this next
Leave the fixture isolated when safe and arrange a plumber's diagnosis of the cartridge, valve body, connections, and water damage.
Why this path and its safety boundary
Safety stop: Stop repeated testing and leave for uncontrolled flow, flooding, electrical contact, or a failed upstream isolation.
Helpful context
Understand the symptom
An O-ring is a location-specific diagnosis
The EPA WaterSense program identifies worn faucet gaskets as a common leak source and advises turning off the water line before work. Delta's parts guidance shows that O-rings can be associated with different faucet locations, including under-deck hose connections and spout hubs. A dripping faucet therefore needs a leak-location check before a seal is ordered.
Fit and pressure matter before disassembly
An O-ring that looks similar may have a different size, material, or location. KOHLER's faucet guidance starts with closing the hot and cold shutoffs and releasing remaining pressure, then identifying the valve and model before inspecting parts. Keep this sequence so a small leak does not become uncontrolled water damage.
Only after diagnosis
Potential parts
- faucet cartridge
Consider this only when a continuous spout drip or inspection supports cartridge or valve wear rather than an O-ring leak at the base or connection.
Confirm faucet model, valve family, dimensions, handle arrangement, and manufacturer fit information before ordering. - faucet repair kit
Consider this only when the model-specific faucet design uses serviceable seals and the exact leak location has been confirmed after water isolation.
Match the model, valve assembly, seal material, and joint location; do not assume a visually similar kit fits. - faucet o-ring kit
Consider this only when the confirmed leak path contains a worn, flattened, torn, or displaced O-ring and the model-specific replacement is identified.
Confirm size, material, potable-water suitability, groove location, and model fit before use; do not substitute by color or appearance.
When checks do not resolve it
Need a professional?
Arrange plumbing service when a fixture shutoff will not stop water, the leak is at a supply connection or valve body, an O-ring groove or cartridge is damaged, water is reaching electricity or cabinetry, or dripping continues after compatible seal service.
Have this ready
- Provide the faucet model if known, first wet location, drip timing, photos before and after service, shutoff behavior, seal location and fit information, and any cabinet or floor water damage.
Common questions
FAQ
Can a worn O-ring cause a faucet to drip?
Yes, when the leak is at the O-ring's specific joint, but a continuous spout drip may instead involve a cartridge or valve. Locate the first wet point before choosing a part.
Do I need to shut off water before replacing a faucet O-ring?
Yes. Close both fixture shutoff valves, open the faucet to release pressure, and verify that flow has stopped before removing a handle, spout, cartridge, or seal.
Can I use any faucet O-ring that looks the same?
No. Size, material, groove location, faucet model, and valve design matter. Confirm the exact fit rather than substituting by color or appearance.
When should a plumber handle the O-ring leak?
Arrange plumbing service for a failed shutoff, uncontrolled flow, supply-line leak, damaged valve body or cartridge, water near electricity, cabinet flooding, or a drip that remains after compatible seal service.
Read the exact guide
Official sources
- How to Fix a Leaky Sink FaucetKohler Co. · Supports the safe order of operations without asserting brand-specific fit for this unbranded faucet topic.
- Fix a Leak WeekU.S. Environmental Protection Agency WaterSense · Supports identifying the leak location and shutting off the water line before faucet seal work.
- Find Parts and Identify Your ProductDelta Faucet · Supports the conditional, model-first approach to cartridge, repair-kit, and O-ring selection.
Community feedback
Share a repair observation
Share a plain-text repair observation. Accepted observations are published automatically; this page may take a moment to update.