
On this page
Start here
Quick answer
First locate where the water appears: the spout outlet, a handle or base, an under-sink connection, or a tub spout while the shower is running. Turn off the faucet's water supply before opening or loosening anything. A drip from the outlet with the handles off can be caused by a worn washer, gasket or other internal seal, but an unknown faucet model does not identify the correct cartridge or valve. Check accessible aerators, scale and external connections without forcing corroded parts. If a shutoff will not close, water is coming from inside a wall, the leak continues after the water is isolated, or the faucet type cannot be identified, stop and use a licensed plumber or the manufacturer's exact instructions.
Work through in order
Diagnostic checks
Use only checks that match the exact appliance or system and its official guide.
-
Check 1
With the faucet unused, dry the spout, handles, base and visible supply connections. Watch where the first new drop appears, and look inside the cabinet or below the sink for a wet hose, valve, puddle or water mark.
Expected result: The first water is at the spout outlet, around a handle or base, at an under-sink connection, or from a less accessible wall/floor area.
Next step: Use the matching branch below. If the source cannot be seen or the water is reaching a wall, cabinet base or flooring, contain the water and arrange plumbing service rather than guessing at a faucet part.
Why this matters
Why: The location distinguishes an outlet drip from an external connection or concealed leak; a wet cabinet or wall area is not proof that the faucet's internal valve is the cause.
-
Check 2
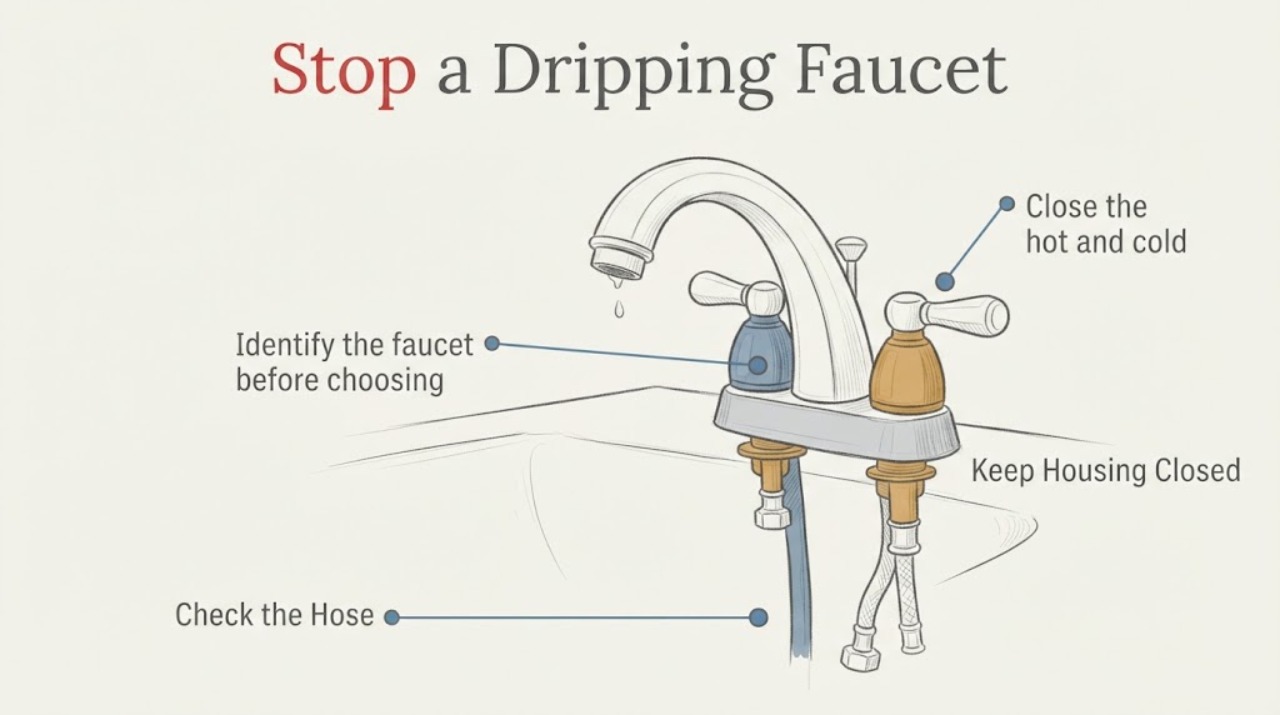
Identify the faucet before choosing an internal repair: note whether it has one handle or separate hot and cold handles, whether it is a sink or tub/shower faucet, and any visible brand or model marking. Do not infer a cartridge or washer from appearance alone.
Expected result: The type and an exact brand/model are confirmed, or only a generic appearance is known.
Next step: If the model is confirmed, follow that manufacturer's instructions for the exact model. If it is not, limit work to the external checks in this article and have a plumber identify the faucet before ordering a part.
Why this matters
Why: Handle layout and faucet location narrow the family of possible instructions, but they do not establish the internal seal, thread, cartridge or washer dimensions. A generic-looking faucet may use a different repair kit.
-
Check 3
Close the hot and cold fixture shutoff valves, then open the faucet briefly to release pressure before loosening an accessible aerator or connection. Keep a towel or container under the work area and do not force a valve that is seized, leaking or damaged.
Expected result: The water stops and the shutoffs remain dry, or the water continues, the valve leaks, or the shutoff cannot be operated.
Next step: If isolation fails, stop, use the house shutoff only if it is safely accessible, and call a plumber. Do not open the faucet body while water is still pressurized.
Why this matters
Why: A successful shutoff makes a low-risk external inspection possible. A continuing flow or failing shutoff creates a flooding or scald hazard and means the supply isolation is not reliable.
-
Check 4
With the water isolated, inspect the accessible aerator or outlet for mineral scale and inspect visible hose, valve and threaded connections for a loose joint, damaged gasket or continuing wetness. Clean only accessible buildup using a method allowed for the faucet finish; do not force corroded threads or scrape sealing surfaces.
Expected result: Scale is visible at the outlet, an external connection is wet, or the external parts are dry while the spout still drips when the handles are closed.
Next step: Reassemble only accessible parts according to exact model instructions. If the drip remains, do not substitute a guessed washer or cartridge; have the faucet identified and serviced.
Why this matters
Why: Scale can interfere with the outlet and external wetness points to a connection or seal that needs exact instructions. A continued outlet drip with dry external connections is consistent with an internal seal problem, but does not identify which internal part is fitted.
-
Check 5
For a tub/shower faucet, divert flow to the showerhead and observe the tub spout for about one minute after the water has been running. Keep the test external and do not open the wall or valve trim.
Expected result: Water continues to seep from the tub spout while the shower is selected, or the tub spout remains dry.
Next step: For continuing seepage, use the exact faucet instructions or call a plumber, especially if the valve is behind the wall. Do not remove concealed valve components based only on the symptom.
Why this matters
Why: EPA's tub-faucet check treats continual seepage during shower use as a leak at the tub faucet or diverter path; a dry spout does not explain a separate leak at the handle, wall or supply connection.
-
Check 6
After an accessible inspection or model-matched repair, reopen the shutoff valves slowly and watch every connection and the outlet. Stop immediately if the leak increases, water appears from a wall or cabinet, or a hot-water connection creates a scald risk.
Expected result: The area stays dry and the faucet no longer drips, or the leak returns or becomes inaccessible.
Next step: If the leak returns, close the shutoffs again and call a licensed plumber. Do not keep cycling the faucet or leave a worsening leak unattended.
Why this matters
Why: A dry observation supports that the visible leak stopped; it does not prove a concealed connection or internal valve will remain sound. A recurring or inaccessible leak needs professional diagnosis.
Use your observations
Decision map
Find the observation that best matches what you see, then follow the next safe action.
-
PATH 01Next step
What you see
The spout outlet drips while the handles are fully off, and the visible supply connections are dry.
Do this next
Shut off the fixture water, confirm the exact faucet model if possible, and use the manufacturer's matching instructions or a plumber. Do not order a part from a generic photo or handle count.
Why this path and its safety boundary
Why it matters: An internal washer, gasket or valve seal may be worn, but the unknown faucet identity does not establish whether it uses a washer, cartridge, ceramic disc or another assembly.
-
PATH 02Next step
What you see
Water appears around a handle or base, or a hose/valve connection under the sink is wet.
Do this next
Isolate the water and inspect only accessible connections for the exact faucet. If water reaches the cabinet, wall or flooring, or the connection cannot be safely isolated, use a plumber.
Why this path and its safety boundary
Why it matters: The visible leak is external to the spout outlet; it may involve a connection, gasket or body seal, but the observation does not prove which component needs replacement.
-
PATH 03Next step
What you see
A tub spout continues to seep while the shower is selected during the one-minute external check.
Do this next
Use exact manufacturer guidance if the model is known, or have a plumber assess the valve, especially when it is behind the wall. Do not open concealed plumbing based only on this test.
Why this path and its safety boundary
Why it matters: The tub faucet or diverter path is leaking; the symptom does not identify a safe valve repair procedure or a compatible part.
-
PATH 04Next step
What you see
The shutoff is stuck or leaking, water is coming from an inaccessible wall/floor area, or the drip continues after the external checks.
Do this next
Stop using the faucet, close the safest available supply, protect nearby surfaces, and contact a licensed plumber. If hot water is involved, avoid contact with the water and let it cool before handling the area.
Why this path and its safety boundary
Why it matters: The faucet cannot be safely isolated or the visible symptom has not established a repairable external cause; continued testing can cause flooding or conceal damage.
Helpful context
Understand the symptom
A drip location is more useful than a guessed faucet part
A faucet can drip from the outlet even when the handles are closed, or it can leak at the handle, base, hose connection or tub spout. Those observations lead to different next steps. EPA WaterSense identifies worn washers and gaskets as frequent causes of faucet leaks, but the supplied topic has no brand, model or handle type, so it does not support naming a cartridge, ceramic valve, washer size or replacement part.
Use the supply shutoff before opening the faucet
Before removing an aerator, handle or accessible connection, close the fixture shutoff valves and relieve pressure by opening the faucet. Protect the cabinet or floor from residual water. If a shutoff is stuck, sprays, or cannot stop the flow, do not force it or continue dismantling; shut off the appropriate house supply if that can be done safely and call a plumber.
Common questions
FAQ
Does a dripping faucet always need a new cartridge?
No. EPA WaterSense identifies worn washers and gaskets as frequent causes, but a faucet with no confirmed model may use a different seal, cartridge or valve. Locate the leak, isolate the water and match any procedure to the exact faucet before selecting a part.
Can I keep using the faucet if the drip is small?
A small drip still warrants locating the source. If the water is reaching a cabinet, wall or floor, the shutoff is unreliable, or the leak grows when the faucet is used, stop using it and call a plumber rather than repeatedly testing it.
Why does my tub spout drip when the shower is on?
EPA's tub-faucet check treats continual seepage from the tub spout while the shower is selected as a leak at the tub faucet or diverter path. Use the exact model instructions or a plumber; the symptom alone does not identify a valve part or justify opening the wall.
Read the exact guide
Official sources
- Home MaintenanceU.S. Environmental Protection Agency WaterSense · Official EPA WaterSense household maintenance guidance used for the generic, model-free faucet topic.
- Fix a Leak WeekU.S. Environmental Protection Agency WaterSense · Official EPA WaterSense public guidance used for common faucet leak observations and the limit of external troubleshooting.
- Fixing Leaks At Home | WaterSenseU.S. Environmental Protection Agency WaterSense · Official EPA WaterSense leak-repair guidance; applied only to low-risk isolation, observation and escalation, not to an unverified faucet model or part.
- WaterSense Labeled Homes Technical Sheet: Free of Water LeaksU.S. Environmental Protection Agency WaterSense · Official EPA WaterSense technical sheet used to separate faucet outlet, supply connection and tub-spout observations without assuming a model or internal part.
Community feedback
Share a repair observation
Share a plain-text repair observation. Accepted observations are published automatically; this page may take a moment to update.