
On this page
Start here
Quick answer
Low flow at one Pfister faucet is often caused by debris or mineral buildup in the aerator, sprayhead, inlet screens, supply hose, or cartridge. First compare hot and cold flow and check another fixture: a problem at only one outlet points toward the faucet or its local supply, while several fixtures being weak points toward a house or utility supply issue. With the faucet safely off, clean the aerator or sprayhead and flush the outlet as the Pfister instructions describe; inspect accessible shutoff valves and kinked hoses without forcing them. If low flow remains after those checks, or the cartridge or supply connection needs internal access, arrange qualified plumbing service. Do not force a seized fitting, work on a pressurized connection, or remove a cartridge without shutting off the local water and following the exact model instructions.
Before you begin
Safety first
- Cartridge, valve-body, supply-line, shutoff, upstream-pressure, and plumbing repairs should follow the exact Pfister model instructions and be performed by a qualified plumber when water cannot be isolated safely or connections are damaged, seized, or concealed.
Work through in order
Diagnostic checks
Use only checks that match the exact appliance or system and its official guide.
-
Check 1
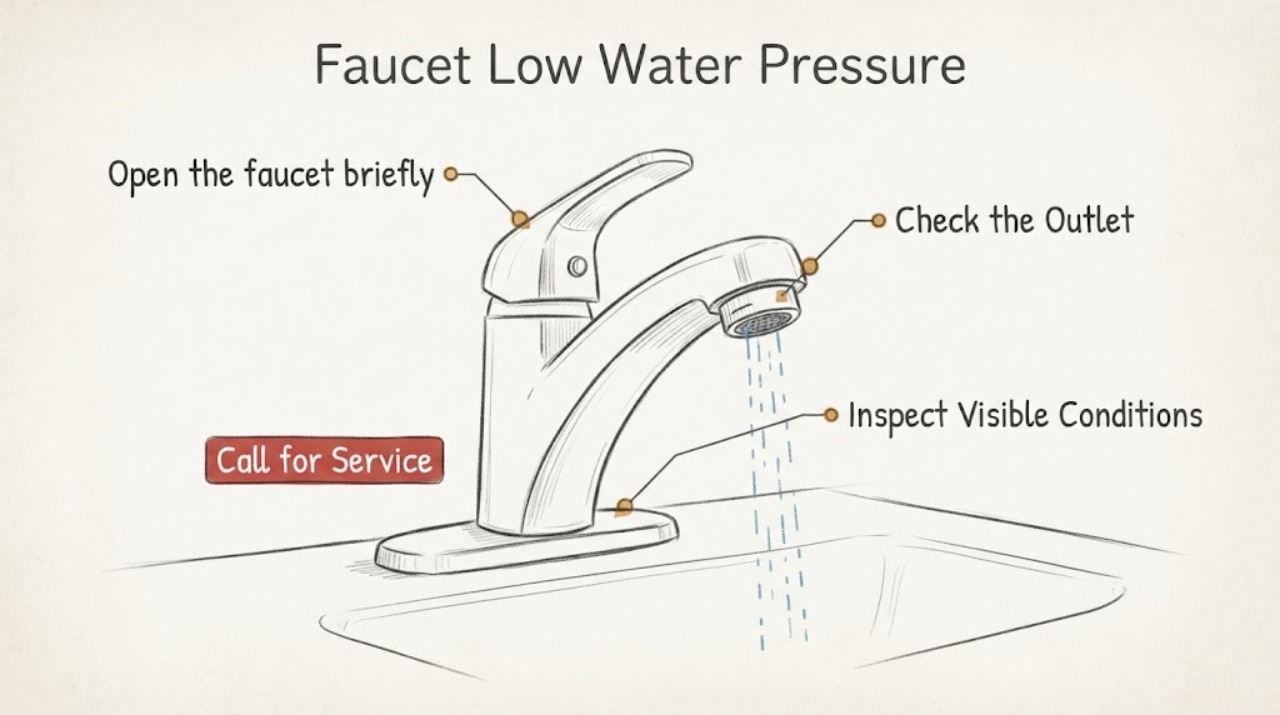
Open the Pfister faucet briefly and compare hot and cold flow, then open a nearby faucet or shower. Note whether the weak flow affects one handle, one temperature, both temperatures, or several fixtures. Close the faucet and avoid leaving water running while inspecting below the sink.
Expected result: Only this faucet is weak, only hot or cold is weak, both sides are weak, or multiple fixtures throughout the home are weak.
Next step: Continue with faucet-specific checks only when the problem is local. If multiple fixtures are weak or the change was sudden across the home, check for a known supply interruption and arrange plumbing or utility support instead of disassembling the faucet.
Stop if: Stop if a shutoff, pipe, or connection leaks, cannot be controlled, or shows corrosion or damage; do not work on a pressurized connection.
Why this matters
Why: A single-outlet or single-temperature problem points toward the faucet aerator, cartridge, hose, inlet screen, or local shutoff. Several weak fixtures point farther upstream toward a house valve, pressure regulator, supply interruption, or utility issue rather than a Pfister outlet part.
-
Check 2
Identify the outlet style and clean its accessible screen. For a standard spout, remove the aerator by hand or with the model-supplied key, rinse away debris, and briefly flush the faucet slowly without the aerator. For a pull-out or pull-down style, follow the model instructions to separate the sprayhead or screen only when it can be held securely over the sink; reinstall the screen by hand-tightening as directed.
Expected result: The screen or aerator contains scale or debris, flow improves with the aerator or sprayhead removed, or flow stays weak even at the open outlet.
Next step: Rinse and reinstall the clean screen, then test hot and cold flow. If the screen is damaged, seized, or the flow remains weak with it clean, continue to the inlet and cartridge checks or arrange service.
Stop if: Do not force a concealed aerator, scratch the finish, use a sharp tool inside the outlet, or continue if the faucet begins leaking around the screen.
Why this matters
Why: Debris at the outlet is a strong local restriction, and better flow with the screen removed points to the aerator or sprayhead rather than household pressure. Weak flow with the outlet open shifts attention to the hose, inlet screens, cartridge, shutoff, or upstream supply.
-
Check 3
With the faucet closed, inspect the accessible supply lines below the sink. Confirm the hot and cold angle stops are open, look for a kinked or pinched hose, and check for visible debris at an inlet screen only if the exact Pfister instructions permit access. Do not loosen a connection until the local water can be shut off and a container is ready.
Expected result: A stop is partly closed, a hose is kinked, an inlet screen is visibly obstructed, a connection is wet, or the supply path looks open and dry.
Next step: Open a clearly partly closed stop slowly only if it turns normally and the connection remains dry; straighten a visible hose kink without pulling on fittings. For a wet, seized, corroded, or obstructed connection, shut off water if safe and arrange plumbing service.
Stop if: Stop for leaking, corroded, seized, or damaged valves or hoses, or if the local water cannot be shut off reliably.
Why this matters
Why: A partly closed stop, kink, or inlet-screen obstruction can restrict one or both temperatures before water reaches the faucet. A wet connection may be a separate leak and should not be treated as a simple pressure adjustment; a clear, dry path shifts suspicion toward the cartridge or faucet body.
-
Check 4
If the aerator, sprayhead, hose, and inlet path are clear, use the exact Pfister model instructions to decide whether a cartridge inspection is an appropriate owner task. If permitted, close both local stops, release pressure at the faucet, inspect only for loose debris, and reassemble exactly; otherwise leave the handle and cartridge intact.
Expected result: Flow improves after clearing the outlet or inlet, debris is visible at the cartridge, the cartridge is worn or damaged, or all accessible paths are clear but flow remains low.
Next step: Replace a cartridge only after the exact model and fit are confirmed and the instructions support the repair; otherwise have a plumber inspect the cartridge, valve body, and supply pressure. Test for leaks slowly after any permitted reassembly.
Stop if: Do not remove a handle or cartridge with water pressurized, force a retainer, mix unknown cartridge parts, or continue if reassembly leaks.
Why this matters
Why: Improvement after an external cleaning identifies that restriction as the likely cause. Debris or damage at a cartridge can restrict both temperatures on a single-handle faucet, but a clear cartridge does not rule out a house-side pressure problem, a hidden hose restriction, or a model-specific valve issue.
-
Check 5
After the permitted cleaning or adjustment, run hot and cold water briefly and compare the result with the nearby fixture again. Record whether flow is restored, improves only on one temperature, remains weak at the open outlet, or drops again after a short run.
Expected result: Flow is restored, improves only partly, remains weak after the outlet and inlet checks, or the problem returns with debris or a leak.
Next step: Keep the faucet usable only if it is dry and stable. Arrange qualified plumbing service for persistent or recurring low flow, a cartridge or valve diagnosis, a hidden supply restriction, or any leak, and provide the faucet model and results of each check.
Stop if: Stop using the faucet for active leaks, sudden loss of control, contaminated water, or pressure changes affecting other fixtures.
Why this matters
Why: Restored flow supports an outlet, hose, screen, or local shutoff restriction. Partial or recurring improvement suggests ongoing debris, a cartridge or valve restriction, or an upstream supply issue; low flow with the outlet open is not an aerator-only problem.
Use your observations
Decision map
Find the observation that best matches what you see, then follow the next safe action.
-
PATH 01Next step
What you see
Do this next
Clean and reinstall the screen using the model instructions. Replace it only after the exact faucet model is identified, and arrange service if the outlet remains restricted or leaks.
Why this path and its safety boundary
Why it matters: An outlet screen or sprayhead restriction is more likely than a house-wide pressure problem.
-
PATH 02Next step
What you see
Do this next
Correct only a visible kink or clearly partly closed stop when it moves normally and stays dry. Have a plumber address seized valves, wet connections, inlet blockages, or cartridge access.
Why this path and its safety boundary
Why it matters: The restriction is more likely in the local supply hose, inlet screen, angle stop, or the corresponding cartridge passage.
-
PATH 03Next step
What you see
Do this next
Check for a known water outage or building supply change and arrange plumbing or utility support. Do not remove multiple faucet parts while the upstream issue is unresolved.
Why this path and its safety boundary
Why it matters: A faucet aerator or Pfister cartridge is unlikely to be the sole cause; a supply interruption, house valve, pressure regulator, or plumbing restriction is more likely.
-
PATH 04Next step
What you see
Do this next
Keep the faucet dry and arrange qualified plumbing diagnosis. Provide the Pfister model, hot-versus-cold result, fixture comparison, and checks already completed.
Why this path and its safety boundary
Why it matters: A cartridge, valve body, hidden supply restriction, or upstream pressure issue is more likely than simple outlet debris.
-
PATH 05Next step
What you see
Do this next
Stop the check, shut off the nearest reliable water control only if safe, protect the cabinet and floor, and obtain qualified plumbing service.
Why this path and its safety boundary
Why it matters: This is a water-damage and control hazard, not a routine aerator cleaning.
Helpful context
Understand the symptom
Low pressure at one faucet is usually local
A faucet can feel like it has low household pressure when the restriction is actually at its outlet or inlet. Mineral debris can narrow an aerator or sprayhead, installation debris can collect in a hose or inlet screen, and a cartridge can restrict flow after the simpler checks are clear. Comparing another fixture and hot versus cold flow prevents replacing a faucet part when the restriction is upstream.
Use the faucet type to choose the check
Pfister's troubleshooting steps differ for a standard closed spout, a standard open spout, and pull-out or pull-down styles. A standard spout points first to its aerator; an open spout may have inlet screens below the sink; a pull-out or pull-down faucet can have a sprayhead or hose restriction. The exact model manual controls access and reassembly.
Safety boundary
Stop conditions
- Stop for an active leak, corroded or seized valve, damaged hose, sudden loss of water control, or a connection that cannot be isolated safely.
- Do not loosen a pressurized connection, force a concealed aerator or retainer, scratch the finish with a tool, or insert sharp objects into the outlet.
- Do not remove a handle or cartridge until the local water is shut off, pressure is released, and the exact Pfister model instructions support the work.
- Stop using the faucet if reassembly leaks, water is discolored or contaminated, or pressure changes affect several fixtures.
- Arrange qualified plumbing service for persistent low flow after outlet and supply checks, a hidden blockage, cartridge or valve-body diagnosis, upstream pressure trouble, or any unsafe access condition.
Only after diagnosis
Potential parts
- Pfister faucet aerator or sprayhead screen
Consider this only when cleaning confirms the outlet screen is damaged, missing, or still restricting flow and the exact faucet model identifies the correct part.
Thread style, screen type, flow specification, and finish vary by faucet; identify the model before ordering. - Pfister faucet cartridge
Consider this only when the outlet and supply checks are clear and inspection confirms a blocked, worn, or damaged cartridge is restricting flow.
Cartridge shape, handle configuration, seals, and fit are model-specific; confirm the exact Pfister model and instructions before ordering or installing. - faucet inlet screen or supply hose
Consider this only when a qualified inspection confirms a damaged hose or an inlet screen that cannot be cleaned and is the cause of the low flow.
Connection type, length, screen placement, and local shutoff compatibility vary; verify the faucet model and plumbing connections.
When checks do not resolve it
Need a professional?
Contact qualified plumbing service when a Pfister faucet remains weak after the aerator, sprayhead, hose, inlet, and visible shutoff checks, when a cartridge or valve body may be blocked, when several fixtures are affected, or when a valve or connection leaks, corrodes, or cannot be isolated.
Safety scope: Cartridge, valve-body, supply-line, shutoff, upstream-pressure, and plumbing repairs should follow the exact Pfister model instructions and be performed by a qualified plumber when water cannot be isolated safely or connections are damaged, seized, or concealed.
Have this ready
- Provide the faucet type and model if known, single- or two-handle configuration, hot-versus-cold result, nearby-fixture comparison, aerator or sprayhead condition, hose and inlet observations, shutoff status, any leak or discoloration, and what changed after cleaning.
Common questions
FAQ
Why is my Pfister faucet water pressure low?
At one faucet, start with the aerator or sprayhead, then the supply hose, inlet screens, local stops, and cartridge. Compare another fixture and hot versus cold flow first; several weak fixtures point to an upstream plumbing or utility issue rather than one Pfister part.
How do I clean a Pfister faucet aerator?
Remove a threaded aerator by hand or use the model-supplied key for a concealed aerator, rinse away debris, briefly flush the faucet slowly without the screen, and reinstall it by hand as the instructions direct. Do not force a seized screen or scratch the finish.
Could a Pfister cartridge cause low flow?
Yes. If the outlet, hose, inlet screens, and local supply are clear, debris or wear in a cartridge can restrict flow. Shut off the local water and follow the exact model instructions, or have a plumber inspect it; a cartridge should not be replaced from a low-flow symptom alone.
Why is only the hot or cold side of my Pfister faucet weak?
A one-temperature problem points toward that side's stop, supply hose, inlet screen, or cartridge passage. Check only visible, dry, accessible conditions with the faucet closed; a wet, corroded, seized, or concealed connection needs plumbing service.
When should I call a plumber for Pfister low water pressure?
Call when flow stays low after cleaning the outlet and checking the visible supply path, when a cartridge or valve body may be blocked, when several fixtures are weak, or when a shutoff or connection leaks, corrodes, or cannot be isolated safely.
Read the exact guide
Official sources
- My Kitchen Handle is not Working ProperlyPfister Faucets · Official Pfister troubleshooting content used for pull-out or pull-down faucet flow checks; the visible faucet design and exact model determine safe access.
- Bathroom - Getting Less Water or Flow Seems LowPfister Faucets · Official Pfister troubleshooting page covering standard bathroom and open-spout faucet variants; exact faucet model determines which steps and parts apply.
- Troubleshooting Issues About Your FaucetPfister Faucets · Official Pfister support hub used to keep model identification and manual-first boundaries explicit before cartridge or other part work.
Community feedback
Share a repair observation
Share a plain-text repair observation. Accepted observations are published automatically; this page may take a moment to update.