
On this page
Start here
Quick answer
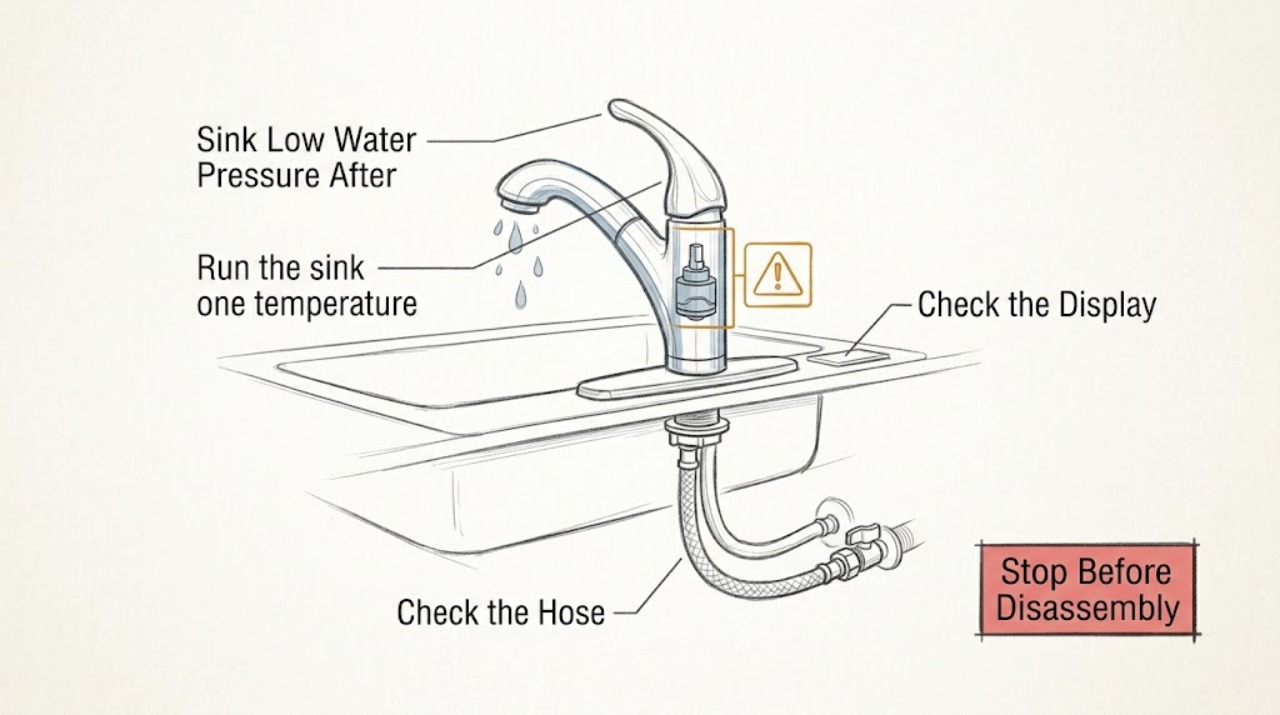
Low flow that appears after a sink cartridge replacement is often caused by debris released during the repair, a blocked aerator or screen, a partly closed or kinked supply line, or a cartridge that is the wrong model or not seated as its instructions require. First compare hot and cold flow and determine whether other fixtures are affected. Clean an accessible aerator and check visible shutoff and hose positions without loosening a pressurized connection. Follow the exact faucet manual for any post-repair flush or cartridge check; do not repeatedly disassemble the valve or guess at cartridge fit. Stop for uncontrolled leakage, hot-water injury risk, contamination, or a wet area near electrical equipment, and call a plumber or the faucet manufacturer when the low flow persists.
Work through in order
Diagnostic checks
Use only checks that match the exact appliance or system and its official guide.
-
Check 1
Run the sink one temperature at a time, then together, and compare the flow with another nearby fixture supplied by the same hot and cold water sources. Do not force the handle past its normal range.
Expected result: Record low hot flow, low cold flow, low flow on both sides, a normal nearby fixture, or low flow throughout the home. Note whether the weakness is at the spout, a pull-out wand, or a side spray.
Next step: Use the result to choose the aerator, supply, or model-specific cartridge branch; do not remove internal parts just because the replacement preceded the symptom.
Why this matters
Why: Low flow on both temperatures at only this sink points toward the aerator, cartridge, faucet body, or local supply lines. One-temperature loss points toward that supply path or cartridge passage. Low flow at several fixtures is not a cartridge-only diagnosis.
-
Check 2
If the faucet has an externally removable aerator or spray screen, remove it only by the faucet's normal user procedure, rinse visible debris with clean water, and briefly test flow into the sink or a container. Keep the opening controlled and do not insert tools into the valve body.
Expected result: Good flow with the aerator or spray screen removed indicates debris or a restrictor at that outlet. Flow that remains low without it points upstream toward the cartridge, hose, supply, or faucet body.
Next step: Clean and reinstall the screen if the manufacturer allows it. If flow is still low, continue with visible supply checks and the exact faucet model guidance.
Why this matters
Why: Debris released after the repair can lodge at the outlet, so a clean aerator can solve a post-cartridge low-flow symptom. A poor no-aerator test means replacing the aerator alone is unlikely to solve it.
-
Check 3
Look under the sink at the hot and cold shutoff handles and flexible supply hoses without loosening any connection. Confirm that each valve appears in its normal open position and that neither hose is visibly kinked, crushed, or newly strained.
Expected result: Record whether one valve is partly closed, one hose is bent, both supplies look normal, or there is a drip at a connection. Do not turn a stuck valve or disconnect a hose under pressure.
Next step: If a valve is visibly out of its normal open position and moves freely without leakage, restore it only as the faucet instructions permit. For a stuck valve, leak, or uncertain connection, stop and call a plumber.
Why this matters
Why: A partly closed valve or kink can restrict one temperature or both. A normal-looking supply path shifts attention toward the aerator, cartridge seating/model, debris, or faucet body, but it does not prove which internal part is at fault.
-
Check 4
Find the faucet model from the visible label, manual, or manufacturer product record and compare the installed cartridge's model, orientation, seals, retainer, and required post-repair steps against that exact documentation. Do not remove the handle or cartridge again solely to inspect it.
Expected result: Record whether the model and cartridge identity are confirmed, uncertain, or different from the instructions. Note any unusual handle travel, reduced temperature range, drip, or new leak after the replacement.
Next step: If documentation confirms a missed user step, follow only that step with the water safely isolated as instructed. If internal access or retainer removal is required, have the repairer or plumber correct it.
Why this matters
Why: A wrong or incorrectly seated cartridge can restrict flow, but fit and orientation are model-specific. Uncertainty is a reason to use the manufacturer's support or a plumber, not to substitute a similar-looking cartridge.
-
Check 5
Review the exact faucet manual for a post-cartridge or post-shutoff flush. If it permits an external flush with the aerator removed, direct the water into the sink or a stable container and follow the manual's hot/cold sequence; never improvise an open-valve flush that requires removing internal components.
Expected result: Record whether debris appears, whether flow improves after the documented flush, and whether the water is discolored or unsafe-looking. Check all accessible joints for drips when the faucet is closed.
Next step: Stop the flush if water escapes where it should not, the manual does not cover the procedure, or the area becomes wet. Arrange plumbing or manufacturer service for persistent flow loss.
Why this matters
Why: Improvement after a model-approved flush supports displaced sediment. Continued low flow or a leak indicates a remaining cartridge, valve-body, supply, or faucet fault; discoloration can require water-quality or plumbing follow-up.
-
Check 6
Check whether the sink has a pull-out/pull-down spray head, side spray, filter, or diverter and test only the normal user control identified by the faucet manual. Do not disconnect a hose or open a diverter body unless the model procedure explicitly assigns that step to the user.
Expected result: Record normal flow at a side spray or hose, low flow at both the hose and spout, or a spray head that is the only weak outlet.
Next step: Clean only an externally accessible screen or spray head as documented. Escalate diverter, hose, valve-body, or internal cartridge work to the manufacturer or plumber.
Why this matters
Why: Good flow before a spray head points toward its screen or head. Good side-spray flow with a weak spout can point toward a diverter or spout path. Low flow at the hose and spout keeps the cartridge or supply path in consideration.
-
Check 7
Create a service note with the faucet model, cartridge identity, replacement date, hot/cold flow pattern, aerator result, visible valve/hose condition, flush result, other-fixture comparison, and any leak or water-quality observation.
Expected result: A clear before-and-after record shows whether the flow loss began immediately after replacement, is isolated to one temperature, and changes when the outlet screen is removed.
Next step: Request plumbing or faucet-manufacturer service and keep the area dry; do not continue disassembling the faucet to chase the symptom.
Why this matters
Why: If low flow persists after safe outlet, supply, and model-documentation checks, the technician can inspect cartridge seating, valve body, supply lines, shutoffs, and house pressure without guessing at a part.
Use your observations
Decision map
Find the observation that best matches what you see, then follow the next safe action.
-
PATH 01Safety boundary
What you see
Do this next
Start with the aerator or spray screen, then visible local supply valves and hoses, followed by model-specific cartridge and valve-body guidance. Debris introduced during the repair is plausible, but the cartridge is not proven defective.
Why this path and its safety boundary
Safety stop: Use the one-temperature, whole-home, or outlet-specific branch rather than assuming a shared cartridge cause.
-
PATH 02Safety boundary
What you see
Do this next
Clean the accessible screen according to the manufacturer and reinstall it. If it clogs again or flow remains low after reinstallation, arrange faucet service.
Why this path and its safety boundary
Safety stop: The restriction is upstream or the problem is broader; continue with visible supply and exact-model cartridge checks.
-
PATH 03Safety boundary
What you see
Do this next
Check the corresponding visible shutoff and hose for a partly closed valve or kink, then use the model manual to distinguish a cartridge passage from a supply-side restriction. Do not disconnect the line under pressure.
Why this path and its safety boundary
Safety stop: For both-temperature loss, compare the local sink with another fixture and inspect the common outlet/faucet path.
-
PATH 04Safety boundary
What you see
Do this next
Stop internal troubleshooting and contact the faucet manufacturer or a plumber with the faucet model and installed part information. Do not force the handle or substitute a similar-looking cartridge.
Why this path and its safety boundary
Safety stop: Follow only the documented post-repair flush or user check; persistent low flow still needs service diagnosis.
-
PATH 05Safety boundary
What you see
Do this next
Stop using the sink, shut off the local water supply only if it is safe and operates normally, keep clear of wet electrical equipment, and call a plumber. Do not continue flushing or disassemble the pressurized connection.
Why this path and its safety boundary
Safety stop: If the sink remains low-flow after safe checks, arrange plumbing or manufacturer service rather than repeated cartridge replacement.
Helpful context
Understand the symptom
Why the timing after cartridge replacement matters
A cartridge replacement changes the faucet's internal flow path and often involves shutting the hot and cold supplies. Sediment can move when the supplies are closed and reopened, then lodge in the aerator, screen, cartridge, or hose. A retainer, cartridge orientation, or model mismatch can also limit flow, but a timing correlation does not prove that the new cartridge is defective. The first decision is whether both temperatures are weak at this sink or whether the problem is limited to one side or one fixture.
Keep the repair reversible and dry
Use only checks that do not expose a pressurized connection or require a model-unknown disassembly. An aerator that is designed to be removed by hand can be cleaned, and visible shutoff valves and hoses can be observed. Do not loosen supply nuts, force a stuck cartridge, remove a retainer without the exact manual, or leave an open valve unattended. After any safe check, look for drips under the sink and keep water away from outlets and electrical equipment.
Safety boundary
Stop conditions
- Stop for uncontrolled leakage, a shutoff that will not close, hot-water injury risk, contaminated or persistently discolored water, or water near an electrical outlet or appliance.
- Do not loosen supply connections, remove internal cartridge or valve-body parts, force a retainer, or flush an open valve unless the exact faucet instructions authorize the procedure and the water is safely isolated.
- Do not guess at cartridge compatibility, alter the cartridge orientation, bypass a pressure or temperature limit, or repeatedly replace parts without confirming the faucet model.
- Stop if the sink is under pressure while a connection is being disturbed, the faucet is damaged, or a step requires tools or access not covered by the model's user instructions.
When checks do not resolve it
Need a professional?
Call a plumber or the faucet manufacturer's support when low flow persists after a safe aerator, visible supply, fixture-comparison, and exact-model documentation check; when the cartridge fit or installation cannot be confirmed; when a shutoff or hose leaks; or when internal flushing, cartridge seating, valve-body, diverter, or house-pressure diagnosis is required.
Common questions
FAQ
Why did sink pressure drop right after I replaced the cartridge?
The repair may have displaced debris into the aerator, spray screen, cartridge passage, hose, or faucet body, or a supply valve may not be fully open. A wrong or incorrectly seated model-specific cartridge is also possible, but timing alone does not prove it.
How can I tell whether the restriction is the aerator or the cartridge?
Clean or remove an externally accessible aerator or spray screen only as the manufacturer permits and compare flow briefly. Good flow without it points toward the screen; low flow without it points upstream toward the cartridge, supply, hose, or faucet body.
Should I remove the cartridge again to check its orientation?
Do not repeatedly disassemble the faucet or force a retainer. First confirm the exact model and documented cartridge instructions. If internal access is required or the fit cannot be confirmed, have the original repairer, a plumber, or the manufacturer correct it.
When should low sink pressure become a plumbing service call?
Arrange service when low flow persists after safe outlet, visible supply, and model-documentation checks; when only one temperature is lost and its supply path is uncertain; or when there is leakage, a stuck shutoff, unsafe water, or a need to open the valve body or disconnect a pressurized line.
Read the exact guide
Official sources
- Low Flow from Hot and Cold Water | Kitchen Faucets | Kohler AssistKohler Assist · Kohler kitchen-faucet low-flow diagnosis for debris, supply hoses, spray heads, cartridges, model identification, and compatibility.
- Low water flow from spout- BOTH hot and cold water on sink faucetsMoen Solutions · Moen sink-faucet low-flow diagnosis for aerators, supply lines, spray hoses, cartridges, and model-specific service.
- Why does my faucet have low water pressure?Delta Faucet · Delta Faucet low-flow causes, aerator/flow-restrictor cleaning, and flushing after water is turned off for repairs.
Community feedback
Share a repair observation
Share a plain-text repair observation. Accepted observations are published automatically; this page may take a moment to update.