
On this page
Start here
Quick answer
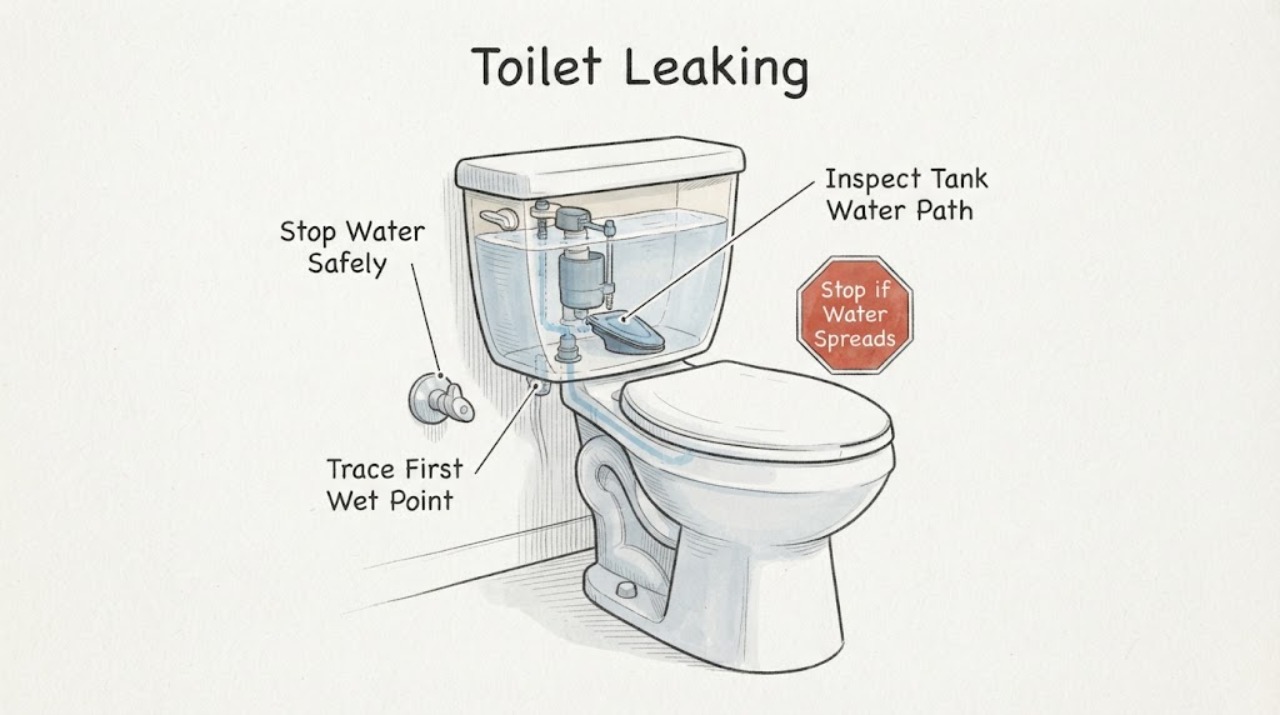
A leaking toilet may be losing water from the tank seal or flush valve, the tank-to-bowl gasket, the supply connection, the bowl seal at the floor, or a cracked tank, bowl, or nearby pipe. First close the toilet's water shutoff if it is safe and accessible, keep the floor dry, and trace the first wet point without removing the tank or bowl. Water at the base, sewage odor or contamination, a cracked porcelain tank or bowl, a supply line that will not stop, or water near electrical equipment requires the toilet to stay out of use and a qualified plumber. Do not overtighten porcelain fasteners, use in-tank chemicals to solve a leak, or keep flushing to test an active leak.
Work through in order
Diagnostic checks
Use only checks that match the exact appliance or system and its official guide.
-
Check 1
From a dry, stable position, note the leak rate, water level, sewage odor or contamination, floor condition, and whether the toilet is near electrical equipment; close the local water shutoff only if it is dry, accessible, and turns normally without force.
Expected result: The leak stops when the shutoff is closed, continues with the valve closed, the valve is stuck, the bowl or tank is cracked, or water is approaching an electrical outlet or equipment.
Next step: Keep the toilet out of use, keep people away from contaminated or wet electrical areas, and call a qualified plumber. Use qualified electrical or emergency help if water reaches electrical equipment or the fixture is actively flooding.
Stop if: Do not force the shutoff, keep flushing, touch sewage or electrical equipment, or continue if porcelain is cracked, water is uncontrolled, or the floor is unsafe.
Why this matters
Why: A shutoff that stops the leak points toward the toilet's supply or tank water path; continued leakage can be residual water, a bowl or floor seal, a nearby pipe, or another source. A stuck valve, crack, contaminated water, or electrical exposure is not a routine adjustment.
-
Check 2
With the water supply isolated when safe, use a dry cloth or flashlight from outside the fixture to identify the first wet point at the tank lid and valve, tank-to-bowl seam, supply connection, bowl base, floor, or nearby pipe; do not remove the tank, bowl, or access covers.
Expected result: Water first appears at the supply connection, tank or tank-to-bowl seam, inside the bowl with no outside wetness, under the bowl base, or at a nearby wall or pipe.
Next step: Photograph the first wet point and arrange the appropriate plumbing diagnosis. Keep the supply closed for an active external leak and do not apply sealant, overtighten fittings, or lift the fixture as a test.
Stop if: Do not remove porcelain hardware, disconnect the supply line, scrape a floor seal, or continue where wastewater, a crack, structural movement, or electrical water exposure is present.
Why this matters
Why: The location separates supply-line or fill-valve work, tank seal or flush-valve leakage, normal internal bowl water, a bowl or floor-seal problem, and a separate plumbing leak. Water inside the bowl alone is not an external tank leak.
-
Check 3
If the tank is intact and the area is dry, observe the water level relative to the marked waterline, whether water reaches the flush-valve overflow, whether the fill valve runs periodically, and whether the refill hose end is visibly below the waterline; do not reach into a powered or contaminated fixture.
Expected result: The water level is above the marked line, water enters the overflow, the fill valve cycles periodically, the flush seal appears to pass water into the bowl, or the tank-to-valve or tank-to-bowl area is externally wet.
Next step: Use only the exact model instructions for a safe water-level or refill-hose observation; otherwise leave the supply closed and call a plumber. Do not use in-tank cleaners, force a valve, remove the tank, or replace a seal without model confirmation.
Stop if: Stop for a cracked tank, uncontrolled overflow, sewage contamination, wet electrical equipment, or any need to remove the tank or work inside an unknown pressure-assist assembly.
Why this matters
Why: A high level, overflow, worn or dirty flush seal, tight trip chain, or refill-hose placement can cause internal water loss and recurring fill. External wetness at the valve base or tank seam points toward a gasket, connection, cracked tank, or seal issue rather than ordinary bowl water.
-
Check 4
From outside the fixture, inspect the wall shutoff, supply line, coupling, fill-valve shank, and surrounding floor for a first wet point, missing washer, kink, corrosion, spray, or leak that appears only while the valve is open; do not loosen a wet connection or use force.
Expected result: The supply connection is dry, the line or coupling leaks, water is at the fill-valve shank, the shutoff will not close, or the leak continues with the shutoff closed.
Next step: Keep the shutoff closed for an active supply leak and call a plumber. Do not overtighten, remove the line, or reopen the water repeatedly to reproduce a spray or leak.
Stop if: Do not force a seized shutoff, touch contaminated water, work on a cracked porcelain connection, or continue if water is entering a wall or electrical area.
Why this matters
Why: A line, washer, coupling, fill-valve connection, or shutoff can leak independently of the tank seal. Continued leakage with the shutoff closed shifts concern toward residual water, the fixture body, floor seal, or an upstream or nearby pipe.
-
Check 5
After the fixture is no longer being used and the area is dry enough to observe safely, check whether water appears at the bowl-to-floor perimeter after a flush, at the tank-to-bowl seam, or from a nearby wall or supply line; do not rock the bowl, lift it, or remove caulk or floor hardware.
Expected result: The bowl base becomes wet after flushing, the tank-to-bowl seam becomes wet, the bowl rocks or porcelain is cracked, or water comes from outside the fixture.
Next step: Keep the toilet out of use and call a qualified plumber for any base leak, rocking, crack, sewage odor, or unresolved external source. Protect the floor without sealing over the leak or moving the fixture.
Stop if: Do not sit on or rock a damaged fixture, remove the bowl, scrape the floor seal, use the toilet with wastewater leakage, or continue near a wet electrical area.
Why this matters
Why: A base leak can involve a floor seal, bowl damage, drain connection, or a leak traveling from above; a tank seam points to tank hardware or gasket; a rocking or cracked fixture raises structural and sanitation risk. A nearby source is not fixed by replacing a toilet seal.
-
Check 6
Record the toilet make and model if visible, one- or two-piece or pressure-assist style, first wet point, leak timing, waterline and fill behavior, supply shutoff response, tank-to-bowl seam, bowl base, nearby pipe, odor, contamination, crack, movement, and any recent installation or cleaning-product use.
Expected result: The record supports a tank or flush seal, supply connection, tank-to-bowl gasket, bowl base or floor seal, cracked fixture, overflow, or nearby plumbing branch, or the source remains unclear.
Next step: Keep the water supply closed when the leak is active or the shutoff is unreliable and arrange qualified plumbing service. Add cleanup or electrical help for contaminated water, structural damage, or water near power equipment.
Stop if: Do not continue if the floor is unsafe, the water is contaminated, porcelain is cracked or moving, the leak is uncontrolled, or the next step requires removing the tank or bowl.
Why this matters
Why: A structured record helps the plumber choose the correct gasket, valve, supply, floor-seal, porcelain, or pipe inspection without guessing from the size of the puddle. An unclear or recurring leak should remain treated as active.
Use your observations
Decision map
Find the observation that best matches what you see, then follow the next safe action.
-
PATH 01Safety boundary
What you see
Water is uncontrolled, the shutoff is stuck, sewage or contamination is present, a tank or bowl is cracked or moving, or water reaches electrical equipment or a wall.
Do this next
Keep people and pets away, stop using the toilet, and call a qualified plumber; use qualified electrical or emergency help when water reaches power equipment, the fixture is unsafe, or flooding cannot be controlled.
Why this path and its safety boundary
Why it matters: This is a flooding, sanitation, structural, or electrical safety event rather than a seal adjustment.
Safety stop: Do not force the shutoff, touch sewage or electrical equipment, rock the fixture, keep flushing, or seal over an active leak.
-
PATH 02Safety boundary
What you see
The first wet point is the wall shutoff, supply line, coupling, or fill-valve connection and the leak responds to closing the shutoff.
Do this next
Leave the shutoff closed and call a plumber for a persistent, sprayed, corroded, or stuck connection. Do not loosen or overtighten the fitting as a test.
Why this path and its safety boundary
Why it matters: The supply line, washer, coupling, fill valve, or shutoff is more likely than the toilet base seal.
Safety stop: Do not force the valve, disconnect a pressurized line, work on wet fittings, or reopen the water repeatedly.
-
PATH 03Safety boundary
What you see
Water is at the tank-to-bowl seam, flush-valve base, tank hardware, or the tank overflows or refills periodically while the floor remains otherwise dry.
Do this next
Keep the supply closed for an external leak and use only exact model instructions for a simple visible setting observation. Call a plumber for seal, valve, tank hardware, pressure-assist, or porcelain work.
Why this path and its safety boundary
Why it matters: A tank gasket, flush-valve seal, fill-valve adjustment, trip mechanism, refill-hose placement, or cracked tank may be involved.
Safety stop: Do not overtighten tank fasteners, remove the tank, use in-tank cleaners, force a valve, or work inside an unknown pressure-assist unit.
-
PATH 04Safety boundary
What you see
Water first appears at the bowl base, increases after flushing, the bowl rocks, or the source is beneath the fixture.
Do this next
Stop using the toilet and call a qualified plumber. Keep the area dry and avoid moving or loading the fixture until it is inspected.
Why this path and its safety boundary
Why it matters: A floor seal, drain connection, bowl crack, or movement may be allowing wastewater or supply water to reach the floor; the exact cause cannot be confirmed from a puddle alone.
Safety stop: Do not rock or lift the bowl, remove floor hardware, scrape the seal, caulk over the leak, or use the toilet with sewage leakage.
-
PATH 05Safety boundary
What you see
The bowl is receiving water but the outside of the fixture stays dry, the fill valve runs periodically, or water is above the tank waterline or entering the overflow.
Do this next
Use the exact model instructions for a safe visible waterline or hose-position check; if the issue persists or the model is unknown, call a plumber and avoid in-tank chemicals.
Why this path and its safety boundary
Why it matters: This is likely internal water loss from a flush-valve seal, fill-valve setting, trip mechanism, or refill hose rather than an external floor leak.
Safety stop: Do not force the valve, remove internal pressure-assist parts, keep adjusting an unknown mechanism, or mistake internal running for a safe external leak.
-
PATH 06Safety boundary
What you see
The toilet and its visible connections are dry, but water appears at a wall, floor, pipe, or fixture beside or behind it.
Do this next
Keep nearby water use limited if safe, document the timing and first wet point, and call a plumber. Do not remove the toilet or seal the perimeter before the upstream source is identified.
Why this path and its safety boundary
Why it matters: The apparent toilet leak may be a nearby supply, drain, wall, or floor source traveling to the toilet area.
Safety stop: Do not open walls or floors, enter a wet or contaminated area, or continue if water is reaching electrical equipment or causing structural damage.
Helpful context
Understand the symptom
The first wet point matters more than the biggest puddle
Water can travel from the tank lid or valve, tank-to-bowl seal, supply connection, bowl base, wax or other floor seal, a cracked porcelain body, or a nearby pipe. Wipe or observe only from a safe position and follow the first place that becomes wet. A puddle at the base does not automatically prove the floor seal failed.
Separate a tank leak from a running-toilet leak
A worn flush-valve seal or a high tank water level can let water move from the tank into the bowl, causing the fill valve to run periodically even when the floor is dry. A tank-to-bowl gasket, supply line, or cracked tank can leak onto the outside. Use the water level, sound, and first wet point to choose the branch; do not order a seal from the symptom alone.
Stop water before porcelain or contaminated-water work
If the leak is active, close the local shutoff only if it turns normally and can be reached without touching contaminated water. Do not force a stuck valve. A leak at the bowl base, wastewater, a cracked fixture, or water reaching a wall or electrical equipment needs prompt plumbing service and may require additional cleanup or electrical help.
Porcelain hardware has a strict limit
Tank and bowl fasteners can crack porcelain when overtightened. The correct gasket, washer, seal, supply connection, and fixture model matter, so a repair that requires removing a tank or bowl should follow the exact manufacturer instructions or be handled by a plumber. Do not hide an active leak with caulk or keep tightening a fitting.
Safety boundary
Stop conditions
- Close the water supply when safe and stop using the toilet for uncontrolled water, a stuck shutoff, a cracked or rocking fixture, a base leak, sewage or contamination, or water entering a wall or electrical area.
- Do not force the shutoff, keep flushing, touch sewage or wet electrical equipment, or continue near an unsafe floor or active flood.
- Do not overtighten porcelain tank or bowl fasteners, remove the tank or bowl as a test, apply caulk over an active leak, or use in-tank chemicals to solve a leak.
- Do not disconnect a pressurized or wet supply line, enter a wall or floor, or work on pressure-assist or unknown internal assemblies without qualified plumbing service.
- Call a qualified plumber for a persistent or recurring leak, unresolved internal running, tank or floor seal failure, cracked porcelain, supply or drain trouble, or any source that cannot be localized safely.
Only after diagnosis
Potential parts
- flush valve seal or flapper
Only consider this part after the tank is confirmed to lose water into the bowl or the exact model instructions identify a worn, dirty, or misaligned flush seal.
Confirm the toilet model and flush-valve style; do not use in-tank cleaners or assume a universal seal will fit. - tank-to-bowl gasket
Only consider a tank gasket after the first wet point is the tank-to-bowl seam or flush-valve base and a plumber or exact model instructions confirm the gasket is damaged or misaligned.
Confirm one-piece versus two-piece construction, exact model, hardware, and porcelain condition; avoid overtightening. - toilet water supply line
Only consider a supply line after the leak is localized to the line, coupling, washer, or fill-valve connection and the shutoff and surrounding area are safe.
Confirm connection type, length, washer and local requirements with the plumber; do not disconnect a wet or pressurized line. - toilet floor seal
Only consider a floor seal after a qualified plumber confirms a stable bowl with a leak at the bowl-to-floor or drain connection rather than water traveling from above.
Confirm bowl, flange, floor condition, and seal system; removal and reset of the fixture should be performed according to the exact installation requirements.
When checks do not resolve it
Need a professional?
Call a qualified plumber for any active or recurring toilet leak, supply connection that will not stop, tank-to-bowl or base leak, cracked or rocking porcelain, sewage or contamination, stuck shutoff, unresolved internal running, or a source that is not clear. Use qualified electrical or emergency help when water reaches electrical equipment or flooding is uncontrolled.
Have this ready
- Provide the toilet make and model if visible, fixture style, first wet point, leak timing, supply-shutoff response, tank waterline and fill behavior, tank seam, bowl base, supply line, nearby pipe, odor or contamination, crack or movement, and recent installation or cleaning-product history.
Common questions
FAQ
How do I tell whether a toilet leak is from the tank or the base?
Close the water supply if it is safe, dry the outside, and observe the first place that becomes wet. A tank seam or supply connection points upward; a bowl base that wets after flushing points toward the fixture or floor connection; water inside the bowl alone can be an internal flush-valve or fill-valve loss. Do not rock or remove the fixture as a test.
Why does my toilet keep refilling but not show a puddle?
Water may be leaking from the tank into the bowl through a worn flush seal, a high water level, a trip mechanism, or a refill hose positioned incorrectly. Check only visible waterline and hose placement using the exact model guidance; if it continues, call a plumber and avoid in-tank cleaners.
Should I keep tightening a leaking toilet tank bolt?
No. Overtightening can crack porcelain and may not fix a damaged or misaligned gasket. Keep the water supply closed for an active leak and have a plumber inspect the tank-to-bowl hardware, gasket, valve base, and porcelain.
When is a leaking toilet urgent?
Stop using it and call promptly for uncontrolled water, a stuck shutoff, a cracked or rocking fixture, a base leak or sewage odor, contamination, water entering a wall, or water near electrical equipment. Keep people away from unsafe or contaminated areas and do not continue flushing to test.
Read the exact guide
Official sources
- Tank Leak - Fill Valve Hose PositionKohler Assist · Kohler toilet tank leak symptoms, refill-hose siphoning, waterline, valve, seal, tank-base, and cracked-tank causes
- Troubleshooting: KOHLER Pressure Assist ToiletsKohler · Kohler pressure-assist toilet leak flowchart covering tank-to-bowl, water-supply, pressure-vessel, gasket, porcelain, and shutoff branches
- Toilet Tank - Rigid Supply Line InstallationKohler Assist · Kohler toilet tank supply-line washer, coupling, connection, and hand-tightening guidance
- Toilet Occasionally Leaking or RunningKohler Assist · Kohler one- and two-piece toilet tank water loss, overflow, trip lever, flush-valve seal, and tank gasket guidance
Community feedback
Share a repair observation
Share a plain-text repair observation. Accepted observations are published automatically; this page may take a moment to update.