
On this page
Start here
Quick answer
Stop flushing and find the first place water appears: the supply connection, tank, tank-to-bowl seam, bowl, or floor/base. If the leak is active, close the toilet's accessible water-supply stop gently; if the valve will not close or water is reaching the floor, call a plumber. Clean water at a supply fitting or tank connection points toward a hose, washer, tank gasket, or valve; water that appears at the bowl/base after flushing can indicate a bowl, flange, or wax/rubber seal problem; water inside the tank that slowly enters the bowl is a flush-valve seal clue rather than an external leak. Do not overtighten porcelain hardware, caulk around the base to hide a leak, remove the toilet, or continue flushing a base leak. Use only model-matched seals and follow the exact manual; persistent, sewage, structural, or hidden leaks need plumbing service.
Before you begin
Safety first
- This article permits only safe water isolation, non-contact or clean-surface observation, an exact-manual dye test when appropriate, and model-directed visible checks. It does not authorize toilet removal, flange work, porcelain bolt tightening, sewage handling, wall/floor opening, or concealment with caulk.
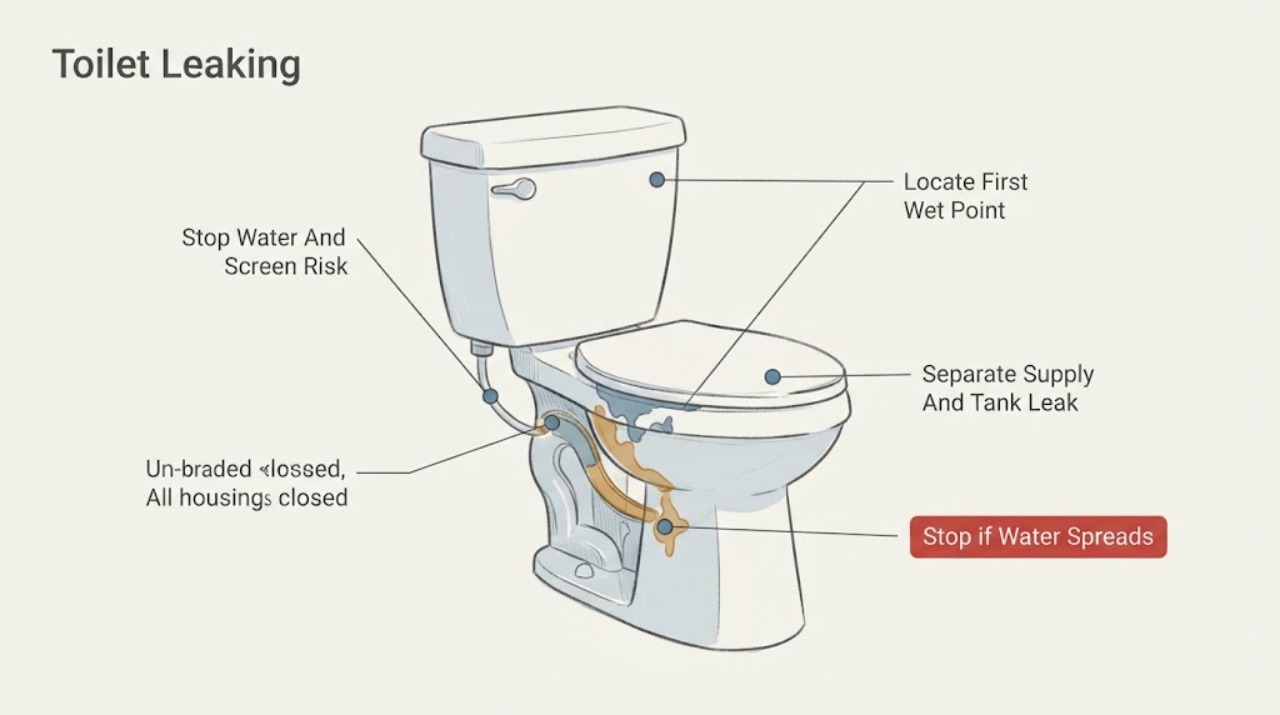
Work through in order
Diagnostic checks
Use only checks that match the exact appliance or system and its official guide.
-
Check 1
Stop flushing and observe the toilet from a safe position. If the supply stop is visible and turns normally, close it gently; do not force a stuck valve. Keep away from sewage, spreading water, cracked porcelain, unstable flooring, or water near electrical equipment.
Expected result: The leak stops when the toilet supply is closed, continues despite the stop being closed, or the valve cannot be safely operated.
Next step: Keep the toilet out of service. If water continues, the stop will not close, or the area is unsafe, call a plumber urgently and use the home's main shutoff only if it is safely accessible.
Stop if: Do not force the shutoff, keep flushing, enter contaminated water, touch wet electrical equipment, or remove the toilet during active leakage.
Why this matters
Why: A stopped leak is supplied by the toilet or its connection; continued flow may be residual tank/bowl water, a supply-stop or wall-pipe problem, or a larger plumbing leak.
-
Check 2
After isolating the water and only if the area is safe, blot visible water with disposable material and watch for a fresh wet point during a single controlled observation. Check the supply nut/stop, tank bottom and sides, tank-to-bowl seam, bowl exterior, and floor/base without tightening or moving anything.
Expected result: Fresh water begins at the supply connection, tank/flush-valve area, tank-to-bowl seam, bowl/base after flushing, or an unknown wall/floor location.
Next step: Record the location, whether the water is clean or contaminated, and whether it appears only while filling or flushing. Keep the supply closed and call the appropriate plumber for any base, wall, sewage, or unknown source.
Stop if: Do not dismantle fittings, lift the tank, rock the bowl, tighten porcelain bolts, or use caulk to conceal the wet point.
Why this matters
Why: The first wet point narrows the likely seal path: supply washer/connection, tank gasket or valve, flush seal, bowl/flange seal, or hidden plumbing. A puddle's final location is not enough.
-
Check 3
With the supply still isolated, inspect only the exterior of the flexible supply line, stop, tank connection, tank underside, and tank-to-bowl seam. Note whether water appears during filling, from a nut/washer, from the seam, or from a visible crack; do not use a wrench on porcelain hardware.
Expected result: Water starts at the supply fitting, at the tank connection, from between tank and bowl, or from a tank/valve crack.
Next step: Keep water off and have the exact model and leak point ready for a plumber. Only a clearly accessible connection that the model manual explicitly permits may be checked without disturbing porcelain; do not guess a seal size or over-tighten.
Stop if: Do not lift the tank, remove tank bolts, tighten against porcelain, operate with a cracked tank, or reopen the supply to a fast or uncontrolled leak.
Why this matters
Why: A fitting or washer may be involved at the supply side; a damaged or misaligned tank gasket can leak at the tank-to-bowl connection; a crack or unstable tank is a stop-and-service condition.
-
Check 4
If there is no external floor leak and the tank can be opened safely, place a small amount of food coloring in the tank without flushing and observe the bowl for the time specified by EPA WaterSense. Flush afterward to avoid staining; do not use chemical tank cleaners or handle contaminated water.
Expected result: Color appears in the bowl, or no color appears during the test and the water level remains stable.
Next step: If color transfers, keep the toilet out of service as needed and consider only the exact model-matched flush seal after verifying the manual; call a plumber if the valve, tank, or model is uncertain. Continue first-wet-point diagnosis for any external leak.
Stop if: Do not flush repeatedly, pour chemicals into the tank, force a valve, or treat a dye result as proof that a base or supply leak is repaired.
Why this matters
Why: Color transfer indicates a leaking flapper or flush-valve seal; no transfer makes that silent internal leak less likely but does not clear a supply, tank, bowl, base, or intermittent leak.
-
Check 5
If water appears at the bowl-to-floor base or only after a flush, stop flushing and note whether it is clean supply water or bowl-contaminated water. Do not rock the toilet, scrape the base, remove caulk, or attempt to lift the bowl.
Expected result: The base is dry, the base leaks after a flush, the toilet moves, the porcelain/flange is damaged, or the water is contaminated/odor-bearing.
Next step: Keep the supply closed and call a licensed plumber for a base leak, movement, cracked porcelain, damaged flange, sewage, or unknown contamination. Do not mask the leak with caulk.
Stop if: Do not keep using the toilet, remove the bowl, disturb the flange, or handle sewage without appropriate professional controls.
Why this matters
Why: A post-flush base leak can involve the wax/rubber seal, flange, bowl, or connection; movement or contaminated water increases the chance of a failed seal or structural issue and needs professional assessment.
-
Check 6
If the complaint is an occasional refill or water sound rather than a floor puddle, observe the tank water level and overflow area with the lid safely lifted. Note whether water enters the overflow or the tank slowly empties into the bowl; do not adjust a part that requires force or model-specific disassembly.
Expected result: Water reaches the overflow, the flush seal leaks into the bowl, the fill valve cycles intermittently, or the tank level is stable but an external leak remains.
Next step: Use the exact manual for a permitted adjustment or call a plumber for a seal, fill valve, tank, or external leak. Keep the supply off if water is escaping outside the bowl or tank.
Stop if: Do not use in-tank chemicals, force the actuator, remove a pressure vessel, or keep operating a toilet with an external or uncontrolled leak.
Why this matters
Why: Overflow, a worn/dirty flush seal, a binding actuator, or a fill-valve issue can cause internal water loss; a stable tank does not explain an external supply, tank, bowl, or base leak.
-
Check 7
Record the toilet brand/model if visible without moving it, the first wet point, clean versus contaminated water, whether the leak appears during filling or flushing, dye-test result, supply-stop behavior, bowl movement, cracks, and any recent installation or seal work.
Expected result: The evidence points to a supply connection, tank/flush seal, tank-to-bowl gasket, base/flange seal, fill valve, or hidden source, or remains ambiguous.
Next step: Keep the supply isolated for active or uncertain leaks and arrange plumbing service. Ask the plumber to inspect the toilet, supply stop, tank/bowl seals, flange/base, and adjacent floor or wall as applicable.
Stop if: Do not order a generic seal, remove the toilet, tighten porcelain hardware, or reopen the water for repeated testing when the source is not resolved.
Why this matters
Why: This record lets a plumber select the correct seal path and avoid replacing a flapper for a base leak or sealing over a supply/wall problem.
Use your observations
Decision map
Find the observation that best matches what you see, then follow the next safe action.
-
PATH 01Safety boundary
What you see
Water is spreading, the shutoff will not close, the leak is contaminated/odor-bearing, the floor is unstable, or water is near electrical equipment.
Do this next
Stop flushing, move people and pets away, use the main shutoff only if safely accessible, and call a plumber urgently; use emergency response for an immediate electrical or structural danger.
Why this path and its safety boundary
Why it matters: The leak can cause water damage, sanitation exposure, structural damage, or an electrical hazard.
Safety stop: Do not enter unsafe water, touch wet electrical equipment, or keep operating the toilet.
-
PATH 02Safety boundary
What you see
The first wet point is the stop, supply hose, or tank inlet and the water is clean.
Do this next
Keep the supply closed and have the exact connection checked; only perform a manual-approved accessible check without force, otherwise call a plumber.
Why this path and its safety boundary
Why it matters: A supply washer, hose, valve, or threaded connection may be leaking.
Safety stop: Do not force the stop, overtighten a tank connection, or reopen a fast leak.
-
PATH 03Safety boundary
What you see
Water starts between the tank and bowl or beneath a tank valve during filling/operation.
Do this next
Keep water off and call a plumber or follow the exact model manual; do not lift the tank or tighten porcelain hardware to a guessed torque.
Why this path and its safety boundary
Why it matters: A tank gasket, valve seal, misalignment, loose/damaged hardware, or porcelain problem may be involved.
Safety stop: Do not overtighten, operate a cracked or unstable tank, or use caulk as a substitute for a gasket.
-
PATH 04Safety boundary
What you see
Food coloring moves from the tank to the bowl without a flush, with no external wet point.
Do this next
Use the exact model manual to identify the correct seal or call a plumber; flush after the dye test and do not use chemical tank cleaners.
Why this path and its safety boundary
Why it matters: The flapper or flush-valve seal is leaking internally.
Safety stop: Do not assume an internal dye result repairs an external leak, and do not force the flush mechanism.
-
PATH 05Safety boundary
What you see
Water appears at the bowl-to-floor base after a flush, the toilet moves, or bowl-contaminated water is present.
Do this next
Stop using the toilet, keep the supply closed, and call a licensed plumber; base repair can require removing the bowl and inspecting the flange.
Why this path and its safety boundary
Why it matters: A wax/rubber closet seal, flange, bowl, or installation issue may be leaking.
Safety stop: Do not rock, lift, re-seat, or caulk the toilet yourself or continue flushing.
-
PATH 06Safety boundary
What you see
The first wet point cannot be seen, water appears from the wall/floor, the leak continues with the toilet supply closed, or multiple sources are possible.
Do this next
Keep the area dry and the toilet out of service, use the main shutoff only if safe, and arrange a plumber to trace the source.
Why this path and its safety boundary
Why it matters: A stop valve, wall pipe, drain, floor, or hidden plumbing issue may be involved rather than the toilet seal.
Safety stop: Do not open the wall, remove flooring, or keep restoring water to reproduce an unknown leak.
Helpful context
Understand the symptom
The first wet point is more useful than the biggest puddle
Water can run down porcelain or the floor before it becomes visible, so wipe or blot only from a safe, clean area and watch where fresh water starts. A supply-side leak is normally clean water. Water appearing at the tank-to-bowl seam, around the base after a flush, or with bowl contents changes the seal and service decision. A toilet may also leak silently into the bowl through a worn flapper or flush-valve seal without making a floor puddle.
Protect the floor and isolate water first
Stop flushing and close the accessible toilet supply stop gently if it turns normally. If the handle is stuck, the leak is fast, the shutoff or wall connection is damaged, or water is spreading toward another room, use the home's main shutoff only when it can be reached safely and call a plumber. Keep contaminated water away from skin, pets, and electrical equipment, and do not remove the toilet just to look for a seal.
A seal is conditional, not a diagnosis
A worn flapper or flush-valve seal can allow tank water into the bowl; a tank gasket can leak between tank and bowl; a supply-line washer can leak at the tank connection; and a wax or rubber closet seal can leak at the floor flange. These parts are not interchangeable. Match the exact toilet model and configuration, and have a plumber handle base removal, a cracked or loose toilet, a damaged flange, hidden leakage, or any repair that requires disturbing the bowl.
Safety boundary
Stop conditions
- Stop flushing and isolate the toilet for active spreading water, a shutoff that will not close, contaminated water, bowl movement, cracked porcelain, structural damage, or water near electrical equipment.
- Do not force the supply stop, overtighten tank/bowl hardware, rock or lift the toilet, remove the bowl, disturb the flange, or use caulk to hide a base leak.
- Do not use chemical tank cleaners, handle sewage unnecessarily, open a wall or floor, or reopen the supply repeatedly when the first wet point is unknown.
- Call a licensed plumber for a base/tank leak, damaged seal or flange, hidden source, recurring leak, uncontrolled flow, sanitation concern, or any repair requiring model-specific disassembly.
When checks do not resolve it
Need a professional?
Call a licensed plumber for any active or recurring toilet leak, a base or tank-to-bowl leak, a supply stop that will not close, contaminated water, a cracked or moving toilet, a hidden source, or a seal that is not clearly identified by the exact manual. Use urgent service for spreading water or structural/electrical risk.
Safety scope: This article permits only safe water isolation, non-contact or clean-surface observation, an exact-manual dye test when appropriate, and model-directed visible checks. It does not authorize toilet removal, flange work, porcelain bolt tightening, sewage handling, wall/floor opening, or concealment with caulk.
Common questions
FAQ
Where should I look first when a toilet leaks?
Stop flushing, close the accessible supply stop if it turns safely, and find the first fresh wet point at the supply connection, tank, tank-to-bowl seam, bowl, or base. The first point is more useful than the final puddle location.
How do I know whether a toilet seal is leaking?
A dye test can show a flapper or flush-valve seal leaking from the tank into the bowl. A tank gasket, supply washer, or base seal has a different wet-point pattern, so do not order a generic seal before identifying the exact location and model.
Can I caulk around a leaking toilet base?
Do not use caulk to hide a base leak. Water after flushing can indicate the wax/rubber seal, flange, bowl, or installation, and the toilet may need professional removal and inspection.
What should I do if the toilet shutoff valve will not close?
Do not force a stuck valve. Stop flushing, keep clear of spreading or contaminated water, and call a plumber; use the home's main shutoff only when it can be reached safely.
Read the exact guide
Official sources
- Fix a Leak WeekU.S. Environmental Protection Agency WaterSense · Government consumer guidance used for safe leak isolation and first-source identification; plumbing conditions and local practice control.
- WaterSense Labeled Homes Technical Sheet: Free of Water LeaksU.S. Environmental Protection Agency WaterSense · Government verification protocol used for a non-invasive silent-leak test; it does not diagnose external toilet or flange leaks.
- Toilet Occasionally Leaking or RunningKOHLER · Kohler two-piece/one-piece guidance used for conditional seal interpretation; exact model configuration controls.
- Troubleshooting KOHLER Pressure Assist ToiletsKOHLER · Kohler model-family flowchart used as an example of location-based diagnosis; other toilet models require their own manuals.
- Learn How to Install a ToiletKOHLER · Manufacturer installation guidance used to identify a base seal as a removal-level repair; exact model and installation conditions control.
Community feedback
Share a repair observation
Share a plain-text repair observation. Accepted observations are published automatically; this page may take a moment to update.