
On this page
Start here
Quick answer
Start at the first wet point instead of assuming the toilet fill valve is leaking. Water at the supply connection or the fill-valve shank points to an external supply-side leak; water rising inside the tank and spilling into the overflow tube points to a fill valve or float-level problem; water moving from the tank into the bowl without a flush points more toward the flapper or flush-valve seal. Close the toilet's accessible supply stop if water is actively escaping and the valve operates normally, keep water away from electrical equipment, and do not use the toilet if the bowl is blocked, sewage is backing up, the floor is soft, or the leak cannot be controlled. Do not overtighten fittings or dismantle the tank until the source is identified; arrange a plumber when the supply stop, tank connection, porcelain, concealed pipe, or fill-valve replacement needs service.
Before you begin
Safety first
- Do not force the shutoff, disconnect a pressurized hose, remove tank or bowl hardware, open concealed surfaces, handle sewage, or work near electrical equipment or damaged porcelain.
Work through in order
Diagnostic checks
Use only checks that match the exact appliance or system and its official guide.
-
Check 1
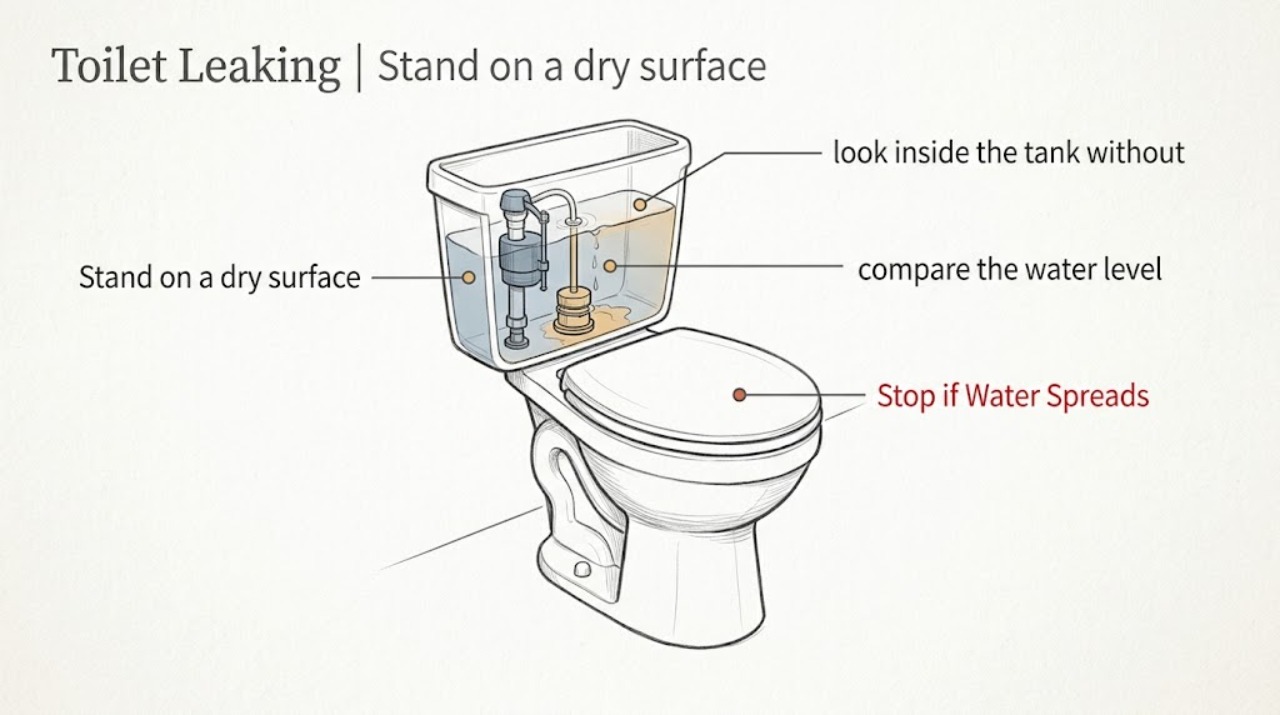
Stand on a dry surface and locate the first wet point without reaching through water: the floor at the supply line, the tank bottom or fill-valve shank, the tank rim/overflow tube, the bowl/base, or a wall/floor penetration. If water is actively escaping and the toilet stop is accessible and moves normally, turn that stop clockwise to close it; do not force it.
Expected result: The leak slows or stops at the supply stop, continues from the tank or bowl, appears only after flushing, or cannot be safely reached or controlled.
Next step: Keep the toilet out of use, protect the floor from further damage, and call a plumber if the stop does not control the leak or the first wet point is concealed.
Stop if: Stop for sewage, an overflowing bowl, water near electrical equipment, a soft or sinking floor, cracked porcelain, a seized stop, or active water that cannot be controlled.
Why this matters
Why: A supply-stop response supports an external supply-side path; continued water from the tank or bowl needs a tank/flush diagnosis. An inaccessible or uncontrolled leak may involve the stop, concealed piping, or a larger plumbing failure.
-
Check 2
When the area is dry and the bowl is not backing up, look inside the tank without touching the valve. Note whether water continues to enter after the tank reaches its normal level, whether the water rises toward or over the overflow tube, and whether the floor or tank exterior becomes wet at the fill-valve connection.
Expected result: Water keeps running into the tank, reaches the overflow tube, stops below the overflow, or appears outside at the valve shank/locknut or supply connection.
Next step: Do not adjust, remove, or replace the fill valve while water is escaping or the connection is wet. Record the exact location and ask a plumber to verify the valve, float setting, gasket, and supply connection.
Stop if: Stop for water over the overflow, a loose tank, cracked porcelain, corrosion that could break when touched, or water near electrical equipment.
Why this matters
Why: Continuous inflow or overflow supports a fill-valve/float-level problem. Exterior wetness at the shank or supply connection is a seal or connection leak, not proof that the internal valve mechanism is faulty. Water below the overflow with no exterior wetness points elsewhere, including the flapper path.
-
Check 3
If there is no active external leak and the tank can be observed safely, compare the water level with the overflow tube and watch whether the fill valve shuts off after a normal refill. Do not bend a float, remove the valve cap, or turn a small adjustment screw unless the exact toilet instructions expressly identify that user adjustment.
Expected result: The valve shuts off at a stable level below the overflow, keeps running, intermittently starts, or the water level changes after the toilet has not been flushed.
Next step: Move to the dye and bowl check if there is no floor/tank exterior leak. If the valve cannot shut off or the level approaches the overflow, close the supply stop and call a plumber.
Stop if: Stop if the tank overflows, the water cannot be stopped, the porcelain moves or cracks, or a valve adjustment would require tools or contact with a wet fitting.
Why this matters
Why: A stable level makes an overflowing fill valve less likely. Continued or intermittent inflow can come from the fill valve/float, supply pressure behavior, or water leaving through the flush seal; the observation alone does not identify a replacement part.
-
Check 4
To distinguish a silent tank-to-bowl leak from a fill-valve overflow, only when the tank is stable and the bowl is clear, add a few drops of food coloring or a dye tablet to the tank without flushing. Wait 10 minutes, then look for color in the bowl and flush afterward to avoid staining.
Expected result: Color appears in the bowl during the wait, or the bowl stays clear while the tank level and exterior remain stable.
Next step: If color appears, report a flush-seal leak to a plumber. If the bowl stays clear but the fill valve runs or leaks outside, report the fill-valve or connection symptoms instead.
Stop if: Do not perform the dye check with an overflowing or backed-up bowl, active sewage, uncontrolled water, or a tank that may be unstable; stop if color cannot be flushed safely.
Why this matters
Why: Color in the bowl indicates water is crossing the flapper or flush-valve seal; it does not diagnose the fill valve. A clear bowl makes a silent flapper leak less likely, so an earlier overflow or connection observation deserves more weight.
-
Check 5
From a dry position, inspect the visible supply hose, shutoff, tank underside, and floor around the toilet for a repeatable drip pattern. Do not tighten the nut, remove the hose, lift the tank, or wipe a fitting while it is under pressure or actively leaking.
Expected result: The first wet point is the supply stop/hose, the fill-valve shank through the tank, the tank-to-bowl joint, the bowl base, or a wall/floor penetration.
Next step: Keep the supply closed if possible and have a plumber repair the identified connection or investigate the concealed path; do not substitute a new fill valve for an unverified leak source.
Stop if: Stop for sewage, porcelain cracks, tank movement, a soft floor, water entering a wall/ceiling, or any fitting that is corroded, seized, or likely to break.
Why this matters
Why: The location separates a supply connection, fill-valve gasket/shank, tank seal, bowl seal, or concealed plumbing path. A leak at the bowl base or wall/floor penetration is not a safe fill-valve replacement diagnosis.
-
Check 6
Prepare the plumbing-service handoff: note the first wet point, whether it occurs during refill or between flushes, whether the supply stop controls it, tank water level relative to overflow, dye-test result, toilet make/model if visible, and any recent repair or part change.
Expected result: The leak is externally controlled, an internal fill-valve/overflow symptom, a tank-to-bowl seal symptom, or a concealed/base leak that needs professional isolation.
Next step: Leave the toilet unused or with its supply closed until the leak is repaired whenever water damage, sewage, overflow, or an uncontrolled connection is possible.
Stop if: Stop all homeowner work if the source remains unclear, the leak returns after a safe observation, or repair would require removing a tank, disconnecting a pressurized line, or handling damaged porcelain.
Why this matters
Why: A time-and-location record prevents a plumber from treating every toilet leak as a fill-valve failure and helps identify whether a conditional valve, gasket, flush seal, tank seal, or supply repair is appropriate.
Use your observations
Decision map
Find the observation that best matches what you see, then follow the next safe action.
-
PATH 01Safety boundary
What you see
Water is escaping rapidly, the bowl is overflowing or backing up, sewage is present, the floor is soft, or water is entering a wall, ceiling, or electrical area.
Do this next
Stop using the toilet, close the accessible supply stop only if it turns normally and safely, keep people away from contaminated or wet areas, and call a plumber promptly. Use emergency building or electrical help if water has reached electrical equipment.
Why this path and its safety boundary
Safety stop: No flushing, plunging into an overflowing bowl, forced shutoff operation, concealed-wall opening, or electrical contact.
-
PATH 02Safety boundary
What you see
The first wet point is the supply stop, hose, tank connection, or fill-valve shank.
Do this next
Keep the supply closed if it can be closed safely and arrange plumbing service for the connection, gasket, tank seal, or fill-valve assembly. Do not assume the internal fill valve is the failed part.
Why this path and its safety boundary
Safety stop: Do not tighten, disconnect, or replace a pressurized fitting when it is wet, corroded, seized, or near cracked porcelain.
-
PATH 03Safety boundary
What you see
Water continues entering the tank and rises to or over the overflow tube.
Do this next
Close the supply stop if safe, stop flushing, and call a plumber to inspect the fill valve and float-level setting. Treat a valve that cannot shut off as an active leak even if no water is on the floor yet.
Why this path and its safety boundary
Safety stop: Do not keep the supply open, force a float adjustment, or dismantle the fill valve while water is uncontrolled.
-
PATH 04Safety boundary
What you see
The tank stays below the overflow but dye appears in the bowl without a flush.
Do this next
Report a flapper or flush-valve seal leak to a plumber; replacing the fill valve would not address the observed tank-to-bowl path.
Why this path and its safety boundary
Safety stop: Do not add chemicals or continue a dye test if the bowl is backed up or cannot be flushed safely.
-
PATH 05Safety boundary
What you see
The first wet point is the bowl base, tank-to-bowl joint, porcelain, or a concealed wall/floor path.
Do this next
Keep the toilet out of service, close the supply if safe, and call a plumber for seal, porcelain, or concealed-pipe diagnosis. A fill-valve change is not an adequate test for these locations.
Why this path and its safety boundary
Safety stop: Do not lift the tank, remove the bowl, open the wall/floor, or use the fixture until the structure and leak path are assessed.
Helpful context
Understand the symptom
The phrase leaking toilet describes several different paths. A fill valve admits water into the tank, so a failed valve may keep running and send water over the overflow tube, or it may leak at the valve's tank or supply connection. A flapper or flush-valve seal can instead let water leave the tank into the bowl without putting water on the floor. The visible wet spot, not the part name, should determine the next safe check.
If water is escaping now, stop the flow at the toilet supply stop only when it is plainly accessible, dry, and turns normally. Do not force a seized or corroded stop. Keep hands and tools away from wet electrical items, and do not flush a toilet that is overflowing or backed up. Dry the surrounding floor only after the water source is controlled and it is safe to do so.
A visual inspection can often distinguish a fill-valve symptom from a silent flapper leak, but it cannot prove that an internal seal, threaded connection, or porcelain is sound. Use the observations below to give a plumber a precise handoff rather than replacing a part by guesswork.
Safety boundary
Stop conditions
- Rapid flow, overflowing or backed-up bowl, sewage, water near electrical equipment, a soft floor, or water entering a wall or ceiling.
- Cracked or moving porcelain, a seized/corroded supply stop, a tank that shifts, or a fitting that may break if touched.
- A fill valve that cannot shut off, water rising over the overflow, or a leak that cannot be controlled safely.
- Any need to disconnect a pressurized line, remove the tank or bowl, open a wall/floor, use chemicals, or work near contaminated water.
Only after diagnosis
Potential parts
- toilet fill valve
Only consider this part if the first wet point and a professional diagnosis show that the fill valve mechanism or its tank connection is the source, rather than the flapper, flush seal, supply stop, tank seal, or bowl base.
Confirm the toilet manufacturer/model, valve style, tank connection, and installation instructions before selecting a replacement.
When checks do not resolve it
Need a professional?
Call a plumber when the fill valve does not shut off, the water reaches the overflow, or the leak returns after a safe supply-stop observation., Arrange prompt service for a supply-stop or tank connection leak, concealed water, a bowl-base leak, cracked porcelain, a soft floor, or an uncontrolled leak., Have the plumber trace the leak before buying a replacement part; a fill valve cannot fix a flapper, tank seal, bowl seal, or concealed pipe leak.
Safety scope: Do not force the shutoff, disconnect a pressurized hose, remove tank or bowl hardware, open concealed surfaces, handle sewage, or work near electrical equipment or damaged porcelain.
Common questions
FAQ
How do I know if the fill valve is causing the toilet leak?
Find the first wet point. Continuous water entering the tank and rising toward the overflow supports a fill-valve or float-level issue. Water at the valve shank or supply hose is an external connection leak, while dye appearing in the bowl without a flush points to the flapper or flush-valve seal instead.
Can a fill valve leak without water on the floor?
Yes. It may keep admitting water into the tank and send it over the overflow tube, or water may pass silently into the bowl through a different seal. Observe the tank level and use the dye test only when the bowl is clear and there is no active uncontrolled leak.
Should I keep using a toilet that is leaking at the tank?
No if the leak is active, the water cannot be controlled, the tank or porcelain is damaged, or water is reaching the floor or electrical equipment. Close the supply stop only if it is accessible and turns normally, then arrange plumbing service.
Do I need a new fill valve for every leaking toilet?
No. A leaking supply connection, tank seal, flapper, flush-valve seal, bowl base, or concealed pipe has a different repair path. Identify the first wet point and give that observation to a plumber before choosing a part.
Read the exact guide
Official sources
- Water Efficiency Management Guide Bathroom SuiteU.S. Environmental Protection Agency WaterSense · Bathroom fixture maintenance guidance; the document's commercial context does not replace fixture-specific instructions.
- WaterSense Labeled Homes Technical Sheet: ToiletsU.S. Environmental Protection Agency WaterSense · WaterSense labeled-home verification guidance used here for general component distinctions.
- Fix a Leak WeekU.S. Environmental Protection Agency WaterSense · General household plumbing leak guidance.
- Home MaintenanceU.S. Environmental Protection Agency WaterSense · General tank-type toilet maintenance guidance; exact fixture instructions control.
Community feedback
Share a repair observation
Share a plain-text repair observation. Accepted observations are published automatically; this page may take a moment to update.