
On this page
Start here
Quick answer
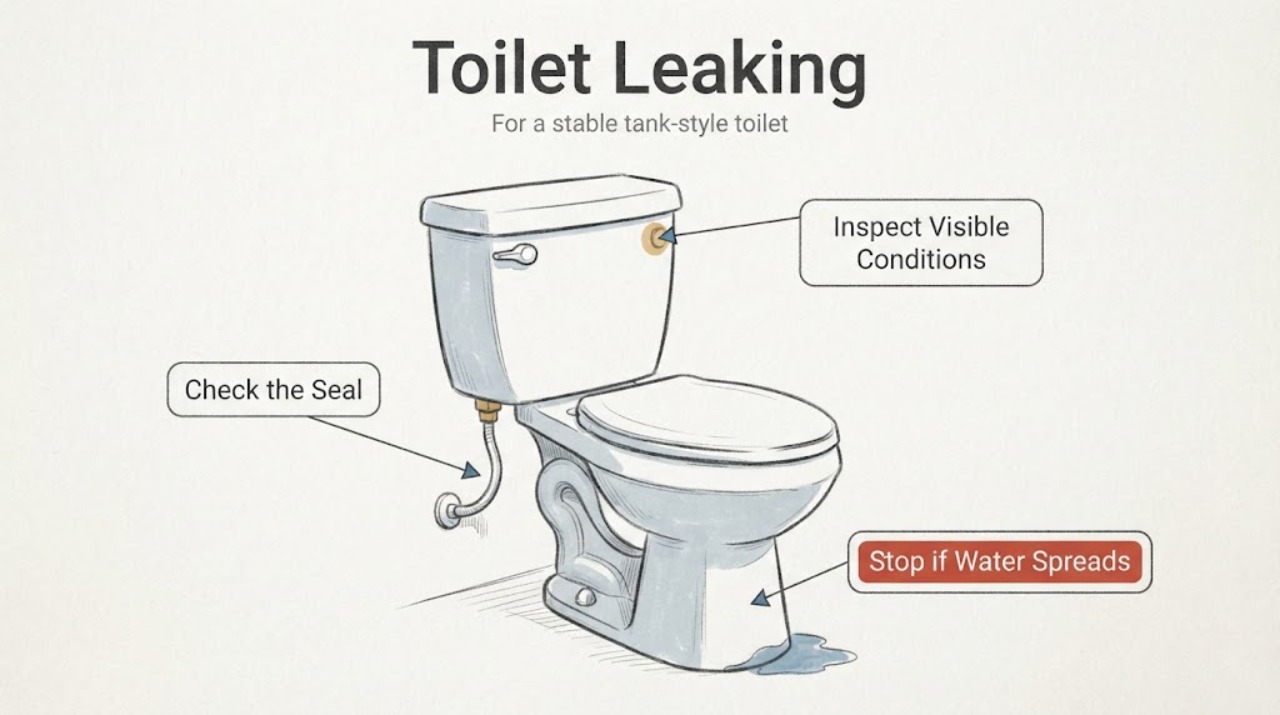
A toilet leak may be silent water passing from the tank into the bowl, a tank that keeps refilling, or water escaping outside at the supply connection, tank bolts, bowl base, or floor. For a tank-style toilet, place a small amount of food coloring in the tank without flushing and check the bowl after 10 to 15 minutes; color in the bowl supports a flapper or flush-valve seal leak. Inspect the tank water level, chain, lever, and flapper alignment, and close the toilet's accessible supply valve if water is escaping externally or the leak is uncontrolled. Do not force a corroded valve, tighten porcelain hardware aggressively, use in-tank chemicals that can damage rubber parts, or keep using a toilet that is rocking, sewage-contaminating the floor, or damaging the structure. Persistent internal leakage, a failed valve, a cracked tank or bowl, or a leak at the floor needs a licensed plumber.
Work through in order
Diagnostic checks
Use only checks that match the exact appliance or system and its official guide.
-
Check 1
Without flushing, listen for intermittent refill noise and look inside the bowl for a thin stream or ripples. Then inspect the floor, tank sides, tank-to-bowl joint, supply hose, shutoff valve, and bowl base for the first wet point; keep hands away from sewage or an unstable toilet.
Expected result: Refill noise or movement in the bowl with no recent flush suggests internal tank leakage. A wet supply connection, tank seam, tank hardware, bowl base, or floor points to an external leak rather than the flapper alone. A toilet that rocks or has a cracked tank or bowl is a structural stop condition.
Next step: For an external or uncontrolled leak, close the accessible supply valve if it turns normally and arrange plumbing help. For a dry exterior with suspected internal leakage, perform the dye test only if the tank is stable and the water path is clean.
Why this matters
Why: The first wet point separates a flapper or fill-valve problem from a supply, porcelain, floor-seal, or drain problem.
-
Check 2
For a stable tank-style toilet with no external leak, place a small amount of food coloring or a dye tablet in the tank water and do not flush for 10 to 15 minutes. Look in the bowl for matching color, then flush promptly after the test to avoid staining.
Expected result: Color appearing in the bowl confirms water is passing from the tank into the bowl. No color makes a flapper leak less likely, but does not rule out an overflow, fill-valve, supply, bowl-base, or intermittent leak.
Next step: If color appears, inspect the flapper's drop, chain, lever, and visible seal alignment. If the test is negative but the toilet refills or water appears outside, follow the fill-valve or external-leak branch.
Why this matters
Why: The dye test confirms the direction of an internal tank-to-bowl leak without assuming that the flapper is the only worn part.
-
Check 3
With the tank lid lifted and the supply path dry, observe the flapper after a normal flush. Check that it drops fully onto the flush-valve seat, the chain is not pulling it up or caught under it, and the lever returns without holding the flapper open. Do not scrape the seal or put hands into contaminated water.
Expected result: A flapper held open by a chain or lever can leak; a warped, brittle, or visibly damaged flapper can fail to seal even when it drops. If it drops fully and seepage continues, the flapper or flush-valve seat may be worn or damaged.
Next step: If the chain is visibly too tight or caught, leave it in a position that allows the flapper to close and retest once. If seepage continues, use a model-matched flapper only when the tank and valve are stable, or call a plumber.
Why this matters
Why: A visible alignment issue is different from a failed rubber seal or damaged flush-valve seat.
-
Check 4
Mark the tank water level after a flush and watch the refill from a dry position. Note whether water stops below the overflow tube, rises into or overflows through it, or the tank keeps filling after the flapper appears closed; do not adjust a corroded mechanism or reach into moving parts.
Expected result: Water rising into the overflow or a fill valve that continues running points toward a fill-valve or float problem. A normal tank level with water still entering the bowl points back toward the flapper or flush-valve seat.
Next step: Follow the fill-valve branch if the level is abnormal or the valve does not shut off. If the level is normal but the dye test is positive, arrange flapper or flush-valve service; do not use in-tank chemicals that can damage rubber parts.
Why this matters
Why: The fill valve can mimic a flapper leak by causing continuous refill, but the water path and tank-level behavior are different.
-
Check 5
If the toilet is wet outside, inspect from above and around the fixture after the tank has refilled: supply connection, shutoff, tank seam, tank hardware, bowl-to-tank joint, bowl base, and floor. Look for clean supply water versus dirty or sewage-contaminated water, and do not tighten porcelain parts aggressively.
Expected result: A connection or tank leak can be isolated by its first wet point. Water at the bowl base, a cracked tank or bowl, a loose or rocking toilet, or contaminated water can indicate a floor seal, porcelain, drain, or structural problem beyond a flapper.
Next step: Close the supply valve if it operates safely, stop using the toilet for an uncontrolled or contaminated leak, protect the floor without touching contaminated water, and call a plumber promptly.
Why this matters
Why: External water damage requires containment and plumbing diagnosis even when the toilet also has an internal refill sound.
-
Check 6
Prepare a service handoff with the toilet type, dye-test result, tank water level, flapper and chain position, refill pattern, first external wet point, supply-valve behavior, floor or porcelain condition, in-tank cleaner history, and any sewage odor or water damage.
Expected result: This record distinguishes flapper seepage, fill-valve overflow, supply or tank leakage, bowl-base or floor-seal leakage, and a structural or drain problem.
Next step: Give the record to a licensed plumber and keep the toilet unused or supplied off when the leak is active, contaminated, structural, or unresolved after a safe external check.
Why this matters
Why: A precise leak path prevents a flapper replacement from being used to mask a supply, porcelain, or floor problem.
Use your observations
Decision map
Find the observation that best matches what you see, then follow the next safe action.
-
PATH 01Next step
What you see
The dye appears in the bowl while the exterior stays dry.
Do this next
Arrange qualified service and follow the exact model guidance.
Why this path and its safety boundary
Why it matters: Treat it as a tank-to-bowl leak. Check that the flapper drops fully and the chain or lever is not holding it open; continued seepage needs a correctly matched flapper or flush-valve diagnosis.
-
PATH 02Next step
What you see
The flapper drops fully but dye still reaches the bowl.
Do this next
Arrange qualified service and follow the exact model guidance.
Why this path and its safety boundary
Why it matters: The flapper seal or flush-valve seat may be worn, warped, or damaged. Arrange plumbing repair or use a model-matched replacement only when the toilet is stable and the instructions support it.
-
PATH 03Next step
What you see
The tank water rises into the overflow or the fill valve keeps running.
Do this next
Arrange qualified service and follow the exact model guidance.
Why this path and its safety boundary
Why it matters: Prioritize the fill valve or float branch rather than the flapper. Do not force or adjust corroded parts; close the supply and call a plumber if the valve will not stop the flow.
-
PATH 04Next step
What you see
Water appears at the supply connection, shutoff, tank seam, tank hardware, bowl-to-tank joint, or bowl base.
Do this next
Arrange qualified service and follow the exact model guidance.
Why this path and its safety boundary
Why it matters: Treat it as an external leak. Close the supply valve gently if it operates normally, protect the area without touching contaminated water, and arrange plumbing service.
-
PATH 05Next step
What you see
The toilet rocks, porcelain is cracked, water is entering the floor or wall, or sewage odor or contaminated water is present.
Do this next
Arrange qualified service and follow the exact model guidance.
Why this path and its safety boundary
Why it matters: Stop using the toilet, close the supply if safe, keep people away from the affected area, and call a plumber promptly for structural, drain, or floor-seal assessment.
-
PATH 06Next step
What you see
The dye test is negative but the toilet still refills or the water meter shows unexplained use.
Do this next
Arrange qualified service and follow the exact model guidance.
Why this path and its safety boundary
Why it matters: A fill-valve, overflow, intermittent, or another fixture leak may be involved. Record the timing and arrange plumbing diagnosis instead of replacing the flapper by assumption.
Helpful context
Understand the symptom
“Toilet leaking” covers two different paths. A silent internal leak sends clean tank water into the bowl and may make the fill valve cycle, while an external leak leaves water around the tank, supply connection, bowl base, or floor. A flapper is relevant to the first path, but it is not the explanation for every wet floor.
Begin with a dry-floor and supply check. If the leak is active or the toilet is unstable, close the accessible supply valve gently if it works normally and keep people away from contaminated water. Do not force a seized valve, lift a heavy tank alone, or tighten porcelain hardware until it cracks.
Food coloring or a dye tablet can confirm tank-to-bowl seepage without dismantling the toilet. A confirmed flapper leak may justify a model-matched replacement, but a damaged flush-valve seat, misaligned chain, fill valve, tank, bowl, or floor seal needs a different diagnosis.
Safety boundary
Stop conditions
- Stop immediately for an uncontrolled leak, cracked tank or bowl, a rocking toilet, sewage-contaminated water, water entering the floor or wall, or a shutoff valve that leaks or will not operate safely.
- Do not force a corroded shutoff, overtighten porcelain hardware, use in-tank chemicals that can damage rubber parts, lift an unstable tank, or put hands into contaminated water.
- Keep the toilet unused and call a licensed plumber when the dye test is positive but seepage continues, the fill valve will not stop, the source is hidden, or water damage is spreading.
Only after diagnosis
Potential parts
- toilet flapper
Consider this only when a dye test confirms tank-to-bowl seepage and the flapper is not sealing after its alignment and chain are checked.
Match the toilet model, flush-valve opening, flapper width, chain arrangement, and any float or adjustment feature; do not assume a universal fit. - toilet fill valve
Consider this only when the tank water rises abnormally, the valve runs continuously, or a qualified diagnosis identifies the fill valve rather than the flapper.
Confirm the toilet design and manufacturer instructions before selecting a replacement, and do not use a fill-valve change to conceal a cracked tank or floor leak.
Common questions
FAQ
How do I know if a toilet flapper is leaking?
Add a small amount of food coloring to the tank without flushing and check the bowl after 10 to 15 minutes. Color in the bowl supports tank-to-bowl leakage; also check that the flapper drops fully and its chain is not holding it open.
Why does my toilet keep refilling?
A flapper may be leaking, the chain or lever may hold it open, or the fill valve may be allowing water into the overflow. Compare the dye result with the tank water level and refill behavior before choosing a part.
Can in-tank cleaner cause a toilet leak?
Some chemical tank cleaners can damage rubber parts, including flappers, and allow seepage. Stop using a product that may be damaging the seal and arrange a correctly matched repair if the dye test is positive.
What if water is leaking onto the floor around the toilet?
Treat it as an external leak rather than assuming the flapper is responsible. Find the first wet point, close the supply valve if it operates safely, stop using the toilet for uncontrolled or contaminated water, and call a plumber.
Read the exact guide
Official sources
- Fix a Leak WeekU.S. Environmental Protection Agency · Silent toilet flapper leaks, food-coloring tests, model-specific replacement, and licensed plumber escalation
- Leak Alerts: Find and Fix LeaksSan Francisco Public Utilities Commission · Toilet flapper, fill-valve, handle and chain leak checks, intermittent leaks, and external plumbing leak awareness
- Toilet Leak Detection - DEPNew York City Department of Environmental Protection · Toilet dye testing, flapper and fill-valve distinction, tank water level, chemical damage, and model-matched repair guidance
- Best Management Practice #6: Toilets and UrinalsU.S. Department of Energy · Tank toilet flapper function, dye testing, tank water level, and repair or replacement decision points
Community feedback
Share a repair observation
Share a plain-text repair observation. Accepted observations are published automatically; this page may take a moment to update.