
On this page
Start here
Quick answer
Do not climb onto the roof or try to press, nail, cement, or reseal a wind-lifted starter strip. From the ground, observe whether the lifted material is at an eave or rake, whether the overlying first shingle course or drip edge is also displaced, and whether loose pieces, exposed underlayment, or water entry are visible. Take photos from a safe location only, keep people away from falling debris, and arrange urgent roofing service after high winds or any visible edge separation. The starter course, sealant bond, fasteners, overlap, and roof-edge substrate must be assessed together under the exact shingle manufacturer instructions; a ground inspection cannot establish that the roof is safe to walk or that a patch will hold.
Before you begin
Safety first
- This article is observation-only. Do not climb onto the roof, use a ladder to reach the edge, walk on shingles, pull or press the starter strip, nail or cement a lifted section, pry drip edge, remove shingles, cut materials, enter unsafe attic space, or stand beneath loose debris. Keep people clear and let a qualified professional provide access, fall protection, diagnosis, and repair.
Work through in order
Diagnostic checks
Use only checks that match the exact appliance or system and its official guide.
-
Confirm the edge can be observed safely
From a normal standing position well clear of the eaves and rakes, look at the roof edge with a camera zoom or binoculars. Do not climb, use a ladder, touch the roof, or stand below a loose flap; if wind, rain, ice, or falling debris is present, stop and move indoors.
Expected result: Record whether the edge is visible without elevation, whether material is actively moving, and whether loose pieces or debris are falling or hanging over a walkway, door, vehicle, or utility area.
Next step: Keep people and pets away from the drop zone, take no-contact photos only when conditions are safe, and arrange a qualified roofer for assessment.
Stop if: Stop immediately for ongoing high wind, lightning, unstable debris, a sagging roof edge, blocked exits, or anything that requires a ladder or stepping onto the roof.
Why this matters
Why: An unsafe viewing condition or active debris makes even inspection inappropriate and requires a professional response. A stable, ground-level view permits documentation only; it does not authorize a repair attempt or roof access.
-
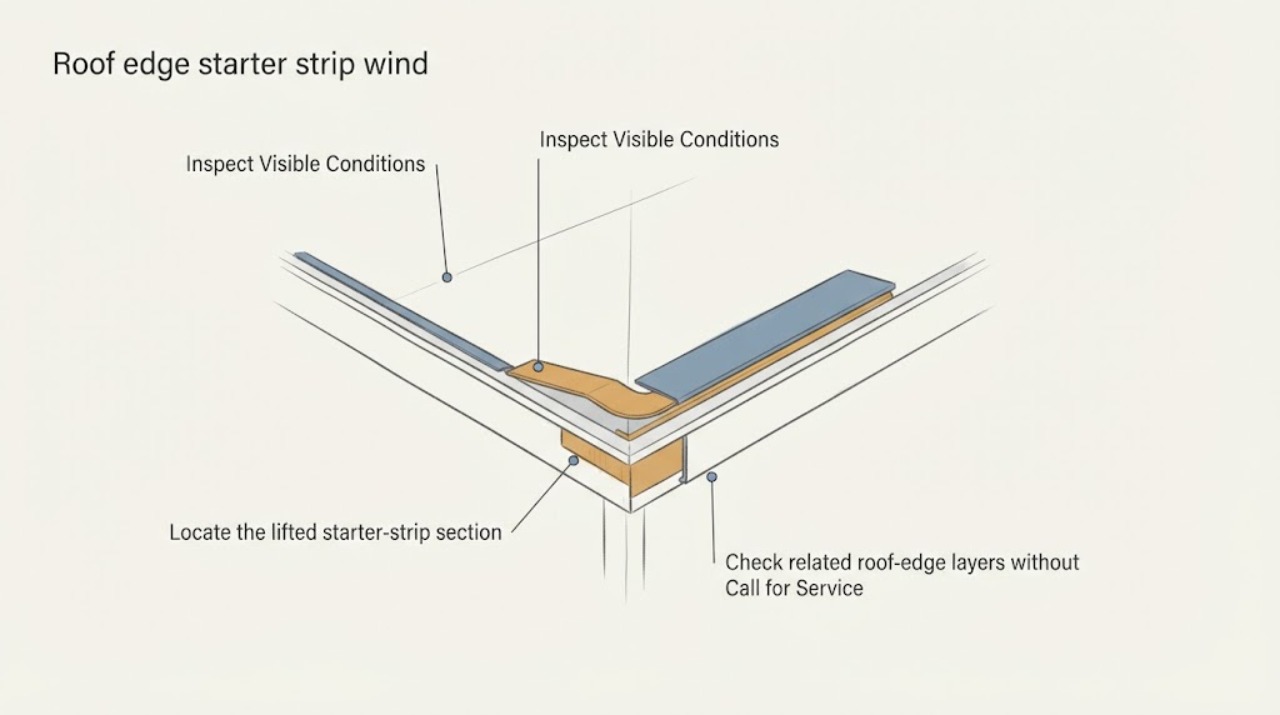
Locate the lifted starter-strip section
Photograph the eave and each accessible rake from the ground, using several angles and a nearby fixed reference such as the gutter line or gable edge. Do not estimate by pulling the material or sliding a tool under it.
Expected result: Record whether the apparent lift is at the eave, at a rake, at a corner transition, or along multiple roof edges; note a curled or detached starter strip, a lifted first-course shingle, exposed underlayment, missing granules, or no clear separation.
Next step: Send the marked photos and exact edge location to the roofer. Keep the roof out of use and do not tape, weigh down, nail, or cement the strip from the ground.
Stop if: Stop documenting if material begins to move, the roof edge appears to sag, or a photo would require approaching beneath the loose section or entering a restricted area.
Why this matters
Why: A localized edge flap can be limited to one starter/first-course interface, while lift at several edges or a corner may indicate broader wind exposure or attachment damage. Exposed underlayment or a missing piece increases the risk of wind-driven rain entry.
-
Check related roof-edge layers without contact
Use the same ground-level view to compare the starter-strip edge with the overlying first shingle course, drip edge, fascia, soffit, and gutter. Do not pry the drip edge, pull a gutter, or lift a shingle to see underneath.
Expected result: Record whether the first course is straight or displaced, the drip edge remains aligned, the gutter or fascia is pulled away, the soffit is open, or multiple layers appear to move together.
Next step: Provide the layer-by-layer observations to a roofing professional and ask for an assessment of starter material, fastening, edge metal, deck, and supporting structure as a system.
Stop if: Stop for a hanging gutter or metal edge, exposed sharp metal, a visibly detached soffit, structural sag, or debris that could fall.
Why this matters
Why: If the starter, first course, and edge metal move together, the problem may extend beyond a sealant bond to fastening, substrate, or storm damage. A separated gutter or fascia can also be a separate hazard and should not be mistaken for a starter-strip repair.
-
Look for water entry from safe interior locations
From inside the home, inspect already accessible ceilings, upper walls, and attic areas without entering a dark, wet, damaged, or unsafe space. Look for signs only; do not open the roof, push insulation aside near wiring, or test the lifted strip with water.
Expected result: Record a dry interior, a new stain, damp insulation or decking visible from a safe access point, dripping, or water near electrical equipment. Note the room or roof-edge side that corresponds with the exterior photos.
Next step: If water is present, protect belongings from below without touching wet electrical equipment and request urgent roofing service; report the location and timing with the exterior photos.
Stop if: Stop for active dripping near electricity, a sagging ceiling, wet insulation or decking, mold-like growth, a damaged ceiling, or any need to cut into a wall or roof assembly.
Why this matters
Why: Interior moisture after the edge lift suggests wind-driven rain or another roof-path leak and makes the issue time-sensitive. A dry interior does not rule out concealed wetting or a future leak, especially when underlayment or edge material is exposed.
-
Record the wind and damage pattern
Write down when the lift was first noticed, the recent wind or storm conditions, whether the edge changed afterward, and whether nearby roof sections, flashing, vents, trees, or outdoor objects show damage. Use dated photos and do not remove storm debris from the roof edge.
Expected result: Record a single affected edge, several wind-facing edges, missing shingles elsewhere, impact marks, fallen branches, or no related damage visible from the ground.
Next step: Give the timeline and complete photo set to the roofer and, when relevant, the property manager or insurer; keep the roof closed to occupants until assessed.
Stop if: Stop if conditions deteriorate, debris becomes unstable, or anyone asks you to climb or handle the roof material without proper professional controls.
Why this matters
Why: A wider pattern or impact damage raises the likelihood of a storm assessment beyond one starter strip. A single apparent lift still needs professional inspection because the attachment below the visible edge cannot be verified from the ground.
-
Prepare a professional handoff
Collect the roof covering type if known, approximate roof age if documented, manufacturer or installer records, edge location, photos from each side, interior moisture observations, and any prior roof work. Do not guess the shingle model or buy a starter product solely from its appearance.
Expected result: Record whether the roof uses asphalt shingles or another covering, whether a product label or installation record is available, whether the edge is eave or rake, and whether the professional will need to inspect concealed fastening, edge metal, deck, or support.
Next step: Schedule urgent roofing service and provide the observations before the visit. Keep people away from the edge and follow the professional's temporary weather-protection plan if one is supplied.
Stop if: Stop gathering information when it would require roof access, ladder work, dismantling, cutting, lifting, or contact with a damaged roof assembly.
Why this matters
Why: Starter-strip geometry, sealant placement, overhang, and fastening are product- and roof-system-dependent. Missing model information is a reason for an on-site assessment, not a reason to substitute a generic strip or patch.
Use your observations
Decision map
Find the observation that best matches what you see, then follow the next safe action.
-
PATH 01Next step
What you see
The edge is actively moving, debris is falling, or wind and weather remain hazardous.
Do this next
Move indoors, keep people and pets clear of the roof edge, and call a qualified roofing professional when conditions permit safe response. Treat urgent falling-debris or structural hazards as an emergency.
-
PATH 02Next step
What you see
The starter strip or first course is visibly lifted, detached, or missing at an eave or rake, even with no interior stain.
Do this next
Do not climb or apply a patch. Photograph from the ground and arrange urgent roof-edge inspection because concealed fastener, sealant, drip-edge, or deck damage cannot be confirmed from below.
-
PATH 03Next step
What you see
The starter edge, first course, drip edge, gutter, fascia, or soffit appears displaced together.
Do this next
Request a broader storm-damage assessment of the roof edge and supporting layers, not a starter-strip-only touch-up. Keep clear of hanging metal and loose components.
-
PATH 04Next step
What you see
Water staining, dripping, damp materials, or water near electrical equipment is visible inside.
Do this next
Protect the area from a safe position, avoid wet electrical components, and request urgent roofing service; provide the interior location and matching exterior edge photos.
-
PATH 05Next step
What you see
No lift is visible from safe ground-level observation and the interior is dry, but the concern began after wind or a storm.
Do this next
Keep the photos and timeline, avoid roof access, and ask a professional to inspect if movement, missing material, or water evidence appears later. A ground view cannot certify the seal or fasteners.
-
PATH 06Next step
What you see
A professional has inspected the roof edge, identified the failed layer, completed the repair, and performed the appropriate controlled check.
Do this next
Keep the service record and monitor from the ground after future wind. If the starter or first course lifts again, water appears, or edge metal moves, stop observation and reopen the roofing service call.
Helpful context
Understand the symptom
Wind lift at the edge is a system issue
A starter strip sits beneath the first course along the eaves and may continue up the rakes. Its sealant, fasteners, overlap, drip-edge relationship, and the deck or edge framing all affect resistance to wind and wind-driven rain. A lifted-looking edge can therefore be an isolated sealant failure, a displaced first course, exposed or damaged edge metal, or broader storm damage. The visible flap does not identify which layer failed, and different manufacturers specify different starter products and fastening details.
Keep the observation at ground level
Roof edges are an elevated fall and falling-object hazard, especially after a storm. Use only normal standing positions and a camera or binoculars from the ground; do not use a ladder to reach the strip, walk on the roof, pull on a shingle, or stand beneath a visibly loose section. If wind is still strong, move indoors and wait for conditions to settle before taking exterior photos.
When checks do not resolve it
Need a professional?
Call a qualified roofing professional urgently for any visible starter-strip or first-course wind lift, missing edge material, displaced drip edge, gutter/fascia separation, exposed underlayment, roof-edge sag, interior water entry, or unclear storm damage. Escalate immediately for falling debris, structural instability, or water near electrical equipment.
Safety scope: This article is observation-only. Do not climb onto the roof, use a ladder to reach the edge, walk on shingles, pull or press the starter strip, nail or cement a lifted section, pry drip edge, remove shingles, cut materials, enter unsafe attic space, or stand beneath loose debris. Keep people clear and let a qualified professional provide access, fall protection, diagnosis, and repair.
Have this ready
- Provide ground-level photos of the eave and rake, the exact affected edge, whether the first course or drip edge also moved, storm timing, interior moisture locations, roof-covering or manufacturer records if available, and any prior roof work. Do not promise that a photo proves the roof is safe or identify a model from appearance alone.
Common questions
FAQ
What does a wind-lifted roof starter strip look like from the ground?
You may see a curled or detached edge beneath the first shingle course, exposed underlayment, an uneven eave or rake line, or movement during gusts. A distant view cannot show whether fasteners, sealant, drip edge, or the deck also failed, so document it without touching the roof and arrange professional inspection.
Can I nail or glue a lifted starter strip back down?
No. Do not climb, nail, cement, press, or glue a lifted strip as a homeowner patch. Product-specific starter material, sealant, fastener location, overlap, edge metal, and substrate must be assessed together, and roof-edge access requires professional fall protection.
Is a lifted starter strip an emergency?
Treat active movement, falling debris, a sagging edge, exposed roof layers, interior water, or water near electrical equipment as urgent. Move people clear, go indoors during hazardous wind, and contact qualified roofing service; avoid the roof and the drop zone.
Why does the rake edge lift when the eave looks fine?
Eaves and rakes can have different edge details, overlaps, wind exposure, and starter-strip fastening layouts. A rake-only lift can still involve the first course, edge metal, sealant bond, or deck, so compare both locations from the ground and have the exact roof system inspected.
What photos should I take for a roofing professional?
Take wide and closer ground-level photos of the eave and each rake, the first course, drip edge, gutter/fascia, visible debris, and any interior stain. Include the date, affected side, storm timing, and whether water appeared. Do not approach beneath loose material or use a ladder for a better angle.
Read the exact guide
Official sources
- Pro-Start Starter Strip Shingles — Installation InstructionsGAF · GAF product instructions used to explain why starter strips, eave/rake placement, overlap, sealant, and fastener location must be assessed as a system; these dimensions and methods do not authorize homeowner repair and do not apply to an unknown product.
- Residential Asphalt Roofing Manual: Design and Application MethodsAsphalt Roofing Manufacturers Association · Industry association manual used for general mechanics of starter strips protecting first-course joints and resisting wind-driven rain; it expressly leaves exact techniques to the shingle manufacturer and is not a homeowner repair procedure.
- Wind Safety ContentNational Weather Service · National Weather Service safety guidance supports moving indoors during hazardous wind and staying clear of falling or blowing objects while observing a damaged roof edge.
- Fall Protection in Residential Construction — OSHA Guidance DocumentOccupational Safety and Health Administration · OSHA guidance supports the article's boundary that roofing work and work near roof edges require appropriate fall protection and trained professional controls; it is not a homeowner authorization or a substitute for site-specific assessment.
Community feedback
Share a repair observation
Share a plain-text repair observation. Accepted observations are published automatically; this page may take a moment to update.