
On this page
Start here
Quick answer
A loose ridge-vent cap can admit wind-driven rain, but a ceiling stain near the ridge is not proof that the ridge vent is the source; water can travel under roof coverings, and attic moisture can also come from condensation or another penetration. From a safe location, first contain interior water, check the attic only from the access opening for wet insulation or roof-deck staining, and use ground-level binoculars to document a shifted cap, visible gap, or missing section. Do not climb onto the roof, walk a wet roof, remove shingles, or apply guessed caulk or fasteners. Have a qualified roofer assess the cap shingles, vent ends, flashing, roof-deck weather barrier, and balanced intake/exhaust ventilation before the next rain; treat active water near electrical equipment, a sagging ceiling, structural decay, or an unsafe roof as urgent.
Before you begin
Safety first
- This article supports safe containment and visual observations from the ground or a safe attic access point only. A qualified professional must handle roof access, shingles, ridge-vent removal or fastening, flashing, sealants, roof-deck repairs, electrical hazards, mold remediation, and ventilation or insulation changes.
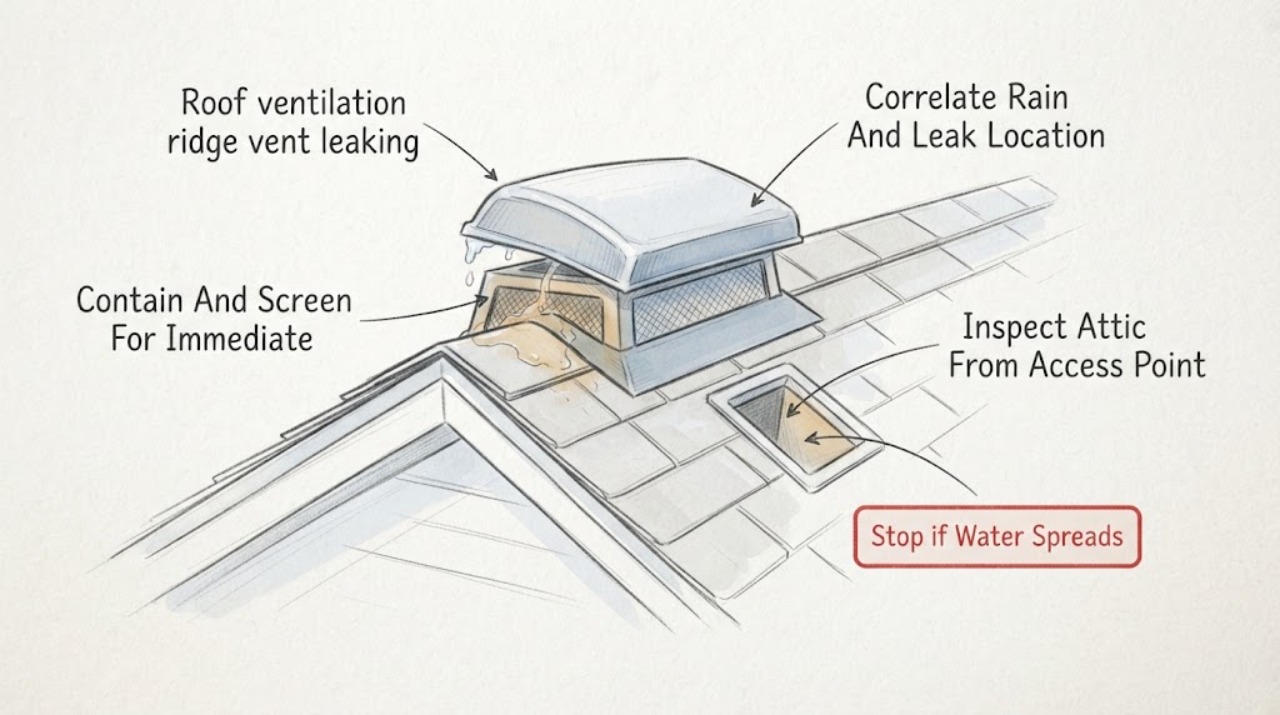
Work through in order
Diagnostic checks
Use only checks that match the exact appliance or system and its official guide.
-
Check 1
Move belongings away from the stain, place a container under an active drip only where it is stable, and note whether water is near a light, outlet, wiring, or a sagging ceiling; do not touch wet electrical equipment or stand under a bulging ceiling.
Expected result: The leak is actively dripping, the ceiling is sagging or swelling, water is near electrical equipment, or there is only an old dry stain.
Next step: For electrical or structural danger, leave the affected area and arrange urgent electrical, emergency, or roofing help from a safe location. Otherwise continue only with safe, non-contact observations and arrange a roofer if water recurs.
Stop if: Do not enter a space with unstable ceiling material, touch wet electrical components, or keep placing containers where a fall or electrical contact is possible.
Why this matters
Why: Active water, a sagging ceiling, or wet electrical equipment is an immediate property and safety concern, regardless of whether the ridge cap is loose. A dry stain permits careful documentation but does not rule out hidden wet materials.
-
Check 2
Record when the stain or drip appears, including rain or wind, time since the storm, temperature, and the room location; compare it with safe attic-access observations without walking on insulation or the roof deck.
Expected result: Water appears during wind-driven rain, only after long storms, on cold clear mornings, or at a ceiling location that does not align with the ridge vent.
Next step: Photograph the stain and any accessible water track, then give the timing and location to a roofer for leak tracing. Do not conclude that the cap is the source from alignment alone.
Stop if: Stop the inspection if the attic access is unsafe, insulation is wet enough to conceal footing, the roof deck flexes, or you encounter mold, rot, or exposed electrical wiring.
Why this matters
Why: Wind or rain correlation makes an exterior weather entry more likely, but a cold-clear-morning pattern raises condensation as another possibility. A ceiling location away from the ridge does not exclude the ridge, because water can travel, but it makes other penetrations, valleys, or flashing important to investigate.
-
Check 3
From a safe attic access opening and without stepping on insulation or approaching an unstable area, use a flashlight to look toward the underside of the ridge for wet insulation, dark water tracks, roof-deck staining, daylight, mold, or deteriorated wood; do not remove insulation or roof coverings.
Expected result: There is a fresh water track or wet material near the ridge, moisture is concentrated at the eaves or broadly across the attic, or the visible roof deck is dry with no trace.
Next step: Keep the area undisturbed, take photos from the access point, and have a qualified roofer assess the exterior and attic assembly. Do not probe soft wood, pull down wet insulation, or try to seal from inside.
Stop if: Do not enter an attic with unsafe framing, visible structural decay, exposed energized wiring, excessive heat, or a ceiling that appears unstable.
Why this matters
Why: A fresh track near the ridge supports a roof-weathering or vent-end investigation but does not identify the exact failed detail. Broad or eave-concentrated moisture makes condensation, air leakage, blocked intake, or ventilation imbalance more likely. A dry view can occur when the leak is intermittent or the water traveled elsewhere.
-
Check 4
From the ground or another secure location, use binoculars or a zoomed photograph to look for a lifted or shifted ridge-cap shingle, a missing vent section, an exposed end, a visible opening, displaced debris, or storm damage; do not climb a ladder or roof to reach it.
Expected result: The cap line is visibly displaced, a vent end or joint appears open, shingles or fasteners are missing, or no exterior defect is visible from the ground.
Next step: Photograph the area with a scale reference if possible and ask a roofer to inspect the complete ridge assembly, not just the loose-looking cap. Keep the roof out of service until inspected if storm damage is extensive.
Stop if: Do not climb, walk, pry, nail, screw, brush debris across shingles, or apply sealant to an elevated roof assembly from an unsafe position.
Why this matters
Why: A visible displacement or open end makes weather entry at the ridge assembly more likely and gives a roofer a useful target. A normal-looking roof from the ground does not clear the ridge, because concealed flashing, underlayment, fasteners, or another penetration may still leak.
-
Check 5
From ground-level eave observations or a safe attic access point, look for blocked soffit openings, insulation pushed into the eaves, or a missing visible air channel; do not remove insulation, change the ridge opening, or cover any vent.
Expected result: Soffit or intake openings are visibly blocked, insulation is tight against the roof deck at the eaves, baffles or air channels are absent where visible, or intake appears open and the issue occurs only during storms.
Next step: Document the condition and have a roofer or qualified building professional evaluate intake, baffles, air sealing, insulation, and ridge exhaust as a system. Do not use tape, foam, or a temporary cover to alter the ventilation path.
Stop if: Do not enter tight or hot attic spaces, pull at insulation near wiring, or block the ridge or soffit vents as a workaround.
Why this matters
Why: Blocked intake or a missing air channel can reduce the intended flow to a ridge exhaust and can contribute to attic moisture. Open intake with storm-correlated water makes a weathering or leak-tracing issue more likely, while ventilation observations alone cannot prove a cap failure.
-
Check 6
Save dated photos of the ceiling, attic evidence, and ground-level ridge view, and record the roof age if known, recent storms, prior repairs, and whether the symptom repeats; do not attempt a temporary roof repair from a ladder or attic.
Expected result: The problem recurs after wind or rain, follows a recent roof or vent repair, is accompanied by widespread storm damage, or has not recurred since an isolated old stain.
Next step: Arrange a qualified roofing inspection and provide the timeline, photos, safe attic observations, and any vent or cap product information visible from the ground. If no safe observation is possible, skip further checking and call the roofer.
Stop if: Do not delay urgent help for active water, structural damage, exposed wiring, or an unsafe roof while gathering more photos.
Why this matters
Why: Recurrence after weather or a recent repair raises the value of a complete roof-leak and ridge-assembly inspection. Widespread damage or a roof with uncertain stability increases urgency. An old isolated stain still deserves verification before the next wet season if the source was never established.
Use your observations
Decision map
Find the observation that best matches what you see, then follow the next safe action.
-
PATH 01Next step
What you see
A drip or fresh attic water track follows wind or rain, and the ground-level view shows a shifted cap, open end, missing section, or storm-displaced roof material.
Do this next
Contain the interior water safely, keep off the roof, and request a prompt roofing inspection before the next storm. Do not nail, pry, or caulk the assembly yourself.
Why this path and its safety boundary
Why it matters: A ridge weathering or vent-end problem becomes more likely, but the roofer should still trace the water path and check nearby penetrations, flashing, and roof-deck protection.
-
PATH 02Next step
What you see
Moisture is broad or eave-concentrated, appears on cold clear mornings rather than during rain, and intake openings or air channels appear blocked or missing.
Do this next
Have a qualified roofing or building professional evaluate air sealing, insulation, baffles, intake, exhaust, and moisture sources together. Do not block vents or add insulation over wet material without an assessment.
Why this path and its safety boundary
Why it matters: Condensation, house-to-attic air leakage, insulation placement, or ventilation imbalance becomes more likely than a loose cap as the sole cause; wet materials can still damage the roof assembly.
-
PATH 03Next step
What you see
The ceiling stain is away from the ridge, the ridge looks intact from the ground, and water appears near a chimney, plumbing vent, skylight, valley, wall transition, or other roof penetration.
Do this next
Ask the roofer for systematic leak tracing across the full roof area rather than ordering a ridge-cap part based only on the stain location.
Why this path and its safety boundary
Why it matters: Another flashing or roof-weathering path becomes more likely, although water can travel below the roof covering and a visual alignment cannot rule out the ridge.
-
PATH 04Next step
What you see
Water recurs after storms but no defect is visible from the ground and the safe attic view is dry or inconclusive.
Do this next
Arrange professional leak tracing while the timing and photos are available. Avoid repeated roof access and do not seal random areas, which can hide the path or obstruct ventilation.
Why this path and its safety boundary
Why it matters: An intermittent concealed failure, wind-driven entry, underlayment or flashing issue, or water travel under the roof covering remains possible; an inconclusive visual check is not a clean bill of health.
-
PATH 05Next step
What you see
The ceiling sags, water reaches electrical equipment, the roof or attic framing appears unsafe, there is extensive storm damage, or mold and structural decay are present.
Do this next
Leave the unsafe area, keep others away, and contact appropriate emergency, electrical, structural, or roofing professionals from a safe location. Do not climb or enter to investigate further.
Why this path and its safety boundary
Why it matters: The immediate hazard outweighs further troubleshooting; this is an urgent safety and property-protection situation, not a do-it-yourself cap repair.
Helpful context
Understand the symptom
A loose cap is a clue, not a complete leak diagnosis
Ridge ventilation is normally an exhaust path along the roof peak, and it is intended to work with adequate intake ventilation. The cap shingles, vent ends, fasteners, and weather barrier form the weathering details around that opening. A visibly shifted cap raises concern, but water may enter at another roof penetration or move beneath the roof covering before appearing on the ceiling, so the visible stain and the entry point may not line up. A roofer should match the cap and vent assembly to the roof rather than sealing the first visible gap.
Separate rain entry from attic condensation
Note whether moisture appears during wind or rain, or instead on cold, clear mornings. Wet insulation, roof-deck staining, mold, or rotted wood are signs that need attention, but they do not by themselves identify a loose ridge cap. Blocked soffit intake, missing air channels, air leakage from the house, or another roof leak can produce attic moisture. Baffles help keep an air channel open from the eaves toward the ridge; changing ventilation or insulation is a professional assessment when the cause is unclear.
Keep the observation boundary on the safe side
Roof surfaces, ladders, openings, and wet electrical areas can turn a small leak into an injury or fire hazard. Keep people and contents away from an active drip, use a container only where it can be placed safely, and photograph accessible evidence from the ground or a safe attic access point. Do not climb to the ridge, walk on a wet or damaged roof, pull apart the vent, or test roof fasteners and sealants yourself.
Safety boundary
Stop conditions
- Do not climb onto the roof, walk on a wet, steep, icy, or damaged roof, or use a ladder to reach the ridge for a photo or repair.
- Do not remove shingles, pull apart the ridge vent, drive fasteners, or apply guessed caulk, foam, tape, or a cover to the roof assembly.
- Stop attic inspection for unsafe framing, exposed wiring, excessive heat, mold, rotted wood, unstable ceiling material, or insulation that hides footing.
- For a sagging ceiling, active water near electrical equipment, fire or electrical damage, extensive storm damage, or an immediate structural hazard, leave the area and arrange urgent professional help.
- Do not block soffit or ridge ventilation, move wet insulation, or treat condensation as a confirmed roof leak without a qualified assessment.
Only after diagnosis
Potential parts
- ridge vent section or end closure
Consider this category only if a qualified inspection finds that the vent body, end treatment, joint, or closure is damaged or missing and confirms the repair approach for the installed ridge assembly.
Confirm the exact vent profile, roof pitch, slot dimensions, cap method, and manufacturer fit information; do not order a vent part from a loose-cap symptom alone. - matching ridge-cap shingles and approved fasteners
Consider this category only if the roofer finds lifted, cracked, missing, or improperly secured cap shingles and verifies that replacement is compatible with the roof covering and vent.
Match the installed roofing system and local installation requirements; the roofer should select fastener type, length, placement, and weathering details rather than relying on a generic kit. - flashing, underlayment, or roof-deck repair materials
Consider this category only if leak tracing finds failed flashing, weather barrier, or damaged roof deck rather than a cap-only problem.
The repair material depends on roof covering, substrate, exposure, and local requirements; have the professional confirm the assembly and repair scope before purchase.
When checks do not resolve it
Need a professional?
Arrange a qualified roofing inspection when a ridge cap looks loose, water recurs after wind or rain, an attic water track is present, a prior roof repair is implicated, or the source cannot be confirmed from safe observations. Request urgent help for an active leak that threatens the ceiling or electrical equipment, a sagging ceiling, structural decay, extensive storm damage, an unsafe roof or attic, or mold and wet insulation that cannot be safely isolated.
Safety scope: This article supports safe containment and visual observations from the ground or a safe attic access point only. A qualified professional must handle roof access, shingles, ridge-vent removal or fastening, flashing, sealants, roof-deck repairs, electrical hazards, mold remediation, and ventilation or insulation changes.
Common questions
FAQ
Can a loose ridge-vent cap cause a roof leak?
It can allow wind-driven rain into the roof assembly if the weathering details are damaged, but a loose-looking cap does not prove it is the entry point. Water can travel beneath roof coverings, and flashing, penetrations, condensation, or ventilation problems can create a similar stain. Have a roofer trace the path.
Can I caulk or nail the loose cap from a ladder?
No. Roof access and improvised fasteners or sealant can create a fall hazard, damage shingles, hide the leak path, or obstruct the ridge vent. Photograph the issue from the ground and arrange qualified roofing service instead.
Why is the ceiling stain below the ridge vent if water enters elsewhere?
Water can move along the underside of the roof covering, deck, framing, or insulation before it becomes visible. The room location is useful evidence but is not a precise map of the entry point, so the entire nearby roof area should be traced.
Could attic condensation look like a ridge-vent leak?
Yes. Broad moisture, wet insulation at the eaves, or moisture on cold clear mornings can point toward condensation, air leakage, blocked intake, missing air channels, or a ventilation imbalance. A professional should evaluate those conditions along with the ridge assembly rather than sealing the cap by guesswork.
When is a ridge-vent leak urgent?
Get urgent help for active water near electrical equipment, a sagging or swelling ceiling, unsafe roof or attic framing, extensive storm damage, or visible mold and structural decay. Keep people away from the area and do not climb or enter an unsafe space to investigate.
Read the exact guide
Official sources
- RESCB902-PDF-0326_Cobra Plastic Ridge Vent Install Instructions.inddGAF · Product-specific installation instructions for GAF Cobra plastic ridge vents; they are provided here to define what a qualified roofer should verify, not as a roof-access procedure for homeowners.
- Guide to Durable AtticsU.S. Department of Energy · General residential attic and roof-moisture guidance; the installed roof assembly and local requirements control repair decisions.
- BafflesU.S. Department of Energy Building Science Education · General residential attic ventilation education; existing roof and insulation design must be assessed before changes.
- Whole-House WeatherizationU.S. Department of Energy Weatherization Assistance Program · General residential weatherization and moisture-safety guidance; it is not a substitute for a roof inspection.
- Ridge VentCertainTeed · Manufacturer product information for CertainTeed residential ridge vents; the installed product and its instructions control compatibility and installation.
- Parts of a roofGAF · General roof-system education from a roofing manufacturer; the actual roof design and local installation requirements control repairs.
Community feedback
Share a repair observation
Share a plain-text repair observation. Accepted observations are published automatically; this page may take a moment to update.