
On this page
Start here
Quick answer
A crack that appears in cold weather can reflect impact, restricted panel movement, installation clearance, or brittle material. From stable ground, photograph the crack, nearby joints, trim, and water-management details without pulling the panel, climbing, or cutting. Arrange siding assessment for spreading cracks, exposed wall areas, recurring damage, or any access requiring a ladder.
Before you begin
Safety first
- Observation-only guidance; professionals identify panels, assess moisture, control dust, and complete replacement or trim work.
Work through in order
Diagnostic checks
Use only checks that match the exact appliance or system and its official guide.
-
Check 1
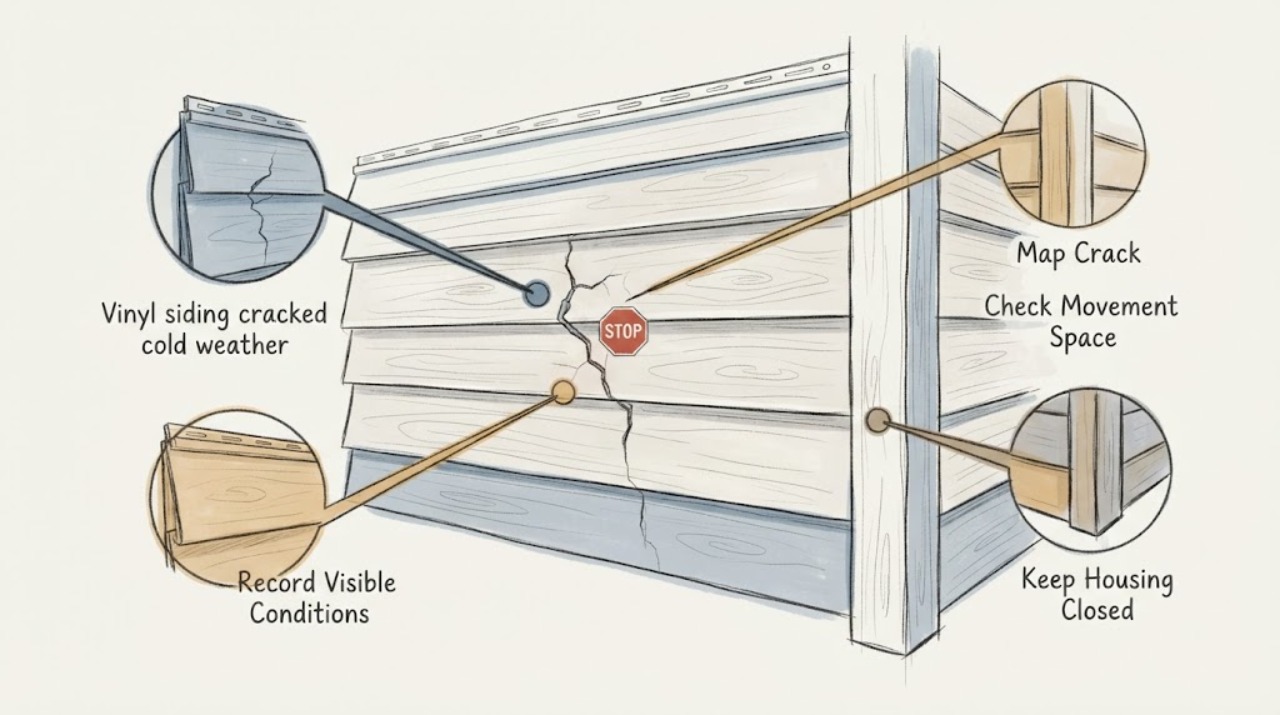
From stable ground, photograph and map the crack, panel edge, overlap, corner, window, door, and trim; do not press or pull the vinyl.
Expected result: The crack is isolated, follows an edge or overlap, crosses the panel, or includes a missing or loose section.
Next step: Share dated photos and the elevation location with a siding professional.
Stop if: Stop for loose pieces, sharp edges, exposed wall, unstable footing, or ladder access.
Why this matters
Why: A localized crack may be impact or movement-related, while a cross-panel or missing section can expose the wall and needs prompt assessment. Appearance alone cannot identify the cause.
-
Check 2
Record whether the crack appeared after a cold spell, impact, wind event, or prior work and whether nearby panels show similar damage; do not strike or flex a panel to compare.
Expected result: One panel is affected; several panels align; damage follows an impact point; or timing is unknown.
Next step: Provide the history and pattern for professional inspection.
Stop if: Do not test flexibility or remove panels.
Why this matters
Why: A repeated alignment can indicate installation or movement conditions, while an impact point suggests localized damage. Unknown timing keeps both causes in scope.
-
Check 3
From the ground, observe whether panel ends appear pinched at corner posts or J-trim and whether seams are distorted; do not caulk, pry, or alter fasteners.
Expected result: Panels appear free, visibly pinched, displaced, or inaccessible.
Next step: Photograph the trim and request siding assessment using the product-specific instructions.
Stop if: Stop for ladder work, brittle fragments, or a need to disturb trim.
Why this matters
Why: Pinching or displacement is consistent with restricted movement, but a visual check cannot verify fastener clearance or the wall behind the cladding.
-
Check 4
Observe from stable ground whether the crack is near gutter discharge, standing water, a roof-wall intersection, or a window and whether the wall appears damp; do not spray the siding.
Expected result: No water sign is visible; staining or wetness is present; the wall is exposed; or the area is hidden.
Next step: Provide the runoff and moisture context to the siding professional.
Stop if: Stop for active water, electrical exposure, or wall-opening needs.
Why this matters
Why: Water signs or exposed wall raise urgency because vinyl siding is cladding rather than the sole water-resistive barrier. A dry surface does not rule out concealed moisture.
Use your observations
Decision map
Find the observation that best matches what you see, then follow the next safe action.
-
PATH 01Safety boundary
What you see
Is the wall or water-resistive layer exposed?
Do this next
Keep people clear and arrange prompt siding and moisture assessment.
Why this path and its safety boundary
Safety stop: Do not tape, caulk, or cover an unknown wall condition.
-
PATH 02Safety boundary
What you see
Would inspection require a ladder or roof access?
Do this next
Stop at ground-level observation and arrange qualified service.
Why this path and its safety boundary
Safety stop: No ladder work or climbing is included.
-
PATH 03Safety boundary
What you see
Do panel ends appear pinched or displaced?
Do this next
Request product-specific movement and replacement assessment.
Why this path and its safety boundary
Safety stop: Do not pry, face-nail, or flex the panel.
-
PATH 04Safety boundary
What you see
Do cracks recur or spread across panels?
Do this next
Arrange professional siding and wall-moisture assessment.
Why this path and its safety boundary
Safety stop: Stop for loose pieces or sharp edges.
Helpful context
Understand the symptom
Temperature changes can expose a movement problem
The Vinyl Siding Institute explains that vinyl siding expands and contracts with temperature and that panels should move freely. A cold-weather crack may therefore be related to impact or movement restriction, but the visible crack does not establish the installation cause or wall condition.
Document before attempting a patch
Do not force the panel, face-nail it, cut it, or open the wall. Record the temperature context, impact history, crack location, and whether the water-resistive layer or wall is exposed. A siding professional can identify the panel profile and safe replacement scope.
Only after diagnosis
Potential parts
- vinyl siding replacement panel
Consider this only after the product profile, color, damage cause, and wall condition are confirmed by a professional.
Match the manufacturer profile and installation instructions; do not remove a panel from an unsafe height. - vinyl siding trim
Consider this only when assessment confirms trim damage or movement restriction and identifies the correct profile.
Use the product instructions and do not alter fasteners or trim as a diagnostic step.
When checks do not resolve it
Need a professional?
Arrange siding service for an exposed wall, loose or spreading crack, repeated cold-weather damage, water signs, several aligned cracks, or any inspection requiring ladder, roof, cutting, or panel removal work.
Safety scope: Observation-only guidance; professionals identify panels, assess moisture, control dust, and complete replacement or trim work.
Have this ready
- Ground-level crack photos and elevation map
- Cold, impact, wind, and prior-work timing
- Panel overlap, trim, displacement, and movement observations
- Water, runoff, staining, exposed wall, or interior moisture signs
- Known product profile and prior siding history
Common questions
FAQ
Why can vinyl siding crack in cold weather?
Temperature-related movement, restricted panel movement, impact, or material condition can all contribute. The Vinyl Siding Institute says panels should move freely, but the visible crack does not prove the cause.
Can I pull or flex the cracked panel?
No. Photograph it from stable ground and arrange siding assessment; flexing or pulling can worsen the crack or disturb the wall system.
What if the wall is exposed?
Keep people clear and arrange prompt siding and moisture service. Do not improvise a cover or open the wall to investigate.
When is a crack urgent?
Arrange service for exposed wall, loose or spreading damage, recurring cracks, water signs, several aligned cracks, or any ladder or roof access requirement.
Read the exact guide
Official sources
- Vinyl Siding Installation ManualVinyl Siding Institute · Supports the effects of temperature movement, free panel movement, and the distinction between siding and the water-resistive barrier.
- Vinyl Siding Installation ResourcesVinyl Siding Institute · Supports using product and manufacturer installation instructions for any replacement decision.
Community feedback
Share a repair observation
Share a plain-text repair observation. Accepted observations are published automatically; this page may take a moment to update.