
On this page
Start here
Quick answer
White or chalky efflorescence on a basement wall is usually a water-migration clue: salts are carried through porous masonry and left behind as moisture evaporates. It is not, by itself, an independent water source, mold diagnosis, or proof that the wall is structurally sound. Map its height and pattern, compare it with dampness and weather, and look from safe interior and exterior ground-level positions for seepage, condensation, grading, downspout, or drainage clues. Repeated deposits, active wetness, spreading damage, crumbling masonry, or a hidden finish need professional water-intrusion assessment. Do not scrape, sand, open the wall, or seal over the deposit blindly.
Before you begin
Safety first
- This page covers safe visual observation and documentation only. Qualified professionals determine source control, drainage, waterproofing, excavation, material removal, structural or masonry repair, and electrical or contaminated-water work.
Work through in order
Diagnostic checks
Use only checks that match the exact appliance or system and its official guide.
-
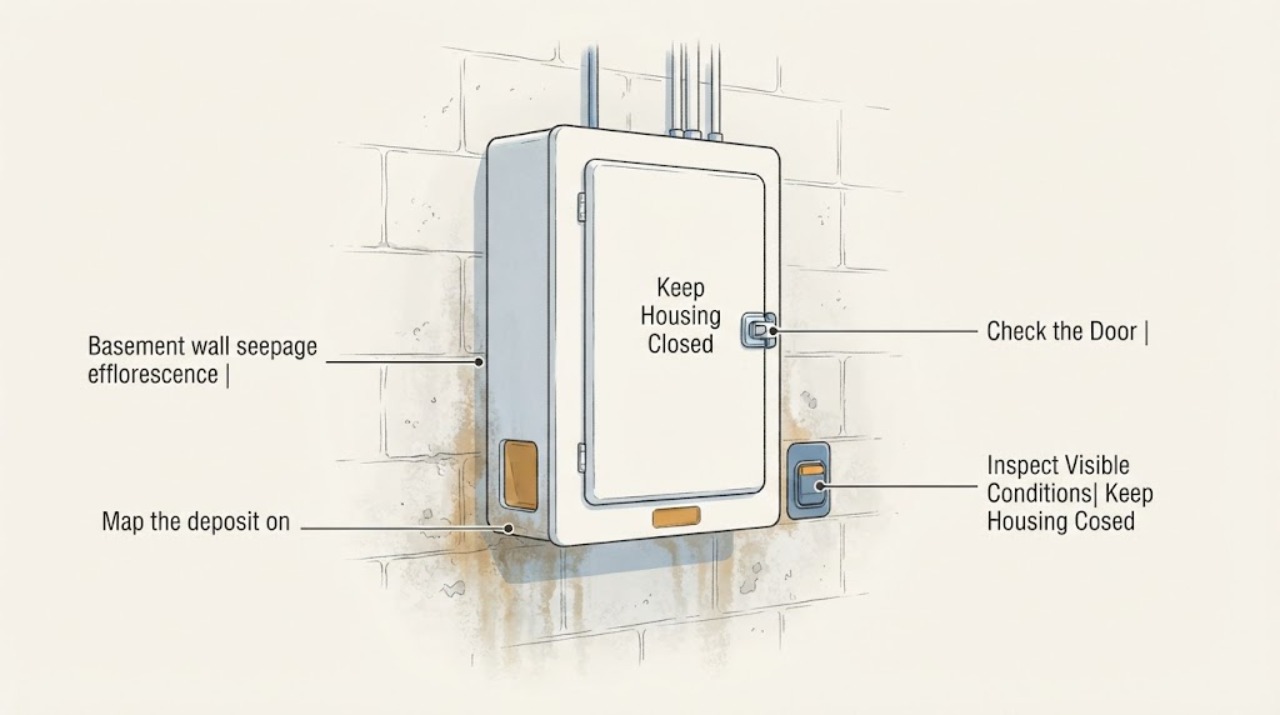
Map the deposit on the basement wall
From a dry, stable position, photograph the wall and mark the deposit's height, width, corners, joints, cracks, windows, pipe locations, and floor or ceiling boundaries. Include nearby wall sections without efflorescence; do not brush, scrape, sand, or touch the crystals.
Expected result: The deposit is a low horizontal band, a corner or joint patch, a spot near a window or pipe, spread across the wall, or on a non-masonry finish.
Next step: Keep the photos with the room location and material description and continue with wetness and weather observations.
Stop if: Stop if the finish is loose, crumbling, visibly bulging, or would need to be disturbed to map the boundary.
Why this matters
Why: A low band or below-grade pattern can fit water migrating through foundation masonry, while a localized joint, window, or pipe pattern directs attention to a specific entry detail. A broad or non-masonry pattern needs wider material and moisture assessment; color alone cannot establish the source.
-
Compare wetness with weather and indoor conditions
Record whether the wall is wet, damp-looking, or dry with only powdery deposits, and whether the appearance changes after rain, snowmelt, irrigation, plumbing use, or high indoor humidity. Take dated photos from the same position; do not put a hand, meter probe, or cloth on the deposit.
Expected result: Dampness or seepage follows exterior weather, follows plumbing use, appears during humid or cold indoor conditions, or the wall remains dry while deposits persist.
Next step: Give the timeline to a water-damage professional and keep the area open for observation rather than sealing or finishing it.
Stop if: Stop for active seepage, standing water, sewage, water near electricity, or any need to enter a wet or unstable area.
Why this matters
Why: Weather-linked wetness supports exterior water-entry or below-grade drainage investigation; plumbing-linked wetness points to a building service source. Room-side condensation can occur on a cold wall, while a dry surface with repeated deposits still indicates a prior or concealed moisture path rather than a proven cure.
-
Look for damage around the deposit without probing
From the floor, look for bubbling paint, peeling finish, soft or swollen base trim, mortar loss, flaking masonry, rust, visible damp insulation, or mold-like growth around and above the deposit. Do not pierce the wall, pull trim, remove insulation, or open a finished cavity.
Expected result: The masonry and finish look intact, the finish is lifting or stained, or masonry, trim, framing, or insulation appears soft, crumbling, or damaged.
Next step: Photograph close and wide views and request a professional assessment before any cosmetic repair or waterproof coating.
Stop if: Stop if material moves, debris falls, a cavity is exposed, or the next step would involve cutting, demolition, or structural contact.
Why this matters
Why: An intact wall with a small deposit may support a focused moisture inspection. Lifting finishes can hide dampness; crumbling masonry, damaged joints, or wet porous material raise the urgency and may require material repair or removal after the water source is addressed.
-
Check outside water paths from ground level
From a safe ground-level position, observe whether roof runoff, downspouts, irrigation, soil grading, or surface pooling directs water toward the affected foundation wall. Note a window well, crack, pipe penetration, or saturated planting area; do not excavate, move soil, enter a pit, or redirect a discharge as a blind fix.
Expected result: Water visibly collects at the wall, a downspout discharges nearby, the ground slopes toward the foundation, a feature aligns with the interior deposit, or no exterior clue is visible.
Next step: Record the exterior feature and relation to the interior map; ask the professional to evaluate the complete water path before excavation or waterproofing.
Stop if: Stop for unstable soil, deep window wells, contaminated runoff, severe weather, or any need for excavation or elevated access.
Why this matters
Why: An aligned exterior water path supports a source-control and drainage review, but it does not prove that the visible deposit is the only entry. No exterior clue leaves condensation, groundwater, plumbing, and concealed drainage possible and warrants professional assessment when seepage persists.
-
Decide whether the wall needs prompt assessment
Ask whether efflorescence is repeated or expanding, the wall is actively wet, paint or masonry is failing, the pattern follows a crack or concealed finish, water reaches electricity, or the source remains unknown after safe observation. Do not treat a dry day or a temporary coating as proof that seepage has stopped.
Expected result: Yes: one or more escalation signs is present. No: the deposit is small, stable, safely documented, and no wetness or material damage is visible.
Next step: Provide the map, weather and humidity timeline, exterior clues, material observations, and photos to a qualified water-damage or foundation professional.
Stop if: Do not scrape, sandblast, wire-brush, open the wall, excavate, install an interior drain, or apply a waterproofing coating without diagnosis.
Why this matters
Why: Any yes result supports prompt water-intrusion or foundation-moisture assessment because the deposit may be the visible end of a deeper path. A no result permits planned documentation, not blind sealing; recurrence or new wetness returns the issue to professional assessment.
Use your observations
Decision map
Find the observation that best matches what you see, then follow the next safe action.
-
PATH 01Safety boundary
What you see
Is the white deposit on porous masonry and concentrated near the floor, a corner, or a below-grade joint?
Do this next
Treat it as evidence of water migration through or along the foundation and arrange a moisture-source assessment; the salt is not the source itself.
Why this path and its safety boundary
Safety stop: Do not scrape, grind, or use abrasive cleaning to classify the deposit.
-
PATH 02Safety boundary
What you see
Does dampness or seepage change after rain, snowmelt, irrigation, or plumbing use?
Do this next
Use the event timing to prioritize exterior drainage or plumbing-source investigation before cosmetic wall work.
Why this path and its safety boundary
Safety stop: Do not redirect water, open a pipe chase, or seal the interior wall as a blind fix.
-
PATH 03Safety boundary
What you see
Is the wall surface dry but cold, with deposits or dampness appearing during humid indoor conditions?
Do this next
Ask for a humidity and condensation review while still checking for below-grade moisture; dehumidification alone does not establish that seepage is absent.
Why this path and its safety boundary
Safety stop: Do not cover a persistently cold or damp wall with insulation, flooring, paint, or a coating before the moisture path is evaluated.
-
PATH 04Safety boundary
What you see
Are paint, trim, masonry joints, insulation, or framing visibly failing around the deposit?
Do this next
Keep the area undisturbed and arrange coordinated water-damage and material assessment; source correction comes before finish replacement.
Why this path and its safety boundary
Safety stop: Do not pull finishes, remove insulation, or perform demolition to see how far damage extends.
-
PATH 05Safety boundary
What you see
Is there active water, sewage, water near electricity, unstable material, or an unsafe access condition?
Do this next
Keep people clear and request prompt qualified water-damage, electrical, or structural help as applicable.
Why this path and its safety boundary
Safety stop: Do not enter pooled or contaminated water or touch wet electrical equipment.
Helpful context
Understand the symptom
Read efflorescence as a moisture trail
Efflorescence is a light-colored salt deposit on masonry. The NIH Office of Research Facilities explains that migrating water brings soluble salts to the wall surface, where evaporation leaves the crystals behind; persistent, repeated, or excessive deposits may indicate internal moisture or rising damp. The deposit records a water path through the wall, but does not identify whether the water came from outside, the footing, a plumbing source, or indoor condensation.
Pattern and location matter more than the color
Photograph the wall without disturbing it and note whether deposits form at the floor line, in a corner, around a crack or joint, below a window, behind a finish, or across much of the wall. A low band on masonry can fit rising or below-grade moisture; a patch near a pipe, window, or crack suggests a different inspection path. White material on painted drywall or wood may be damaged finish or another deposit rather than classic masonry efflorescence.
Compare wetness, weather, and basement humidity
Record whether the wall is visibly wet, only leaves dry crystals, or changes after rain, snowmelt, irrigation, plumbing use, or a period of high indoor humidity. Condensation on a cold wall can resemble seepage from the room side. EPA advises correcting leaks and other moisture problems before finishing a basement; a dehumidifier may change indoor humidity but cannot prove that below-grade water entry has stopped.
Separate cosmetic deposit from material damage
Look for paint bubbling, delamination, soft or swollen trim, mortar loss, flaking brick or block, rusted metal, mold-like growth, or damp insulation that is already visible. Repeated salt deposits can accompany ongoing moisture and may precede or coexist with damage, but the crystals themselves are not the repair. Do not cover the wall with a coating, flooring, insulation, or fresh finish until the water path is understood.
Keep the investigation at the safe boundary
From outside, view only accessible ground-level grading, downspout discharge, pooling, and foundation-wall conditions. From inside, stay on a dry, stable floor and avoid outlets, appliances, and pooled water. Foundation excavation, interior drainage installation, wall opening, electrical work, and structural or masonry repair belong to qualified professionals.
Safety boundary
Stop conditions
- Stop for active water, flooding, sewage, water near electricity, unstable material, falling debris, or unsafe access.
- Do not scrape, sandblast, wire-brush, sand, probe, or chemically clean the deposit during diagnosis.
- Do not open the wall, remove finishes or insulation, excavate, install drainage, or apply a waterproof coating as a blind fix.
- Use qualified water-damage, foundation, structural, electrical, or contaminated-water service when the source or material boundary is uncertain.
Only after diagnosis
Potential parts
- moisture-meter
Consider only as a supplemental comparison tool when a water-damage professional requests readings around the deposit; it cannot identify the source, distinguish all condensation from seepage, or clear a wall cavity.
Confirm material and depth limitations, avoid probes and wet electrical areas, and do not treat a dry reading as proof that the wall is dry inside. - water-leak-alarm
Consider this only to alert to future floor-level water after the source and placement are assessed; an alarm does not stop seepage or replace wall and foundation evaluation.
Place only on a dry, stable surface according to the manufacturer's instructions and keep it away from contaminated water and electrical hazards. - dehumidifier
Consider this only for indoor humidity control after the electrical, drainage, and moisture plan is reviewed; lowering room humidity cannot correct groundwater, plumbing leaks, or water trapped in a wall.
Match capacity, drainage, electrical requirements, and placement to the manufacturer's instructions and the professional assessment; do not use it to justify sealing a damp wall.
When checks do not resolve it
Need a professional?
Request qualified water-damage or foundation-moisture assessment for repeated or expanding efflorescence, active seepage, exterior water paths, damp or damaged finishes, crumbling masonry, hidden wall conditions, or an unexplained pattern. Arrange prompt help for sewage, water near electricity, unstable material, or flooding.
Safety scope: This page covers safe visual observation and documentation only. Qualified professionals determine source control, drainage, waterproofing, excavation, material removal, structural or masonry repair, and electrical or contaminated-water work.
Have this ready
- Photos and map of deposit height, width, material, and nearby cracks, joints, windows, or pipes
- Whether the wall is wet, damp-looking, or dry with crystals only
- Rain, snowmelt, irrigation, plumbing-use, and indoor humidity timing
- Exterior grading, downspout, pooling, window-well, and foundation observations from the ground
- Visible finish or masonry damage and what was not scraped, opened, excavated, or sealed
Common questions
FAQ
Is efflorescence itself causing the basement wall seepage?
No. Efflorescence is a visible salt deposit left when water migrates through porous masonry and evaporates. It is evidence of a water path or prior moisture, not an independent source; the source may be exterior water, groundwater, plumbing, or condensation.
How can I tell efflorescence from mold?
Do not classify it by color alone. Note whether the material is on masonry, its crystalline or chalky appearance, the wall pattern, wetness, odor, and surrounding material damage without touching it. A professional can assess uncertain or mixed conditions safely.
Should I scrape or sand the white deposit off?
Not as part of these checks. Scraping or abrasive work can damage masonry and remove evidence while leaving the moisture path active. Photograph it, map its recurrence, and have the wall and water source assessed before cleaning or coating.
Can a dehumidifier stop basement wall seepage?
It may reduce room humidity and condensation, but it cannot correct groundwater, exterior drainage, plumbing leaks, or water retained in a wall. Use it only within a reviewed moisture and electrical plan and do not treat drier air as proof that seepage is gone.
When does basement efflorescence need a professional?
Call when deposits repeat or spread, the wall is wet, finishes or masonry are failing, the pattern follows a crack or hidden finish, the source is unknown, or water reaches electricity. Use prompt help for flooding, sewage, unstable material, or unsafe access.
Read the exact guide
Official sources
- Remodeling Your Home and Indoor Air QualityU.S. Environmental Protection Agency · Supports correcting basement leaks and moisture before finishing, distinguishing exterior water entry from condensation, and keeping damp materials from becoming a hidden damage or mold problem.
- Efflorescence in Masonry WallsNational Institutes of Health, Office of Research Facilities · Supports treating salt deposits as water-migration evidence rather than an independent water source, and supports investigating repeated deposits, entry points, internal moisture, and material damage.
Community feedback
Share a repair observation
Share a plain-text repair observation. Accepted observations are published automatically; this page may take a moment to update.