
On this page
Start here
Quick answer
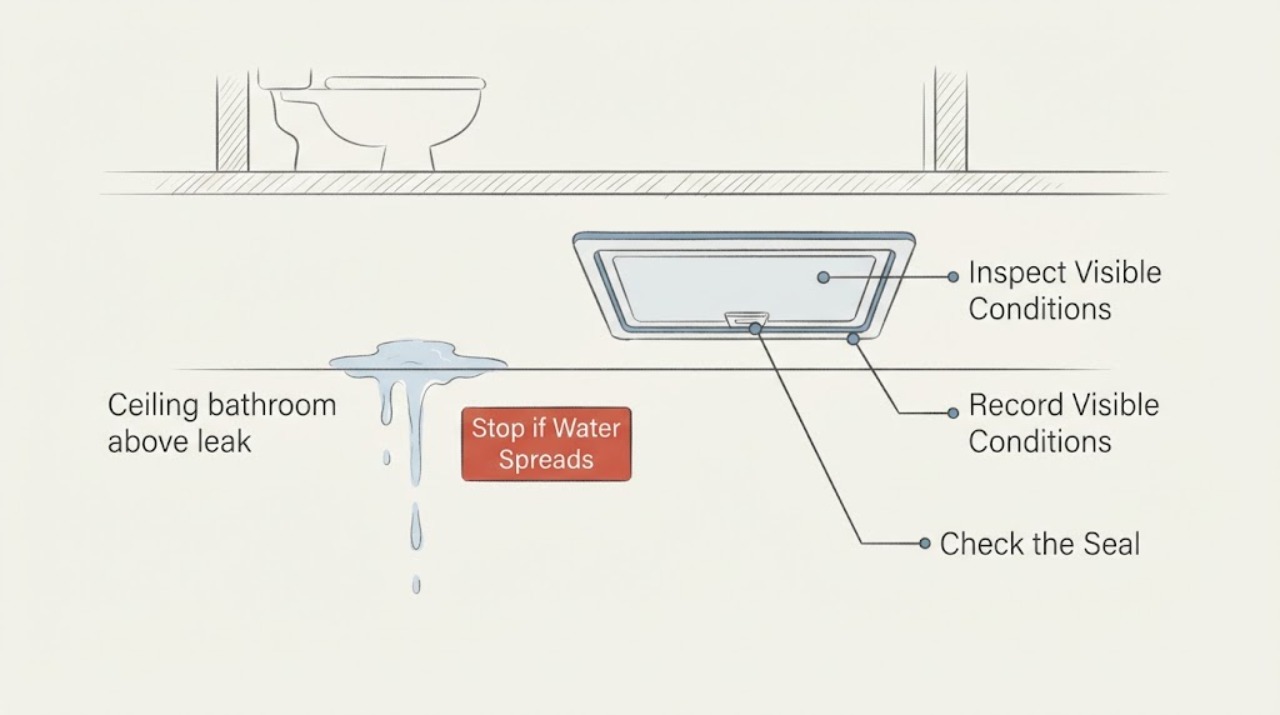
Treat a ceiling leak below a bathroom as an active water-damage problem, not a stain to paint over. From a dry location, record where the drip or stain is and whether it follows shower, toilet, or sink use, then stop using the suspected bathroom fixture until a qualified plumbing or water-damage professional can inspect it. Do not puncture a bulge, stand beneath sagging material, touch wet electrical equipment, open the ceiling, or run a prolonged water test.
Work through in order
Diagnostic checks
Use only checks that match the exact appliance or system and its official guide.
-
Check 1
From a dry floor and outside the area beneath the stain, look at the ceiling without standing under a bulge or touching the surface. Note the stain or drip position, size, edge shape, sagging, bubbling, cracking, active dripping, and whether water is reaching a wall or floor.
Expected result: The mark is dry and unchanged, there is a fresh damp edge or drip, or the ceiling is sagging, bulging, cracking, or shedding material.
Next step: Keep people and furnishings away from the area, photograph it from a safe position, and arrange professional assessment. Do not puncture, brace, scrape, or open the ceiling to release water.
Stop if: Stop immediately and leave the area if material is falling, the bulge is growing, water is pooling, or the ceiling is near an electrical fixture.
Why this matters
Why: A changing mark or active drip suggests ongoing water movement. Sagging or bulging means the ceiling material may be weakened and can fall; the ceiling position still does not identify the source above.
-
Check 2
Build a no-test timeline from events that already occurred: record whether the leak was noticed after a shower or bath, toilet use, sink use, cleaning, rain, or no identifiable event. Do not deliberately run the upstairs fixtures to reproduce the leak.
Expected result: The ceiling symptom follows one bathroom activity, follows several activities, appears after rain, or continues even when the bathroom has not been used.
Next step: Stop using the suspected fixture or the bathroom as a precaution and give the timeline to the plumber or restoration professional. If the pattern is rain-related, report the weather timing as well rather than assuming a bathroom plumbing source.
Stop if: Stop collecting observations if the leak becomes active, the ceiling changes, or anyone would need to enter water or handle a wet appliance, light, fan, or wiring.
Why this matters
Why: A fixture-specific pattern narrows the professional inspection toward that fixture’s water supply, drain, enclosure, or floor transition. A rain-related pattern points to a different building-water path, while recurrence without use suggests stored water or a concealed leak.
-
Check 3
From a dry, well-lit position upstairs, visually inspect the bathroom floor and owner-accessible surfaces without opening walls, lifting flooring, or touching wet materials. Look near the toilet base, tub or shower threshold, sink cabinet, floor joints, and any visible water trail.
Expected result: There is visible water near one fixture, a damp or discolored floor edge, a trail toward a wall, no visible surface water, or an area that cannot be seen safely.
Next step: Photograph the location without moving fixtures or trim, keep the suspected fixture out of service, and share the observation. Do not lift flooring, remove the toilet, dismantle plumbing, or open the ceiling to look for the source.
Stop if: Stop if the floor is unstable, sewage or contaminated water is present, the area is wet near electrical equipment, or inspection would require contact with concealed plumbing.
Why this matters
Why: A visible surface pattern can help the professional prioritize the inspection, but no visible water does not rule out a concealed supply, drain, shower, or subfloor leak. A soft floor, spreading discoloration, or inaccessible area increases the need for professional assessment.
-
Check 4
Check the visible room below from a dry location for electrical proximity and immediate hazards. Note whether the stain is near a light, fan, smoke alarm, vent, or other powered fitting, and listen or look for flicker, buzzing, heat, or water entering the fitting without touching it.
Expected result: The water damage is away from visible electrical fittings, or it is at or near a fitting or accompanied by a warning sign such as flicker, buzzing, heat, or water inside the fitting.
Next step: Keep clear and report the electrical proximity when arranging service. Do not touch the fitting, switch, wet appliance, or wiring, and do not enter standing water to reach a control.
Stop if: Stop all inspection and leave the area if there is sparking, smoke, a burning odor, exposed wiring, active water entering a fitting, or any need to contact energized equipment.
Why this matters
Why: Water near electrical equipment creates a separate shock or fire concern that cannot be evaluated by a visual plumbing check. A warning sign requires the area to be left alone and assessed by a qualified electrician or emergency service as appropriate.
-
Check 5
Create a handoff record without prolonged testing: take dated photos from safe positions, note the room and ceiling location, list recent fixture use and weather, record whether the upper floor looked wet, and note any odor, visible mold, or material change.
Expected result: The record shows an active or recurring symptom, a one-time stain with no current change, visible mold or porous-material damage, or possible sewage involvement.
Next step: Give the record to a qualified plumber, water-damage restoration professional, and electrician when electrical equipment is involved. Keep the bathroom fixture out of service until the source is evaluated.
Stop if: Stop handling materials or attempting cleanup if contaminated water, extensive mold, damaged ceiling material, or health concerns are present.
Why this matters
Why: A recurring or active symptom needs source control and a moisture assessment before cosmetic repair. Mold, porous-material damage, or sewage changes the cleanup risk and may require an experienced restoration professional rather than ordinary household cleaning.
Use your observations
Decision map
Find the observation that best matches what you see, then follow the next safe action.
-
PATH 01Next step
What you see
The leak follows shower, toilet, or sink use
Do this next
Stop using the suspected fixture and request plumbing inspection. Provide the exact activity, delay before the drip appeared, upstairs visual findings, and ceiling location.
-
PATH 02Next step
What you see
The leak follows rain or occurs without bathroom use
Do this next
Report the weather and no-use timing. Request assessment of concealed plumbing and other water paths rather than assuming the bathroom fixture is the source.
-
PATH 03Next step
What you see
The ceiling is sagging, bulging, actively dripping, or shedding material
Do this next
Clear the area and do not stand beneath, puncture, brace, or open it. Arrange prompt water-damage and building assessment.
-
PATH 04Next step
What you see
Water is near a light, fan, wiring, appliance, or other electrical fitting
Do this next
Do not touch the fitting or controls and do not enter water to reach a switch. Leave the area and request qualified electrical assessment alongside water-source service.
-
PATH 05Next step
What you see
Sewage, extensive mold, or a large area of wet porous material is visible
Do this next
Avoid contact and do not perform DIY remediation. Request a professional restoration assessment that can address the contamination and drying scope.
Helpful context
Understand the symptom
The ceiling location is not necessarily the leak location. Water can travel along framing, pipes, or the subfloor before it appears below. The most useful homeowner evidence is a safe timeline: when the drip or stain appears, which upstairs fixture was used beforehand, whether the upstairs floor looks wet, and whether the ceiling is changing when the bathroom is left unused.
A small stain can still conceal wet drywall, insulation, framing, or electrical components. Keep the area below the stain clear and avoid pressing, probing, cutting, or opening the ceiling. If the ceiling is sagging, bulging, actively dripping, or near a light or fan, leave the area and request urgent professional and electrical assessment.
Once the source is controlled, drying and material decisions depend on the water type, how long materials stayed wet, and the extent of damage. Porous ceiling materials or contaminated water require professional judgment; cosmetic patching before the source and moisture are resolved can hide recurring damage.
Only after diagnosis
Potential parts
- moisture meter
Consider this only as an optional documentation aid after a professional or the product instructions confirm it is appropriate; readings do not locate concealed plumbing or replace an inspection.
Confirm the instrument’s material range and safe-use instructions; never use it to probe a bulging ceiling or wet electrical area. - water-leak alarm
Consider this for future monitoring near an identified, accessible risk after the source is corrected; it is not a response to an active concealed leak.
Place only where it can remain dry and accessible, following the device instructions and keeping it away from energized equipment. - pipe repair clamp
Consider this only if a qualified professional identifies a suitable exposed pipe and approves a temporary repair; it is not a reason to open a ceiling or cut concealed plumbing.
Pipe material, diameter, pressure, access, and local requirements must be confirmed by the professional before selection.
When checks do not resolve it
Need a professional?
Call promptly for any active or recurring ceiling leak below a bathroom. Treat sagging material, electrical involvement, sewage, extensive mold, or rapid water flow as urgent hazards requiring the appropriate qualified professional.
Have this ready
- Provide the ceiling and upstairs room locations, dated photos, fixture-use and weather timing, drip delay, visible floor or fixture water, ceiling movement, electrical proximity, odors, and any suspected sewage or mold involvement.
Common questions
FAQ
Should I keep using the bathroom if the ceiling below is leaking?
Stop using the suspected fixture or bathroom until the source is assessed, especially if the leak is active or recurring. Do not run a deliberate test to reproduce the drip.
Can I poke a hole in a bulging ceiling to drain it?
No. Do not puncture, cut, brace, or open a bulging ceiling. Keep people clear and arrange professional water-damage and building assessment, with electrical assessment if a fitting is nearby.
Why is the stain not directly below the bathroom fixture?
Water can travel along framing, pipes, or the subfloor before appearing below. The timing of shower, toilet, sink, rain, and no-use events is more useful than assuming the ceiling spot marks the source.
When is cleanup a professional job?
Use professional help when water is contaminated or sewage-related, the ceiling or porous materials are extensively wet, mold is widespread, the source is concealed, or electrical or structural hazards are present.
Read the exact guide
Official sources
- Remodeling Your Home and Indoor Air QualityU.S. Environmental Protection Agency · General bathroom moisture and water-management guidance, not a substitute for identifying a specific concealed leak.
- Safety Guidelines: Reentering Your Flooded HomeCenters for Disease Control and Prevention · Safety guidance for water-damaged homes; apply the electrical and entry precautions whenever a leak creates comparable hazards.
- Mold Cleanup in Your HomeU.S. Environmental Protection Agency · General home water and mold guidance; the extent and water type determine whether professional cleanup is appropriate.
Community feedback
Share a repair observation
Share a plain-text repair observation. Accepted observations are published automatically; this page may take a moment to update.