
On this page
Start here
Quick answer
A dried ceiling water stain is evidence of a past leak, not proof that the ceiling is safe or that the source is fixed. From the floor, photograph the stain and check for active dampness, swelling, sagging, cracking, soft drywall, a musty odor, and nearby plumbing, roof, attic, or HVAC routes. Trace and repair the water source before painting or sealing the stain. Drywall may be left in place only when it is dry, not swollen, and its seams remain intact; damaged, moldy, repeatedly wet, or concealed materials need a qualified water-damage or building professional. Keep people out from under a sagging or cracked ceiling, avoid cutting into the ceiling, and stop for active water, electrical involvement, suspected sewage, visible mold, or uncertainty about structural support.
Before you begin
Safety first
- The homeowner scope is floor-level observation, documentation, and reporting a visible source. Do not climb, press, poke, cut, sand, demolish, handle moldy material, work near wet electrical equipment, or use fans or chemicals when water may be contaminated without qualified guidance.
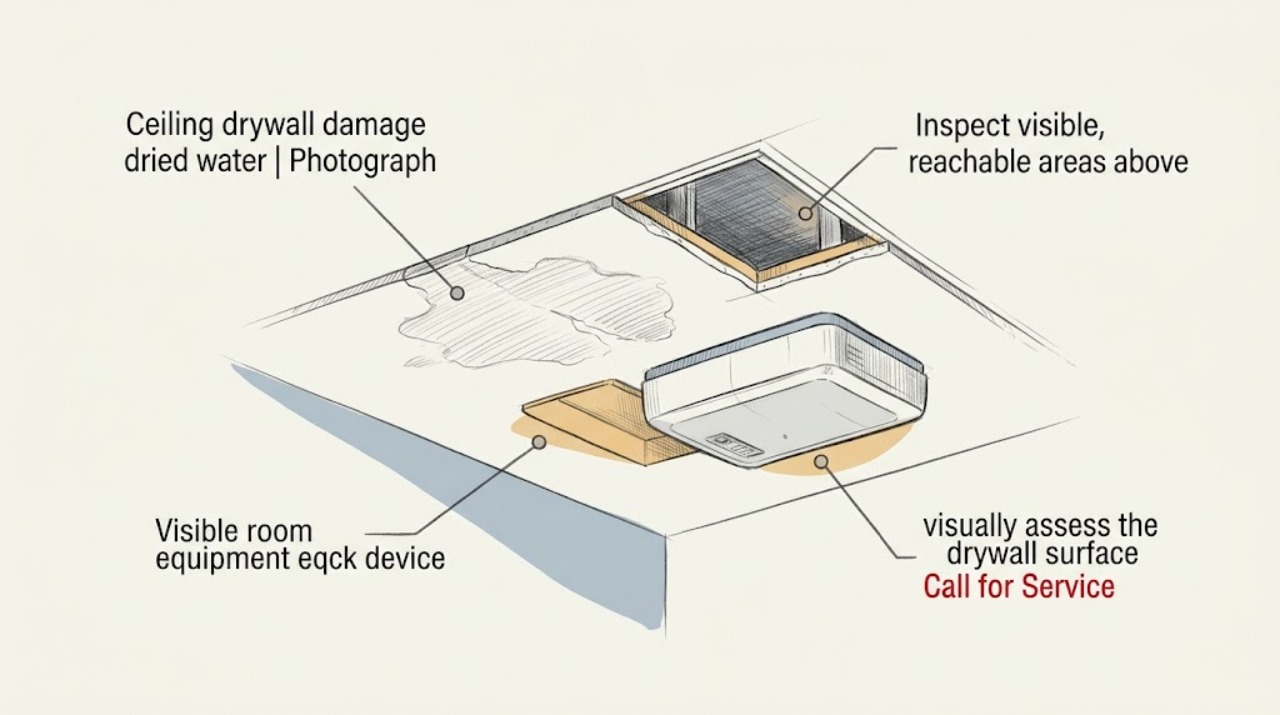
Work through in order
Diagnostic checks
Use only checks that match the exact appliance or system and its official guide.
-
Check 1
From the floor and without touching the ceiling, photograph the stain with a room view and close view. Record its size and shape, location relative to exterior walls, bathroom or plumbing fixtures, attic access, vents, lights, and the date it was noticed.
Expected result: The mark is unchanged and dry, or it is enlarging, darkening, damp at the edge, associated with a drip, or accompanied by a musty odor.
Next step: Keep the photographs and continue with a safe source check. Arrange prompt water-damage assessment for any change, odor, or uncertainty rather than trying to confirm the cavity by probing it.
Stop if: Stop and keep people away if the ceiling sags, bulges, cracks, sheds material, drips, or appears unstable.
Why this matters
Why: A stable dry mark may represent an old event, but growth, dampness, odor, or recurrence makes continuing moisture or hidden damage more likely and means cosmetic covering should wait.
-
Check 2
Inspect visible, reachable areas above or beside the stain only from a stable floor position: attic flooring if safely accessible, roof or exterior surfaces from the ground, nearby plumbing fixtures, condensate lines, and HVAC supply or return areas. Do not climb onto the ceiling, roof, or wet framing and do not remove ceiling material.
Expected result: A current drip, wet insulation, condensation, roof defect, plumbing leak, overflow trace, or HVAC moisture is visible, or no source is visible from the safe inspection points.
Next step: Photograph the source without disturbing it and contact the appropriate qualified roof, plumbing, HVAC, or water-damage professional. If water is near a light or wiring, stop and arrange qualified electrical assessment as well.
Stop if: Stop for wet electrical equipment, unsafe attic or roof access, standing water, structural movement, sewage, or any need to open the ceiling or wall to trace the leak.
Why this matters
Why: A visible active source needs correction before ceiling repair; no visible source does not rule out a concealed roof, pipe, drain, flashing, or cavity path.
-
Check 3
From below, visually assess the drywall surface and seams for sagging, bulging, cracking, peeling paper, softened edges, crumbling material, fastener pops, or a seam that has opened. Do not press, poke, scrape, sand, or cut the stained area to test it.
Expected result: The surface remains flat with intact seams and no obvious swelling, or it is swollen, sagging, cracked, soft-looking, delaminated, or shedding material.
Next step: Leave intact material undisturbed while the source and moisture condition are assessed. Keep people out from below damaged areas and request a qualified repair scope for any deformation or loss of integrity.
Stop if: Stop immediately for sagging, bulging, cracking, falling debris, visible fastener or framing movement, or any need for a ladder, demolition, or overhead work.
Why this matters
Why: Flat drywall with intact seams may be a candidate for drying and later cosmetic repair once the source is fixed; swelling, sagging, open seams, or crumbling indicates that the porous board or its support may not be salvageable and needs professional evaluation.
-
Check 4
Look from the floor for visible mold, fuzzy or discolored growth, damp insulation, a musty smell, or signs that the affected area extends beyond the visible stain. Note whether the water was clean household water or may have involved sewage, flooding, chemicals, or another contaminant.
Expected result: No visible mold or extension is found and the water source was known to be clean, or mold, extensive damage, hidden moisture, or contaminated water is possible.
Next step: Keep occupants away from the area as needed and arrange experienced water-damage or mold assessment for any mold, hidden moisture, extensive damage, or uncertain water quality. Do not disturb contaminated materials.
Stop if: Stop DIY inspection or cleanup for heavy mold, respiratory sensitivity, immune suppression, sewage or chemical contamination, or any need to remove drywall or insulation.
Why this matters
Why: A small, visible, clean-water mark may support a limited assessment after the source is fixed; mold, hidden extension, repeated wetting, or contaminated water increases exposure and containment needs.
-
Check 5
After the water source is repaired, ask the qualified provider to document that the affected area and accessible cavity are dry and that the drywall is flat with intact seams before any primer, paint, or patch is selected. Compare the final condition with the original photographs.
Expected result: The source is corrected and the board is dry and sound, or dampness, odor, staining, mold, swelling, or recurrence remains.
Next step: Proceed with cosmetic restoration only after the source and substrate are confirmed sound. If any moisture, odor, mold, or deformation remains, pause painting and request renewed source tracing and remediation.
Stop if: Stop before painting or caulking if the source is not fixed, the area is not dry, mold is present, or the ceiling condition is uncertain.
Why this matters
Why: Dry, intact drywall may support a cosmetic restoration plan; remaining moisture or damage means the cause or affected materials have not been fully resolved and covering the stain would hide evidence of recurrence.
Use your observations
Decision map
Find the observation that best matches what you see, then follow the next safe action.
-
PATH 01Safety boundary
What you see
The stain is flat and unchanged, seams are intact, no odor or dampness is present, and a qualified check finds no continuing source.
Do this next
Document the finding, monitor after rain or plumbing use, and use a cosmetic repair plan only after the ceiling remains dry and sound.
Why this path and its safety boundary
Safety stop: Pause cosmetic work if the mark returns, grows, smells musty, or the surface changes.
-
PATH 02Safety boundary
What you see
The stain enlarges or returns after rain, plumbing use, condensation, or HVAC operation, or the source cannot be identified from safe access.
Do this next
Treat it as a continuing or concealed moisture problem and arrange coordinated roof, plumbing, HVAC, or water-damage source tracing before patching the ceiling.
Why this path and its safety boundary
Safety stop: Do not paint, caulk, or cut an inspection opening merely to hide or localize the stain.
-
PATH 03Safety boundary
What you see
The drywall is swollen, sagging, cracked, soft-looking, crumbling, delaminated, or its seams have opened.
Do this next
Keep people out from under the area and request qualified water-damage and building assessment for board support, cavity moisture, and a controlled repair scope.
Why this path and its safety boundary
Safety stop: Do not press, poke, sand, demolish, or perform overhead work on the damaged ceiling.
-
PATH 04Safety boundary
What you see
Visible mold, musty odor, damp insulation, or damage extends beyond the visible stain, or the water may contain sewage, chemicals, or flood contamination.
Do this next
Isolate the area as practical and arrange experienced remediation with appropriate containment and protective measures; disclose the water history and occupant health concerns.
Why this path and its safety boundary
Safety stop: Do not scrape, sand, paint over, or remove contaminated drywall or insulation without the required assessment and controls.
-
PATH 05Safety boundary
What you see
Water is near a ceiling light, wiring, HVAC equipment, or other electrical component, or the ceiling shows structural movement.
Do this next
Keep occupants clear, avoid the affected equipment and ceiling, and contact qualified electrical, building, and water-damage professionals as appropriate.
Why this path and its safety boundary
Safety stop: Do not touch wet electrical components, climb toward the leak, or continue using a visibly damaged ceiling area.
-
PATH 06Safety boundary
What you see
The source is repaired, the ceiling is dry and sound, and the remaining issue is only discoloration.
Do this next
Use a qualified or manufacturer-compatible cosmetic restoration plan after confirming the substrate remains dry; retain the source-repair and moisture documentation.
Why this path and its safety boundary
Safety stop: Do not cover a stain that returns or any surface with unresolved moisture, mold, swelling, or open seams.
Helpful context
Understand the symptom
Why a stain can remain after the leak stops
A ceiling stain can be the dried outline of a roof, plumbing, condensate, or overflow event, but water may also have traveled along framing before appearing on the ceiling. The visible mark may therefore be smaller than the affected cavity. A stain that feels dry today still deserves a source check, especially if it is growing, returning, soft at the edges, or accompanied by odor.
The ceiling board and the cavity are different decisions
EPA guidance allows drywall to dry in place when there is no obvious swelling and seams are intact, while noting that the wall cavity is difficult to dry. Sagging, bulging, crumbling paper, open seams, repeated wetting, or mold changes the repair scope. Do not press on a suspect area, poke through it to test depth, or cover it before the source and substrate condition are understood.
Cosmetic cover comes last
Painting or caulking can hide the mark without correcting water entry or damp material. First correct the source and confirm that affected materials are dry and sound. If mold is visible or the water was contaminated, use the applicable containment and protective measures or arrange professional remediation rather than treating a ceiling as an ordinary paint repair.
Only after diagnosis
Potential parts
- replacement drywall or gypsum board section
Consider this only when the water source is fixed and a qualified assessment confirms that the ceiling board is swollen, crumbling, mold-contaminated, or no longer has intact seams and should be removed.
Match thickness, ceiling assembly, fire or moisture requirements, support spacing, and local code; do not select board from stain size alone. - stain-blocking primer
Consider this only after the water source is repaired, the drywall is dry and sound, and no mold or active moisture remains; primer cannot make damaged or damp drywall safe.
Confirm the product is intended for the dry ceiling surface and follow its label; do not coat unresolved moisture, mold, swollen board, or open seams.
When checks do not resolve it
Need a professional?
Escalate for recurring or unexplained staining, deformation, hidden moisture, mold, contaminated water, electrical proximity, structural concern, or any repair that requires overhead access or removal of drywall.
Safety scope: The homeowner scope is floor-level observation, documentation, and reporting a visible source. Do not climb, press, poke, cut, sand, demolish, handle moldy material, work near wet electrical equipment, or use fans or chemicals when water may be contaminated without qualified guidance.
Have this ready
- Provide dated photographs, stain growth or recurrence notes, rain or plumbing timing, nearby roof/plumbing/HVAC details, occupant symptoms or sensitivities, water-quality history, and any prior repairs or drying work.
Common questions
FAQ
Is a dried ceiling stain harmless if it is no longer wet?
Not necessarily. It records a past water event and does not prove the source is fixed or the ceiling cavity is dry. Photograph it, check for recurrence, odor, deformation, or nearby source clues, and obtain qualified assessment when the cause or substrate condition is uncertain.
Can I paint over a dried water stain?
Only after the water source is repaired and the drywall is confirmed dry and sound with intact seams and no mold. Painting or caulking over unresolved moisture or mold can hide recurrence rather than fix it.
When does ceiling drywall need replacement?
Swelling, sagging, crumbling, open seams, repeated wetting, or mold contamination can require a controlled removal and replacement assessment. EPA distinguishes this from flat drywall with intact seams and no obvious swelling, which may sometimes dry in place after the source is fixed.
Should I cut a hole in the ceiling to find the leak?
Do not cut or probe the ceiling as a first test. Water can be near electrical wiring, the board may be weakened, and the visible mark may not be the source. Ask a qualified water-damage, roof, plumbing, or HVAC professional to trace concealed moisture safely.
When should I call a water-damage or mold professional?
Call for a returning or unexplained stain, sagging or cracked drywall, visible mold, musty odor, damp insulation or cavity, contaminated water, electrical proximity, extensive damage, or any work requiring overhead access or drywall removal.
Read the exact guide
Official sources
- Common Signs of Moisture ProblemsU.S. Department of Energy Building Science Education · Building-science reference for recognizing dampness, odor, mold, peeling paint, warping, condensation, and discoloration as moisture clues.
- Mold Clean Up Guidelines and RecommendationsCenters for Disease Control and Prevention · CDC guidance for reducing exposure during mold cleanup, including when occupants should not participate and precautions for disturbing moldy drywall.
- Mold Course Chapter 4: General Remediation IssuesUnited States Environmental Protection Agency · EPA technical guidance for evaluating water-damaged drywall and moisture or mold conditions; it distinguishes intact drywall from swollen or mold-contaminated porous material.
- 8 Tips to Clean up MoldCenters for Disease Control and Prevention · CDC public guidance supporting source repair and drying before painting or caulking after water or mold damage.
- Table 1: Water Damage – Cleanup and Mold PreventionUnited States Environmental Protection Agency · EPA response table for clean-water damage, supporting the conditional distinction between intact wallboard that can dry in place and damaged board that may need replacement.
- Mold, Testing, and RemediationNational Institute for Occupational Safety and Health · NIOSH guidance supporting visual and odor assessment, correction of water entry, drying or removal of wetted materials, and monitoring remediation effectiveness.
Community feedback
Share a repair observation
Share a plain-text repair observation. Accepted observations are published automatically; this page may take a moment to update.