
On this page
Start here
Quick answer
Treat ceiling drywall damage with insulation involvement as a moisture and safety assessment, not a cosmetic stain. From a safe position, document whether water is still entering, the drywall is swollen or sagging, insulation is wet or compressed, mold or sewage is present, and any light or fan is affected. Do not cut into the ceiling, handle wet insulation, or touch a wet electrical fixture. Keep people out of a sagging or actively dripping area and arrange qualified water-damage service; a qualified electrician should assess any affected circuit or fixture.
Before you begin
Safety first
- The professional identifies the moisture source, evaluates ceiling stability and hidden porous materials, sets a safe drying or removal boundary, and coordinates electrical, roofing, plumbing, or mold specialists when indicated.
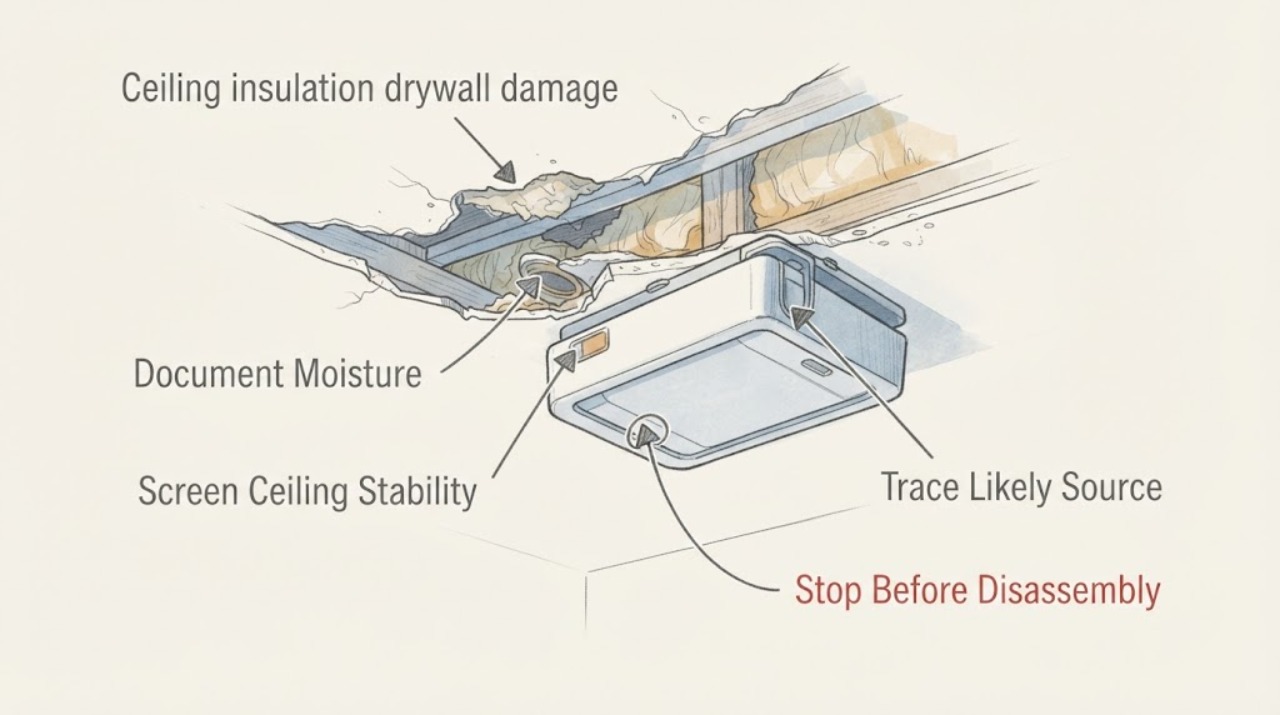
Work through in order
Diagnostic checks
Use only checks that match the exact appliance or system and its official guide.
-
Check 1
From floor level or another stable, dry position, photograph the damaged ceiling and note whether a drip, damp surface, fresh stain, or spreading edge is present.
Expected result: Record the location, size, color, odor, active dripping, and whether the area changes after rain, plumbing use, HVAC operation, or another known event. Do not press, poke, or cut the drywall.
Next step: For active or spreading moisture, keep people and belongings clear and request prompt water-damage assessment. For a stable dry mark, continue only with the safe observations below and arrange assessment if the source is unknown.
Stop if: Stop immediately if water is falling, the surface moves, the floor is wet near electricity, or safe viewing would require a ladder, climbing, or contact with the ceiling.
Why this matters
Why: An active or spreading pattern means the moisture source may still be operating; an old, dry, localized stain narrows the timing but does not prove that the cavity is dry.
-
Check 2
View the ceiling outline and nearby trim without touching it, looking for a bulge, sag, cracked or separated seam, loose surface, falling debris, or a change in the plane of the ceiling.
Expected result: Classify the surface as flat and intact, visibly swollen, sagging, cracked, shedding, or changing over time.
Next step: If any deformation or falling material is present, leave the area, keep others out, and request qualified structural or water-damage assessment. Do not attempt to brace, patch, or remove the ceiling yourself.
Stop if: Stop and leave the area if the ceiling is sagging, cracking, making new noises, or dropping material.
Why this matters
Why: Swelling, sagging, cracking, or falling material can indicate weakened drywall or a supporting area that should not be disturbed; a flat intact surface lowers the immediate falling-material concern but does not rule out wet insulation above it.
-
Check 3
Without opening finishes, compare the damaged location with accessible areas directly above or beside it, such as an attic or roof line, bathroom or plumbing space, HVAC/condensate route, or a room with high humidity.
Expected result: Look for a matching roof or weather event, plumbing use, pipe or duct condensation, HVAC discharge, or a stain that is offset from the suspected source.
Next step: Give the timing and comparison to the water-damage professional or the appropriate roof, plumbing, or HVAC professional. Do not remove insulation or drywall to confirm the path.
Stop if: Stop if tracing requires entering an unsafe attic, walking on ceiling framing, moving wet insulation, or disturbing a suspected mold or contaminated area.
Why this matters
Why: A change tied to rain points toward roof or exterior water entry; a change tied to plumbing use points toward a plumbing path; recurring condensation or HVAC timing points toward a moisture-control or condensate issue. An offset stain means the source may be traveling through the cavity.
-
Check 4
From a dry position, look for a ceiling light, fan, smoke alarm, junction cover, or wiring area within or beside the damaged zone, and note any flicker, tripped breaker, burning odor, buzzing, or visible water at the fixture.
Expected result: The fixture is unaffected and dry, or it is wet, discolored, intermittently operating, making an unusual sound, or associated with a tripped protective device.
Next step: Do not touch, remove, test, or reset the affected fixture or circuit. Keep the area clear and arrange qualified electrical assessment; if there is smoke, burning, arcing, or an immediate fire concern, leave and contact emergency services.
Stop if: Stop all inspection at the fixture if any water, heat, odor, buzzing, flicker, exposed conductor, or breaker operation is present.
Why this matters
Why: Water near an electrical fixture or a changed electrical symptom creates a shock or fire concern; a dry unaffected fixture does not make hidden wiring safe to handle.
-
Check 5
Only from an already open, safe, and accessible edge, look at the insulation without pulling, squeezing, cutting, or moving it; otherwise record that insulation cannot be safely assessed.
Expected result: The insulation appears dry and in place, or it is visibly wet, compressed, displaced, stained, contaminated, or has a musty odor.
Next step: Send photographs and the material type, if known, to a qualified water-damage professional. Do not handle, bag, or remove insulation as a routine homeowner step.
Stop if: Stop if the only way to inspect insulation is to open the ceiling, climb into an unsafe cavity, disturb mold, or handle contaminated material.
Why this matters
Why: Wet or contaminated insulation is a porous material that may not be cleanable or reliably dryable in place. Compression or displacement can also reduce its intended performance, but its condition cannot identify the leak by itself.
-
Check 6
Record when the ceiling first became wet, whether it has remained damp, and whether drying has already occurred; do not apply heat or operate equipment near wet electrical components.
Expected result: The material dried quickly and remains stable, or it stayed wet beyond the first day or two, became wet repeatedly, or cannot be verified as dry.
Next step: Provide the timeline to the professional and prioritize assessment when the material stayed wet, the source continues, or the cavity is hidden. Use fans or dehumidification only when electricity and the water source are known to be safe and the area is not contaminated; do not use fans to spread suspected mold or unsanitary water.
Stop if: Stop if the water may contain sewage or chemicals, mold is being disturbed, or electrical safety is uncertain.
Why this matters
Why: Fast drying can reduce—but does not eliminate—the chance of mold growth. Persistent or repeated wetting increases the need to locate the source and assess hidden drywall and insulation; the elapsed time alone cannot certify that a material is safe to keep.
-
Check 7
From a safe position, note any visible mold-like growth, persistent musty odor, sewage or floodwater involvement, or health symptoms that appeared after the ceiling became wet.
Expected result: There is no visible growth or unusual odor and the water was clean, or there is mold, a musty odor, sewage/floodwater, extensive wetting, or a person at higher respiratory risk.
Next step: Keep the area undisturbed and contact an experienced water-damage or mold-remediation professional. Do not paint, caulk, bleach, vacuum, or run fans over a suspected contaminated cavity as a substitute for assessment.
Stop if: Stop immediately if sewage, floodwater, extensive mold, hidden mold, or a health concern is involved.
Why this matters
Why: Mold or contaminated water changes the cleanup boundary. Porous ceiling and insulation materials may need controlled removal, and people with asthma, chronic lung disease, allergies, or immune suppression may face higher risk from exposure.
Use your observations
Decision map
Find the observation that best matches what you see, then follow the next safe action.
-
PATH 01Safety boundary
What you see
The stain is fresh or spreading, water is dripping, or the pattern changes after rain, plumbing use, or HVAC operation.
Do this next
Keep people and contents away from the area, document the timing, and request prompt water-damage assessment with the likely roof, plumbing, or HVAC context.
Why this path and its safety boundary
Why it matters: The moisture source is probably still active, but the visible spot may be offset from the entry point.
Safety stop: Do not open the ceiling or continue if the surface is moving, electrical equipment is wet, or access is unsafe.
-
PATH 02Safety boundary
What you see
The ceiling is bulging, sagging, cracking, shedding material, or making new noises.
Do this next
Leave the room, keep the area isolated, and request qualified structural or water-damage assessment before anyone works below or above the ceiling.
Why this path and its safety boundary
Why it matters: Water may have weakened the drywall or a supporting assembly, creating a falling-material or structural concern.
Safety stop: No touching, patching, bracing, climbing, or removal by an unqualified occupant.
-
PATH 03Next step
What you see
A light, fan, alarm, junction area, or nearby circuit is wet or shows flicker, buzzing, burning odor, exposed wiring, or a tripped breaker.
Do this next
Do not touch or reset the affected equipment; keep people away and arrange qualified electrical assessment. Leave and contact emergency services for smoke, arcing, or fire.
Why this path and its safety boundary
Why it matters: Water and electrical equipment may create shock or fire risk even when the fixture still appears to operate.
-
PATH 04Next step
What you see
Insulation is visibly wet, compressed, displaced, stained, contaminated, or cannot be assessed without opening the ceiling.
Do this next
Have a qualified water-damage professional assess the cavity, moisture source, drywall condition, and controlled removal boundary.
Why this path and its safety boundary
Why it matters: The insulation is a hidden porous material whose salvageability and drying path cannot be established by a surface stain alone.
-
PATH 05Next step
What you see
Sewage, floodwater, visible mold, persistent musty odor, extensive wetting, or a higher-risk occupant is involved.
Do this next
Keep the area undisturbed and use an experienced water-damage or mold-remediation professional; seek health advice for exposure concerns. Do not run fans until the water is known to be clean and sanitary.
Why this path and its safety boundary
Why it matters: Cleanup and exposure controls are more complex than a cosmetic repair, and porous ceiling materials may not be cleanable in place.
-
PATH 06Next step
What you see
The ceiling is flat and stable, the stain is dry and not spreading, no electrical fixture is affected, and no mold or contaminated water is suspected.
Do this next
Keep monitoring the marked area, identify the likely moisture source, and arrange a planned assessment before sealing or repainting.
Why this path and its safety boundary
Why it matters: The immediate hazard appears lower, but the source and hidden insulation condition remain unconfirmed.
Helpful context
Understand the symptom
A ceiling stain does not identify its source by itself. Water can arrive from a roof or flashing problem, a plumbing space above, an HVAC or condensate path, or indoor condensation. The visible damage may be below the actual entry point, so use the pattern and timing to guide the assessment rather than cutting open the ceiling.
The drywall and insulation are different materials with different limits. Intact drywall may sometimes be dried in place when it has no obvious swelling and its seams remain intact, but wet or contaminated porous insulation may need removal and replacement. That decision belongs to a qualified water-damage professional when the material cannot be assessed safely from an accessible position.
Do not paint over a damp or moldy ceiling. Cosmetic covering can hide a continuing leak and will not solve wet insulation, hidden mold, or an unsafe ceiling.
Safety boundary
Stop conditions
- Stop and leave the area if the ceiling is sagging, bulging, cracking, making new noises, or dropping material.
- Do not touch wet electrical fixtures, exposed wiring, or affected switches; arrange qualified electrical assessment.
- Do not cut into the ceiling, climb into an unsafe cavity, handle wet insulation, or disturb suspected mold or contaminated water.
- Do not use fans over suspected mold or unsanitary water before the water is determined to be clean and safe.
- Do not paint or caulk a damp or moldy surface.
When checks do not resolve it
Need a professional?
Call promptly for active water, spreading damage, sagging or cracking, wet insulation, affected electrical fixtures, suspected mold or sewage, inaccessible cavities, or any uncertainty about safe access. A stable, dry stain without these signs can receive a planned assessment, but do not repaint before the source and materials are confirmed dry.
Safety scope: The professional identifies the moisture source, evaluates ceiling stability and hidden porous materials, sets a safe drying or removal boundary, and coordinates electrical, roofing, plumbing, or mold specialists when indicated.
Have this ready
- Photos showing the full ceiling, close-up damage, nearby fixtures, and any visible insulation
- When the damage began and whether it changes after rain, plumbing use, or HVAC operation
- Whether the ceiling is sagging, wet, odorous, moldy, contaminated, or inaccessible
- Any flicker, buzzing, burning odor, tripped breaker, or other electrical symptom
Common questions
FAQ
Can wet ceiling drywall be dried in place?
Sometimes, but only when it has no obvious swelling and its seams remain intact. Swollen, sagging, cracked, or contaminated drywall needs professional assessment, and insulation above it may still require controlled removal.
Should I remove wet ceiling insulation myself?
No. Do not pull or disturb insulation to investigate a hidden cavity. A qualified water-damage professional should determine whether it is wet, contaminated, salvageable, or accessible for controlled removal.
What if the ceiling leak is near a light or fan?
Do not touch, remove, test, or reset the affected fixture or circuit. Keep the area clear and arrange qualified electrical assessment; smoke, arcing, or a burning odor requires leaving the area and contacting emergency services.
How do I know whether mold is hidden above the ceiling?
A persistent musty odor, known water damage, visible growth, or health symptoms can indicate hidden mold, but a surface inspection cannot prove what is inside the cavity. Do not cut into the ceiling; arrange experienced professional investigation.
When can I repaint a water-damaged ceiling?
Only after the moisture source is repaired, the drywall and insulation are confirmed dry and stable, and any required cleanup or removal is complete. Paint or caulk should not be used to cover a damp or moldy surface.
Read the exact guide
Official sources
- Mold Clean Up Guidelines and RecommendationsCenters for Disease Control and Prevention · Supports escalation and exposure caution for people with asthma, chronic lung disease, allergies, or immune suppression.
- A Brief Guide to Mold, Moisture and Your HomeU.S. Environmental Protection Agency · Supports identifying moisture paths, acting quickly after leaks, hidden mold caution, and avoiding routine biocide use.
- Guidelines for Cleaning Safely After a DisasterCenters for Disease Control and Prevention · Supports rapid drying, discarding drywall or insulation contaminated with sewage/floodwater, and correcting roof, wall, or plumbing leaks.
- 1910.334 - Use of equipmentOccupational Safety and Health Administration · Supports removing damaged electrical equipment from use, avoiding wet energized connections, and limiting testing to qualified persons.
- eTool: Hurricane eMatrix - Removal of Floodwaters from Structures and Initial Entry into Previously Flooded AreasOccupational Safety and Health Administration · Supports limiting access until stability is known, qualified inspection, keeping clear of electrical hazards, and escalation for contaminated or unstable areas.
- Mold Remediation in Schools and Commercial Buildings - Table 1: Water Damage - Cleanup and Mold PreventionU.S. Environmental Protection Agency · Supports the distinction between drywall that may be dried in place when intact and porous insulation or swollen drywall that may require removal; also supports contaminated-water and fan cautions.
- Mold Cleanup in Your HomeU.S. Environmental Protection Agency · Supports fixing moisture sources, drying materials, avoiding paint over mold, and professional escalation for extensive, contaminated, or health-sensitive conditions.
Community feedback
Share a repair observation
Share a plain-text repair observation. Accepted observations are published automatically; this page may take a moment to update.