
On this page
Start here
Quick answer
Condensation on the room-side of a window during cold weather usually means humid indoor air is reaching a surface cold enough to fall below its dew point; it is not automatically proof that the window is defective. First identify whether the moisture is on the room side, outside, or between panes, then note whether it affects one window or many and whether it follows showers, cooking, drying clothes, a humidifier, closed blinds, or poor air circulation. Use bathroom and kitchen exhaust fans vented outdoors, keep air moving across the glass, avoid blocking the window with tight coverings, and reduce indoor moisture without creating an unsafe or unvented combustion condition. Persistent water on the sash or wall, frost inside the assembly, decay, mold, a failed insulated-glass seal, or condensation after reasonable humidity and airflow control calls for a qualified window or building-envelope assessment. Do not drill the frame, remove a sealed glass unit, paint over wet damage, or assume a replacement window alone will solve high indoor humidity.
Before you begin
Safety first
- This article supports ordinary safe observation, humidity logging, surface drying and ventilation use according to installed instructions only. Do not disassemble glazing, open walls, climb for exterior access, block combustion ventilation, or paint over wet or moldy materials.
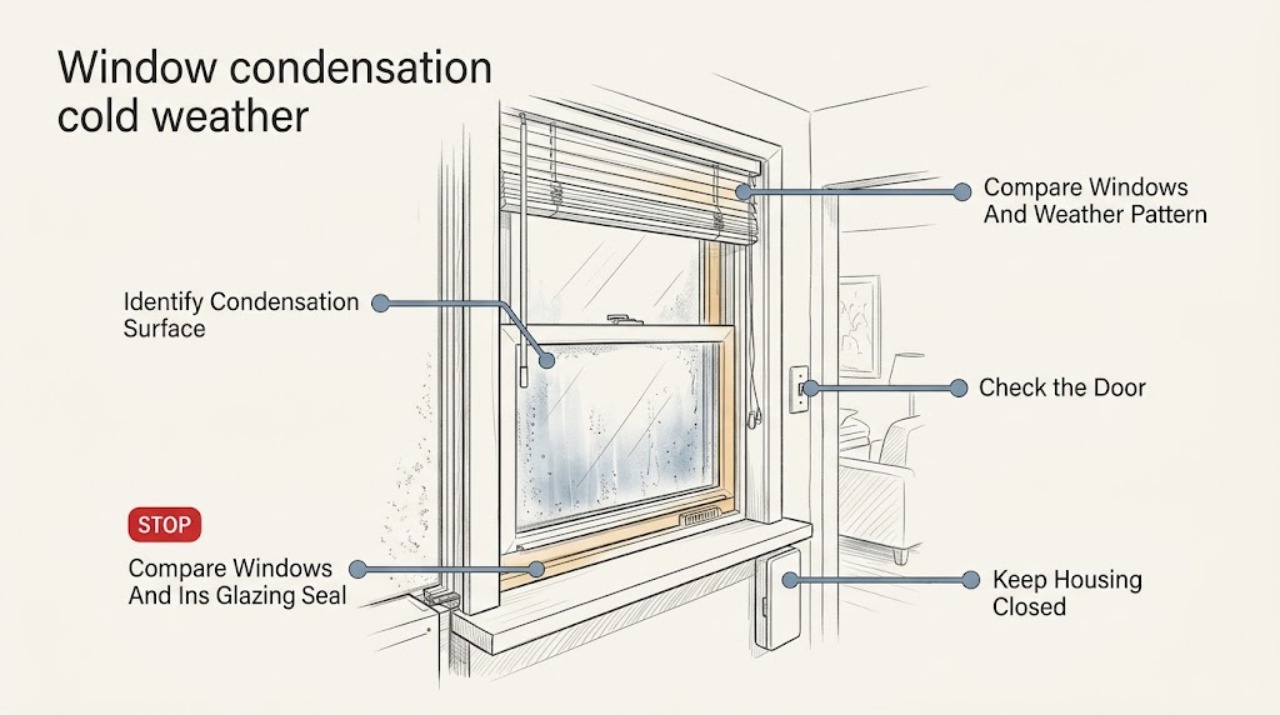
Work through in order
Diagnostic checks
Use only checks that match the exact appliance or system and its official guide.
-
Check 1
Use a dry cloth only on an ordinary reachable surface to identify where moisture is forming, then look without removing trim or glazing.
Expected result: Classify the moisture as on the room-side glass or frame, on the exterior glass, between panes, on the sill or adjacent wall, or as a running leak that returns after wiping.
Next step: Photograph the location and record the outdoor conditions, then follow the matching branch. Arrange window or building-envelope service for between-pane moisture, wet wall materials, staining, decay, or an unexplained running leak.
Stop if: Do not pry glazing beads, drill the frame, remove a sealed unit, or use heat, a torch, or an electrical appliance close to wet materials.
Why this matters
Why: Room-side moisture supports a dew-point and indoor-humidity branch; exterior moisture has a different weather context; moisture between panes suggests a sealed-unit or spacer problem; water on the sill or wall can indicate repeated wetting, drainage, installation or envelope failure rather than harmless surface condensation.
-
Check 2
Compare affected and unaffected windows at the same time, noting room, orientation, frame material, glazing appearance, blinds or curtains, and whether condensation appears only during the coldest periods.
Expected result: Record whether many windows show room-side droplets, only one window does, the lower edge or corners are worst, the frame is wetter than the glass, or the pattern changes when a covering is opened to allow air movement.
Next step: Keep a short cold-weather log of window, room, time and weather conditions. Move coverings or nearby furniture only enough to allow safe airflow, and ask a qualified professional to assess a persistent single-window pattern.
Stop if: Do not remove trim, open wall cavities, or change the window assembly to compare performance; stop if the frame or wall is soft, decayed, visibly wet behind finishes, or showing mold.
Why this matters
Why: Many windows with similar room-side moisture make indoor humidity or general airflow more likely; one colder or more exposed window may have a local thermal bridge, installation gap, damaged seal, or blocked airflow. A corner or frame pattern does not by itself identify a failed window.
-
Check 3
Review safe sources of indoor moisture and use a humidity indicator in the living area if available; do not change a heating or combustion appliance beyond its instructions.
Expected result: Note humidifier use, long showers, cooking or boiling, indoor clothes drying, plants, unvented combustion, bathroom or kitchen fans that do not exhaust outdoors, and the measured indoor humidity trend during condensation events.
Next step: Use bathroom and kitchen exhaust ventilation as designed, vent the clothes dryer outdoors, stop or reduce a humidifier when the manufacturer's or building guidance indicates excess moisture, and continue logging the window response. Seek professional advice if humidity remains high or the home lacks safe ventilation.
Stop if: Do not block combustion-air openings, vent a dryer or exhaust fan into an attic or wall, operate an unvented combustion appliance to dry the room, or use a dehumidifier with a damaged cord or near standing water.
Why this matters
Why: A high or rising indoor moisture load can drive room-side condensation when cold glass falls below the indoor dew point. A normal-looking reading at one moment does not rule out overnight or room-specific humidity, and reducing humidity does not explain moisture between panes or water entering around the frame.
-
Check 4
Allow warm room air to reach the window surface by opening or repositioning curtains and blinds as their design permits and moving nearby furniture away from the glass without blocking heat or egress.
Expected result: Observe whether droplets reduce when airflow reaches the glass, whether moisture is concentrated behind a closed covering or at a deep sill, and whether the room remains comfortable without creating a draft or frozen pipe concern.
Next step: Keep the window area ventilated and dry, then request professional evaluation if the sill, frame, wall or finish remains wet or damaged. Do not use a temporary covering that traps moisture against the glazing or wall.
Stop if: Do not force a swollen sash, remove a safety or egress guard, tape over drainage paths, or place electric heaters, fans or cords where they can contact water.
Why this matters
Why: Improvement with airflow supports a local cold-surface and circulation contribution. No improvement, persistent water on the frame or wall, or moisture between panes points toward a seal, installation, thermal-bridge, water-resistance or humidity issue requiring further assessment.
-
Check 5
After safe humidity and airflow changes have been logged, inspect the visible frame, sash, sill, wall finish and glass edges for damage without removing components.
Expected result: Look for moisture between panes, failed or missing weatherstripping, deteriorated sealant, swollen or rotted wood, peeling paint, staining below the sill, mold, drafts, a loose sash, or water that returns when condensation is wiped away.
Next step: Give photos, the condensation log, humidity trend, window identity and any installation or warranty records to a qualified window installer or building-envelope professional. Ask whether the remedy is humidity control, weatherstripping, a sealed-glass-unit repair, installation correction, or full window replacement.
Stop if: Do not scrape mold into the room, paint over wet or moldy material, cut the frame, or order replacement glass or a window without confirming the exact assembly and installation requirements.
Why this matters
Why: Between-pane moisture is consistent with a failed insulating-glass seal; wet surrounding materials, drafts or decay may involve installation, drainage or envelope details; mold or persistent wet porous materials require prompt moisture control and may need specialist cleanup. No visible damage does not prove the window is performing correctly.
Use your observations
Decision map
Find the observation that best matches what you see, then follow the next safe action.
-
PATH 01Safety boundary
What you see
Condensation is on the room-side glass or frame, affects several windows, and increases after showers, cooking, indoor drying, humidifier use, or closed coverings.
Do this next
Use safe bathroom and kitchen exhaust ventilation to the outdoors, vent the dryer outdoors, reduce an unnecessary humidifier, allow air movement at the glass, and log the response. Use climate-specific humidity guidance rather than a one-size-fits-all target.
Why this path and its safety boundary
Why it matters: Indoor moisture load and cold-surface dew-point conditions are more likely than a defect in every window.
Safety stop: Do not vent moisture into an attic or wall, block combustion ventilation, or keep wiping water while the sill, wall or frame remains wet or damaged.
-
PATH 02Safety boundary
What you see
Only one window or one room is affected, moisture is worst at corners, the frame or sill is cold, or opening coverings changes the pattern.
Do this next
Keep air moving across the glass, document room and window differences, and arrange a qualified window or building-envelope assessment if the pattern persists or damages the frame or wall.
Why this path and its safety boundary
Why it matters: A local airflow restriction, thermal bridge, installation gap, frame or glazing difference is more likely, although indoor humidity still contributes.
Safety stop: Do not remove trim, inject foam, drill the frame, or seal drainage or weep paths without a window-specific diagnosis.
-
PATH 03Safety boundary
What you see
Haze, droplets or frost remain between the panes and cannot be wiped from either accessible surface.
Do this next
Photograph the glass and obtain a qualified window assessment using the exact window and glass-unit identity. Ask whether the sealed glass unit can be replaced within the existing frame or whether the complete assembly requires replacement.
Why this path and its safety boundary
Why it matters: The insulating-glass seal or sealed cavity may have failed; surface humidity control may reduce room-side droplets but will not dry a breached sealed cavity.
Safety stop: Do not drill the glass, inject a desiccant, pry glazing beads, or order a unit based only on visible dimensions.
-
PATH 04Safety boundary
What you see
Water pools on the sill, staining or mold appears on the frame or adjacent wall, finishes swell or decay, or moisture returns after wiping.
Do this next
Dry the accessible surface safely, keep the area ventilated, and arrange prompt window or building-envelope inspection. Address mold or extensive wet porous materials with an experienced professional after the moisture source is controlled.
Why this path and its safety boundary
Why it matters: Repeated wetting may be damaging the window, wall or surrounding materials and could involve installation, drainage, air leakage, a roof or wall leak, or persistent condensation.
Safety stop: Do not paint, caulk, cover or replace the interior finish before the water source and drying status are confirmed; stop if mold is extensive or occupants have health concerns.
-
PATH 05Safety boundary
What you see
Moisture is on the exterior, appears only after a particular weather transition, or is accompanied by water entering around the opening rather than forming on the room-side glass.
Do this next
Document the weather and water path, inspect only from safe ground or ordinary interior access, and arrange qualified window or building-envelope service if water enters the wall or finish.
Why this path and its safety boundary
Why it matters: The event may be exterior condensation or rain and water-intrusion behavior rather than indoor cold-weather condensation; different inspection and repair logic applies.
Safety stop: Do not seal over drainage paths, remove exterior cladding, climb the roof or use a ladder to test the opening during hazardous weather.
Helpful context
Understand the symptom
First locate the condensation surface
Room-side droplets or frost are usually a warm, humid-air and cold-surface interaction. Moisture on the exterior can be normal under different weather conditions. Haze or droplets between panes indicate a sealed insulating-glass unit concern rather than a surface wipe-down problem. Condensation on the frame, sash, sill, or adjacent wall deserves attention because repeated wetting can damage finishes and encourage mold.
Humidity and airflow are part of the window system
Showers, cooking, indoor clothes drying, plants, humidifiers, and unvented combustion appliances add moisture. Exhaust fans should discharge outdoors, not into an attic or wall cavity. Curtains, blinds, furniture, or deep sills that trap cold air at the glass can make one window worse than another. Improve safe air movement and moisture removal before assuming the glazing needs replacement.
Do not confuse condensation with a leak or failed seal
A cold-weather pattern that appears on many room-side windows often points toward indoor humidity or airflow. Water entering around the frame, wet drywall, staining, or condensation that persists in dry weather may point toward a water-resistance, installation, or building-envelope problem. A broken insulated-glass seal generally shows moisture between panes; replacing exterior caulk or wiping the glass will not restore that sealed cavity.
Safety boundary
Stop conditions
- Do not drill, pry, cut, remove sealed glazing, inject foam, or disassemble the frame to chase condensation.
- Do not vent a dryer, bath fan, or kitchen exhaust into an attic or wall, block combustion air, or use an unvented combustion appliance to dry the room.
- Do not paint or caulk over wet, moldy, swollen or decayed frames, sills or walls; control the moisture and dry the assembly first.
- Stop and arrange qualified service for moisture between panes, persistent wet walls or sills, decay, mold, drafts, failed weatherstripping, or condensation that remains after safe humidity and airflow control.
- Use a qualified professional for any work requiring trim or glazing removal, egress changes, exterior-height access, wall opening, or a decision between sealed-unit and full-window replacement.
Only after diagnosis
Potential parts
- window weatherstripping or gasket
Consider this only when inspection confirms a worn or missing seal is causing drafts or water entry and the exact window system supports replacement weatherstripping.
Match the window manufacturer, series, sash geometry, seal profile and drainage design; do not block weep paths or use generic foam as a glazing repair. - replacement insulated glass unit
Consider this only when moisture between panes or damaged glazing is confirmed and the existing frame can safely accept a compatible sealed unit.
Confirm exact dimensions, glazing construction, spacer, coatings, gas fill if applicable, safety glazing, frame rebate and installation method with a qualified window professional. - interior storm window or compatible secondary glazing
Consider this only after a professional confirms that a secondary glazing approach is appropriate for the climate, frame and moisture-control design.
Provide controlled airflow and drainage as designed; an incorrectly fitted interior layer can trap moisture against the existing window or wall. - replacement window assembly
Consider full replacement only when the existing frame, glazing, installation, water resistance or thermal performance cannot be corrected, and indoor humidity has also been addressed.
Match opening dimensions, egress, water resistance, climate-zone performance, condensation resistance, flashing and installation requirements; certification or label alone does not replace correct installation.
When checks do not resolve it
Need a professional?
Arrange qualified window or building-envelope service for moisture between panes, persistent water on the sill or adjacent wall, frame decay, failed weatherstripping, drafts, mold, a single window that remains wet despite safe humidity and airflow control, or any work requiring glazing or trim removal. Consult an HVAC or ventilation professional when fans, dryers, humidifiers or combustion appliances cannot safely control indoor moisture. Use a mold or water-damage professional for extensive, contaminated or health-sensitive moisture damage.
Safety scope: This article supports ordinary safe observation, humidity logging, surface drying and ventilation use according to installed instructions only. Do not disassemble glazing, open walls, climb for exterior access, block combustion ventilation, or paint over wet or moldy materials.
Common questions
FAQ
Why do windows get condensation in cold weather?
Warm indoor air contains moisture. When that air reaches glass or a frame cold enough to fall below its dew point, water forms on the surface. Cold weather, indoor humidity, blocked airflow and the window's thermal performance all affect how much condensation appears.
How can I tell if condensation is inside or between the window panes?
Wipe the accessible room-side and exterior surfaces only. If haze or droplets remain sealed between the panes, the insulating-glass cavity may have lost its seal. Do not drill the glass or remove glazing; document it and ask a qualified window professional whether the sealed unit or entire assembly is the appropriate remedy.
Will opening blinds stop window condensation?
Allowing room air to reach the glass can reduce a local airflow problem, especially when a tight covering traps cold air. It will not repair a failed sealed-glass unit, water entry, decayed frame or persistently high indoor humidity. Keep the sill and wall dry and investigate recurring damage.
Should I turn down the humidifier when windows fog in winter?
If condensation appears on windows, review humidifier use and other moisture sources, then use a humidity indicator and climate-specific guidance. Vent showers, cooking and dryers outdoors as designed. Do not block combustion ventilation or operate an unvented appliance to dry the room.
When should window condensation be treated as a window repair?
Arrange qualified service when moisture remains between panes, water pools on the sill or wall, frames decay, drafts persist, mold appears, one window stays wet after safe humidity and airflow changes, or trim or glazing must be removed. A professional can distinguish humidity control, weatherstripping, installation correction, sealed-unit replacement and full-window replacement.
Read the exact guide
Official sources
- Moisture Control Guidance for Building Design, Construction and MaintenanceU.S. Environmental Protection Agency · EPA building moisture-control guidance; it is not a substitute for window installation instructions or a qualified building-envelope inspection.
- Residential Windows, Doors, & SkylightsENERGY STAR, U.S. Environmental Protection Agency · ENERGY STAR consumer guidance for residential fenestration; the installed product's instructions and a qualified professional control a particular window repair.
- Mold Cleanup in Your HomeU.S. Environmental Protection Agency · EPA residential mold guidance; the extent, contamination, porous materials, HVAC involvement and occupants' health determine whether professional remediation is needed.
- Purchasing Energy-Efficient Residential Windows, Doors, and SkylightsU.S. Department of Energy, Federal Energy Management Program · DOE/FEMP acquisition guidance; product labels and performance ratings do not replace correct installation or a window-specific moisture diagnosis.
- What are the main ways to control moisture in your home?U.S. Environmental Protection Agency · EPA home moisture guidance; climate, building construction and installed appliance instructions determine the appropriate humidity and ventilation response.
Community feedback
Share a repair observation
Share a plain-text repair observation. Accepted observations are published automatically; this page may take a moment to update.