
On this page
Start here
Quick answer
Water noticed at a window after a winter thaw is not automatically a failed window. First separate room-side condensation or meltwater held in frost and drainage openings from water entering at the glazing, frame, sill, flashing, or the wall and roof around the opening. Photograph the first wet location, dry the sill, and observe whether water returns on the room-side glass or only after exterior snow or ice melts. From ground level, inspect only visible exterior damage or loose coverings and confirm the sash is fully closed and locked without forcing ice-bonded hardware. Do not scrape or heat frozen glass, block drainage openings, apply a sealant over an unknown leak, or access a roof. Repeated water, wet wall finishes, swelling, mold, water between panes, cracked glass, or a roof-window leak needs a qualified window installer, roofer, or building-envelope professional.
Work through in order
Diagnostic checks
Use only checks that match the exact appliance or system and its official guide.
-
Map the first water and the thaw-related timing
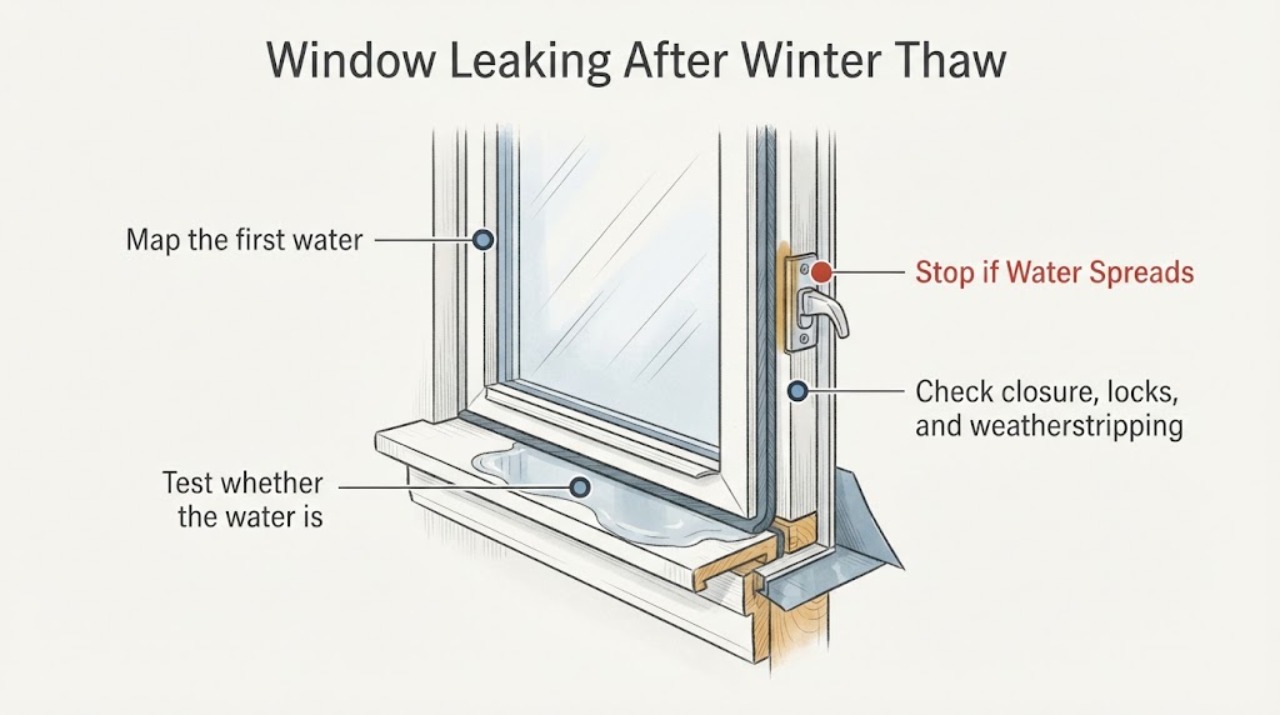
Dry the visible water and mark or photograph where it first reappears: on the room-side glass, the inner sill, the top or side of the frame, the wall or ceiling beside the opening, or beneath the sill. Record whether it returned as outdoor frost or snow melted, during rain, only with wind, or without any exterior precipitation.
Expected result: Water forms on the room-side surface; it appears at the top or side of the frame; it tracks from a sill or wall; it is concentrated around a roof window; or it returns only after thaw conditions.
Next step: Keep the floor and sill dry and continue with the condensation and safe exterior checks. If water is reaching electrical equipment, spreading into the wall or ceiling, or causing active damage, contain it without opening finishes and arrange prompt professional assessment.
Stop if: Do not remove trim, wallboard, siding, or roofing to chase the first visible drip.
Why this matters
Why: Room-side droplets favor condensation, while water entering at a frame, wall, ceiling, roof covering, or consistent thaw pathway points to exterior drainage, flashing, weatherstripping, or envelope work. A thaw-only pattern can expose stored ice or snow in addition to a leak.
-
Test whether the water is room-side condensation
When the glass and frame are cool but dry, wipe the room-side surfaces and observe them through a normal temperature change. Look for droplets or frost forming directly on the interior surface, and note room humidity, blocked air circulation from heavy coverings, or water between sealed panes. Do not use flame or a hot tool to dry or thaw the window.
Expected result: Droplets reform on the room-side glass or frame without an exterior wetting event; moisture is between panes; or the room-side surface stays dry while water returns at the frame, sill, or wall after thaw.
Next step: Increase safe air circulation and reduce indoor moisture if the problem is surface condensation, while continuing to monitor the frame and wall. If moisture is between panes or water returns at the opening, document it and arrange window or building-envelope service.
Stop if: Do not drill the glass, remove glazing beads, or open a sealed unit.
Why this matters
Why: Room-side condensation is moisture from indoor air contacting a cold surface and is different from water entering through the opening. Moisture between sealed panes suggests a failed glazing seal, while a dry interior surface with thaw-timed frame or wall water needs an exterior or envelope investigation.
-
Check closure, locks, and weatherstripping without forcing frost
From indoors, check whether the sash closes evenly and the latches engage as designed. Inspect visible weatherstripping for gaps, displacement, cracking, or ice bonding, but do not force a frozen or stuck sash and do not chip frost from the glass or frame. Keep the window closed and locked when conditions make that safe.
Expected result: The sash does not close or lock; weatherstripping is damaged or displaced; the frame is warped or cracked; or the window closes normally while water still appears after thaw.
Next step: Leave a damaged or ice-bonded window undisturbed and arrange a qualified window professional. If closure is normal, continue with a ground-level exterior inspection and preserve the evidence of where water appeared.
Stop if: Do not force the sash, use a hammer or heat source, remove hardware, or defeat an emergency-egress function.
Why this matters
Why: A window that cannot close tightly can admit wind-driven snow or water, while ice-bonded hardware can be damaged by force. Normal closure does not rule out flashing, sill-slope, roof, or wall drainage problems.
-
Inspect visible exterior conditions from a safe location
From ground level or another already-safe position, look for loose exterior coverings, damaged trim, displaced weatherstripping, visible cracks, snow or ice packed around the opening, and water marks below a roof window or sill. For a roof window or skylight, inspect only what is visible from a safe interior or ground position; do not access the roof.
Expected result: A covering, trim, flashing edge, roof material, or drainage path looks loose or damaged; snow or ice is packed around the opening; or the visible exterior looks intact while water still returns.
Next step: Photograph the condition without disturbing it. Keep people away from falling ice and arrange a qualified window installer or roofer when the exterior covering, roof material, flashing, or wall assembly may be involved. Do not cover designed drainage openings with tape or sealant.
Stop if: Do not access a roof, walk on ice, remove snow from an elevated opening, or dismantle exterior flashing.
Why this matters
Why: VELUX directs owners to check obvious outside damage or loose coverings, and government guidance explains that flashing and sill slope should direct water away from the wall. An intact visible surface cannot exclude concealed flashing or envelope damage.
-
Check the sill, wall finish, and drainage evidence
Inspect the sill and nearby wall or ceiling for standing water, staining, peeling finish, swelling, soft material, mold, cracks at the frame corners, or a sill that appears to slope toward the room. Check only visible drainage openings and keep them free of loose debris if they are safely reachable from indoors; do not insert tools into the frame.
Expected result: Water sits on the sill, the wall or ceiling is stained or swollen, mold or rot is visible, the sill slopes inward, cracks or damaged caulking are present, or the visible interior remains sound.
Next step: Photograph the damage, keep furnishings and electrical equipment away from water, and arrange a qualified window, roofing, or building-envelope assessment. Do not repaint, seal, or close the wall before the moisture source is identified.
Stop if: Do not probe soft wall material, remove trim, or block a weep or drainage opening.
Why this matters
Why: Government housing guidance lists water on sills, damaged weatherstripping, cracked caulking, stains, condensation, and mold as evidence to assess. An inward-sloping sill or failed flashing can route meltwater into the building envelope, and visible damage means drying alone is not a repair.
-
Escalate a recurring thaw leak or concealed damage
After one thaw-related observation period, decide whether the water was isolated surface condensation, a one-time release of safe-to-remove interior moisture, or recurring entry at the opening or surrounding wall. Record photos, weather timing, the first wet location, window type, closure result, exterior observations, and any damage before contacting service.
Expected result: The water does not return after surface condensation is controlled and the window remains dry, or it returns after thaw, reaches the wall or ceiling, appears between panes, or involves a roof window or concealed flashing.
Next step: For recurring or damaging water, arrange qualified window-installer, roofer, or building-envelope service and provide the evidence log. Keep the affected area protected and do not use a generic part or sealant as a substitute for diagnosis.
Stop if: Stop all DIY work if glass is cracked, the frame is unstable, water is entering an electrical area, mold is extensive, or the leak requires elevated exterior access.
Why this matters
Why: A dry repeat observation supports condensation or a temporary surface event. Recurring water or damage requires the opening and surrounding roof or wall assembly to be assessed; replacing visible sealant alone may not correct the entry path.
Use your observations
Decision map
Find the observation that best matches what you see, then follow the next safe action.
-
PATH 01Next step
What you see
Water forms directly on the room-side glass or frame and no exterior wetting event is present.
Do this next
Treat condensation as the leading branch, improve safe room air circulation and moisture control, and monitor the frame and wall for a separate entry path.
-
PATH 02Next step
What you see
Water appears at the top or side of the frame, on the wall or ceiling, or returns after winter snow or frost melts.
Do this next
Document the timing and first wet location, inspect only visible exterior conditions from a safe position, and arrange qualified window or building-envelope service if it recurs.
-
PATH 03Next step
What you see
The sash will not close or lock, weatherstripping is damaged, or ice has bonded the moving parts.
Do this next
Do not force or heat the window. Keep people away from the opening and arrange a qualified window professional to assess hardware, weatherstripping, and frame condition.
-
PATH 04Next step
What you see
Water sits on the sill, enters the wall or ceiling, causes staining or swelling, appears between panes, or involves a roof window or skylight.
Do this next
Protect the interior, photograph the damage, and arrange prompt window-installer, roofer, or building-envelope assessment; do not repaint or seal over the evidence.
-
PATH 05Next step
What you see
There is cracked glass, unstable framing, falling ice, extensive mold, water near electrical equipment, or a need for elevated exterior access.
Do this next
Stop DIY work, keep clear of the hazard, contain water only when safe, and obtain qualified professional help.
Helpful context
Understand the symptom
Why a thaw changes the diagnosis
A thaw can release water from frost, snow, or ice that accumulated on the frame, sill, drainage path, roof covering, or nearby wall. Canada Mortgage and Housing Corporation guidance warns that melting frost can damage frames and wall finishes, and that snow entering a weep hole can melt later and damage the frame and wall. That timing is a clue, not proof that the sealed glass unit itself failed.
Condensation can look like a leak
Water on the room-side glass or frame may be condensation when warm, humid indoor air meets a cold surface. Government guidance lists condensation, frost, and ice dams as signs of moisture problems, while VELUX recommends checking internal condensation before assuming water entered through the window. The water path, side of the glass, and weather timing matter more than the appearance of a single drip.
Do not hide an exterior drainage failure
Improper flashing, an inward-sloping sill, damaged weatherstripping, or a roof covering around a roof window can route water into the wall rather than outside. A surface bead of caulk may conceal the entry path or block designed drainage. Keep temporary protection and documentation in place while a qualified installer or roofer assesses the opening, flashing, and surrounding wall or roof assembly.
Common questions
FAQ
Is water on a window after winter thaw always a leak?
No. It may be room-side condensation or water released from frost or snow, but water at the frame, sill, wall, ceiling, roof covering, or a recurring thaw pathway can indicate exterior entry. Dry the area, map the first wet point, and compare the timing with indoor condensation and outdoor thaw conditions.
How can I tell condensation from a window leak?
Condensation usually forms directly on the room-side glass or frame when warm indoor air meets a cold surface. Water that returns at the top or side of the frame, tracks into the wall, or appears after exterior snow or frost melts needs an exterior and building-envelope assessment. Moisture between sealed panes suggests a glazing-seal problem.
Should I scrape or heat ice off a leaking window?
Do not chip frost, force an ice-bonded sash, or use a heat source on the glass or frame. Frost and ice can damage weatherstripping and hardware, and sudden or uneven heating can damage glazing. Keep the area safe and arrange professional assessment if the window remains stuck or damaged.
What should I check outside when a window leaks during a thaw?
From a safe ground-level position, look for obvious damage or loose coverings, snow or ice packed around the opening, and water marks below the sill or roof window. Do not access a roof, dismantle flashing, or cover drainage openings. Recurring water needs a qualified window installer, roofer, or building-envelope professional.
When should I call a professional about a window leak?
Arrange professional help for recurring thaw-related water, water in a wall or ceiling, staining, swelling, mold, cracked glass, moisture between panes, a damaged or unclosable window, a roof-window leak, or any situation requiring elevated exterior access. Keep the area protected and document the first wet location and weather timing.
Read the exact guide
Official sources
- Common Signs of Moisture ProblemsU.S. Department of Energy Building Science Education · Government building-science signs of condensation, frost, ice dams, odors, mold, and moisture damage
- Purchasing Energy-Efficient Residential Windows, Doors, and SkylightsU.S. Department of Energy · Government window guidance on air leakage, condensation resistance, and installation considerations
- My window is leaking, what should I do?VELUX · VELUX window water-entry, condensation, closure, and visible exterior damage guidance
- Layout 1Canada Mortgage and Housing Corporation · Canadian government housing guidance on window condensation, flashing, sill slope, weatherstripping, and water damage indicators
- Envelope PenetrationCanada Mortgage and Housing Corporation · Canadian government building-envelope guidance on winter frost, thaw, snow, weep holes, and window-frame moisture damage
- Home Energy ChecklistU.S. Department of Energy · Government guidance on leaky-window maintenance, air leaks, and window upgrades
Community feedback
Share a repair observation
Share a plain-text repair observation. Accepted observations are published automatically; this page may take a moment to update.