
On this page
Start here
Quick answer
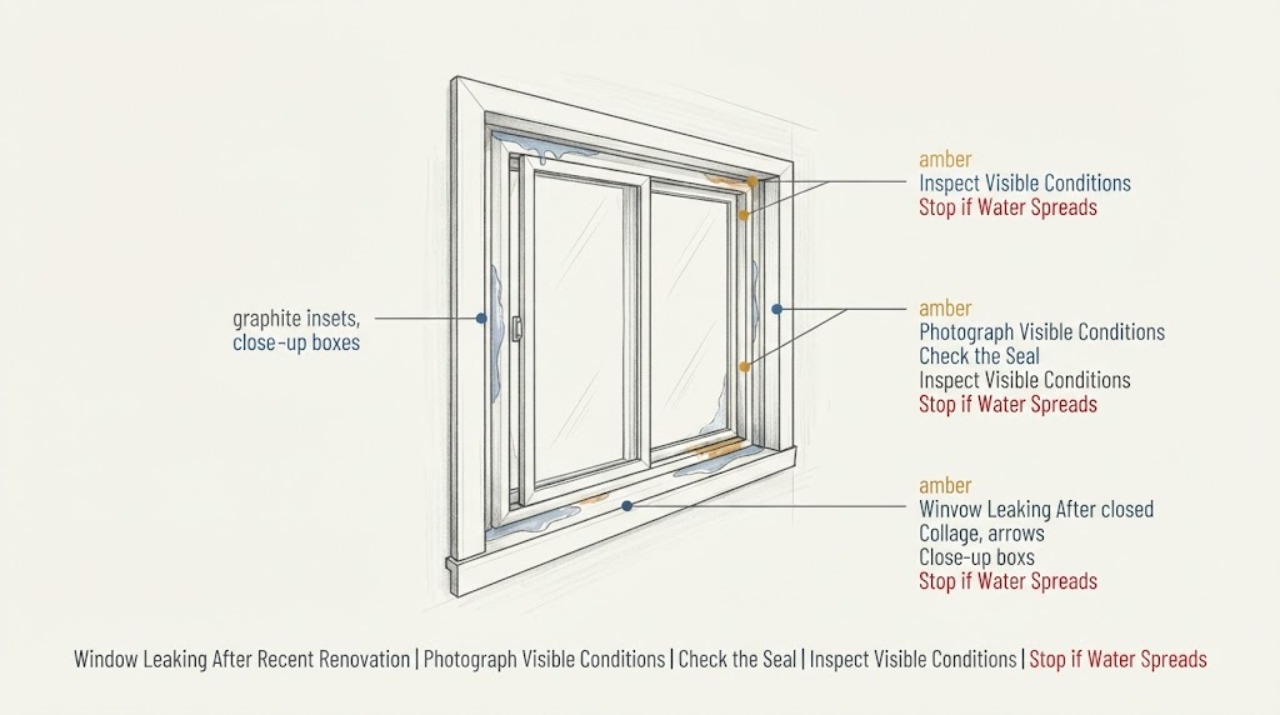
A window that started leaking after renovation needs a water-path diagnosis, not a blanket bead of caulk. First separate rain entry from interior condensation, then inspect the visible frame and track, including the sill and weep openings, without blocking or drilling them. Because the timing follows renovation, ask for the installation and exterior-water-management details: the head flashing or drip cap, side flashing, sill-pan path, and the way the window was integrated with the wall's water-resistive barrier. Water appearing at the top or sides, or staining that extends into the wall, can be an installation or wall-envelope problem even when the window itself looks intact. Stop for active heavy leakage, hidden rot or mold, damaged glass, water near electrical equipment, or unsafe ladder, roof, storm, or high-access work, and arrange a qualified window or building-envelope professional.
Work through in order
Diagnostic checks
Use only checks that match the exact appliance or system and its official guide.
-
Check 1
Record the first date of the leak, whether it follows rain or wind, whether it also occurs on a dry day, and the exact interior starting point: glass, sash, track, frame joint, trim, wall, ceiling, or floor. Photograph the path and any renovation work around the opening while the evidence is visible.
Expected result: Water appears only during or after rain, appears as indoor moisture on cold glass, collects in the track, begins at the top or side of the frame, or appears above or beside the window.
Next step: Use the matching branch below. Keep the photos, weather notes, and renovation date for the installer or building-envelope professional, and do not remove trim to chase the water.
Why this matters
Why: Rain timing and a defined path support an exterior water-entry investigation; moisture limited to cold interior surfaces can be condensation; water above or beside the opening may be entering through the wall, roof, or trim rather than through the track.
-
Check 2
When the area is dry and safely reachable from the floor, inspect the visible sill and track. Remove loose dirt with a soft brush or vacuum, and check that the visible drain or weep openings at the lower frame are not covered by dirt, paint, or sealant. Do not drill, enlarge, plug, or caulk an opening.
Expected result: The track is dirty, a weep opening is visibly blocked, water stands in the track, or the visible path is clear but water still returns during rain.
Next step: Clean only the accessible surface and observe whether water can leave through the existing path. If the opening remains blocked, is painted over, or the leak continues, stop surface work and arrange qualified window service rather than sealing the track.
Why this matters
Why: A blocked visible weep path can retain water in the track, but a clear path with recurring water points toward a deeper sash, frame, flashing, sill, or wall-envelope issue; a wet track during wind-driven rain is not by itself proof of a failed window.
-
Check 3
From a dry, ground-level position, inspect the outside of the same opening without removing cladding or trim. Look for disturbed finish, gaps at the sill or side trim, missing or displaced head flashing or drip protection, and a recent sealant line that could redirect water into the assembly.
Expected result: The top or side finish is disturbed, head protection is absent or displaced, the lower route appears sealed shut, or no exterior defect is visible.
Next step: Photograph the exterior and give the renovation contractor the exact location and timing. Do not pry off trim, cut the wall, or attempt to rebuild flashing from the outside as a homeowner check.
Why this matters
Why: Flashing and the wall water-resistive barrier are part of the drainage assembly; an apparently neat sealant line does not prove that the opening is waterproof, and the absence of a visible defect does not clear concealed flashing or wall work.
-
Check 4
Request the renovation scope, window installation instructions, and any records showing how the rough opening was flashed. Ask specifically whether the sill-pan path, side and head flashing, drip cap, and wall water-resistive barrier were kept continuous and lapped to drain outward.
Expected result: The contractor can document the water-management details, the bottom path was sealed, the head or side work was changed, or no installation information is available.
Next step: Ask the contractor or a qualified window/building-envelope professional to inspect the assembly before any cosmetic patch. Keep the issue tied to the renovation warranty or scope when appropriate, without authorizing destructive opening work until the inspection plan is clear.
Why this matters
Why: A continuous water-management path is the key decision point. A taped or sealed route that traps water, missing head protection, or a break in the wall drainage plane can explain a leak that began after the renovation; missing records increase the need for an on-site assessment.
-
Check 5
Inspect adjacent low-risk water sources from the ground or interior: gutters, roof edge, siding or masonry joints, a wall or ceiling stain above the window, and nearby plumbing. Compare the wettest point with the window opening rather than assuming the first visible drip is the entry point.
Expected result: Water begins above or beside the opening, follows a roof or wall line, appears only when an adjacent fixture is used, or clearly starts at the window frame or track.
Next step: Document the route and arrange the appropriate qualified professional. Do not climb onto a roof or use a ladder in rain, wind, ice, or an unstable area to chase the source.
Why this matters
Why: A roof, gutter, wall, or plumbing source can mimic a window leak. A route that reaches the room from above or through the wall needs the appropriate trade, while a frame or track origin keeps the window and opening assembly as the primary investigation.
-
Check 6
Only when the weather is calm, the exterior is safely reachable from the ground, and no electrical or structural hazard is present, ask a qualified person to perform a controlled low-flow exterior observation one small section at a time. Do not use a pressure washer or flood the opening.
Expected result: Water appears at the same interior location when one exterior section is observed, water enters only near the head or side, water collects at the sill and exits normally, or no entry is reproduced.
Next step: Stop the observation as soon as water enters or the path is uncertain. Give the timing, section, and interior location to a qualified installer or envelope professional; do not escalate to higher flow or remove the window to prove the source.
Why this matters
Why: A repeatable location helps separate a frame or sash path from a wall or flashing path, but a non-reproduced leak does not rule out wind-driven rain or concealed water movement.
-
Check 7
Inspect the affected interior finish without opening the wall: note soft or swollen trim, peeling paint, staining, musty odor, visible mold, floor damage, or a ceiling that is sagging. Keep the area dry and ventilated where safe, and preserve photos of the damage.
Expected result: There is only a small surface wet spot, or there is persistent dampness, soft material, mold-like growth, a sagging ceiling, or damage extending into the wall.
Next step: Arrange qualified window/building-envelope and, when needed, moisture-remediation assessment. Stop all leak tests and keep people away from damaged material or any wet electrical equipment.
Why this matters
Why: Persistent moisture can damage framing, sheathing, drywall, and trim behind the visible finish. The deeper the damage or the longer it remains wet, the less appropriate a surface sealant experiment becomes.
Use your observations
Decision map
Find the observation that best matches what you see, then follow the next safe action.
-
PATH 01Next step
What you see
Moisture appears on cold interior glass or frame on a dry day and does not follow rain, with no exterior water path or staining.
Do this next
Improve ordinary ventilation or humidity control as appropriate and monitor the same area. If water begins after rain, stains the wall, or reaches the track from outside, return to the rain-entry investigation.
Why this path and its safety boundary
Why it matters: Interior condensation is more likely than a rain leak; FGIA relates it to indoor humidity and cold surface conditions.
-
PATH 02Next step
What you see
Water stands in the track and a visible weep opening is blocked by loose dirt or surface debris.
Do this next
Clean the visible track and opening only as the window manufacturer's care guidance permits, then observe the existing exit path. Do not drill, plug, or seal it; arrange service if it stays blocked or the leak returns.
Why this path and its safety boundary
Why it matters: The accessible drainage path may be restricted.
-
PATH 03Next step
What you see
The leak started after renovation and appears at the top or sides, behind new trim, or in the wall above or beside the window.
Do this next
Have the renovation contractor or a qualified window/building-envelope professional review the opening water-management details before any cosmetic resealing.
Why this path and its safety boundary
Why it matters: A flashing, head-protection, wall-barrier, or trim-integration problem is possible; the first visible drip may not be the entry point.
-
PATH 04Next step
What you see
Water begins at the lower frame or track, but visible weeps are clear and the symptom repeats after rain.
Do this next
Keep the window out of service if it is worsening and arrange model- and installation-specific inspection. Do not assume that sealing the bottom edge will fix it, because a drainage route may need to remain open.
Why this path and its safety boundary
Why it matters: A sash, frame joint, sill-pan, level, or concealed drainage issue remains possible.
-
PATH 05Next step
What you see
The wettest point is above or beside the window, follows a roof or wall line, or correlates with another plumbing or exterior source.
Do this next
Provide the route and photos to the appropriate qualified professional and avoid opening the wall or climbing to the source as a first check.
Why this path and its safety boundary
Why it matters: The window may only be where water becomes visible; roof, gutter, wall, or plumbing work may be required.
-
PATH 06Next step
What you see
There is soft or swollen material, persistent dampness, visible mold-like growth, a sagging ceiling, active heavy flow, or water near electrical equipment.
Do this next
Stop troubleshooting and arrange qualified building-envelope, moisture-remediation, or electrical help as applicable. Isolate the area and do not touch wet electrical equipment.
Why this path and its safety boundary
Why it matters: The situation has moved beyond a low-risk window-track check.
Helpful context
Understand the symptom
Why renovation timing matters
A new interior trim, exterior finish, replacement window, or wall repair can change the route water takes around an opening. Andersen describes the wall water-resistive barrier as a drainage plane and explains that a window opening needs a continuous path to shed water down and out. A leak that began after work therefore deserves a review of the opening assembly and the work sequence, not just a cosmetic repair at the room side.
Rainwater and condensation are different paths
FGIA notes that water can normally collect in a track during wind-driven rain when the weep system is clear, while indoor condensation can occur when indoor humidity is high and the glass or frame is cold. Record when the water appears and where it starts. A ceiling or wall stain above the window, a leak that tracks down behind trim, or a strong rain-only pattern needs an envelope investigation even if the track is dry.
Do not make the drainage path worse
A sill pan and flashing system are designed to direct incidental water outward. Andersen specifically describes leaving the bottom route open for escape in the drainage method and warns that sealant alone is not a substitute for correct integration. Do not fill weep openings or seal every edge as a first response; preserve the evidence for the person who evaluates the renovation.
Only after diagnosis
Potential parts
- window weather seal or gasket
Consider only after inspection shows a damaged, displaced, or model-specific seal is the entry path rather than a wall or flashing defect.
Confirm the window series, operating style, dimensions, and manufacturer's fit information before selecting a seal. - weep cover or drainage insert
Consider only when the exact window design uses a damaged replaceable cover or insert and the existing drainage path is otherwise correct.
Do not add a generic cover or plug that restricts drainage; confirm the model-specific design with a qualified source. - sill pan or window flashing material
Consider only after a qualified inspection confirms a sill or flashing installation defect and identifies the correct repair method.
Flashing details depend on the window, wall assembly, cladding, and local installation requirements; this is not a generic homeowner replacement.
When checks do not resolve it
Need a professional?
Arrange qualified window or building-envelope service when the leak recurs after visible track care, began after renovation, appears at the top or sides or behind trim, involves a concealed wall path, or requires flashing, sill-pan, frame, sash, glass, or cladding work. Use qualified electrical or moisture-remediation help when water reaches electrical equipment or visible damage extends beyond the finish.
Common questions
FAQ
Why did my window start leaking after renovation?
New trim, cladding, sealant, or window installation can change how water is directed around the opening. The sill, side and head flashing, drip protection, and wall water-resistive barrier must form a continuous path that sheds water outward; a professional should review those details before a cosmetic reseal.
Should I caulk around a leaking window?
Do not caulk every edge as the first response. Some window drainage routes, including visible weeps and the bottom escape path in a drainage installation, must remain open. Trace the water and have the installation evaluated if the leak recurs.
How can I tell condensation from a window leak?
Condensation is more likely when moisture forms on cold interior glass or frame on a dry day and does not follow rain. A rain-linked drip, water in the track after weather, staining behind trim, or water entering from above or beside the opening needs a water-entry investigation.
Read the exact guide
Official sources
- Installing windows for continuous water controlAndersen Windows · Window water-control layers, drainage method, sill pan flashing, side and head flashing, drip cap, and outward drainage
- The consequences of a failed window installationAndersen Windows · Window installation failure, head flashing, sill-pan and WRB integration, trapped moisture, rot and mold risk, and limits of sealant-only repairs
- Maximize Window, Door & Skylight LifespanFenestration and Glazing Industry Alliance · Window sill and track care, clear weep openings, wind-driven rain in tracks, and interior condensation distinctions
- Window installation and water resistive barriers (WRBs)Andersen Windows · Window integration with water-resistive barriers, flashing, lapping, and drainage away from the wall assembly
Community feedback
Share a repair observation
Share a plain-text repair observation. Accepted observations are published automatically; this page may take a moment to update.