
On this page
Start here
Quick answer
A leaking window is not always a failed glass unit. First determine whether the moisture is condensation on the room-side glass, water trapped between panes, water in the sill or track, or water entering around the frame or wall opening after rain. Keep the sill's drainage path and any weep openings clear, inspect the lock, weatherstripping, visible sealant, frame, and glass without dismantling them, and trace water from above as well as from the window. Stop for cracked glass, soft or rotting framing, active interior water damage, or water near electrical components; persistent frame or opening leaks need a qualified window or building professional.
Work through in order
Diagnostic checks
Use only checks that match the exact appliance or system and its official guide.
-
Check 1
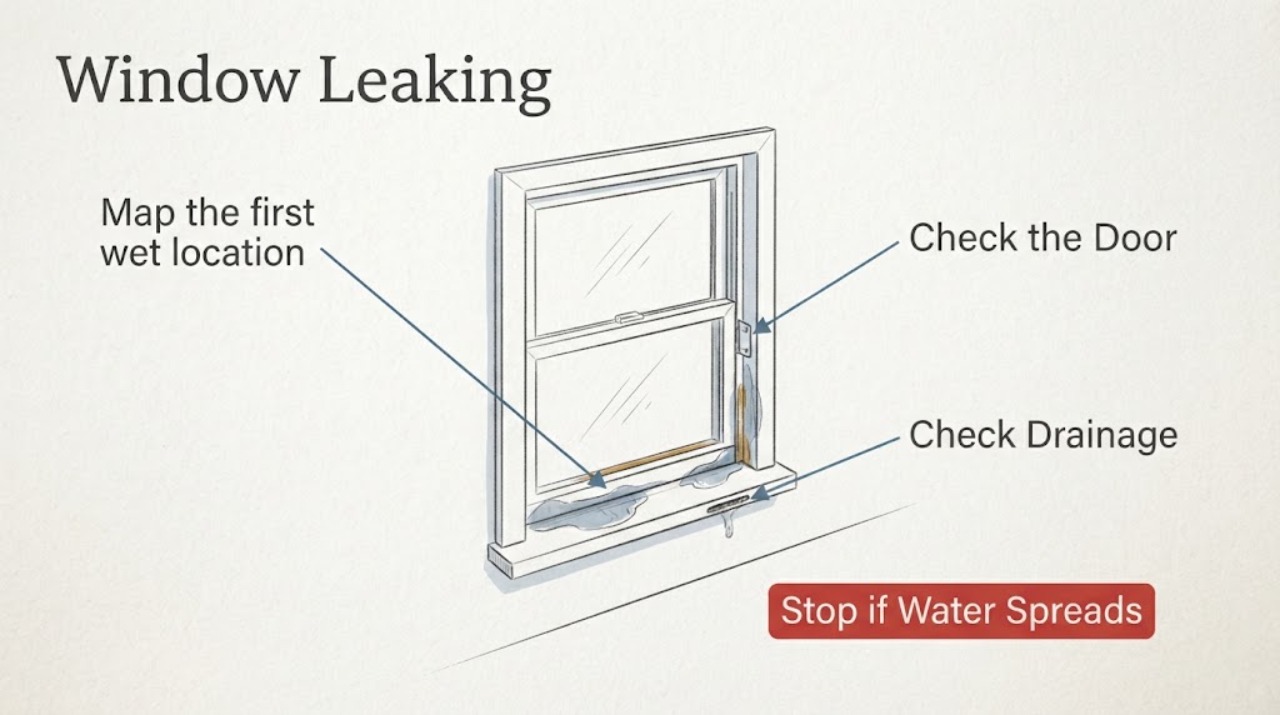
Map the first wet location after the next safe inspection: check the room-side glass, the space between panes, the sill or track, the frame edge, and the adjacent trim or wall without removing the sash or glass.
Expected result: Moisture is only on the room-side glass, between panes, in the track, or on the frame/wall perimeter.
Next step: Follow the matching branch rather than applying sealant everywhere. Photograph the location and note whether it appeared after rain, temperature change, or ordinary indoor activity.
Why this matters
Why: Room-side surface moisture is more consistent with condensation; moisture between panes suggests a sealed-glass-unit seal issue; track or perimeter water requires a drainage and water-entry trace.
-
Check 2
Compare the event with weather and indoor conditions: note whether the moisture appears during high indoor humidity or temperature differences, or only after wind-driven rain, snow, or exterior washing.
Expected result: Moisture forms without rain on the interior glass, or it appears at the frame or wall after precipitation and is concentrated on one side.
Next step: For condensation, reduce indoor moisture and monitor the glass and frame. For rain-related perimeter water, inspect the sill, exterior joints, and areas above the window; do not assume the visible wet spot is the entry point.
Why this matters
Why: Andersen explains that interior condensation can form when indoor moisture meets cooler glass, while exterior water management depends on a continuous drainage path around the opening.
-
Check 3
With the window closed and safe to reach, inspect the sill and track for dirt, paint, insect debris, or other material blocking the existing drainage or weep openings. Clear only loose surface debris with a soft brush or vacuum as permitted by the manufacturer's care instructions.
Expected result: An existing sill drain or weep opening is visibly blocked, or water remains pooled in the track after the area is cleaned.
Next step: Clean the accessible opening without enlarging it or sealing it. If water still remains, the opening is concealed, or the sill is damaged, stop and arrange window service rather than drilling or caulking the track.
Why this matters
Why: Some window systems are designed to let incidental water collect in the sill and drain outside; an obstruction can redirect that water toward the room.
-
Check 4
Inspect the user-accessible frame and sash: verify that the window closes and locks fully, look for torn or compressed weatherstripping, cracked visible sealant, gaps, frame movement, and damage to the glass edge or glazing bead.
Expected result: The lock does not pull the sash snug, weatherstripping is missing or damaged, sealant has cracks or voids, or the frame or glass is visibly damaged.
Next step: Keep the opening protected from rain and use the manufacturer's approved repair or replacement path for a clearly damaged weatherstrip or exterior sealant. Escalate a damaged frame, glass, glazing bead, or recurring leak to a qualified window professional; do not force the sash or remove the glass.
Why this matters
Why: Andersen notes that a window that is not secured may leak and that weatherstripping or sealant can deteriorate; frame or glass damage can exceed a simple maintenance adjustment.
-
Check 5
Trace above and beside the window before resealing the frame: inspect visible trim, siding or cladding joints, roof or gutter discharge, and the exterior head and side areas for a path that could carry water down to the frame.
Expected result: Water staining or wetness begins above the window, at a side joint, or behind exterior cladding rather than at the glass or sash.
Next step: Do not seal over the suspected drainage route or remove cladding as a casual test. Arrange a qualified window installer or building-envelope professional to inspect the flashing, rough opening, and adjacent wall assembly.
Why this matters
Why: Window openings interrupt the wall's water-resistive layer; flashing and the surrounding drainage plane must direct water out and away, so the window may only be the place where a higher leak becomes visible.
-
Check 6
Assess the extent of damage before any repair: check the interior trim, drywall, sill, flooring, and frame for swelling, softness, discoloration, musty odor, or recurring dampness, and stop if water is near an outlet or other electrical component.
Expected result: The frame or wall is soft or rotting, the leak is active or recurring, mold-like growth or a musty odor is present, or water has reached electrical components.
Next step: Stop using or opening the window if doing so worsens the leak, move valuables away, and arrange qualified window/building-moisture service; use an electrician for affected electrical components. Do not conceal wet materials with paint or interior caulk.
Why this matters
Why: The problem may include hidden structural, moisture, or electrical damage and is no longer a simple visible weatherstrip or cleaning issue.
Use your observations
Decision map
Find the observation that best matches what you see, then follow the next safe action.
-
PATH 01Next step
What you see
Moisture is only on the room-side glass and appears without rain
Do this next
Treat it first as a condensation branch: reduce indoor moisture and monitor whether the glass dries; persistent moisture between panes follows the sealed-glass branch.
-
PATH 02Next step
What you see
Moisture is trapped between insulating glass panes
Do this next
Do not drill or clean between panes. Have a qualified glazier or window professional assess the sealed glass unit and the surrounding frame.
-
PATH 03Next step
What you see
Water collects in the sill or track and an existing drain or weep opening is blocked
Do this next
Clear only loose accessible debris according to the window care instructions and keep the drainage opening open; escalate if pooling continues.
-
PATH 04Next step
What you see
Water enters at the frame, adjacent trim, or wall after rain
Do this next
Trace the area above and beside the window and arrange professional inspection of flashing, the rough opening, and the wall drainage layer before resealing.
-
PATH 05Next step
What you see
The frame or wall is soft, rotten, persistently damp, or water reaches electrical components
Do this next
Stop and obtain qualified window/building-moisture service, plus electrical service where needed; do not hide or seal over the damage.
Helpful context
Understand the symptom
Find where the water first appears
A wet pane, a wet sill track, and a wet wall beside the frame are different clues. Interior condensation forms on a cooler glass surface when indoor air contains excess moisture; water between insulating glass panes points to a sealed-glass-unit problem; water that arrives after wind-driven rain may be entering through the sash, frame, flashing, cladding, or rough opening. Wiping the visible water is not enough unless the entry path is identified.
Do not turn a drainage detail into a blockage
Many window systems are designed to manage small amounts of water in the sill and direct it back outside. Do not caulk across weep openings, fill the sill track, drill new holes, or pack the frame with unapproved foam. A sealant bead on the wrong side can hold water inside the wall instead of sending it out.
When the frame or glass needs a professional
A damaged weatherstrip or a deteriorated visible sealant joint may be a maintenance issue, but a soft frame, failed insulating-glass seal, recurring leak at the rough opening, or hidden wall moisture can require a glazier, window installer, or building-envelope professional. Use the window manufacturer's installation and care instructions for model-specific materials and access.
Safety boundary
Stop conditions
- Stop and obtain professional help for cracked or loose glass, a soft or rotting frame, active water entering the wall, recurring hidden dampness, mold-like growth, or water near electrical components.
- Do not caulk across weep openings, seal the sill shut, drill drainage holes, remove glass, or fill the rough opening with unapproved material as a leak test.
- Do not use a pressure hose or climb to reach an unsafe exterior location; document the water path and arrange a qualified inspection instead.
When checks do not resolve it
Need a professional?
Arrange qualified window, glazier, or building-envelope service when water enters around the frame or wall, moisture remains between panes, the frame or glass is damaged, the drain path is concealed or still pools after safe cleaning, or the leak recurs after visible maintenance. Use an electrician if water has reached electrical components.
Common questions
FAQ
How can I tell whether a leaking window has condensation or a rain leak?
Condensation usually appears on the room-side glass during humid indoor conditions without rain. A rain leak is more likely when water appears in the sill, around the frame, or on nearby trim after precipitation, especially on the side exposed to wind. Water between panes is a separate sealed-glass-unit clue.
Should I caulk around a leaking window?
Not before tracing the water. Sealant can help with an appropriate visible joint, but sealing the sill or a drainage opening can trap water. If the leak involves flashing, the rough opening, damaged glass, or a deteriorated frame, use a qualified window professional and the manufacturer's installation guidance.
What if water is leaking into the wall beside the window?
Stop treating it as a glass-cleaning issue. Protect the interior, inspect only safe visible areas above and beside the opening, and arrange a qualified inspection of the flashing, water-resistive barrier, rough opening, and any hidden moisture or structural damage.
Read the exact guide
Official sources
- Window and Patio Door Maintenance TipsAndersen Corporation · Window and patio door condensation, weatherstripping, locks, sealant, and maintenance
- Window installation and water resistive barriers (WRBs)Andersen Windows · Window opening flashing, water-resistive barriers, drainage, and installation guidance
Community feedback
Share a repair observation
Share a plain-text repair observation. Accepted observations are published automatically; this page may take a moment to update.