
On this page
Start here
Quick answer
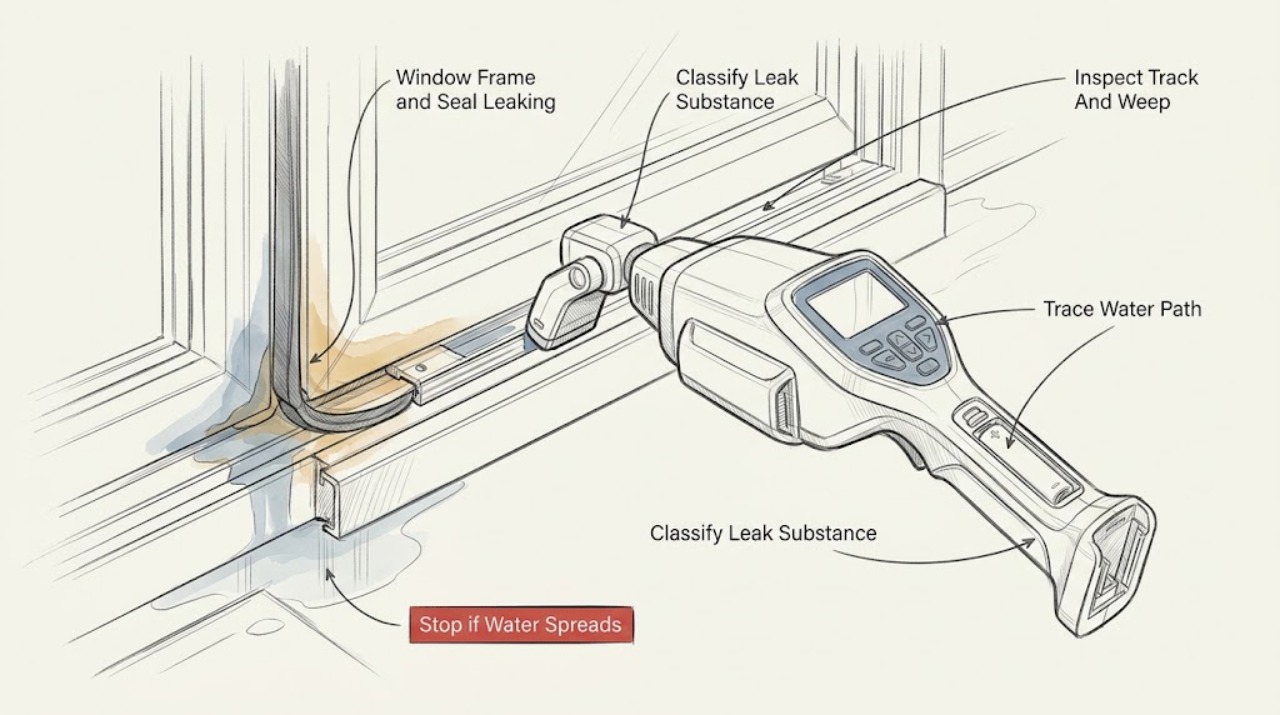
Identify whether the leak is air, rainwater, or condensation before applying a seal. During or just after rain, inspect the sill, track, corners, sash edges, frame-to-trim joint, and wall below the window from a safe interior position. Water in a track can be part of the window's drainage design if the weep paths are clear; water on the wall, behind trim, or under a damaged frame indicates a water-management or installation problem. A paper or safe smoke test can locate an air leak around the closed sash or fixed frame, while condensation is moisture formed on a cold surface rather than incoming rain. Keep weep holes open, clean tracks only with a manufacturer-approved method, and use weatherstripping on moving joints and compatible caulk or low-expansion window-and-door foam only at appropriate stationary gaps. Do not pressure-wash, drill drainage holes, seal a weep path, inject foam blindly, or force the sash. Stop and arrange qualified window or building-envelope service for recurring water, staining or rot, a distorted frame, loose or cracked glass, failed latching, a hidden leak, or unsafe trim and exterior access.
Before you begin
Safety first
- This article supports safe interior observation, permitted surface cleaning, and compatible accessible sealing only. Do not pressure-wash, drill or seal weeps, inject uncontrolled foam, force a sash, remove glazing, disturb suspect paint, or work at height without appropriate protection and qualified help.
Work through in order
Diagnostic checks
Use only checks that match the exact appliance or system and its official guide.
-
Check 1
From a safe interior position, inspect the window during or after the reported event and classify the material without opening the wall or leaning outside: rainwater, a damp or stained surface, airflow, room-side condensation, or an unknown substance.
Expected result: Record whether water appears at the sill, track, corners, sash edge, frame-to-trim joint, or wall; note whether airflow is present and whether moisture appears only in cold or humid conditions.
Next step: Photograph the location, protect nearby finishes, and continue only with the matching drainage, seal, or condensation check.
Stop if: Do not touch exposed wiring, open a wet wall, use a flame for an airflow test, or lean outside the window.
Why this matters
Why: Rain entering the frame follows a water-management path. Airflow at a closed joint follows an air-sealing path. Condensation on a cold surface is not proof of incoming rain. An unknown or worsening leak needs professional assessment.
-
Check 2
Inspect the sill and track for loose dirt, leaves, paint, sealant, insects, or other debris and locate the manufacturer's weep openings on the inside and outside of the frame without drilling or enlarging them.
Expected result: Note whether the track has standing water, whether the weep openings are clear, whether water can exit outside, or whether the opening is blocked, damaged, or not identifiable.
Next step: Remove only loose accessible debris with the soft brush or vacuum method allowed by the manufacturer, then observe the next normal rain event without pressure-washing.
Stop if: Do not probe, drill, tape over, oil, caulk, or fill a weep path, and do not use a high-pressure sprayer.
Why this matters
Why: A blocked weep can make designed track drainage appear to be a leak. Clear drainage may redirect water outside, but continued interior water, a damaged opening, or water with no exterior route suggests a frame, flashing, or installation problem.
-
Check 3
With the window dry and closed, inspect the sash corners, gasket, frame joints, sill, trim, and wall finish for a continuous water path, cracked or missing sealant, staining, blistered paint, soft wood, loose trim, or a gap behind the frame; do not remove trim yet.
Expected result: Classify the evidence as water confined to the track, water on the interior sill, water below or behind trim, an active stain or rot, a loose or distorted frame, or no visible path.
Next step: Document the path and arrange window or building-envelope assessment for water behind trim, rot, distortion, or a path that cannot be isolated.
Stop if: Do not caulk over active water or rot, cover drainage, pry a distorted frame, or remove complex trim without a safe plan.
Why this matters
Why: Water confined to a clear drainable track may be expected. Interior sill water may be a seal or drainage failure. Water behind trim, staining, rot, or distortion can involve flashing, rough-opening sealing, or structural damage and is not a surface-caulk-only repair.
-
Check 4
After the frame is dry and there is no active water hazard, close and latch the window and test the sash edges, meeting rail, corners, track, jambs, and frame-to-trim joint with a paper strip or safe smoke source, one location at a time.
Expected result: Mark where paper releases easily or smoke bends, and distinguish airflow at a moving sash seal from airflow at a fixed frame or track.
Next step: Record all confirmed air paths and identify the seal profile before any replacement; do not use a thicker strip as a diagnostic.
Stop if: Do not use an open flame, lean outside, or apply sealant before confirming the path and checking for water damage.
Why this matters
Why: A moving-joint result supports a matched weatherstrip. A fixed frame result supports caulk or rough-opening air sealing. Air along the track may reflect a liner or frame gap and should not be closed with material that impairs sash movement or drainage.
-
Check 5
Inspect the closed sash edge, meeting rail, corners, gasket, latch, and visible frame contact for a worn or missing weatherstrip, uneven compression, a loose sash, or a latch that needs unusual force.
Expected result: Record whether the seal is cracked, flattened, detached, folded, or intact; note whether the sash closes squarely and whether the leak changes when the latch is engaged.
Next step: Photograph the profile and use the manufacturer's model information before replacing the seal; arrange service for a loose sash, damaged glass, or alignment fault.
Stop if: Do not glue the sash, stack seals, force the latch, or remove a loaded sash or glazing bead.
Why this matters
Why: A localized air or water leak with a damaged moving seal supports a matched weatherstrip repair. A good seal with a loose, rubbing, or misaligned sash points to hardware or frame alignment rather than a thicker seal.
-
Check 6
For a confirmed dry stationary frame or trim crack, use a compatible caulk method. For an accessible gap between the jamb and rough opening, use only a low-expansion window-and-door foam or backer-rod method appropriate to the assembly; keep the sash, track, weeps, and hardware clear.
Expected result: After curing, check that the frame remains square, the sash opens and closes, the latch engages, drainage works, and the marked water or air path is reduced without a new gap.
Next step: Stop material changes and arrange qualified service for hidden gaps, active water, complex trim, or any altered frame geometry.
Stop if: Do not use uncontrolled expanding foam, force backer rod, seal a moving joint, or cover a drainage opening.
Why this matters
Why: A stationary repair that stops the confirmed path without changing operation supports the diagnosis. A bowed frame, binding sash, new water, or persistent leak means the gap was misidentified, overfilled, or part of a larger installation failure.
-
Check 7
Repeat the water-path and airflow checks during comparable conditions after any permitted cleaning or compatible seal repair, then inspect the interior finish, sill, track, sash operation, and latch.
Expected result: Classify the result as dry with normal drainage, remaining air leak, remaining rain leak, water behind trim, recurring condensation, or impaired operation after sealing.
Next step: Keep the window closed and secured when possible and arrange window or home-performance service for a persistent or hidden leak.
Stop if: Stop for active wall damage, a falling sash, cracked or loose glass, failure to latch, or water near electrical equipment.
Why this matters
Why: A dry frame with normal operation supports a successful limited repair. A remaining or moved leak identifies another path; water behind trim, repeated condensation damage, or impaired operation requires broader assessment.
-
Check 8
Before removing trim or working outside, assess window height, frame complexity, paint age, fiberglass exposure, glass condition, and whether the source is hidden or structural. Prepare a service record with photos, weather timing, water path, test results, and materials used.
Expected result: Escalation is indicated by rot, repeated water, a distorted frame, cracked or loose glass, a sash that cannot close or latch, hidden rough-opening leakage, suspect old paint, unsafe height, or a repair that changes operation.
Next step: Arrange qualified window or building-envelope service and keep the area protected from further water while awaiting assessment.
Stop if: Do not disturb suspect paint, remove extensive trim, climb from an unstable position, work on exterior components without safe access, or conceal active damage.
Why this matters
Why: The issue may involve flashing, rough-opening sealing, glazing, structural alignment, lead-safe work, or fall protection rather than a seal alone.
Use your observations
Decision map
Find the observation that best matches what you see, then follow the next safe action.
-
PATH 01Safety boundary
What you see
Water appears in the sill or track during wind-driven rain, the weep path is clear, and it drains outside without wetting the interior wall.
Do this next
Keep the track and weeps clear and monitor the interior sill, wall, and frame during future rain.
Why this path and its safety boundary
Why it matters: The track may be collecting and draining water as designed rather than leaking through the frame.
Safety stop: Stop for water on the wall, staining, rot, a blocked or damaged weep, or water that no longer exits outside.
-
PATH 02Safety boundary
What you see
Water pools in the track and a visible weep or sill path is blocked by dirt, paint, sealant, or debris.
Do this next
Remove only loose accessible debris with a soft brush or vacuum method allowed by the manufacturer, then observe normal drainage.
Why this path and its safety boundary
Why it matters: Blocked drainage can make a designed water path overflow into the interior.
Safety stop: Do not drill, enlarge, oil, tape, or caulk the opening, and do not use pressure water.
-
PATH 03Safety boundary
What you see
Air or water is localized to a moving sash joint and the weatherstrip is worn, missing, or detached.
Do this next
Identify and install the compatible profile, then retest drainage, operation, latching, and the marked leak path.
Why this path and its safety boundary
Why it matters: A matched moving-joint seal may restore compression if the sash and frame are square.
Safety stop: Stop if the sash binds, the latch fails, the profile is unknown, or water still enters.
-
PATH 04Safety boundary
What you see
Air or water is confirmed at a fixed frame-to-trim or rough-opening joint.
Do this next
Use a compatible fixed-joint method only for a dry, accessible gap and preserve frame geometry, drainage, and sash movement.
Why this path and its safety boundary
Why it matters: The path needs stationary air sealing or water-management assessment, not a thicker sash strip.
Safety stop: Stop for hidden gaps, active water, rot, complex trim, or any risk of bowing the frame.
-
PATH 05Safety boundary
What you see
Moisture forms on an interior glass or frame surface in cold or humid conditions, without a rain path or water behind trim.
Do this next
Manage indoor humidity and airflow, keep the frame dry, and arrange assessment if moisture damages the window or persists unexpectedly.
Why this path and its safety boundary
Why it matters: Surface condensation from indoor humidity and a cold surface is more likely than an incoming window leak.
Safety stop: Do not seal over wet framing, mold-like growth, or a suspected water path.
-
PATH 06Safety boundary
What you see
Water enters behind trim, staining or rot is present, the frame is distorted, glass is loose or cracked, or the sash cannot latch.
Do this next
Stop cosmetic repairs, protect the interior, and arrange qualified window or building-envelope service.
Why this path and its safety boundary
Why it matters: The assembly may have flashing, rough-opening, glazing, structural, or safety damage beyond a seal replacement.
Safety stop: Do not inject foam blindly, pry the frame, remove glazing, disturb suspect paint, or work at unsafe height.
Helpful context
Understand the symptom
Water in the track is not automatically a failed window
Many windows are designed to collect some wind-driven rain in a sill or track and route it outside through weep openings. That design only works when the drainage path is clear. Water on the interior wall, under trim, or in a place with no route outside suggests a different fault. Air leaks and surface condensation also leave different evidence, so record the substance and timing before sealing anything.
Match the seal to a moving or fixed joint
Weatherstripping seals a joint that opens and closes, such as a sash edge. Caulk is generally used at fixed cracks around the frame and trim. A rough-opening gap may need a compatible backer rod or low-expansion foam made for windows and doors, but the frame must remain square and the sash, track, balance, and drainage must remain free. A thick strip is not a substitute for a bent frame or failed flashing.
Protect the assembly while finding the cause
Use a soft brush or vacuum for accessible track and weep debris and follow the installed window's care instructions. Avoid pressure washers, abrasive tools, petroleum products, and unapproved coatings that can damage seals or finishes. If trim must be removed, account for fiberglass and old paint; a wet or rotten frame should be assessed before a cosmetic patch hides it.
Only after diagnosis
Potential parts
- window sash weatherstrip
Consider this category only when a moving-joint leak is confirmed and the existing seal is worn, missing, or detached with a square, operable sash.
Match the window manufacturer, series, seal location, profile, attachment method, compression, and sash clearance; keep tracks and drainage open. - window weep or track component
Consider this category only when the exact window design has a damaged or missing drain component after loose debris is removed and water cannot exit as designed.
Confirm the frame profile, drainage design, baffle or screen, and manufacturer fit information; never create a new hole or seal the designed water path. - window frame sealant or backer rod
Consider this category only for a confirmed dry stationary frame or rough-opening gap where the material is appropriate and the frame can remain square.
Use material compatible with the frame and adjacent assembly, preserve sash movement and drainage, and follow manufacturer and product instructions.
When checks do not resolve it
Need a professional?
Safety scope: This article supports safe interior observation, permitted surface cleaning, and compatible accessible sealing only. Do not pressure-wash, drill or seal weeps, inject uncontrolled foam, force a sash, remove glazing, disturb suspect paint, or work at height without appropriate protection and qualified help.
Common questions
FAQ
Why is water collecting in my window track?
Some windows are designed to collect wind-driven rain in a track and drain it outside through weep openings. Keep the track and weeps clear, but arrange service if water reaches the interior wall, the drain is damaged, or the water does not exit outside.
How can I tell whether a window is leaking air or water?
Inspect during or after rain for a water path, staining, and wet framing. For an air path, close and latch the window and use a paper or safe smoke test at the sash, track, and frame joints. Surface condensation in cold or humid conditions is a separate moisture symptom.
Should I use weatherstripping or caulk on a leaking window?
Weatherstripping is for a moving sash joint. Caulk is generally for a stationary frame or trim crack. A suitable backer rod or low-expansion window-and-door foam may fit an accessible rough-opening gap, but never seal a track, weep path, or active water problem blindly.
Can I pressure-wash a leaking window to clean the track?
No. High-pressure water can drive moisture inside and damage seals or frame components. Use the manufacturer's approved soft-brush or vacuum method for accessible debris and arrange service for blocked, damaged, or unidentified drainage.
When should a professional repair a leaking window?
Arrange service for water behind trim, staining or rot, a distorted frame, loose or cracked glass, a sash that will not close or latch, a hidden rough-opening leak, repeated water, suspect old paint, or unsafe exterior or ladder access.
Read the exact guide
Official sources
- Maximize Window, Door & Skylight LifespanFenestration and Glazing Industry Alliance · FGIA homeowner maintenance guidance; the installed product manufacturer's instructions control specific window repairs.
- Energy-Efficient Home Improvement Credit Insulation and Air-Sealing EssentialsU.S. Department of Energy · U.S. Department of Energy residential air-sealing guidance; exact water-management and window repair details depend on the assembly.
- Sealing Behind Window & Door Trim ProjectENERGY STAR · ENERGY STAR home air-sealing guidance; exact window instructions and applicable building requirements control a particular assembly.
Community feedback
Share a repair observation
Share a plain-text repair observation. Accepted observations are published automatically; this page may take a moment to update.