
On this page
Start here
Quick answer
First determine whether the moisture is condensation on the room side of the glass or rainwater entering at the sash, sill, frame, or surrounding wall. If by inside moss you mean green, fuzzy, or dark growth on the sill or frame, treat it as a sign of persistent moisture rather than proof that the glass itself has failed. Dry the area promptly, avoid disturbing hidden growth, and check humidity, ventilation, the lock and seal, and the exterior drainage path. Do not seal over wet growth or block drainage openings. Stop and call a qualified window, building-envelope, or mold-remediation professional when water is inside the wall, the frame is soft or damaged, growth is extensive or hidden, or the leak returns after accessible checks.
Work through in order
Diagnostic checks
Use only checks that match the exact appliance or system and its official guide.
-
Check 1
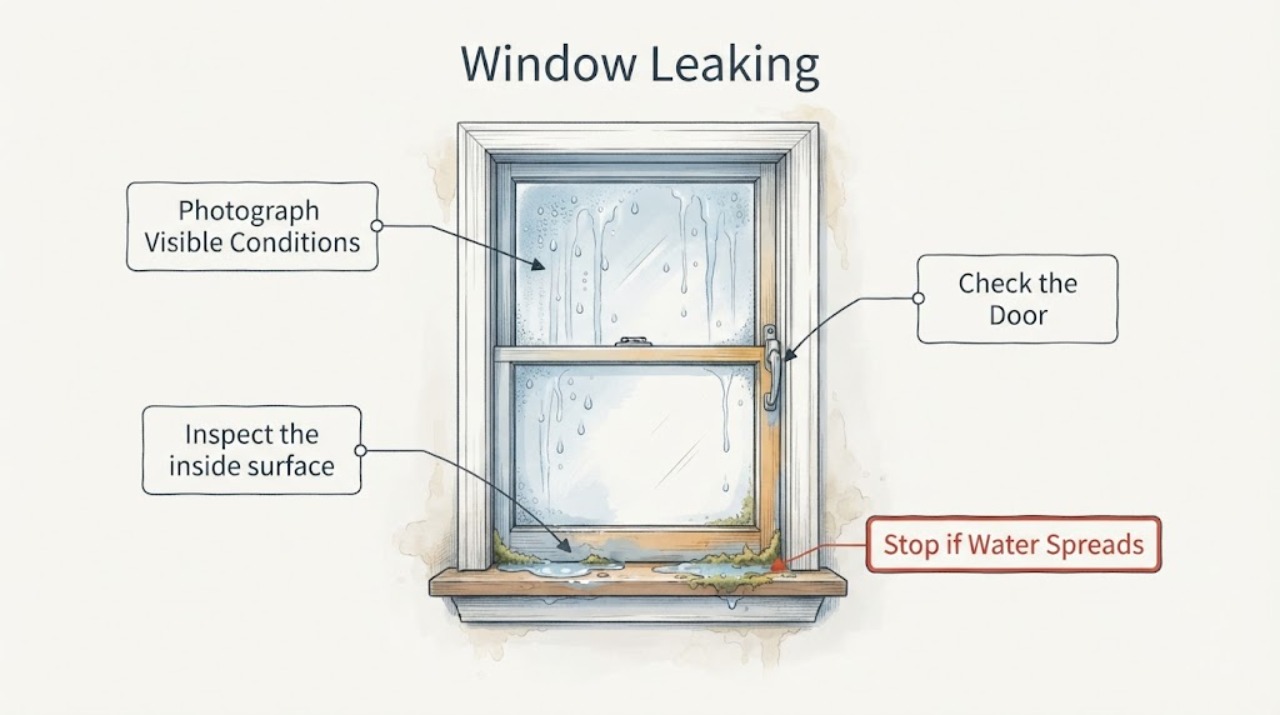
Dry the glass, sill, frame, trim, and nearby wall, then mark or photograph the first place moisture reappears while noting whether it follows rain, cold weather, showering, cooking, or another indoor moisture event.
Expected result: Condensation beads across the room-side glass during humid or cold conditions suggest indoor moisture; a narrow track from an upper corner, sash joint, exterior sill, or wall after rain suggests water intrusion. Growth or staining confined to one damp edge is also useful evidence.
Next step: Follow the condensation path if moisture forms broadly on the glass; follow the intrusion path if water tracks from a joint or appears after rain. Keep records for a professional if the source remains unclear.
Why this matters
Why: The timing and starting location separate a humidity or condensation problem from an exterior drainage, seal, installation, or hidden-wall problem. A dry surface after wiping does not prove the source is fixed.
-
Check 2
Inspect the inside surface and any moss-like or mold-like growth without disturbing hidden cavities; wear gloves and eye protection for a small accessible hard-surface cleanup, and use mild detergent and water only when the surface and material are suitable.
Expected result: Growth that wipes from a hard, non-porous sill after the moisture source is controlled is different from softened wood, staining that extends into trim, porous material, a musty odor with no visible source, or growth behind casing.
Next step: Dry the cleaned surface completely and do not paint or caulk over wet or growing material. Escalate to an experienced professional for hidden, extensive, porous, contaminated, or recurring growth, or when anyone has health concerns.
Why this matters
Why: EPA guidance treats moisture control as the key to mold control and warns that hidden growth can be difficult and risky to investigate. Cleaning alone will not prevent recurrence if water or condensation continues.
-
Check 3
Check indoor moisture conditions around the window: use normal bathroom and kitchen exhaust, move curtains or blinds so air can reach the glass, and reduce unnecessary humidifier use while observing whether new interior droplets decrease.
Expected result: Moisture that improves when indoor humidity and air movement improve, especially without rain, is consistent with condensation. Moisture that returns at one edge despite a drier room needs a seal, drainage, or wall investigation.
Next step: Continue moisture control while tracking the window. If condensation remains severe or the room cannot be kept reasonably dry, consult an HVAC or building professional rather than sealing the glass surface.
Why this matters
Why: Andersen and EPA explain that humid indoor air can condense on cooler window surfaces; DOE also links lower air infiltration with reduced condensation and notes that persistent condensation can damage surrounding components.
-
Check 4
With the window closed, inspect the accessible sash, frame, weatherstrip, locks, and interior sealant for gaps, compression, cracking, or a lock that does not pull the sash evenly into the frame.
Expected result: A visible gap, damaged weatherstrip, loose lock, or cracked sealant at the perimeter can align with an air or water path; a sound seal with moisture only on the glass points back toward condensation or another source.
Next step: Clean loose dirt and operate only the normal lock or latch. Do not force hardware, remove the sash, or seal drainage openings; obtain model-specific repair guidance if the seal or lock is damaged.
Why this matters
Why: A window that is not closed and locked securely may leak, but a perimeter seal is not a substitute for the window's designed drainage path. Surface caulk cannot safely repair concealed flashing or framing defects.
-
Check 5
From ground level after wet weather, inspect the exterior sill and visible drainage openings for leaves, dirt, or tape, and check whether water has a clear path away from the unit; do not climb or remove exterior trim as a routine test.
Expected result: Pooling at the exterior sill or blocked visible weep openings after rain can redirect water inward. Water entering above the sill, behind trim, or through the wall despite clear openings suggests an installation, flashing, or building-envelope issue.
Next step: Remove only loose debris that is safely reachable and permitted by the product instructions. Do not fill, tape, or caulk the openings; arrange professional inspection if the leak persists or the source is above or behind the window.
Why this matters
Why: Andersen describes window drainage systems that route water through exterior weep openings and warns that continued pooling warrants checking those openings. The design and openings vary by product, so the product instructions control.
-
Check 6
Inspect the surrounding interior trim and wall for swelling, peeling finish, soft material, staining that extends beyond the sill, or a musty odor with no visible source, and compare the area with the dry wall nearby.
Expected result: Soft or discolored trim, a widening stain, hidden odor, or moisture that returns inside the wall indicates that the problem is larger than surface glass condensation or a dirty sill.
Next step: Stop opening trim or wall cavities and arrange an experienced window or building-envelope professional, with mold remediation support when growth or contaminated water is involved.
Why this matters
Why: EPA notes that hidden mold can occur around leaks and inside walls and that investigating concealed growth requires caution. Persistent wetting can damage components and wall surfaces even when the pane looks intact.
Use your observations
Decision map
Find the observation that best matches what you see, then follow the next safe action.
-
PATH 01Next step
What you see
Moisture is spread across the room-side glass, appears during humid or cold conditions, and is not tied to rain.
Do this next
Treat condensation as the leading path: dry the glass, improve ventilation and air movement, reduce indoor moisture, and monitor whether the surface stays dry.
-
PATH 02Next step
What you see
Water starts at an edge, sash joint, sill, or wall after rain, or the exterior sill pools.
Do this next
Inspect only reachable visible drainage openings and the lock or seal; do not block weep openings or apply a surface patch over a wet assembly. Arrange professional inspection if water returns.
-
PATH 03Next step
What you see
The window closes or locks unevenly, or weatherstrip and sealant show gaps or damage.
Do this next
Use the product instructions for an accessible adjustment or replacement path; stop if the sash, frame, or installation joint must be removed or forced.
-
PATH 04Next step
What you see
Moss-like or mold-like growth returns, extends into porous trim, has a musty odor without a visible source, or appears behind casing.
Do this next
Do not disturb hidden material or paint over it. Correct the water source and obtain experienced moisture or mold-remediation help, especially if the affected area is extensive or anyone has health concerns.
-
PATH 05Next step
What you see
The frame or wall is soft, the leak is active, water reaches electrical equipment, or the source cannot be identified without a ladder or opening the wall.
Do this next
Stop the DIY inspection, protect the room from further damage, and call a qualified window or building professional; use a mold specialist when growth or contaminated water is involved.
Helpful context
Understand the symptom
A wet interior window does not automatically mean the sealed glass unit is leaking. Condensation forms when humid indoor air meets a cooler surface, while rain intrusion usually follows a different pattern: it appears after weather, starts at an edge or joint, or leaves a track into the sill, trim, or wall. The word moss in this topic may describe green or fuzzy interior growth; whatever the appearance, moisture control comes before cosmetic cleanup.
Use only low-risk, reachable checks. Keep the sash supported, avoid ladders and aggressive scraping, and do not caulk or paint over a wet or visibly growing surface. A window that leaks into concealed framing needs a building professional, not another bead of surface sealant.
Safety boundary
Stop conditions
- Stop if water reaches electrical wiring, outlets, lighting, or other equipment, or if the window opening cannot be kept safe and dry.
- Stop if the frame, sill, trim, or wall is soft, swollen, structurally damaged, or wet inside a concealed cavity.
- Do not climb, remove exterior trim, force locks, remove the sash, open the wall, or seal over a wet surface or drainage opening as a routine check.
- Stop and arrange qualified service when growth is hidden, recurring, extensive, associated with contaminated water or a musty odor, or accompanied by health concerns.
Only after diagnosis
Potential parts
- window weatherstrip or sash seal
Consider this only when the exact window's accessible weatherstrip is visibly damaged, permanently compressed, or leaving a confirmed perimeter gap.
Confirm the window make, series, sash type, and official fit information before ordering or installing a seal. - window lock or latch
Consider this only when the window will not close and lock evenly after cleaning and the model-specific diagnosis confirms a hardware fault.
Hardware varies by window design and handing; confirm the exact unit and installation instructions before ordering.
When checks do not resolve it
Need a professional?
Call a qualified window or building-envelope professional when water returns after accessible checks, the leak appears to come from flashing or the wall, the frame is damaged, the sash or lock cannot close evenly, or diagnosis requires a ladder, trim removal, or opening the wall. Use an experienced mold-remediation professional for hidden, extensive, porous, or contaminated growth.
Common questions
FAQ
Does water on the inside of a window always mean the glass is leaking?
No. Broad moisture on the room-side glass during humid or cold conditions can be condensation, while rain-linked water that starts at an edge or tracks into the sill suggests intrusion. Trace the first wet point before choosing a repair.
What should I do about moss-like growth inside the window?
Treat it as a persistent-moisture clue. Dry the area, use appropriate protection for a small accessible hard-surface cleanup, and fix the water or humidity source. Do not paint or caulk over wet growth, and use an experienced professional for hidden, extensive, porous, recurring, or contaminated growth.
Should I caulk the outside of a leaking window?
Not as a first response. Some windows use exterior drainage openings to release water, and blocking them can worsen pooling. Check the product instructions and have a professional inspect flashing, installation, and concealed wall moisture when the leak returns.
Read the exact guide
Official sources
- Important Product, Care and Maintenance Information for Anderse Windows and DoorsAndersen Windows · Window drainage systems, visible weep openings, condensation, and care
- Condensation on the Interior of Window or Patio Door GlassAndersen Windows · Interior window condensation and moisture-reduction practices
- Purchasing Energy-Efficient Residential Windows, Doors, and SkylightsU.S. Department of Energy · Window air leakage, condensation resistance, and moisture-related component damage
- Window and Patio Door Maintenance TipsAndersen Windows · Window lock, closure, weather sealing, and accessible maintenance checks
- A Brief Guide to Mold, Moisture and Your HomeU.S. Environmental Protection Agency · Mold and moisture control, visible and hidden growth, and professional cleanup boundaries
- Installing windows for continuous water controlAndersen Windows · Window water-management and drainage paths around installation openings
- A Brief Guide to Mold, Moisture, and Your Home EPA-402-K-02-003, September 2010U.S. Environmental Protection Agency · Indoor moisture, condensation on windows, mold prevention, cleanup, and hidden mold safety
- Window and door glossaryAndersen Windows · Window terminology for condensation, seals, weatherstrip, flashing, and weep holes
Community feedback
Share a repair observation
Share a plain-text repair observation. Accepted observations are published automatically; this page may take a moment to update.