
On this page
Start here
Quick answer
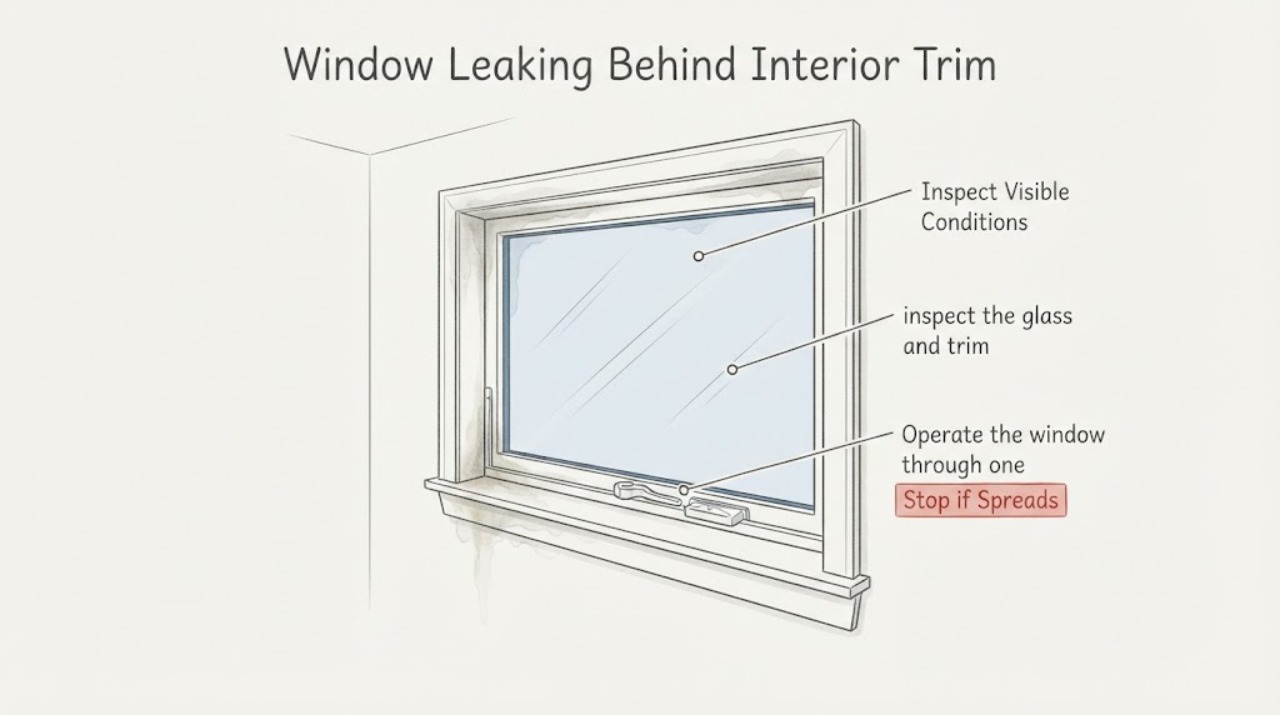
Water showing inside the window trim means the visible trim may be downstream from the true entry point. Dry the trim and wall, identify whether water is coming from the sash, sill, head, or the wall cavity, and compare the pattern with rain and indoor humidity. Check that the window closes and locks, that accessible weatherstripping is intact, and that exterior drainage and flashing are not blocked. Do not simply caulk the interior trim or track until the water path is known; that can hide damage or trap water. Removing trim is a moderate-to-difficult project and can disturb lead paint, insulation, or concealed flashing. If the wall is wet, the frame is soft or moving, water reaches electrical equipment, or the source is behind the rough opening, stop and use a qualified window or building-envelope professional.
Work through in order
Diagnostic checks
Use only checks that match the exact appliance or system and its official guide.
-
Check 1
Wipe the interior trim, jamb, sill, glass, and nearby wall dry; during the next ordinary rain, observe from a safe position and record where moisture first returns, the rain and wind conditions, and whether the window was closed and locked.
Expected result: Water first appears at the upper trim, side jamb, lower corner, sill, sash joint, glass surface, or behind the trim and wall finish.
Next step: Photograph the first wet location and trace upward and outward without removing trim or spraying the window; use the result to select the sash, drainage, or installation branch.
Stop if: Stop for active water near electrical equipment, cracked or loose glass, a falling sash, structural movement, or unsafe exterior access.
Why this matters
Why: The first wet point is more useful than the lowest stain. Upper or side trim can indicate water traveling from flashing or a wall path, while a sash or sill start points toward closure, weatherstrip, track, or drainage.
-
Check 2
After the rain event, inspect the glass and trim for the difference between surface condensation, moisture between insulated panes, and a water trail entering from the frame or wall; check whether the room is humid and whether the moisture returns without rain.
Expected result: Moisture forms uniformly on cool interior glass, persists between panes, starts at a glazing edge, or returns at trim only after rain.
Next step: Record the pattern and avoid replacing trim or glass until the water mechanism is identified; arrange glazing service for moisture between panes or damaged glass.
Stop if: Stop for cracked, shattered, loose, or sharp-edged glass, water entering electrical parts, or a glazing repair requiring pane removal.
Why this matters
Why: Surface condensation can run down into trim without rain entering the window. Moisture between panes points to a failed insulating-glass seal, while rain-linked trim moisture points toward the sash, sill, flashing, or rough opening.
-
Check 3
Operate the window through one open-close-lock cycle when dry and safe; inspect accessible weatherstripping, sash corners, meeting rails, and lock contact for tears, gaps, flattening, missing sections, or uneven compression, and verify the sash closes squarely without force.
Expected result: The lock will not latch, the sash is skewed, weatherstrip is damaged or missing, one corner has a gap, or closure and contact are even.
Next step: Use only the exact window instructions for cleaning or adjustment; identify the window series before replacing weatherstrip and retest during comparable rain.
Stop if: Stop if the sash drops, binds, cannot latch, the glass moves, or sash removal or exterior access is required.
Why this matters
Why: Rain can enter through a moving joint and travel to the inside trim when the sash is misaligned or not compressed into its seal. Even closure shifts attention toward the sill, flashing, or concealed wall path.
-
Check 4
With the window off and dry, inspect the sill and track for standing water, dirt, paint, sealant, insects, or debris covering designed weep openings; clear only loose accessible debris using the exact window instructions and never seal the track or weeps.
Expected result: Weep openings are blocked, water remains in the sill after rain, the track drains outward normally, or water still appears at the trim with clear drainage.
Next step: Restore only the documented accessible drainage condition and observe one later rain event; do not drill, enlarge, or caulk a weep or sill channel.
Stop if: Stop for water near electricity, a blocked path that cannot be reached safely, pressure washing, or any proposed modification of the drainage path.
Why this matters
Why: A blocked drainage path can overflow into the room or send water behind the frame. Clear weeps with persistent trim moisture points toward excessive rain entry, flashing, frame level, or a rough-opening issue.
-
Check 5
Before considering trim removal, identify the window age and finish, inspect for peeling paint, visible gaps, staining, soft material, or a persistent draft, and decide whether the work can be done without disturbing lead paint, insulation, flashing, or the window frame; use a qualified professional when uncertain.
Expected result: The home may predate lead-safe renovation requirements, trim is decorative or complicated, the wall is wet or soft, there is a visible jamb gap, or the trim is simple, dry, and safely accessible.
Next step: If the area is dry, simple, and confirmed safe, follow the applicable air-sealing instructions without deflecting the frame; otherwise document the location and arrange professional assessment.
Stop if: Stop for lead-paint risk, wet or moldy insulation, rot, concealed framing damage, complex trim, bowed frame, or any work requiring aggressive prying or exterior access.
Why this matters
Why: A gap behind trim can be an air-sealing defect, but water behind the trim can signal flashing or rough-opening failure. Disturbing old finishes or packing material without a plan can create health, fit, and water-management problems.
-
Check 6
Arrange qualified window, glazing, or building-envelope service when water persists at the inside trim after safe sash and drainage checks, when the source is behind the jamb or wall, or when glass, frame, flashing, or trim is damaged; provide photos and the first-wet location.
Expected result: The leak is repeatable or wind-driven, the track and weeps are clear, water reaches drywall or framing, the frame moves, the sash cannot latch, or the repair requires trim, sash, glass, or flashing removal.
Next step: Keep the window closed and latched when practical, protect finishes, document rain and wind conditions, and let the professional determine the repair scope before sealing or dismantling.
Stop if: Stop DIY work for active wall damage, cracked glass, unsafe sash movement, electrical contact, unsafe access, or any need to remove a heavy sash or pane.
Why this matters
Why: The visible trim stain may be downstream from a failed gasket, sill pan, head flashing, sealant joint, rough opening, or wall drainage path. A surface bead cannot reliably distinguish or correct these faults.
Use your observations
Decision map
Find the observation that best matches what you see, then follow the next safe action.
-
PATH 01Next step
What you see
Moisture appears on the interior glass surface without rain-path evidence and runs down toward the trim.
Do this next
Arrange qualified service and follow the exact model guidance.
Why this path and its safety boundary
Why it matters: Check indoor humidity and room airflow; do not treat surface condensation as proof of a failed trim seal.
-
PATH 02Next step
What you see
Rain starts at the moving sash edge and the lock, alignment, or weatherstrip is damaged or uneven.
Do this next
Arrange qualified service and follow the exact model guidance.
Why this path and its safety boundary
Why it matters: Use exact window instructions for closure, alignment, and seal identification, then verify operation and monitor the trim.
-
PATH 03Next step
What you see
Water collects in the track, a weep is blocked, and the trim dries after a safe accessible cleaning.
Do this next
Arrange qualified service and follow the exact model guidance.
Why this path and its safety boundary
Why it matters: Keep the drainage path clear and never caulk the track or weep openings.
-
PATH 04Next step
What you see
A dry, simple trim inspection confirms an air gap behind the jamb without an active water path.
Do this next
Arrange qualified service and follow the exact model guidance.
Why this path and its safety boundary
Why it matters: Use compatible air-sealing materials without deflecting the frame; use professional help for older finishes or complex trim.
-
PATH 05Next step
What you see
Water reaches trim or wall despite sound sash closure and clear drainage, or enters from above, the side, or behind the jamb.
Do this next
Arrange qualified service and follow the exact model guidance.
Why this path and its safety boundary
Why it matters: Stop cosmetic patching and arrange a qualified water-management or building-envelope assessment.
-
PATH 06Next step
What you see
Water reaches electrical equipment, the frame or glass is unsafe, or work requires lead-disturbing trim removal or exterior access.
Do this next
Arrange qualified service and follow the exact model guidance.
Why this path and its safety boundary
Why it matters: Stop DIY work, protect or disconnect affected equipment only when safe, and obtain qualified assistance.
Helpful context
Understand the symptom
The trim may only be where the leak becomes visible
Water can travel behind casing before staining the lower corner or drywall. During rain, note where the first moisture appears and whether the trail starts at the sash, sill, head, side jamb, or wall. Surface condensation on cool glass is a different problem from rainwater entering the assembly, so dry the area and record humidity and weather before opening anything.
Treat trim removal as an invasive repair
Pulling trim can expose insulation, nails, sharp edges, old paint, and a gap between the jamb and rough opening. ENERGY STAR identifies this as a moderate-to-difficult project and warns about lead paint in older homes. Do not pry trim just to look for a leak if the frame is wet, the finish may contain lead, or the water-management path is not understood.
Safety boundary
Stop conditions
- Water reaches outlets, wiring, or other electrical equipment.
- Glass is cracked, loose, shattered, fogged between panes, or has sharp exposed edges.
- The sash or frame moves, cannot latch, is rotten, or could fall during operation.
- The home may contain lead paint, or trim removal would disturb old paint, insulation, or concealed materials.
- A repair would block track channels, weep holes, sill drainage, flashing, or another water-management path.
- The work requires exterior access, a ladder, sash or glass removal, concealed wall repair, or pressure washing.
Only after diagnosis
Potential parts
- window sash weatherstrip or gasket
Consider only when rain enters through the moving sash joint and the existing seal is damaged or missing.
Match the exact series, operating type, profile, and orientation; verify the sash still closes and locks evenly. - window glazing gasket or insulated glass unit
Consider only when a professional confirms moisture between panes, a failed glazing seal, or a damaged glass edge.
Verify exact dimensions and safe installation through qualified glazing service; do not drill or pry the pane. - drip cap, sill flashing, or compatible sealant
Consider only after a qualified assessment identifies a failed exterior water-management or installation component.
Match the window, cladding, and water-resistive-barrier instructions and preserve all designed drainage openings. - compatible backer rod or low-expansion window sealant
Consider only for a confirmed dry, accessible jamb-to-wall air gap with no active water path and no unsafe old-paint or insulation exposure.
Use only materials and placement allowed by the applicable installation guidance; do not deflect the frame or block drainage.
When checks do not resolve it
Need a professional?
Water remains inside the trim after safe closure, weatherstrip, track, and weep checks., Water enters the wall, trim is soft or stained, or the frame moves or cannot latch., Moisture is between panes or the glass or glazing edge is damaged., The home may contain lead paint or the leak is behind complex trim or concealed flashing., The repair requires sash or glass removal, exterior access, rough-opening work, or building-envelope diagnosis.
Common questions
FAQ
Why is water showing inside my window trim?
The trim may be where water becomes visible after entering at the sash, sill, head flashing, frame, or rough opening. Dry the area and identify the first wet point during rain before applying caulk.
Can I remove the trim to find the leak?
Only if the finish, trim complexity, access, and water path are understood. Trim removal can be a moderate-to-difficult project and may disturb lead paint, insulation, flashing, or the frame; use a qualified professional when uncertain.
Should I caulk the inside trim of a leaking window?
Not until the entry path is identified. Caulk may be appropriate for a compatible stationary air gap, but it can hide active water or block a drainage route when used at the sill, track, or weeps.
Could condensation be mistaken for a trim leak?
Yes. Moisture on cold interior glass can run down into the trim without rain entering the window. Moisture between panes is a different glazing-seal problem; compare the symptom with weather and indoor humidity.
When should I call a professional for water inside window trim?
Call when water reaches the wall or electricity, the leak persists with clear drainage and a correctly closing sash, glass or frame is damaged, the home may contain lead paint, or the repair requires trim, sash, glass, flashing, or rough-opening access.
Read the exact guide
Official sources
- Window and Patio Door Maintenance TipsAndersen Windows and Doors · Official manufacturer maintenance guidance used to distinguish condensation from rain leaks and to support checks of weatherstrip, locks, sealant, and drainage.
- Window install mistakesAndersen Windows and Doors · Official manufacturer installation guidance used for tracing exterior and rough-opening water paths; exact window details vary.
- Winterize Windows to Keep the Cold at BayPella · Official manufacturer guidance used for accessible sash, seal, and lock checks; it is not a substitute for the assigned window's instructions.
- Residential Windows, Doors, & SkylightsENERGY STAR / U.S. Environmental Protection Agency · Government efficiency guidance used for condensation context, installation boundaries, and air and water leak location.
- Sealing Behind Window & Door Trim ProjectENERGY STAR / U.S. Environmental Protection Agency · Government guidance used for trim inspection and air-sealing boundaries; it does not establish a specific window's flashing or glazing design.
Community feedback
Share a repair observation
Share a plain-text repair observation. Accepted observations are published automatically; this page may take a moment to update.