
On this page
Start here
Quick answer
When a window sticks, first determine whether the sash is rubbing the frame, the track is dirty, the lock or operator is misaligned, or the wood or surrounding frame has swollen, shifted, or been painted shut. Confirm that the unit is designed to open, then inspect the frame and tracks for dirt, paint, debris, moisture swelling, or a visibly uneven reveal. Clean accessible tracks with a mild solution, dry them completely, and use only the dry lubricant or product-specific care method recommended for that window. Check that the sash sits squarely and that the lock operates without force. A broken balancer, cracked glass, rotten or distorted frame, sash that slams or will not stay open, or a window needed for emergency egress is a stop-and-service condition. Do not pry against glass, force a lock, remove a sash without support, use oily lubricant that attracts grit, or sand or cut the frame as a guess.
Work through in order
Diagnostic checks
Use only checks that match the exact appliance or system and its official guide.
-
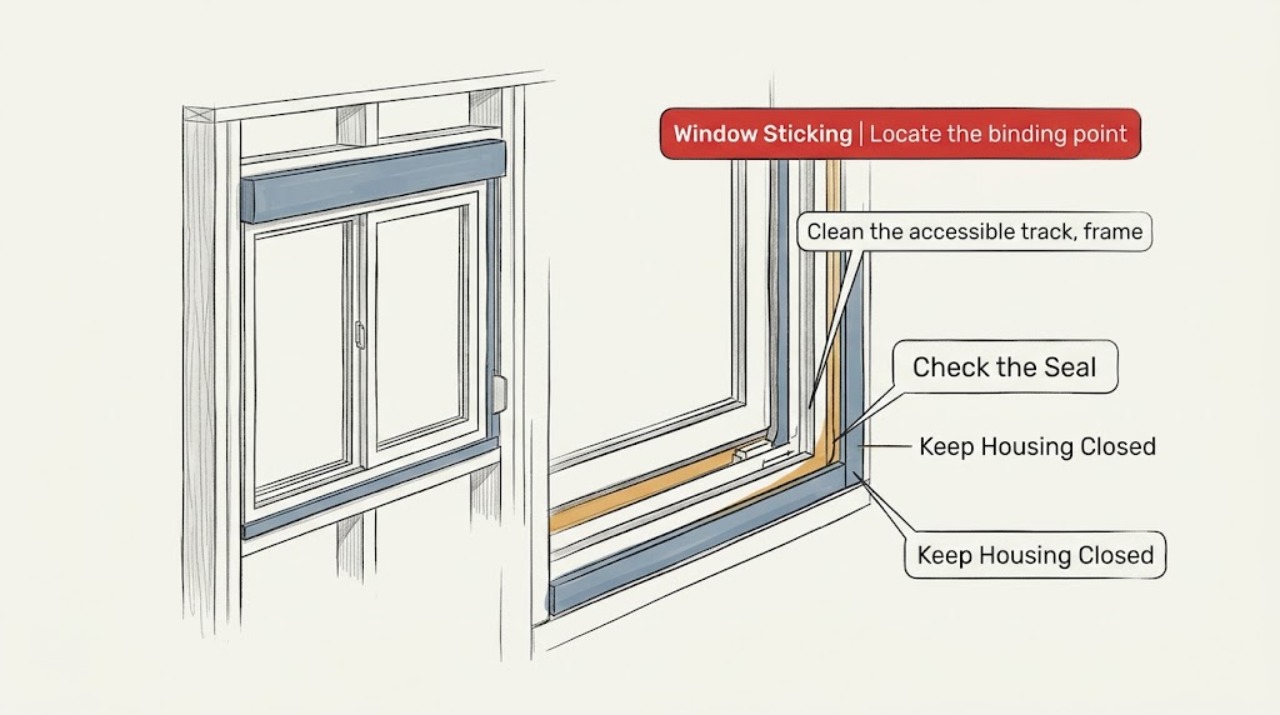
Locate the binding point and confirm the window should open
Try the sash, crank, or hinge only with normal hand pressure. Confirm that the unit is an operable window rather than a fixed pane or a panel intentionally secured for energy or security. Note whether the resistance occurs at the sill, head, one jamb, the track, the lock, or the operator, and compare the visible gap at the top and bottom of the sash.
Expected result: The window is fixed or intentionally sealed; the sash is crooked in the frame; one edge rubs; the entire track drags; the lock or crank binds; or the frame appears square and the obstruction is not visible.
Next step: Continue to the track and frame-cleaning check for visible debris or paint. If the sash is crooked, the hardware binds, or the window is needed for emergency egress, stop before forcing it and arrange service.
Stop if: Stop for cracked glass, a sash that could fall, a window above unsafe height, a lock that requires force, or any opening that cannot be kept safe while it is being inspected.
Why this matters
Why: A fixed unit is not a sticking repair. A crooked reveal suggests frame, sash, glide, or balance alignment; uniform track drag suggests dirt or finish buildup; lock or crank resistance points to hardware alignment. An unseen obstruction or frame movement needs product-specific diagnosis rather than more force.
-
Clean the accessible track, frame, and weatherstrip
With the window supported in its current safe position, remove loose dirt and debris from the accessible track and frame using a soft cloth or vacuum brush. If the product care instructions permit, use a mild cleaning solution on deposits and dry the surfaces completely. Inspect the weatherstrip or seal for dirt, paint, cracking, flattening, or a section pulled from its channel; do not remove it as a test.
Expected result: Dirt, pollen, paint, or residue is restricting movement; the weatherstrip is contaminated but intact; the weatherstrip is damaged or displaced; or the track and seal are clean with no visible obstruction.
Next step: After the track is dry, test movement gently. Use only the product's specified lubricant method if the manufacturer permits it. If the window still sticks, continue to the frame and sash alignment check rather than using more force.
Stop if: Do not scrape aggressively against glass, use abrasive chemicals, sand the frame, remove the weatherstrip, or operate the window if cleaning has left the track wet and slippery.
Why this matters
Why: Pella links track debris and excess paint to difficult operation, while Andersen notes that weatherstripping can lose its sealing ability through exposure, wear, and compression. Cleaning can restore movement when contamination is the cause; a damaged seal or clean track with continued binding points to alignment or hardware.
-
Check for swelling, paint seal, or frame distortion
Inspect the frame and sash for swollen wood, peeling or bridging paint, loose trim, a gap that changes from top to bottom, or contact marks where the sash rubs. Compare operation on a dry day with the condition after wet weather if the symptom is seasonal. Do not cut through paint, apply improvised heat, or remove trim unless the exact product instructions explicitly cover that procedure.
Expected result: The sash is tight only in wet or humid conditions; paint visibly bridges the sash and stop; the frame or sill is swollen, soft, or distorted; the reveal is uneven; or no seasonal or frame defect is visible.
Next step: For a minor accessible paint film, follow the exact product guidance or have a professional release it without damaging the sash or glass. For swelling, softness, distortion, or recurring seasonal binding, arrange a window or building-envelope assessment.
Stop if: Stop for soft or rotten wood, mold, water intrusion, cracked glass, a frame that is pulling away from the wall, or any need to cut into the frame or remove trim.
Why this matters
Why: Pella identifies wet-weather swelling and excess paint as causes of a sticking wood window. An uneven reveal or soft, distorted frame can indicate movement, settling, water damage, or incorrect installation; those conditions are not safely corrected by lubricant alone.
-
Check sash alignment, hardware, and balance only within the product guide
If the window is a gliding or double-hung design, compare the sash gap at the top and bottom and check whether the sash sits squarely in the frame. Inspect visible screws, lock receivers, hinges, or glides for looseness only if the product manual identifies them as user-accessible. Never remove a sash unless the manual provides the procedure and another person can support it safely.
Expected result: The sash is visibly crooked; a lock or operator is loose or misaligned; the sash slams or will not stay open; the balance or glide appears displaced; or the hardware and reveal are normal.
Next step: Perform only the small adjustment explicitly documented for the exact window model, then recheck operation. If the sash remains crooked, slams, will not stay open, or the hardware is damaged, stop and arrange service.
Stop if: Do not loosen structural fasteners, remove a heavy sash alone, bypass a lock, force a crank, or leave a window opening unattended where a fall hazard exists.
Why this matters
Why: Andersen's model-specific guide uses the sash reveal to identify a crooked gliding sash and warns that the sash must be supported during removal. Andersen also identifies a broken balancer, lock, or operator as repairable causes of difficult operation. A normal reveal with continuing drag suggests a product-specific track, frame, or hardware diagnosis.
-
Decide whether the frame needs professional repair
After one careful cleaning and any exact-model adjustment permitted by the product guide, test the window through its normal travel without force. Record whether it moves smoothly, still binds at the same frame point, will not stay open, or creates a gap that affects weather sealing or emergency egress.
Expected result: The window operates normally; resistance remains at one frame point; the sash slams or falls; the lock or operator still will not engage; or the frame, glass, wall, or trim shows damage.
Next step: If the symptom persists, keep the window in a safe position and arrange a qualified window repair or installation assessment. Provide the window type, photos of the frame and reveal, when the sticking began, and the cleaning or adjustment already attempted.
Stop if: Stop immediately for a falling sash, cracked glass, an unsafe opening, severe frame distortion, water damage, or any need to pry, dismantle, or remove the unit.
Why this matters
Why: A stable operation after cleaning supports contamination as the immediate cause. Persistent binding, loss of balance, lock failure, or frame and glass damage indicates a repair-level problem. A window needed as an emergency exit must remain operable and should not be left compromised.
Use your observations
Decision map
Find the observation that best matches what you see, then follow the next safe action.
-
PATH 01Safety boundary
What you see
The window is fixed or intentionally secured and is not designed for normal opening.
Do this next
Do not force it; confirm the intended ventilation or security design and arrange service only if the unit was supposed to be operable.
Why this path and its safety boundary
Safety stop: True
-
PATH 02Safety boundary
What you see
Dirt, paint, or residue is visible in the track or on the weatherstrip and the frame is otherwise sound.
Do this next
Clean accessible surfaces with the product-approved method, dry them completely, and use only the specified dry lubricant or care method before a gentle retest.
Why this path and its safety boundary
Safety stop: Continue with swelling, frame distortion, and alignment checks.
-
PATH 03Safety boundary
What you see
The window sticks only after wet or humid weather, or the frame or sill is swollen, soft, or distorted.
Do this next
Do not force, sand, or heat the frame; document the seasonal pattern and arrange a window or building-envelope assessment for moisture, frame, and installation conditions.
Why this path and its safety boundary
Safety stop: True
-
PATH 04Safety boundary
What you see
The sash is crooked, the reveal is uneven, or the lock, glide, operator, or balance is visibly displaced.
Do this next
Use only the exact-model adjustment procedure and support requirements; persistent misalignment, a slamming sash, or damaged hardware needs service.
Why this path and its safety boundary
Safety stop: Continue with one normal gentle operation test after cleaning.
-
PATH 05Safety boundary
What you see
The window still sticks after the permitted cleaning or exact-model adjustment, or it is needed for emergency egress.
Do this next
Stop forcing it and arrange qualified window service with photos and the observed frame, sash, and hardware behavior.
Why this path and its safety boundary
Safety stop: True
Helpful context
Understand the symptom
Identify where the frame is binding
A sticking window is a symptom, not a part diagnosis. Move the sash only as far as it goes without force and note whether the resistance is at the sill, head, one side jamb, track, lock, crank, or hinge. Compare the gap between sash and frame at the top and bottom. A narrow or crooked reveal points toward alignment or frame movement; uniform drag over a dirty track points toward cleaning; seasonal swelling or a paint film needs a different response.
Start with cleaning and the correct lubricant
Dirt, pollen, old cleaner, and paint can restrict a track or weatherstrip. Clean accessible surfaces with the product's care instructions, remove loose debris, and dry the track before testing. Pella warns that oily lubricants attract dust and grime on the products covered by its guide; Andersen's care guidance recommends a light oil or dry silicone spray only where the product instructions call for lubrication. A lubricant cannot correct a warped frame, loose sash, or broken balance.
Treat frame damage and emergency access as service issues
A window that is consistently difficult to open or will not stay open can involve a warped frame, broken balancer, damaged lock, or operator. Andersen also points out that difficult operation can be a safety concern when a window is needed for fire egress. Do not make the opening worse by prying on glass, cutting the frame, or removing a sash without support; document the condition and arrange a window professional when the simple external checks do not restore smooth movement.
Safety boundary
Stop conditions
- Stop for cracked glass, a falling or unsupported sash, a frame pulling away from the wall, soft or rotten material, mold, or water damage.
- Do not pry against glass, force locks or operators, or cut, sand, or heat the frame as a generic fix.
- Do not remove a sash, balance, glide, or weatherstrip unless the exact product instructions cover it and safe support is available.
- Do not use oily lubricant that attracts dirt or apply lubricant where the product instructions do not permit it.
- Do not leave an emergency-egress window stuck, unsecured, or unattended while open.
Only after diagnosis
Potential parts
- window track or glide component
Consider this class only when the exact window design has a damaged or worn track or glide confirmed after cleaning and a qualified diagnosis of the binding point.
Identify the exact manufacturer, series, and sash design before ordering; do not remove a sash or substitute a generic glide as a test. - window balance or sash support
Consider this class only when a sash slams, will not stay open, or a balance or support fault is confirmed by the product guide or qualified service.
Balance systems vary by window and require safe sash support; do not attempt removal without the exact procedure and assistance. - window lock or operator
Consider this class only when the sash is aligned but the lock, crank, or operator remains damaged or misaligned after permitted external checks.
Confirm the exact window type, handing, and manufacturer fit information; never force or bypass the locking hardware. - window weatherstrip or frame seal
Consider this class only when the seal is visibly missing, torn, compressed, or displaced and the window's operation problem is linked to that condition.
Match the exact profile and product instructions; a seal replacement cannot correct a warped or moisture-damaged frame.
When checks do not resolve it
Need a professional?
Arrange qualified window repair or building-envelope service when the frame is swollen, soft, warped, or pulling away; the sash is crooked, slams, or will not stay open; the lock, crank, balance, glide, or operator is damaged; cleaning and an exact-model adjustment do not restore smooth operation; the window is needed for emergency egress; or glass, trim, wall, or seal damage is visible. Stop immediately for cracked glass, a falling sash, mold or water damage, unsafe height, or any need to pry, cut, sand, heat, remove trim, or remove the sash without proper support.
Common questions
FAQ
Why is my window sticking?
Common causes include dirt or debris in the track, wet-weather swelling, excess paint, a sash that was not repositioned correctly, frame distortion, or a misaligned lock, glide, balance, or operator. Find the exact binding point before choosing a repair.
How can I clean a window that is hard to open?
Remove loose debris from the accessible track and frame, use only the product-approved mild cleaning method, and dry the track completely. Use lubricant only where the product instructions permit it; do not use oily lubricant that attracts dirt or force the sash.
Can humidity or wet weather make a window stick?
Yes. Pella identifies wet-weather swelling as one cause of a sticking wood window. If the frame or sill is soft, swollen, distorted, or repeatedly binds after wet weather, arrange an assessment rather than sanding or heating the frame as a guess.
Should I adjust the window frame or remove the sash?
Only follow an exact-model procedure that identifies the adjustment and safe support method. A product-specific Andersen guide warns that a sash must be supported during removal; a crooked frame, damaged balance, or persistent binding should be handled by qualified service.
When should I call a professional for a sticking window?
Call when the window still binds after permitted cleaning, the sash is crooked, slams, or will not stay open, the lock or operator is damaged, the frame is warped or rotten, glass is cracked, or the window is needed for emergency egress. Do not pry against glass or dismantle the unit as a test.
Read the exact guide
Official sources
- Window and Patio Door Maintenance TipsAndersen Windows · Andersen maintenance guidance covers weatherstrip wear and compression, closure and lock checks, and visible sealant inspection; used here for general external inspection with product-specific caveats.
- 6 signs it's time to replace your windowsAndersen Windows · Andersen guidance explains that consistently sticking windows can reflect warped or broken components and identifies weatherstripping, sash, balancer, lock, and operator issues as possible repair paths.
- The Cost of a Bad InstallationPella · Pella professional guidance explains that insufficient support, out-of-square frames, and sealant or installation errors can affect operation, alignment, and long-term performance.
- Adjust Sash on Primed Gliding Windows, 1940 to 1971Andersen Windows · Andersen's product-specific guide checks sash reveal and glides and includes safety guidance for supporting a sash during removal; the adjustment is not generalized to other window designs.
- Why Do Windows Crack? 3 Types of Window Cracks ExplainedPella · Pella homeowner guidance identifies fixed versus operable windows, track debris, wet-weather swelling, excess paint, and model-specific cleaning or adjustment considerations for hard-to-open windows.
- How to: Clean the Outside Frame of Your WindowAndersen Windows · Andersen care guidance covers mild cleaning of frame surfaces and product-appropriate lubrication, with a warning against harsh cleaners and a model-specific approach.
Community feedback
Share a repair observation
Share a plain-text repair observation. Accepted observations are published automatically; this page may take a moment to update.