
On this page
Start here
Quick answer
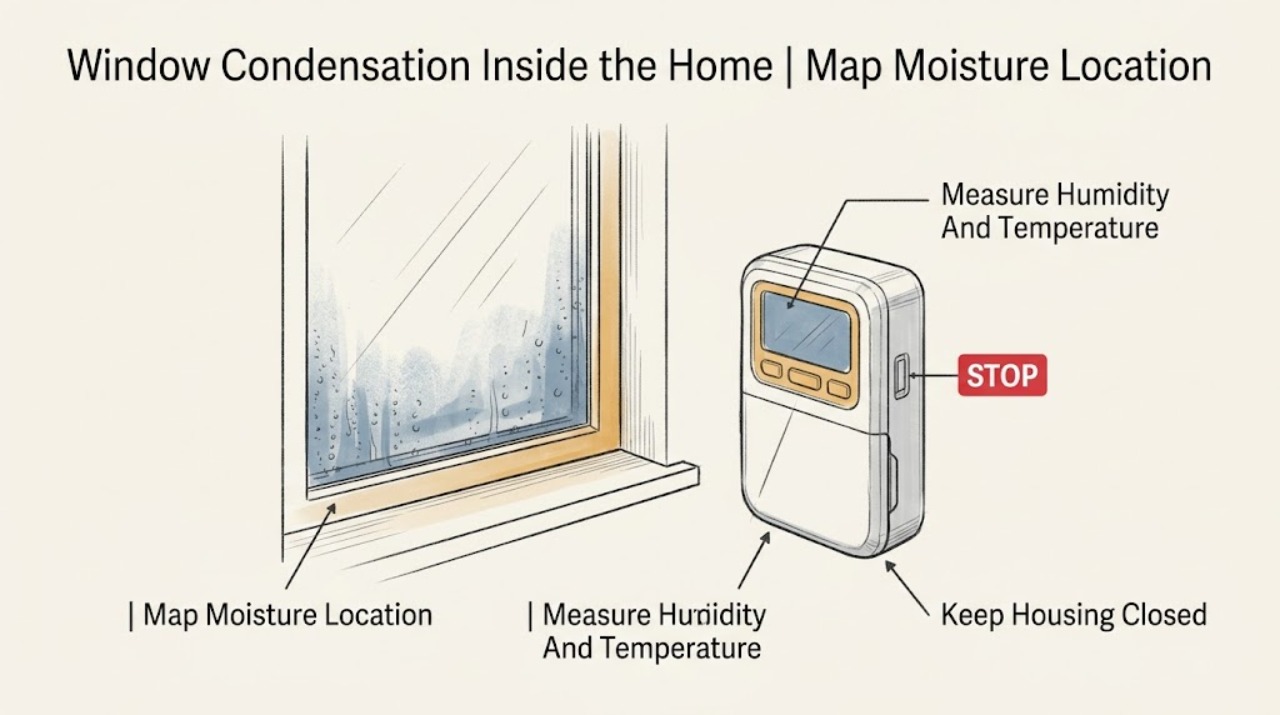
Interior window condensation forms when humid indoor air meets a glass or frame surface that is below the air's dew point. First determine whether the moisture is on the room side, confined to the frame and sill, between insulating-glass panes, or arriving after rain. Measure indoor humidity and temperature, run kitchen and bathroom exhaust to the outside, vent the dryer outside, keep blinds and curtains from blocking air movement, and inspect only visible frame joints and drainage paths. Condensation limited to the frame with normal room humidity can indicate a cold bridge or air leak; fog sealed between panes suggests an insulating-glass seal problem. Stop and arrange qualified help for mold, soft or rotting trim, water entering the wall, disturbed pre-1978 paint, high work, or water near electrical equipment.
Before you begin
Safety first
- This article supports low-risk observation, humidity and airflow changes, and ground-level visual checks only. Do not remove trim or glass, drill, climb, disturb suspect lead paint, open walls, seal drainage openings, or touch wet electrical equipment.
Work through in order
Diagnostic checks
Use only checks that match the exact appliance or system and its official guide.
-
Check 1
From a safe standing position, wipe one small area and identify where moisture returns: on the room-side glass, only at the frame or sill, between panes where it cannot be wiped, or on trim and wall surfaces; record the room, weather, time, and whether rain preceded it.
Expected result: Moisture is removable from the room-side glass, returns mainly at the frame or corners, remains trapped between panes, or appears on the frame and wall after rain rather than during humid indoor conditions.
Next step: Photograph the first wet point and follow the matching humidity, frame, glazing, or rain-leak branch; do not add sealant before the water path is understood.
Stop if: Stop if the wall is wet, trim is soft or rotting, mold is visible, water reaches electrical equipment, or the observation would require removing trim or climbing.
Why this matters
Why: Room-side droplets support a humidity and cold-surface mechanism. A frame-only pattern raises a thermal-bridge or air-leak question. Between-pane fogging points to the insulating-glass seal. Rain-linked wall or trim wetting keeps an exterior water path in scope.
-
Check 2
Place a hygrometer near the affected window and another in the room if available, and record indoor temperature and relative humidity during the episode without placing instruments on a wet or energized surface.
Expected result: Humidity is elevated during showers, cooking, drying clothes, or sleeping; readings are similar across the room; or the affected frame is wet even when room humidity is not unusually high.
Next step: Repeat the observation on a dry day and after moisture-control changes; use the exact window and local building guidance for target humidity, and arrange an assessment if a localized frame pattern persists.
Stop if: Do not use a wet electrical outlet, install wiring, or open a wall to place a sensor; stop if moisture is near electrical equipment.
Why this matters
Why: A humidity rise supports moisture-load reduction as the first intervention. Similar room readings with a localized cold frame or edge support a surface-temperature, thermal-bridge, or air-sealing investigation rather than simply adding more ventilation.
-
Check 3
Run the bathroom and kitchen exhaust fans while moisture is produced and afterward, confirm the clothes dryer exhausts outdoors, and use a suitable dehumidifier or reduce a built-in humidifier only according to its instructions; do not vent moist air into the room or attic.
Expected result: Room humidity and recurring room-side droplets decrease after moisture sources are controlled, or condensation remains concentrated at one frame or corner despite a stable reading.
Next step: Keep a short log through the next cold or humid period, then move to airflow and visible frame checks if the same window remains wet.
Stop if: Stop using a fan, dehumidifier, or dryer if its cord, plug, housing, or nearby outlet is wet, hot, damaged, or repeatedly trips protection; obtain qualified electrical help.
Why this matters
Why: Improvement after ventilation or dehumidification supports excess indoor moisture as a major contributor. A persistent localized frame symptom means humidity control alone has not explained the cold surface or possible opening leak.
-
Check 4
Open blinds or curtains enough to allow room air to reach the pane, check that furniture or a covering is not blocking the window-side airflow, and note whether a nearby supply register or fan can circulate air without unsafe modification.
Expected result: The glass or frame dries more evenly when airflow is restored, or the affected edge remains substantially colder and wetter than comparable windows in the same room.
Next step: Keep the window treatment from trapping a pocket of cold air and compare the pattern with another window; request a window or building-envelope inspection if the frame remains wet.
Stop if: Do not block a required heater clearance, add improvised heaters near curtains, or touch a fan or appliance with wet hands.
Why this matters
Why: Improvement supports stagnant air at the cold surface as a contributor. A persistent edge-only difference suggests a frame thermal bridge, installation gap, or localized air leak that requires assessment.
-
Check 5
With the area dry, inspect only the visible interior frame, sill, corners, trim, and adjacent wall for daylight, a draft, open joint, staining, peeling paint, soft wood, mold, or a path from the frame toward the wall; do not remove trim or probe concealed layers.
Expected result: The frame has a visible air gap or stain, the sill is soft or discolored, mold or peeling paint is present, or all accessible surfaces are sound while the frame still condenses.
Next step: Photograph the detail and ask a qualified window or building-envelope professional to identify the failed layer; only apply a compatible surface sealant when the joint and drainage design are confirmed and the surface is dry.
Stop if: Stop at mold, soft or rotting wood, disturbed pre-1978 paint, suspected lead paint, water entering the wall, or any need to open the wall or work at height.
Why this matters
Why: A visible gap or localized stain supports an air-leak or water-intrusion investigation. Soft, moldy, or peeling material means moisture damage may extend beyond the surface. Sound visible trim does not rule out concealed insulation or installation defects.
-
Check 6
Compare the affected frame edge and glass with another window in the same room, and use a non-contact surface thermometer only as directed by its manufacturer; document whether moisture is confined to the frame, spread across the pane, or visible between panes.
Expected result: Only one frame edge is colder or wet, the whole room-side pane is wet during high humidity, or haze stays inside the sealed glass cavity and cannot be wiped away.
Next step: Use humidity control for whole-pane room-side condensation, request a frame and installation assessment for a persistent edge pattern, and contact the manufacturer or glazier for between-pane fogging.
Stop if: Do not drill, puncture, disassemble, or remove glass stops to release between-pane moisture; stop if the pane is cracked or unstable.
Why this matters
Why: A one-edge pattern is consistent with a localized frame or opening condition; whole-pane room-side droplets track humidity and cold glass; between-pane haze suggests insulating-glass seal failure rather than room humidity.
-
Check 7
Only in good weather and from ground level, inspect the exterior sill, frame corners, visible weep openings, trim, and cladding above the window for blocked openings, damaged joints, staining, or a rain path; clear only loose visible debris without tools entering the frame.
Expected result: Water or staining follows rain, a visible weep path is blocked, exterior trim is damaged, or no exterior defect is visible while the interior frame still becomes wet.
Next step: Keep drainage openings open, photograph the exterior detail, and arrange a qualified window or building-envelope inspection when leakage persists; do not seal over a weep path.
Stop if: Do not use a ladder, remove cladding, drill the frame, seal weep openings, or work near overhead electrical lines; arrange qualified help for high or inaccessible windows.
Why this matters
Why: A rain-linked pattern or blocked drainage opening raises an exterior water-management issue. No visible defect does not clear concealed flashing, rough-opening sealing, or a frame thermal bridge.
-
Check 8
After one controlled period with indoor moisture sources managed and airflow restored, repeat the same humidity, location, and weather observations and keep the window dry enough to see whether damage returns.
Expected result: Condensation stops or is greatly reduced, returns only when indoor humidity rises, remains limited to the frame, appears between panes, or returns with rain and wall staining.
Next step: Keep the observation log and arrange the matching window, glazing, building-envelope, mold-remediation, or electrical service described in the branches; do not keep testing a visibly damaged opening.
Stop if: Stop immediately for mold growth, rot, water inside the wall, lead-paint disturbance, a high-work hazard, or water near electrical equipment.
Why this matters
Why: A repeatable response to humidity supports a moisture-load cause. A frame-only, between-pane, or rain-linked recurrence needs a different professional path and should not be treated as a generic condensation problem.
Use your observations
Decision map
Find the observation that best matches what you see, then follow the next safe action.
-
PATH 01Safety boundary
What you see
Droplets wipe from the room-side glass and appear across one or more windows when indoor humidity rises.
Do this next
Control shower, cooking, laundry, and humidifier moisture; run exhaust outdoors, maintain airflow at the glass, and recheck with a hygrometer.
Why this path and its safety boundary
Why it matters: Humid indoor air is reaching a surface below its dew point; this does not by itself show that the window glass has failed.
Safety stop: Use qualified help if fans, plugs, or outlets are wet or damaged, or if mold or wall damage is visible.
-
PATH 02Safety boundary
What you see
Humidity is stable but condensation repeatedly forms at the inside frame, sill, corner, or trim of one window.
Do this next
Document the edge temperature and visible gap or staining, then arrange a qualified window or building-envelope assessment of the frame and opening; do not rely on a cosmetic bead of caulk alone.
Why this path and its safety boundary
Why it matters: The localized surface may be colder because of a frame thermal bridge, an air leak, insulation or installation gap, or an adjacent water path.
Safety stop: Stop for soft or rotting wood, mold, water entering the wall, peeling or suspect lead paint, or any need for concealed or high work.
-
PATH 03Safety boundary
What you see
The haze or moisture lies between the panes and cannot be wiped from either room-side or exterior glass.
Do this next
Record the window identification and contact the manufacturer, installer, or qualified glazier about evaluation, warranty, or glazing-unit replacement.
Why this path and its safety boundary
Why it matters: This is different from ordinary room-side condensation and may indicate an insulating-glass seal or glazing-unit problem.
Safety stop: Do not drill the glass, remove stops, inject chemicals, or dismantle the sash to dry the cavity.
-
PATH 04Safety boundary
What you see
Water or staining appears at the frame, sill, trim, or wall after rain, especially when room humidity is normal.
Do this next
Keep the area dry, photograph the first wet point and exterior conditions, keep visible drainage openings clear, and request a qualified opening and wall assessment.
Why this path and its safety boundary
Why it matters: The symptom may be a water-management, flashing, drainage, or exterior-joint problem rather than condensation alone.
Safety stop: Do not seal over weep openings, remove trim or cladding, climb, or continue if the wall is wet, wood is soft, mold is present, or water is near electrical equipment.
-
PATH 05Safety boundary
What you see
Mold is visible, trim or framing is soft or rotting, paint is peeling or may predate 1978, or the repair requires a ladder or opening the wall.
Do this next
Stop disturbance, document the condition from a safe position, and arrange qualified window, building-envelope, moisture-remediation, or lead-safe help as applicable.
Why this path and its safety boundary
Why it matters: The work may involve moisture damage, lead-safe practices, concealed construction, or fall exposure beyond a low-risk homeowner check.
Safety stop: Do not sand, scrape, cut, demolish, or climb to continue the diagnosis.
-
PATH 06Safety boundary
What you see
Water is near an outlet, wiring, powered fan, heater, or other electrical equipment, or a connected device is hot, damaged, or tripping protection.
Do this next
Keep clear and, only if it can be done without touching water or damaged equipment, isolate the affected circuit from a dry safe position; arrange qualified electrical help.
Why this path and its safety boundary
Why it matters: Electrical shock or fire risk takes priority over condensation diagnosis.
Safety stop: Do not touch wet electrical equipment, use an extension lead, reset protection repeatedly, or work inside the wall.
Helpful context
Understand the symptom
Start by locating the moisture
A damp room-side pane is not the same symptom as fog trapped between panes or water that appears only after rain. Use a dry tissue and a photo to record the first wet surface, and note the room, weather, time of day, and whether the frame, sill, trim, or adjacent wall is affected. That pattern determines whether to start with indoor moisture control, a frame and installation assessment, or a glazing professional.
Humidity and airflow change the dew-point risk
Condensation is more likely when indoor air carries more moisture or when a cold window surface is isolated from room air. Use a hygrometer to track room conditions, run bathroom and kitchen exhaust while moisture is produced and afterward, confirm the dryer vents outdoors, and open blinds or curtains enough for air to reach the glass. Follow local building and manufacturer guidance for acceptable humidity rather than treating one number as universal.
A frame-only pattern needs a different inspection
If the glass stays clear but the inside edge of the frame, sill, or nearby trim repeatedly becomes wet while room humidity is reasonable, the coldest surface may be the frame or the joint between the window and its opening. Visible drafts, staining, soft trim, or a gap can support an air-sealing or water-intrusion investigation, but surface caulk cannot prove or repair concealed flashing, insulation, or framing damage. Do not cover a drainage opening simply to hide the symptom.
Separate condensation from rain leakage and sealed-glass fogging
Room-side droplets that track indoor humidity usually point to a cold surface and moisture load. Water at a frame or sill after rain, especially with staining in the wall or trim, needs a water-management assessment. A cloudy appearance that cannot be wiped from either side and lies between panes is not ordinary room-side condensation; document it and ask the window manufacturer or a qualified glazier about the insulating-glass unit and warranty.
Safety boundary
Stop conditions
- Stop and arrange qualified moisture or building-envelope help for visible mold, soft or rotting trim, persistent wall wetting, or water entering the wall cavity.
- Do not sand, scrape, cut, or disturb peeling or suspect pre-1978 paint; use lead-safe professionals when that work is necessary.
- Do not climb, remove cladding or trim, open the wall, drill the frame or glass, or work near overhead electrical lines to continue diagnosis.
- Keep visible window drainage openings clear and do not seal weep paths before the water-management design is understood.
- Do not touch wet electrical equipment or use a wet outlet, fan, dehumidifier, heater, or cord; isolate power only from a dry safe position and call qualified electrical help.
- Do not keep testing a cracked, unstable, or damaged pane, and do not try to drill or chemically dry moisture trapped between insulating-glass panes.
Only after diagnosis
Potential parts
- compatible window or frame sealant
Consider this category only after a qualified assessment confirms a visible, accessible joint is the air or water path and the sealant will not block designed drainage.
Confirm the exact frame material, finish, joint location, manufacturer instructions, and drainage design before applying any sealant. - insulating glass replacement unit
Consider this category only when moisture is confirmed between panes and the manufacturer or glazier identifies a failed insulating-glass unit.
A glazier must verify exact dimensions, glazing thickness, spacer, coating, safety glass requirements, and frame compatibility. - window frame or opening insulation
Consider this category only when inspection confirms a frame-to-opening thermal bridge or air-sealing defect rather than ordinary high indoor humidity.
Confirm the window system and manufacturer-approved installation method; do not inject material into a concealed cavity based only on condensation.
When checks do not resolve it
Need a professional?
Arrange a qualified window or building-envelope inspection when condensation remains localized to the frame after humidity and airflow corrections, water appears after rain, the frame or opening is visibly damaged, or moisture has reached trim or the wall. Contact the manufacturer or a qualified glazier for moisture between panes. Use qualified mold-remediation or lead-safe help for visible growth, rot, or disturbed pre-1978 paint, and qualified electrical service for water near electrical equipment.
Safety scope: This article supports low-risk observation, humidity and airflow changes, and ground-level visual checks only. Do not remove trim or glass, drill, climb, disturb suspect lead paint, open walls, seal drainage openings, or touch wet electrical equipment.
Have this ready
- Provide the window location and approximate age, photos of the first wet point and frame corners, room temperature and humidity readings, weather and rain history, whether moisture wipes off or is between panes, visible drafts or stains, and any mold, soft wood, peeling paint, or electrical proximity.
Common questions
FAQ
Is condensation on the inside of a window always a failed window?
No. Droplets that wipe from the room side commonly reflect humid indoor air meeting a cold surface. A pattern confined to the frame, moisture that appears after rain, or haze trapped between panes needs a separate frame, water-management, or glazing assessment.
What should I do first when several windows are wet inside?
Measure indoor humidity and temperature, run bathroom and kitchen exhaust outdoors, confirm the dryer vents outdoors, and allow air to reach the glass. Recheck the same windows after the moisture load changes, while watching for mold or wall damage.
Why is only the window frame wet when the glass is clear?
The frame edge may be the coldest surface because of a thermal bridge, air leak, installation gap, or nearby water path. Compare it with another window, document drafts or staining, and arrange a qualified opening assessment if humidity control does not change the pattern.
Can I caulk the frame or drill a fogged pane?
Do not caulk over a drainage opening or concealed water path, and do not drill insulating glass. A visible accessible joint should be sealed only after its role is confirmed; moisture between panes should be evaluated by the manufacturer or a qualified glazier.
Read the exact guide
Official sources
- Purchasing Energy-Efficient Residential Windows, Doors, and SkylightsU.S. Department of Energy · Residential window selection and installation; product ratings and installation details vary by climate and project.
- Residential Windows, Doors, & SkylightsENERGY STAR · Residential windows and openings; exact window construction and local climate affect condensation risk.
- Condensation on the Interior of Window or Patio Door GlassAndersen Windows · Andersen window and patio-door glass guidance; the physical distinction is broadly useful, but model instructions control product-specific service or warranty decisions.
Community feedback
Share a repair observation
Share a plain-text repair observation. Accepted observations are published automatically; this page may take a moment to update.