
On this page
Start here
Quick answer
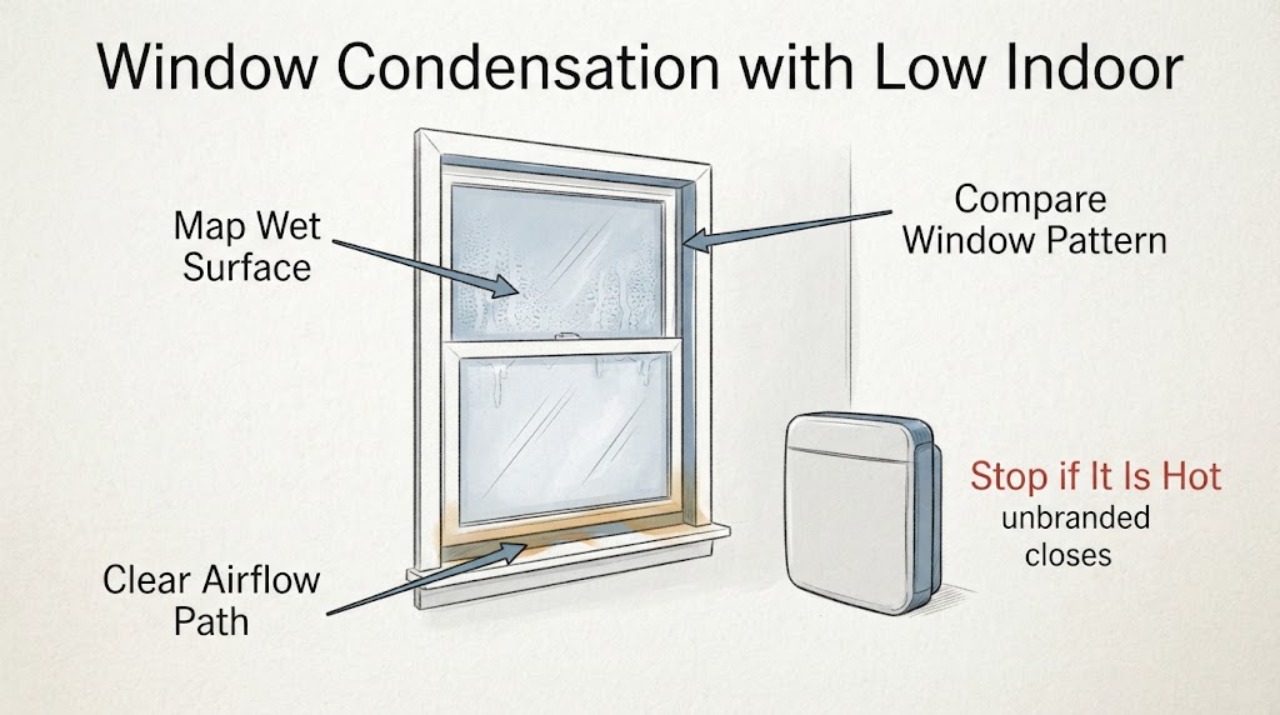
Low indoor relative humidity does not rule out condensation. Water or frost still forms when the local glass or frame surface falls below the room-air dew point, so one unusually cold pane, edge, frame, spacer, thermal bridge, or air leak can condense even when a room reading looks dry. First confirm whether the moisture is on the room side, outside, or between insulating glass panes, then compare the affected window with nearby windows and map whether the droplets are at the edge, frame, or center. Open blinds or curtains so room air can reach the glass, keep drainage paths clear, and look for a visible draft or damaged weatherstripping without dismantling the window. If moisture is between panes, the frame or sill is wet, ice is forming, glass is cracked, the window is high or unsafe to reach, or water is near electrical equipment, stop and arrange qualified window service. Do not drill the frame, puncture a sealed unit, use a ladder in unsafe conditions, or seal over drainage openings.
Before you begin
Safety first
- This article supports safe observation and ordinary-access cleaning only. Do not puncture or dismantle insulating glass, remove trim, seal weep holes, apply a heat source to ice, use harsh solvents or pressure washing, touch wet electrical equipment, or work at height without qualified equipment and training.
Work through in order
Diagnostic checks
Use only checks that match the exact appliance or system and its official guide.
-
Check 1
From a safe standing position, photograph and gently blot the visible moisture, then identify whether it is on the room side of the glass or frame, on the exterior, or visibly between insulating glass panes; note whether it is water, frost, or fog.
Expected result: Record the surface, the exact location, and whether moisture is at the center of glass, along an edge or spacer, on the frame/sill, or between panes. Note whether the sash still operates normally.
Next step: Continue with a window-to-window and treatment comparison for room-side surface moisture; arrange glazing or window service for moisture between panes, a wet wall or sill, a damaged frame, or a sash that binds.
Stop if: Stop if glass is cracked, shards are present, water is near electrical equipment, the window is unsafe to reach, the sash is frozen or unstable, or moisture is entering the wall.
Why this matters
Why: Room-side moisture means a local interior surface is below the room-air dew point; exterior moisture can have a different cause. Moisture or fogging between panes is not a wipe-away surface film and can indicate a sealed-unit condition. Edge/frame-only moisture points toward a local cold path, draft, or installation detail rather than the room-average reading alone.
-
Check 2
Compare the affected window with nearby windows under the same indoor conditions, and map whether the condensation follows one pane, one edge, one frame material, one orientation, a room corner, or all windows.
Expected result: Record whether only one window is affected, several windows on the same exposure are affected, or every window is affected; note differences in glass type, frame, shade, sill, nearby heat source, and exterior exposure.
Next step: Use the pattern to target the next visible check and give the comparison to a window professional; do not assume that replacing the hygrometer or sealing one interior surface has found the cause.
Stop if: Stop if the comparison requires removing trim, entering an attic or crawlspace, opening a wall, or working at height.
Why this matters
Why: One localized pattern supports a colder glass edge, spacer, frame, thermal bridge, installation gap, or local airflow problem. A whole-home pattern is more consistent with broad temperature, ventilation, or moisture conditions even if one room hygrometer reads low. Different orientations or surfaces can have different temperatures and dew-point margins.
-
Check 3
Open curtains or blinds and move only easily movable objects that block the window surface, then observe the same glass during comparable conditions; do not cover vents or permanently alter the treatment.
Expected result: Record whether the condensation reduces when room air can circulate over the glass, stays fixed at the same edge or frame, or is unchanged between open and closed treatments.
Next step: Keep treatments clear enough to allow air movement and continue with a perimeter and drainage inspection from ordinary access; request service if the pattern persists or the sill becomes wet.
Stop if: Do not attach film, insulation, or sealant without manufacturer approval, block the window's drainage path, or reach over furniture or a radiator in an unsafe posture.
Why this matters
Why: Improvement after opening the treatment supports trapped room air at a cold surface as a contributor. A fixed edge/frame pattern or no change suggests a local temperature, draft, thermal bridge, or glazing condition that airflow alone did not solve.
-
Check 4
From safe ordinary access, inspect the closed window's visible weatherstripping, latches, frame joints, sill, and interior and exterior weep openings for a gap, damaged seal, draft, standing water, or debris; do not remove trim or seal over a weep opening.
Expected result: Record a visible draft or damaged weatherstrip/caulk, a blocked or wet sill, clear drainage, or a condition that cannot be safely reached. Note whether the symptom changes when the sash is fully latched.
Next step: Use only the manufacturer's maintenance method for light cleaning and give photos to a qualified installer for perimeter, rough-opening, flashing, or weatherstripping repair; keep the sill dry while waiting.
Stop if: Stop for water entering the wall, damaged or loose glass, a missing frame component, a need to open the wall, pressure-washing, solvent use, or any exterior/high-window access that needs a ladder.
Why this matters
Why: A perimeter air leak can chill a local frame or admit cold air, while blocked drainage can leave water in the sill. Clear visible drainage and damaged weatherstripping can improve function, but neither observation proves that the sealed glass or rough-opening insulation is sound.
-
Check 5
With the glass dry and the room conditions recorded, observe the condensation pattern over time and compare the center of glass with the edge, spacer, frame, and nearby wall; do not drill, puncture, disassemble, or apply a heat source to the glazing.
Expected result: Record whether the center stays clear while the edge or frame repeatedly wets, whether the entire pane is cold and wet, whether fog remains between panes, or whether the adjacent wall/rough opening is colder or damp.
Next step: Provide the pattern, photos, indoor/outdoor readings, window age/type, and treatment state to a qualified window professional for glazing, frame, installation, or envelope assessment.
Stop if: Stop if the glass cracks, ice prevents safe operation, water reaches electrical equipment, mold is extensive, or confirming the cold path would require invasive or high-access work.
Why this matters
Why: Edge- or frame-only moisture is consistent with a local cold path such as a frame/spacer detail, thermal bridge, or installation air leak; this is a diagnostic direction, not proof of one failed part. Persistent haze or droplets between panes points to the insulated glass unit or its seal. A damp wall suggests an envelope or water-intrusion issue rather than surface condensation alone.
-
Check 6
After the surface, pattern, airflow, perimeter, drainage, and glazing observations, document the condition and stop ordinary troubleshooting if condensation persists despite low humidity and clear visible drainage or if any damage is present.
Expected result: Record indoor humidity and temperature at the window, outdoor conditions, exact wet surface and pattern, photos before and after opening treatments, visible draft or seal condition, between-pane fog, ice, sill/wall moisture, and whether the window operates and latches.
Next step: Arrange qualified window/glazing or building-envelope service and provide the complete record; request an assessment of the glass unit, frame/spacer, weatherstripping, rough opening, flashing, and interior air path as applicable.
Stop if: Stop immediately for cracked glass, falling ice, significant mold or water damage, water near electrical equipment, a loose sash, unsafe height, or any need to dismantle the window or open the wall.
Why this matters
Why: A repeatable localized pattern under low measured humidity indicates that the window's local surface temperature, air leakage, thermal path, glazing seal, or installation deserves professional assessment. The reading does not justify aggressive drying, sealing, or glass replacement by guesswork.
Use your observations
Decision map
Find the observation that best matches what you see, then follow the next safe action.
-
PATH 01Safety boundary
What you see
Water is on the room-side glass or frame, indoor humidity is already low, and the pattern is localized to one edge, frame, corner, or window.
Do this next
Compare the pattern with other windows, open treatments for airflow, and inspect the visible perimeter without invasive work; arrange assessment if the pattern persists.
Why this path and its safety boundary
Why it matters: A local surface can still be below the dew point because of a cold glass edge, spacer, frame, thermal bridge, or air leak; room-average humidity does not rule this out.
Safety stop: Do not puncture, remove trim, apply heat, or seal over drainage openings.
-
PATH 02Safety boundary
What you see
Condensation is concentrated behind closed curtains or blinds and reduces when the glass is exposed to room air.
Do this next
Keep the treatment arranged to allow airflow over the pane and monitor the same window under comparable weather; continue perimeter checks if moisture remains.
Why this path and its safety boundary
Why it matters: The treatment was likely limiting warm air movement across the cold surface and may have contributed to the local dew-point crossing.
Safety stop: Do not block a heater or window vent, attach unapproved film, or use a ladder to alter a high treatment without safe access.
-
PATH 03Safety boundary
What you see
A visible draft, damaged weatherstripping, cracked caulk, wet sill, or blocked weep opening is present.
Do this next
Use only manufacturer-approved ordinary cleaning or maintenance and ask a qualified installer to repair the perimeter, rough opening, or drainage detail; keep water away from the wall.
Why this path and its safety boundary
Why it matters: Cold air can chill the perimeter and a blocked drainage path can retain water, but a visible symptom does not identify the full installation or flashing condition.
Safety stop: Do not caulk over weep holes, remove trim, pressure-wash, or work outside at height.
-
PATH 04Safety boundary
What you see
Fog, droplets, or persistent haze appear between the panes of an insulating glass unit rather than on a cleanable surface.
Do this next
Document the pane and arrange qualified glazing or window service to assess the insulated glass unit and frame; do not drill or disassemble it.
Why this path and its safety boundary
Why it matters: This is a glazing-unit or seal assessment branch, not a room-humidity cleaning problem.
Safety stop: Stop if glass is cracked, the sash is unstable, or moisture is causing wall damage or reaching electrical equipment.
-
PATH 05Safety boundary
What you see
Condensation freezes, the sash sticks, glass is cracked, the sill or wall is significantly wet, mold is extensive, or the window is high or unsafe to reach.
Do this next
Keep people clear, dry only what is safely reachable, protect nearby electrical equipment without touching wet components, and arrange qualified window/building service.
Why this path and its safety boundary
Why it matters: The condition has crossed a property, glass, health, electrical, or fall-safety boundary and should not be treated as a simple wipe-down.
Safety stop: Do not scrape ice with a blade, lean out, climb an unsafe ladder, touch electrical equipment with wet hands, or break a sealed unit to dry it.
Helpful context
Understand the symptom
Why condensation can occur when the humidity reading is low
A hygrometer reports the air around it, not the coldest millimeter of a window. FGIA defines condensation as water or frost forming when a surface is below the surrounding air's dew point. A cold edge, metal frame, spacer, installation gap, or air leak can make one location colder than the rest of the room. Compare locations and surfaces before deciding that the humidity reading disproves condensation.
Identify which surface is wet
Touch only when safe and use a dry cloth to establish whether water is on the room-side glass or frame, on the exterior, or trapped between panes. Interior surface moisture points toward a cold local surface and room-air contact. Exterior moisture can occur when the exterior glass is cooled by interior air conditioning or radiant conditions. Fogging or moisture between insulating panes is a different path and is a reason to have the sealed glazing unit assessed rather than wiping the same surface repeatedly.
Restore air movement and check the perimeter without invasive work
Curtains, blinds, furniture, or a deep sill can keep warm room air from reaching the glass and can make a localized cold spot worse. Open the treatment and compare the result. From ordinary access, look for a visible draft, damaged weatherstripping, cracked caulk, a wet sill, or blocked weep openings. Do not cover drainage paths with caulk or foam and do not remove trim to chase an installation gap; those are inspection and repair tasks for a qualified installer.
Separate a surface problem from a sealed-unit or installation problem
If droplets appear at the same edge or frame section on a low-humidity day, the local surface may be colder because of a frame or spacer thermal path, a draft, or the rough-opening installation. If haze or droplets are between panes, the insulating glass seal or unit condition needs assessment. ENERGY STAR and the Department of Energy describe air leakage, insulation, glazing performance, and condensation resistance as window-system factors; a visible symptom alone cannot identify which part failed.
Protect the building while deciding on service
Dry recurring water promptly and document the room humidity reading, outdoor conditions, wet surface, pattern, and time of day. Persistent water can damage sills and surrounding wall surfaces and can encourage mold or mildew. If the area freezes, the sash sticks, the glass is cracked, water reaches an outlet or wiring, or the window is at height, stop ordinary troubleshooting. Do not scrape ice with a hard blade, lean out, or use a ladder without a safe setup.
When checks do not resolve it
Need a professional?
Safety scope: This article supports safe observation and ordinary-access cleaning only. Do not puncture or dismantle insulating glass, remove trim, seal weep holes, apply a heat source to ice, use harsh solvents or pressure washing, touch wet electrical equipment, or work at height without qualified equipment and training.
Common questions
FAQ
Why is one window wet when my indoor humidity is already low?
Condensation depends on the local window-surface temperature falling below the room-air dew point, not just on the room's average humidity. One cold glass edge, metal frame, spacer, thermal bridge, installation gap, or draft can cross that threshold while a nearby hygrometer reads low.
How can I tell whether condensation is inside or between the panes?
Dry and observe the surface from a safe position. Room-side or exterior water wipes from that surface; persistent haze or droplets that remain trapped between the panes indicate a different glazing-unit condition. Do not drill or puncture the sealed unit to confirm it.
Can curtains or blinds cause window condensation?
They can contribute by limiting warm room-air movement over a cold pane. Open the treatment and compare the same window under similar conditions. If the moisture stays fixed at an edge or frame, investigate a local cold path, draft, or glazing condition instead of relying on airflow alone.
Should I caulk around a window that has condensation?
Do not seal blindly or cover weep holes. First document the wet surface and inspect only visible weatherstripping, caulk, sill, and drainage from safe access. A qualified installer should assess perimeter air leakage, flashing, rough-opening insulation, and glazing before an invasive or permanent repair.
When should window condensation become a service call?
Arrange service when condensation persists despite low humidity and open treatments, appears between panes, follows one edge or frame, produces ice, wets the sill or wall, or accompanies a draft or damaged seal. Stop immediately for cracked glass, unsafe height, extensive mold or water damage, or water near electrical equipment.
Read the exact guide
Official sources
- Purchasing Energy-Efficient Residential Windows, Doors, and SkylightsU.S. Department of Energy · U.S. Department of Energy fenestration performance guidance; it does not diagnose a particular installed window.
- Understanding Indoor CondensationFenestration and Glazing Industry Alliance · FGIA homeowner education for interior condensation on windows, doors, and skylights; local conditions and product instructions still apply.
- Residential Windows, Doors, & SkylightsENERGY STAR · ENERGY STAR consumer guidance for residential windows, doors, and skylights; exact installed-product instructions still control.
- Maximize Window, Door & Skylight LifespanFenestration and Glazing Industry Alliance · FGIA homeowner guidance across window, door, and skylight products; manufacturer instructions control a particular product.
Community feedback
Share a repair observation
Share a plain-text repair observation. Accepted observations are published automatically; this page may take a moment to update.