
On this page
Start here
Quick answer
Do not force a stuck window or use a tool against the glass. First identify whether it is a fixed, sliding, double-hung, or casement window and confirm that the lock or handle is fully in its open position. Clear only visible dirt or movable objects from the track, inspect the sash-to-frame gap for rubbing or an uneven reveal, and use only the cleaning or dry-lubrication method allowed by the matching manufacturer instructions. If the sash is painted or weatherstripped shut, the frame is distorted, the glass or hardware is damaged, the window is above a safe working height, or it is an emergency-escape window that cannot open, stop and call a qualified window professional.
Work through in order
Diagnostic checks
Use only checks that match the exact appliance or system and its official guide.
-
Check 1
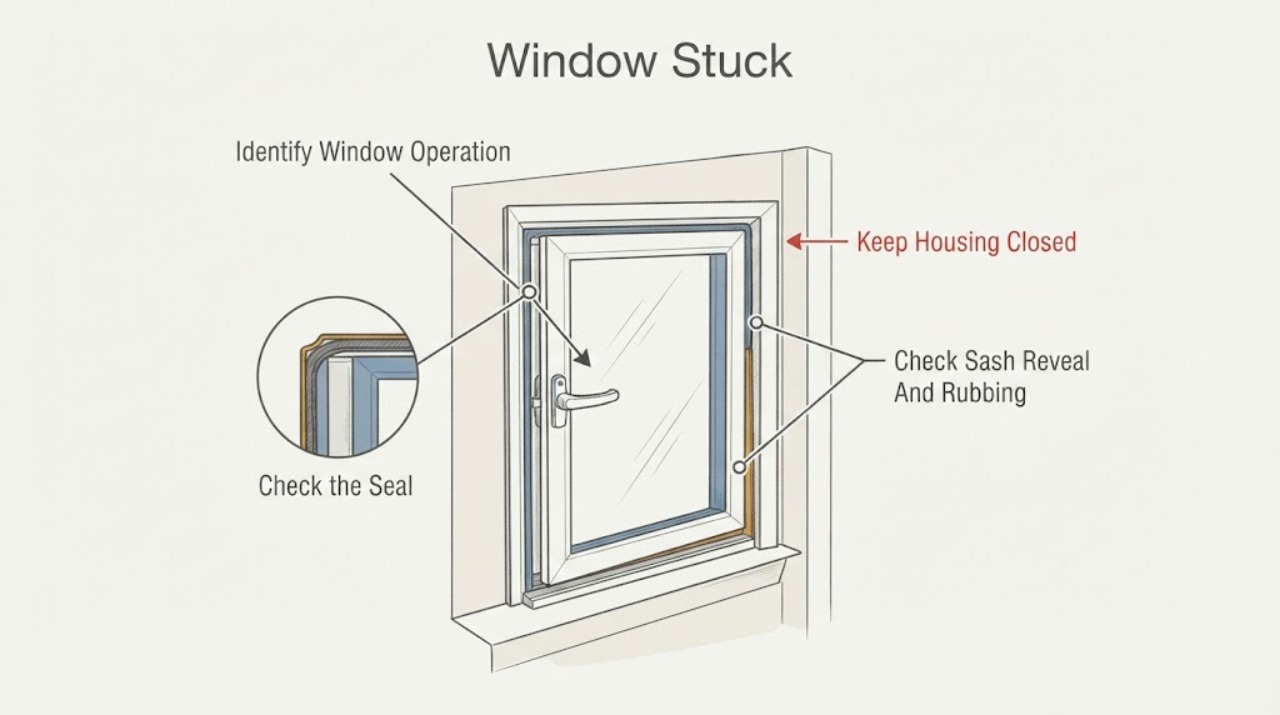
Look at the window from inside without climbing or removing trim. Determine whether it is fixed, sliding, double-hung, awning, or casement, then check the handle, lock, latch, or crank for its normal open position. Confirm in the product documentation that the pane is designed to open.
Expected result: The pane is fixed, the lock or latch remains engaged, the handle/crank moves but the sash does not, or the window type and controls are clear.
Next step: If the pane is operable and the lock releases normally, continue to the visible obstruction and alignment checks. If the hardware will not release or the window type is uncertain, use the matching manual or call a window professional.
Stop if: Stop if the handle is loose or broken, the glass is cracked, the sash is unsupported, or opening it would expose someone to a fall.
Why this matters
Why: A fixed pane is not a stuck operable window. A locked or incorrectly positioned mechanism can block movement without a frame or track fault; an unknown control should not be forced because window hardware differs by design.
-
Check 2
With the window closed and secure, inspect the visible sill, track, jamb, and sash edges for dust, grit, loose debris, hardened sealant, paint, or a movable object bridging the path. Wipe accessible surfaces with a soft cloth and vacuum loose debris; do not insert a blade or pry against the glass.
Expected result: Debris or a visible coating is blocking the movement path, or the track and sash edges are clean and unobstructed.
Next step: After cleaning, try the normal handle or sash movement gently. If it still will not move, proceed to the reveal/alignment check and do not escalate force.
Stop if: Stop if removing the material would require a metal blade, chemical solvent, impact, a ladder, or access to a high exterior side of the window.
Why this matters
Why: Contamination or a painted, caulked, or weatherstripped joint can bind an operable sash. Cleaning may restore movement, but a coating that has bonded the sash to the frame or a damaged seal needs a controlled repair rather than force.
-
Check 3
For an operable sash that is safe to examine, look at the gap between the sash and frame at the top, middle, and bottom. Note rubbing marks, a visibly uneven reveal, a sash that sits low or twisted, or a frame that appears bowed; do not remove shims, trim, or the sash during this check.
Expected result: The reveal is even and the sash is square, or one side is tight and the gap is visibly uneven.
Next step: If the reveal is uneven or the sash rubs, stop before forcing it and arrange a product-qualified inspection. If the reveal is even, continue only with the manufacturer-approved care for that operating type.
Stop if: Stop if the sash shifts, drops, binds at one corner, or could fall from the opening, or if checking the exterior requires unsafe access.
Why this matters
Why: An even reveal supports a simple lock or track check. An uneven reveal can indicate sash adjustment, installation alignment, a warped frame, or over-shimming; it is not proof that a generic adjustment will fit this window.
-
Check 4
Only if the exact manufacturer instructions identify a user-care point, clean the moving hardware and apply the specified dry lubricant or other approved product sparingly. Do not substitute an oily lubricant, harsh abrasive, or unlisted spray, and keep products off the glass and weather seals.
Expected result: The manual permits care and the handle or sash becomes smooth, or the window remains stuck after approved care.
Next step: If movement improves, cycle the window gently and verify that it still latches and seals. If there is no improvement, stop user adjustments and document the window type and symptom for a professional.
Stop if: Stop if the manual does not identify the lubricant or access point, the hardware is cracked or loose, or movement requires force, removal of the sash, or adjustment of springs, balances, rollers, or locking cams.
Why this matters
Why: Correct lubrication can reduce friction at compatible moving parts; a persistent bind after approved care points toward alignment, a broken operator, balance, lock, roller, or frame issue rather than a need for more lubricant.
-
Check 5
After any permitted cleaning or care, test only from a stable, safe position: confirm that the sash opens and closes without binding, the lock engages without force, and the window remains supported. Identify whether this window is part of the home's emergency escape or rescue plan.
Expected result: The window operates and locks normally, remains partly or fully stuck, or is an emergency-escape window that cannot be opened.
Next step: Use the window only after normal operation is restored. For a stuck emergency-escape window, arrange urgent qualified repair and use another safe escape route while waiting; do not improvise a forced opening.
Stop if: Stop immediately for cracked or loose glass, a falling sash, broken hardware, a fall hazard, or any window that cannot be secured after testing.
Why this matters
Why: A window that cannot open or lock reliably is an ongoing safety defect even if it provides some ventilation. Andersen advises keeping escape paths operable and repairing broken sash, locks, balances, and operating parts promptly.
Use your observations
Decision map
Find the observation that best matches what you see, then follow the next safe action.
-
PATH 01Next step
What you see
The pane is fixed or the lock, latch, handle, or crank has not reached its normal open position.
Do this next
Do not pry the pane. Confirm the product type and use the matching operating instructions; call service if the hardware will not release normally.
-
PATH 02Next step
What you see
Dust, grit, loose debris, paint, caulk, or a movable object is visible in the track or sash path.
Do this next
Remove only loose, accessible debris with gentle cleaning. Avoid blades, solvents, impact, and force against the glass; escalate if a coating has bonded the sash shut.
-
PATH 03Next step
What you see
The sash rubs, sits low or twisted, or the frame-to-sash gap is visibly uneven.
Do this next
Stop before changing shims, balances, rollers, or adjustment cams and arrange a technician familiar with the window design.
-
PATH 04Next step
What you see
The exact instructions permit cleaning or dry lubrication and gentle operation becomes smooth afterward.
Do this next
Cycle the window gently, verify that it latches and seals, and continue periodic care using only the approved method.
-
PATH 05Next step
What you see
The window remains stuck after visible cleaning, or the operator, lock, balance, roller, frame, or glass appears damaged.
Do this next
Stop forcing it and book qualified window service. Do not order a generic mechanism or remove the sash without exact product instructions.
-
PATH 06Next step
What you see
The window is above a safe working height, opens over a fall hazard, has a falling sash or cracked glass, or is a required emergency-escape window that cannot open.
Do this next
Keep people away from the opening, use another safe exit if needed, and arrange qualified repair; do not climb, pry, or improvise a release.
Helpful context
Understand the symptom
“Stuck” describes several different situations: a lock may still be engaged, a sliding sash may be rubbing in its track, a hung sash may be out of position, or a casement operator may be binding. The safest first distinction is whether the window is meant to open at all and which part of the movement stops. A fixed pane should not be pried, while an operable sash should move with controlled, moderate hand pressure when its hardware is correctly released.
These checks are limited to accessible inspection, gentle cleaning, and manufacturer-permitted care. A window can be heavy, glass can break, and an incorrectly adjusted sash can fall or fail as an emergency exit. Keep people away from the opening and use the exact product manual before attempting any adjustment.
When checks do not resolve it
Need a professional?
Request a qualified window technician or the product manufacturer's service channel for a persistent stuck window. Provide the window type, room and level, whether the lock or handle moves, where the sash rubs, the condition of the reveal, visible damage, and any safe cleaning already attempted; do not specify a replacement balance, roller, lock, or operator without exact product identification.
Common questions
FAQ
Why is my window stuck even though the handle moves?
The lock may be released while the sash is rubbing in its track, sitting out of alignment, or binding at an operator or hinge. Check the visible path and sash-to-frame gap without forcing it. An uneven reveal or damaged hardware needs a product-qualified inspection rather than a generic part.
Can I use oil or pry a stuck window open?
Do not pry against the glass. Use only the cleaning or lubricant method stated in the exact manufacturer instructions; Andersen's care guidance warns against harsh cleaners and identifies dry lubricant for applicable moving parts. If care does not restore gentle movement, call a professional.
What if the stuck window is an emergency exit?
Treat it as a safety defect. Keep the opening clear, use another safe escape route if necessary, and arrange qualified repair promptly. Do not climb, break glass, or force a falling or damaged sash; windows intended for escape must remain operable and secure.
Read the exact guide
Official sources
- Product Care & MaintenanceAndersen Windows · Window cleaning, moving-part care, lubricant restrictions, and safe work around openings
- Sash Adjustments for 400 Series Gliding Window (1991- Present)Andersen Windows Help Center · Product-specific gliding-sash reveal and adjustment guidance; not a generic procedure for other window types
- Window and door safety tipsAndersen Windows · Window opening, fall, repair, emergency escape, and operating-part safety guidance
- Checking Window or Patio Door Unit InstallationAndersen Windows Help Center · Sash and frame reveal, plumb, level, square, alignment symptoms, and professional escalation
- Service Guide - Windows - Operation & Adjustment -- 400 Series - Complementary French Casement, CladAndersen Windows · Product-specific casement lock, operator, sash clearance, and adjustment boundary; apply only to matching hardware
Community feedback
Share a repair observation
Share a plain-text repair observation. Accepted observations are published automatically; this page may take a moment to update.